Accessing your event
Guests, moderators and you as the host all move around in the same gallery – only your way into the admin area is deliberately tucked away. This page walks you through the four steps that take you from purchase to your command center: claiming your event (securing ownership), signing in (classic or passwordless), opening the admin area, and – if you look after several events – switching between them with ease.
1. Claim your event (secure ownership)
Section titled “1. Claim your event (secure ownership)”Right after your purchase your event doesn’t belong to any account yet. Claiming it links it permanently and exclusively to your account – from that moment you’re the owner and have full control.
There are two ways to reach the claim page:
- Direct link from the purchase email: the link already has your event key pre-filled, e.g.
.../claim?key=XXXXX-XXXXX-XXXXX-XXXXX. - Manually: open
/claimand enter your event key by hand.
-
Sign in or register first. If you’re not logged in or only a guest, the page first shows a full-screen login with registration (the Register tab is pre-selected). On the right you’ll see the info panel Secure Your Event with the benefits Permanent Ownership, Data Protection and Prevent Loss, plus – if already present – Your Event Key. Important: guests must create a real account to be able to claim an event.
-
Enter the event key. Type your key into the Event Key field (placeholder
XXXXX-XXXXX-XXXXX-XXXXX, with the hint Format: XXXXX-XXXXX-XXXXX-XXXXX below). A green check icon means the key is valid, a red X means there’s an error. -
Accept the terms. Once the key is complete (23 characters), the terms-of-service consent checkbox appears. Ticking it is mandatory – without it the page reports Please accept the terms of service to continue.
-
Tap “Claim Event”. The button reads Claim Event (the page heading is Claim Your Event). During the process it shows Claiming….
-
Redirect. If your event is already set up, you land straight in the dashboard (
.../admin). If it isn’t set up yet, the setup wizard takes over (.../setup).
Gift an event
Section titled “Gift an event”As soon as a complete key is entered, the Want to gift this event? block appears with the buttons Copy Code and Copy Link. Use them to pass the key or link to someone else, who then claims the event themselves. Handy if you bought an event for someone else.
Troubleshooting claiming
Section titled “Troubleshooting claiming”| Message | Meaning & fix |
|---|---|
| Invalid event key format… | The key isn’t in the right format. Check for typos and the four groups of five. |
| We couldn’t find an event for that key… | No event exists for this key. Copy the key fresh from the purchase email or use the original link. |
| This event has already been claimed… | The event has already been claimed. Sign in with exactly the email address you used at checkout. Otherwise the key belongs to another account. |
| Direct redirect, no message | You already own the event – the page redirects you straight through. |
2. Claim via email link (magic claim)
Section titled “2. Claim via email link (magic claim)”Instead of a key, some purchase emails contain a ready-made confirmation link (.../claim/confirm-magic?token=…). It takes you to a page titled Confirm your event claim that explains the link attaches the event to your account and signs you in.
-
Open the link in the email. Best on the same device you’ll sign in with afterwards.
-
Tick the terms checkbox. Consent to the terms of service is mandatory here too.
-
Tap “Claim my event & sign in”. During the process the button shows Claiming your event… and signs you in at the same time.
-
Done. You then land in the dashboard (event set up) or in the setup wizard.
For an existing passwordless account there’s also a sign-in-only link (.../claim/confirm-magic-login?token=…), titled Log in to your account, button Sign in. After the click you briefly see Taking you to your events… and land in your event list. This link claims nothing – it only signs you in.
3. Sign in – with a password or passwordless
Section titled “3. Sign in – with a password or passwordless”Sign-in is deliberately built as an email-first flow: you enter only your email at first, and the system automatically decides what happens next.
-
Google login (optional). A Google sign-in button sits at the very top; below it, an OR divider separates the classic email sign-in.
-
Enter your email. Type your address into the Email field and tap Continue (a brief Checking… while it looks you up).
-
The right step appears automatically:
- Password account: your email shows as a chip with a Change button, then the Password field, the Forgot password? link and the Sign in button (Logging in… while signing in).
- Passwordless account: the Check your inbox step opens – we’ve sent you a sign-in link (“We sent a login link to …”). Clicking that link logs you in. Use Use a different email to correct the address.
- No account found: No account found with Create an account or Change email.
- Social login only: Use your social login – your account is linked to a provider; sign in via its button.
-
reCAPTCHA (only if suspicious). Occasionally an extra security check is required. Content or script blockers can interfere with it – disable them briefly if the check won’t load.
Where sign-in appears: as its own page at /login (on success it redirects to your event list) or as a dialog straight from the gallery – via the Sign In entry in the guest profile menu or the Sign In with Account button on the gallery password gate.
4. Unlock a gallery (password/invite code) – the distinction
Section titled “4. Unlock a gallery (password/invite code) – the distinction”This step is normally only for guests. If a gallery is password-protected, visitors first see the Welcome to Our Gallery page with the Gallery Password field (placeholder “Enter shared password”), a QR-scan icon and the Continue button. A nickname step follows: Your Display Name (placeholder “e.g. ShutterBug42”), Generate for a random name, Change Code to go back, and finally Continue to Gallery (signed in) or Enter as Guest (guest).
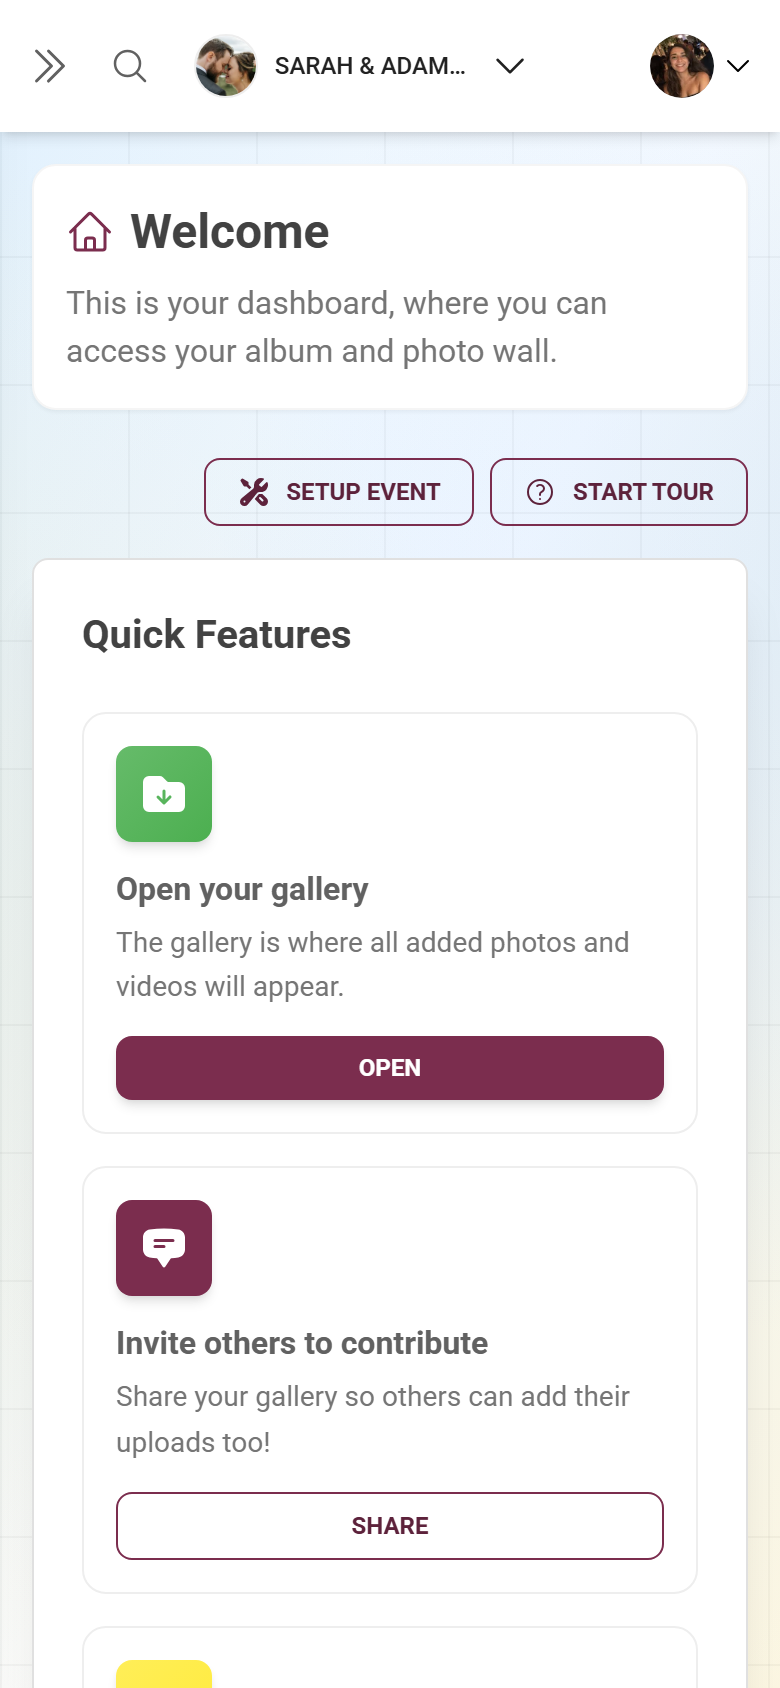
5. How to open the admin area
Section titled “5. How to open the admin area”The way into your command center runs through your profile menu – same gallery, but with one extra entry only you can see.
-
Open the profile menu. Tap your avatar or profile picture in the top right. The profile menu opens.
-
Choose “Admin Portal”. Only accounts with the role Admin or Owner see this entry. A click takes you into the admin area.
-
You’re in. You land in your admin area – the command center for your whole event.
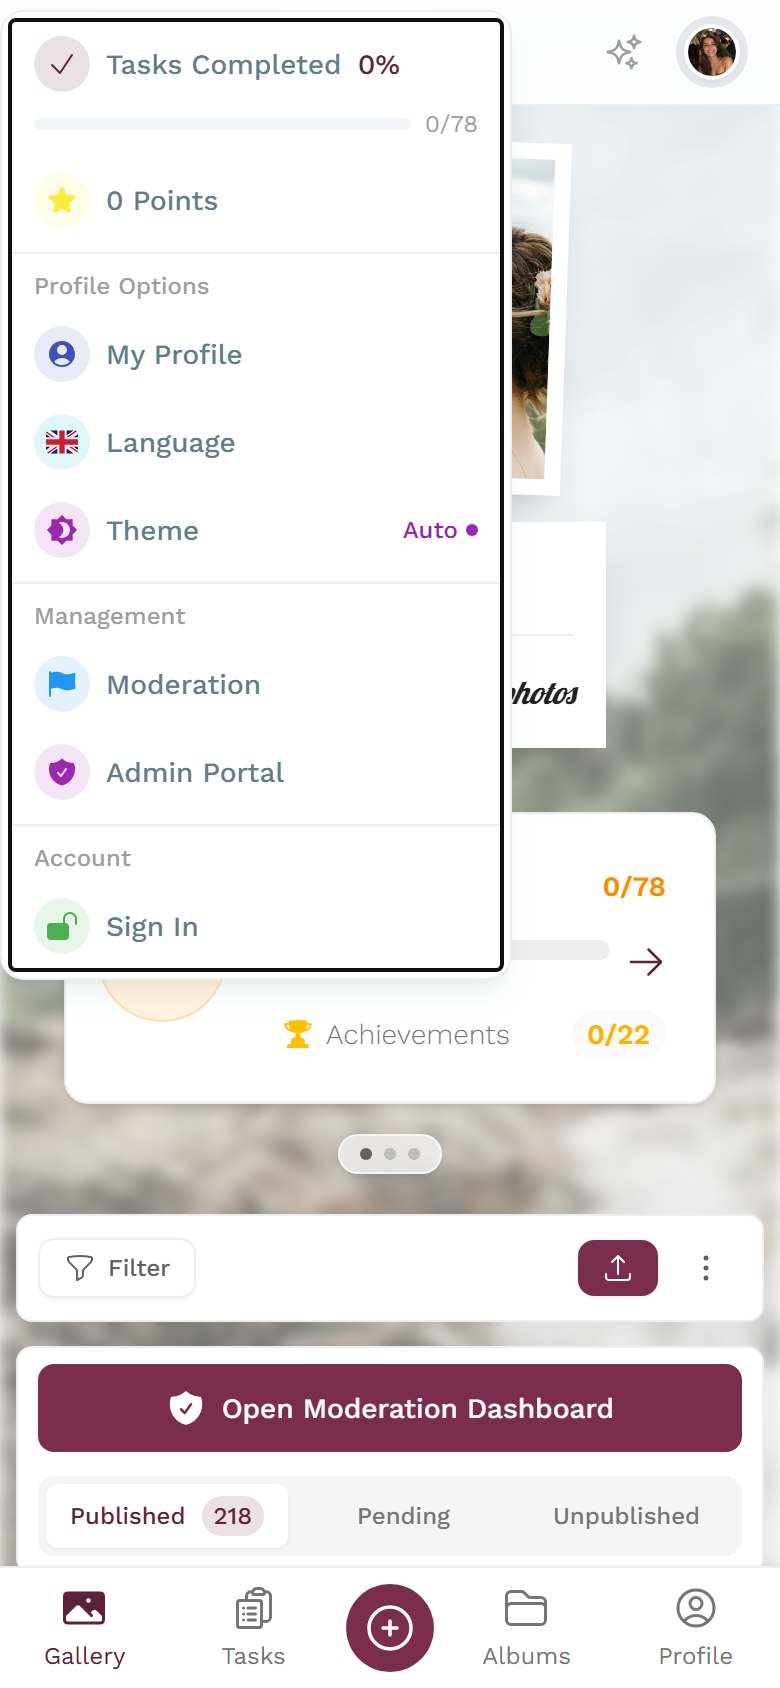
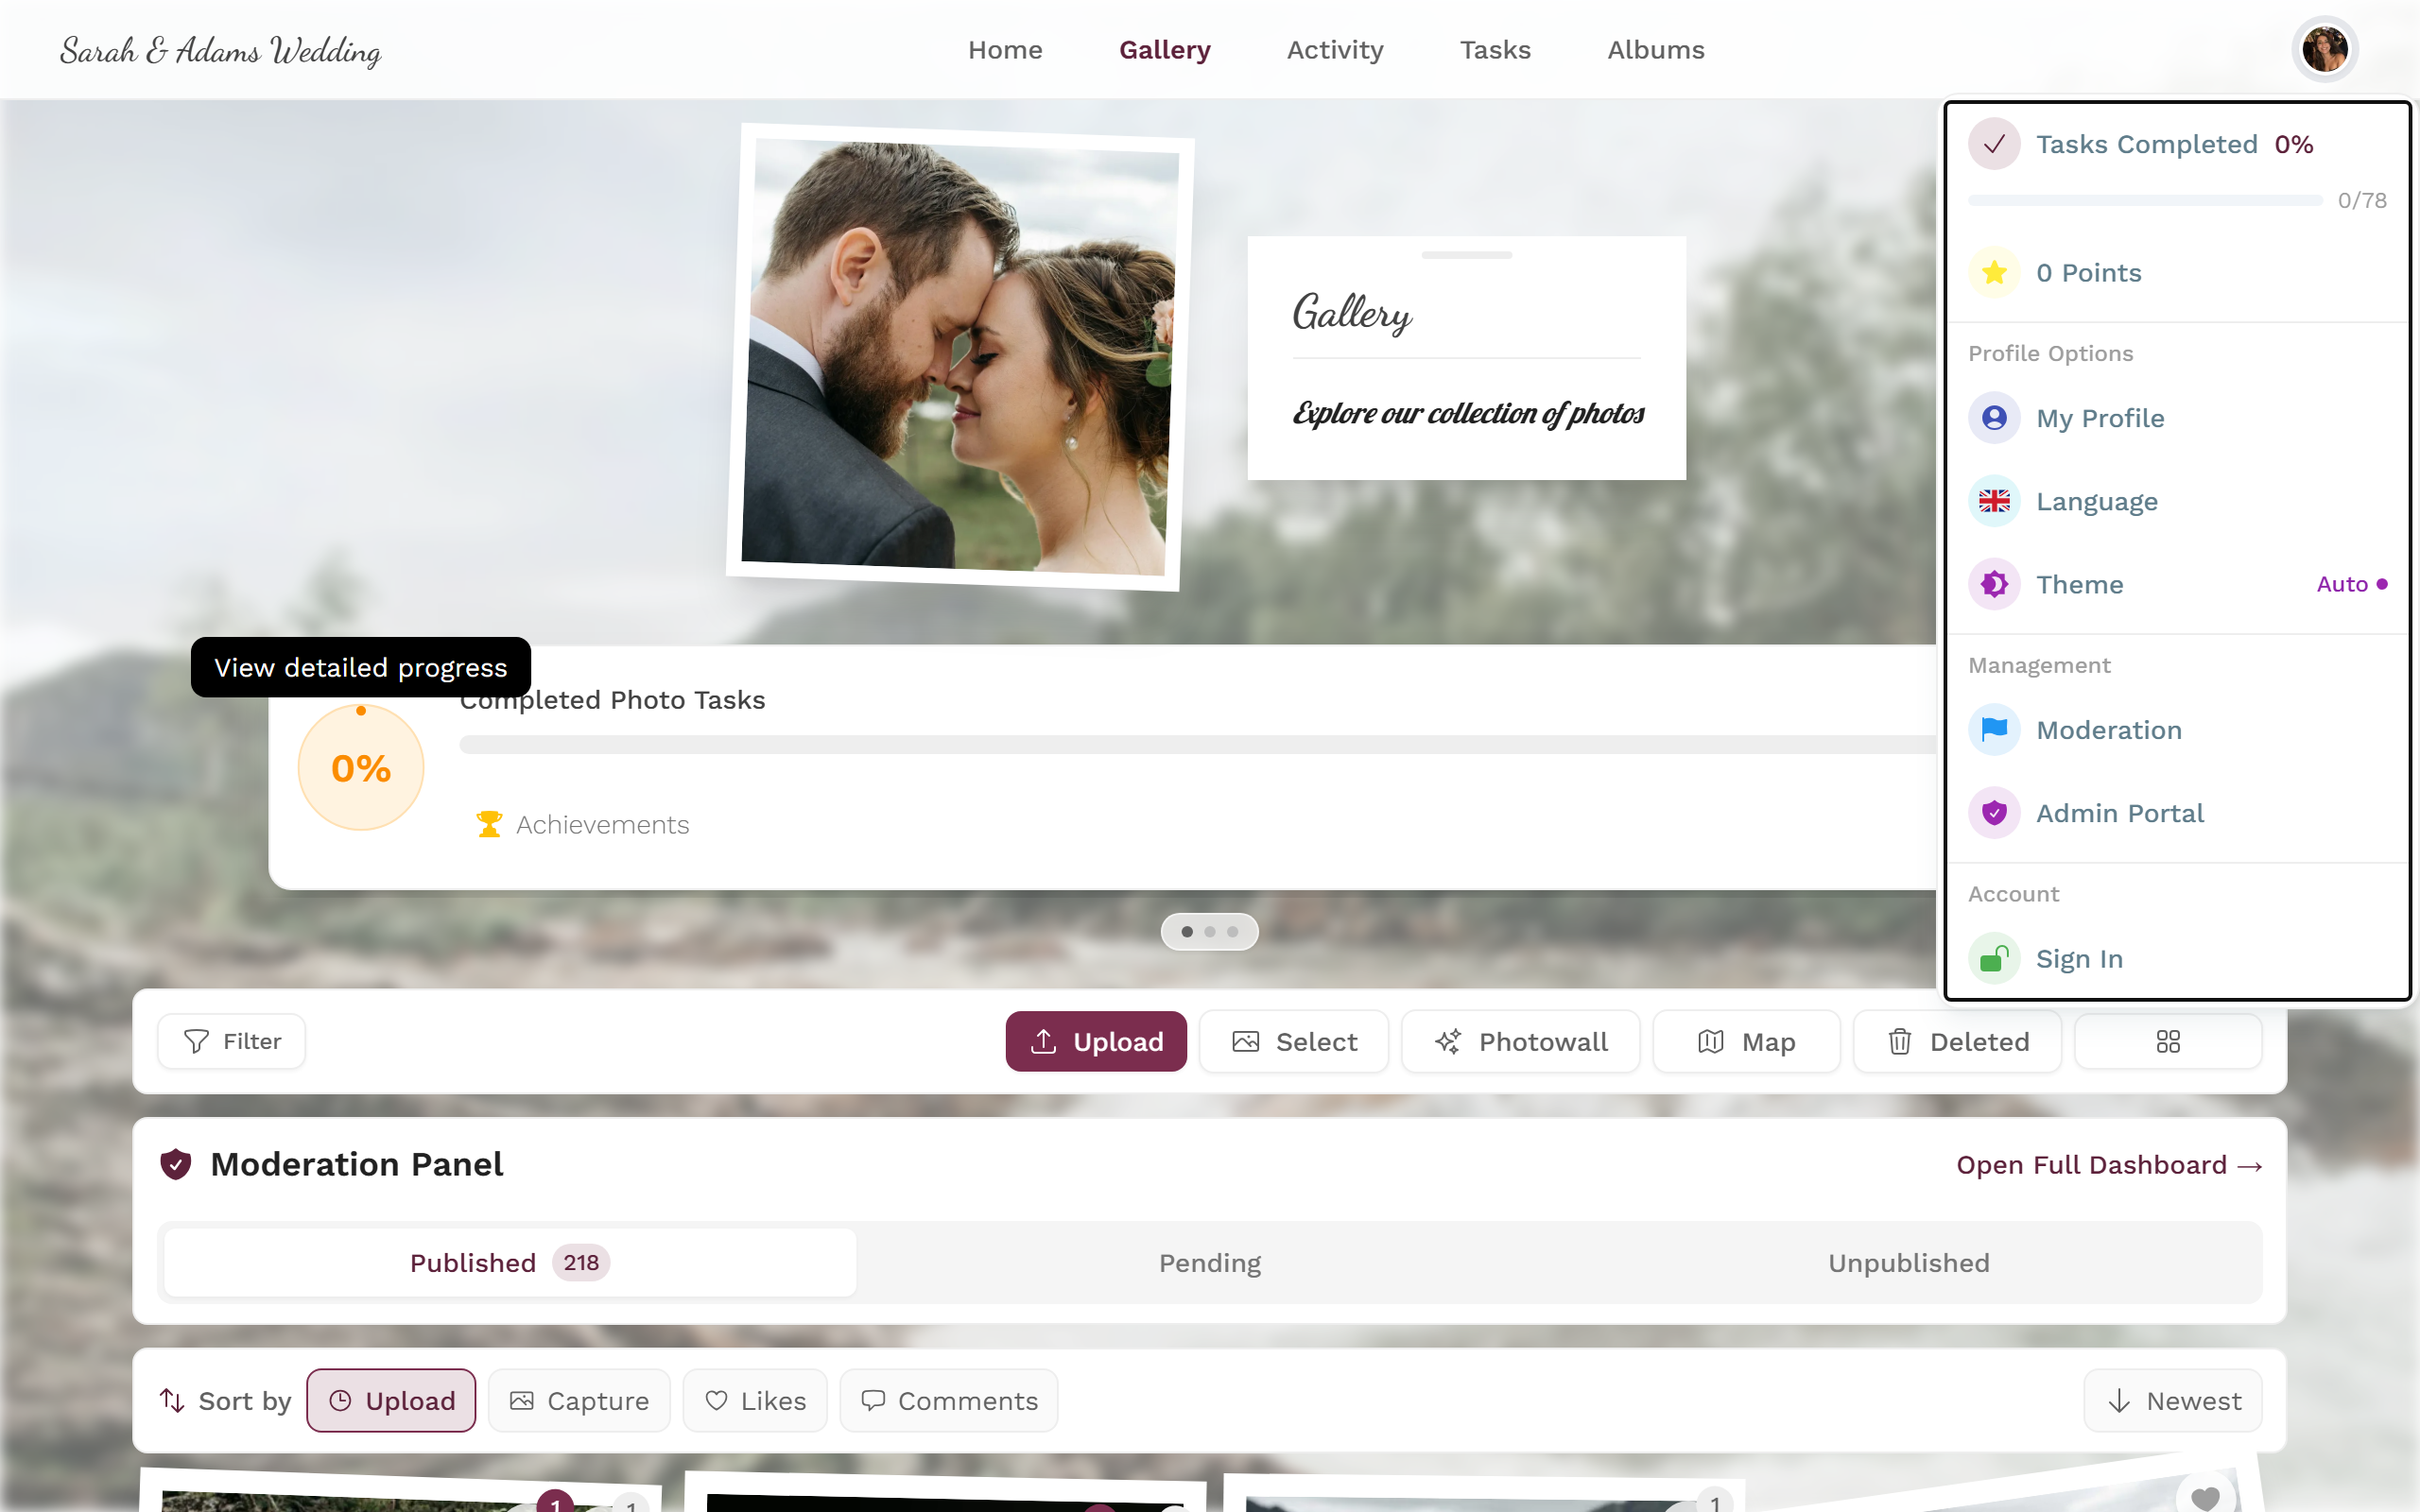
Other entries in the profile menu appear depending on your role and which features are enabled:
- Moderation – for moderators only; goes straight to the moderation page and may carry a red number (pending reports plus media awaiting review).
- Administration Portal – for global platform administrators only, not for normal hosts.
- Partner Dashboard – for affiliates/partners only.
- Context-dependent as well: My Profile, Language, Theme (Auto/Dark/Light, only when dark mode is available), Account Settings (only when signed in, not as a guest), Sign In/Sign Out, plus Points/Tasks Completed (only with gamification active).
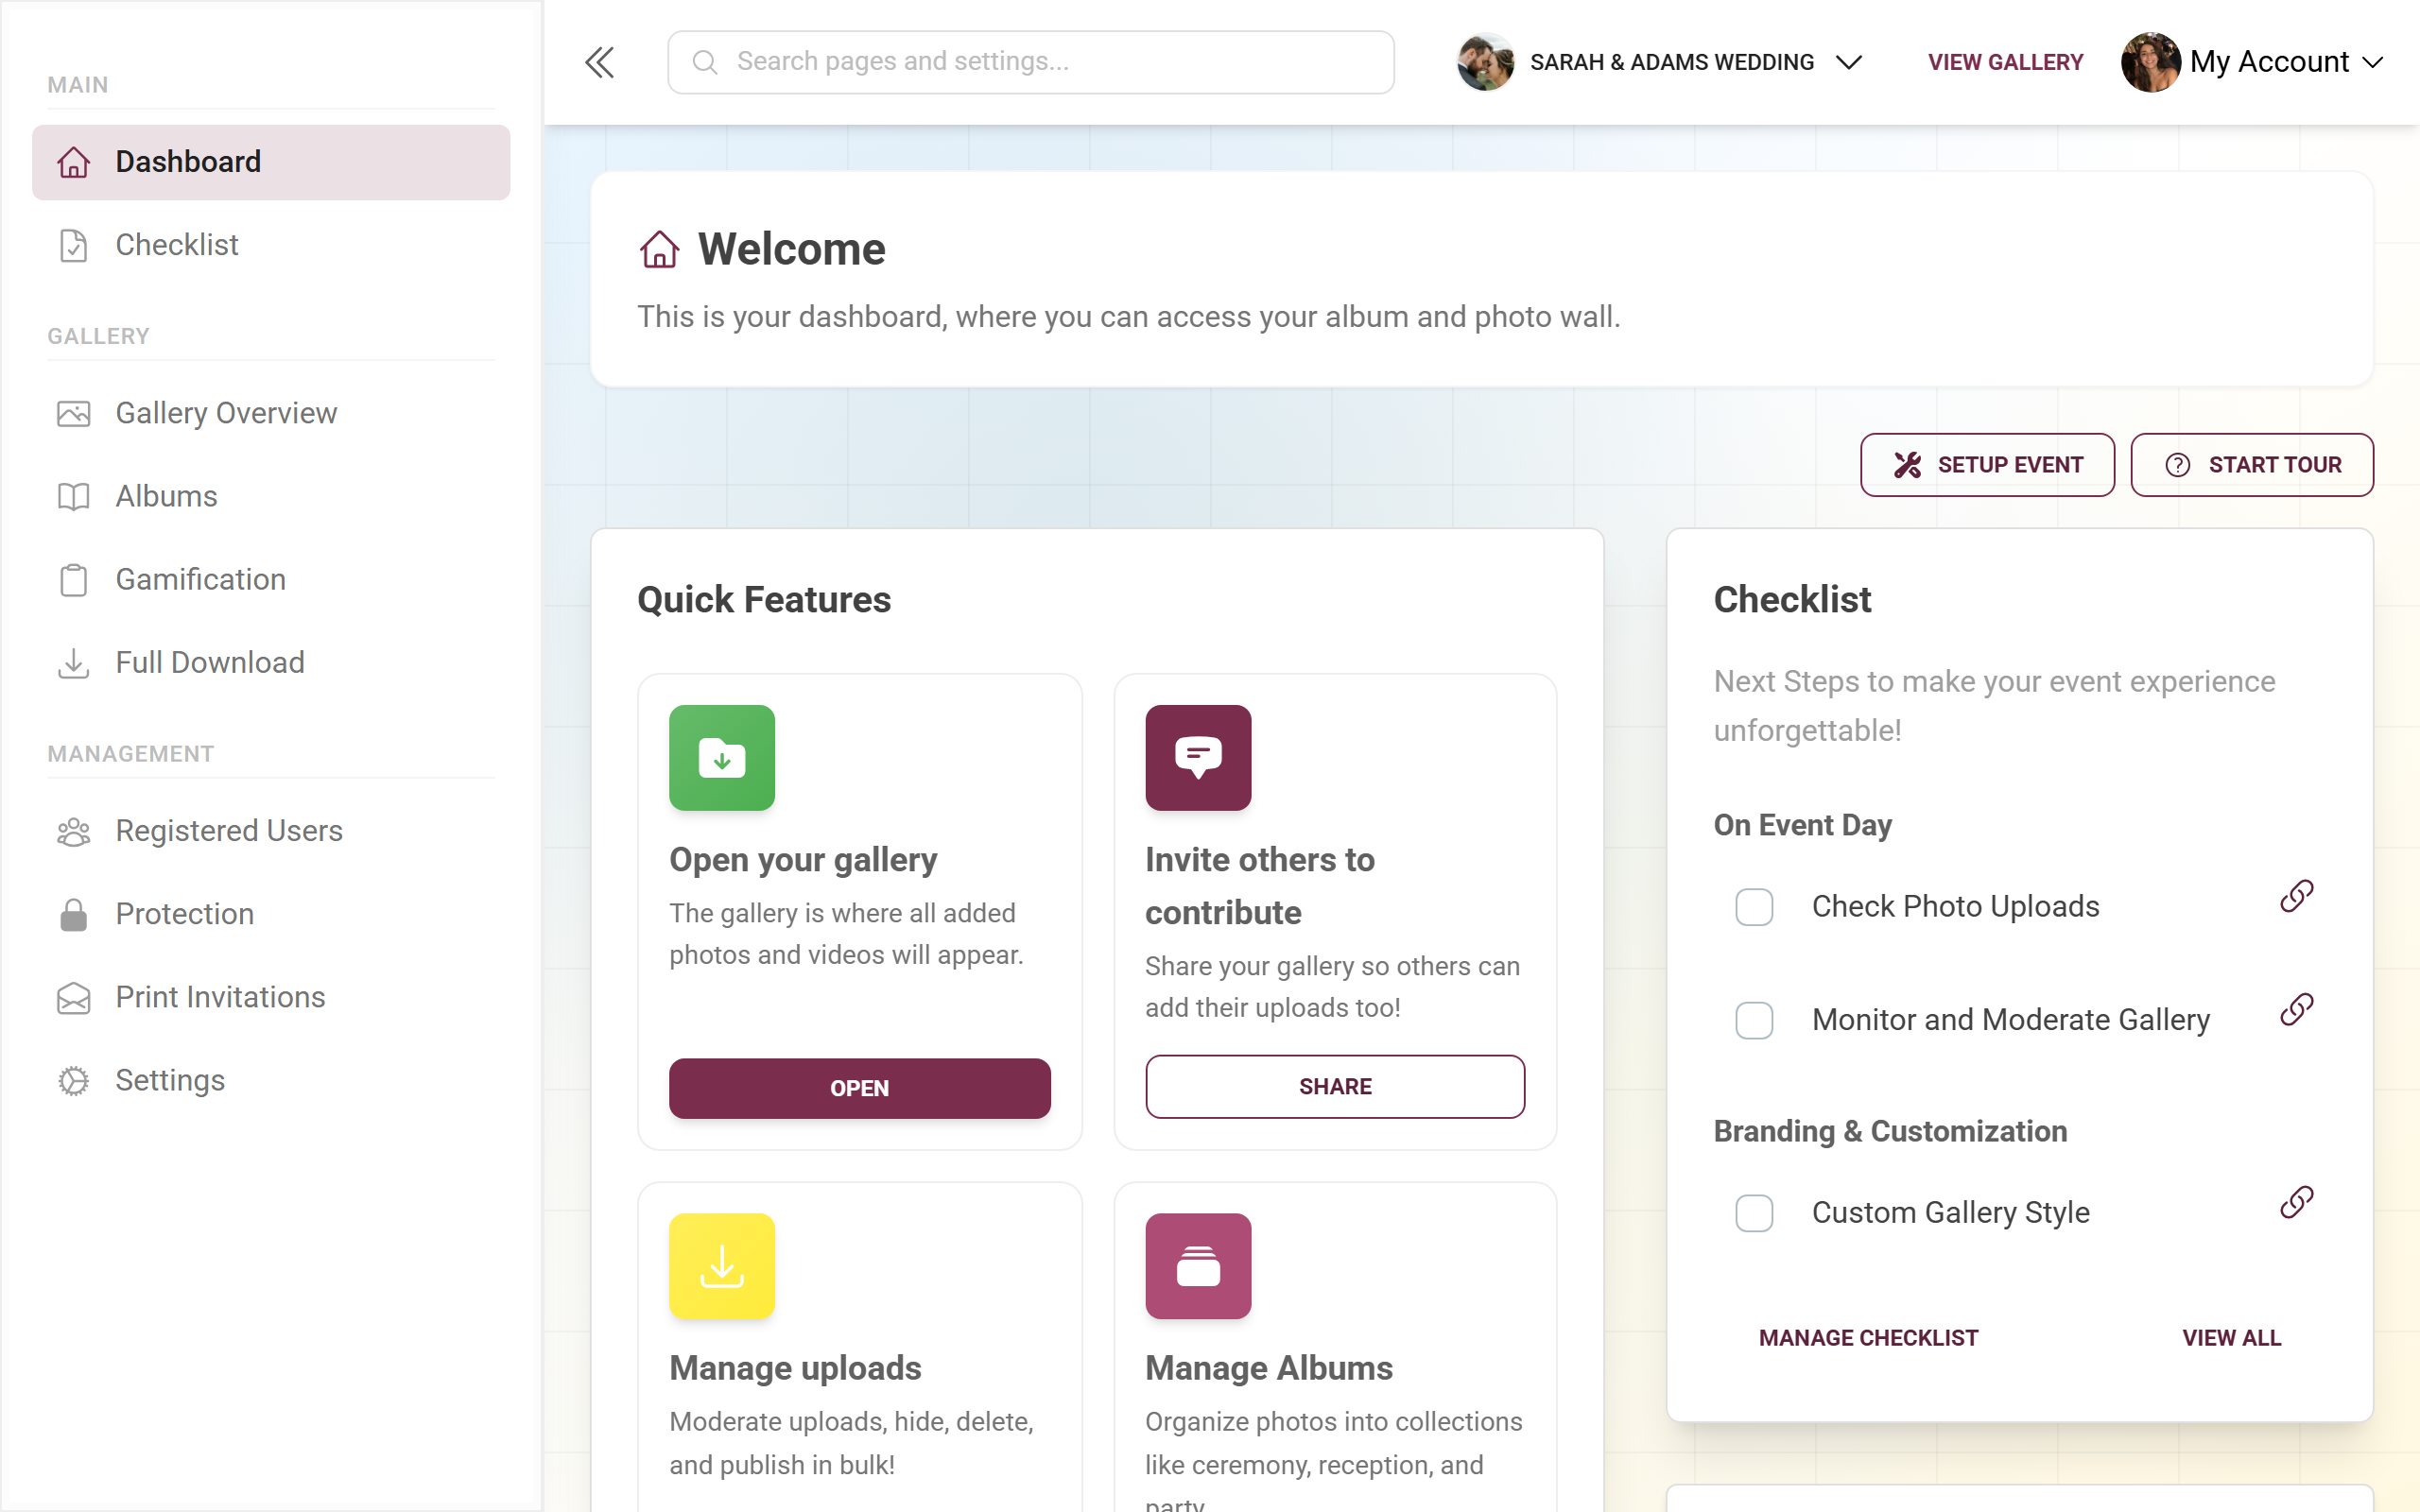
6. Navigating the admin area: the admin profile menu
Section titled “6. Navigating the admin area: the admin profile menu”Inside the admin area there’s a separate profile menu – not the same one as in the gallery. You’ll spot it in the top right by the label My Account with a small downward chevron.
The entries:
- View Gallery – back to the public gallery.
- Account Settings – opens your account settings (see below).
- Language – choose the language of the admin interface.
- Partner Portal – for affiliates only.
- Administration Portal – for platform administrators only.
- Help – opens the help/contact page.
- Sign Out – log out.
Account Settings
Section titled “Account Settings”The Account Settings dialog is organised into tabs:
- General – general account details.
- Security – manage your password, your active sessions and general account security here. If you haven’t set a password yet, you can create one here to sign in the classic way in future.
- Billing – appears only if there are payments on your account.
- Notifications – your account’s email notifications.
7. Managing several events (event switcher)
Section titled “7. Managing several events (event switcher)”If you look after several events, there’s no need to sign in each time. You switch straight from the admin area.
-
Open the switcher. In the admin area’s top bar, click the event-title button on the left – it shows the event logo and a small downward chevron.
-
Pick an event. The Your Galleries dialog lists all your galleries with the subtitle “Browse and select from your collection of photo galleries.”
-
Switch. A click on Choose (with admin rights) or View opens the gallery in the admin area and closes the dialog. The current event is marked Selected.
Each row in the switcher shows you at a glance:
- The logo or role icon and the gallery’s title.
- A role badge: Owner, Administrator, Moderator, Contributor or Viewer.
- The status: a green dot for No expiration, amber when few days remain (“X days”), red Expired or a Valid until … date. An event that hasn’t started yet shows Not started yet (it starts automatically after 10 uploads); deleted galleries are marked Deleted.
Further controls:
- Also show N deleted / Hide deleted galleries shows or hides deleted galleries (only when there are any). You can restore them via the recycle bin.
- View all events opens the full-page overview; in the footer, Create gallery starts a new gallery.
- Previous / Next page through the list; the Showing X - Y of Z events line shows the current slice.
What comes next
Section titled “What comes next”Once you’re in the admin area, you get your event ready. It’s best to work through the setup checklist from top to bottom – it walks you through every important step.