Privacy & moderation
The Privacy & moderation tab is the central place where you decide two things: who may see and upload to your event and what actually ends up in the gallery. From here you control access protection, photo pre-approval, the AI content filter, guest permissions and — as the owner — the permanent deletion of the event.

Reaching the area
Section titled “Reaching the area”-
Open your event’s admin area — via the profile menu in the top right (Management → Admin portal) or directly through the admin route. How to get into the admin area is covered in Access your event.
-
In the left sidebar, choose Settings.
-
In the tab bar at the top, click Privacy & moderation.
Gallery protection — who gets in
Section titled “Gallery protection — who gets in”The heart of the tab. Under Gallery protection you decide how guests access your gallery. There are three mutually exclusive options.
Password protected
Section titled “Password protected”Guests need a code to enter. When you choose this option, a section with the default invitation code unfolds.
-
Select the Password protected tile.
-
Enter a code in the Default invitation code field (placeholder e.g.
wedding-2024). The Random button generates a readable code such asgolden-gala-482. This code is used for simple invitation links and QR codes — it is your event’s “access code”. -
Optional: enable Include default invitation code in QR code so a scan of the QR code lets the guest in directly (one-scan access, without typing the code).
Completely private (Advanced)
Section titled “Completely private (Advanced)”Maximum privacy: only custom invitations work, and the default code is disabled. An info box Maximum privacy mode unfolds, along with the button Manage advanced invitations, which takes you to the invitation manager in advanced mode (roles/individual codes).
Open access
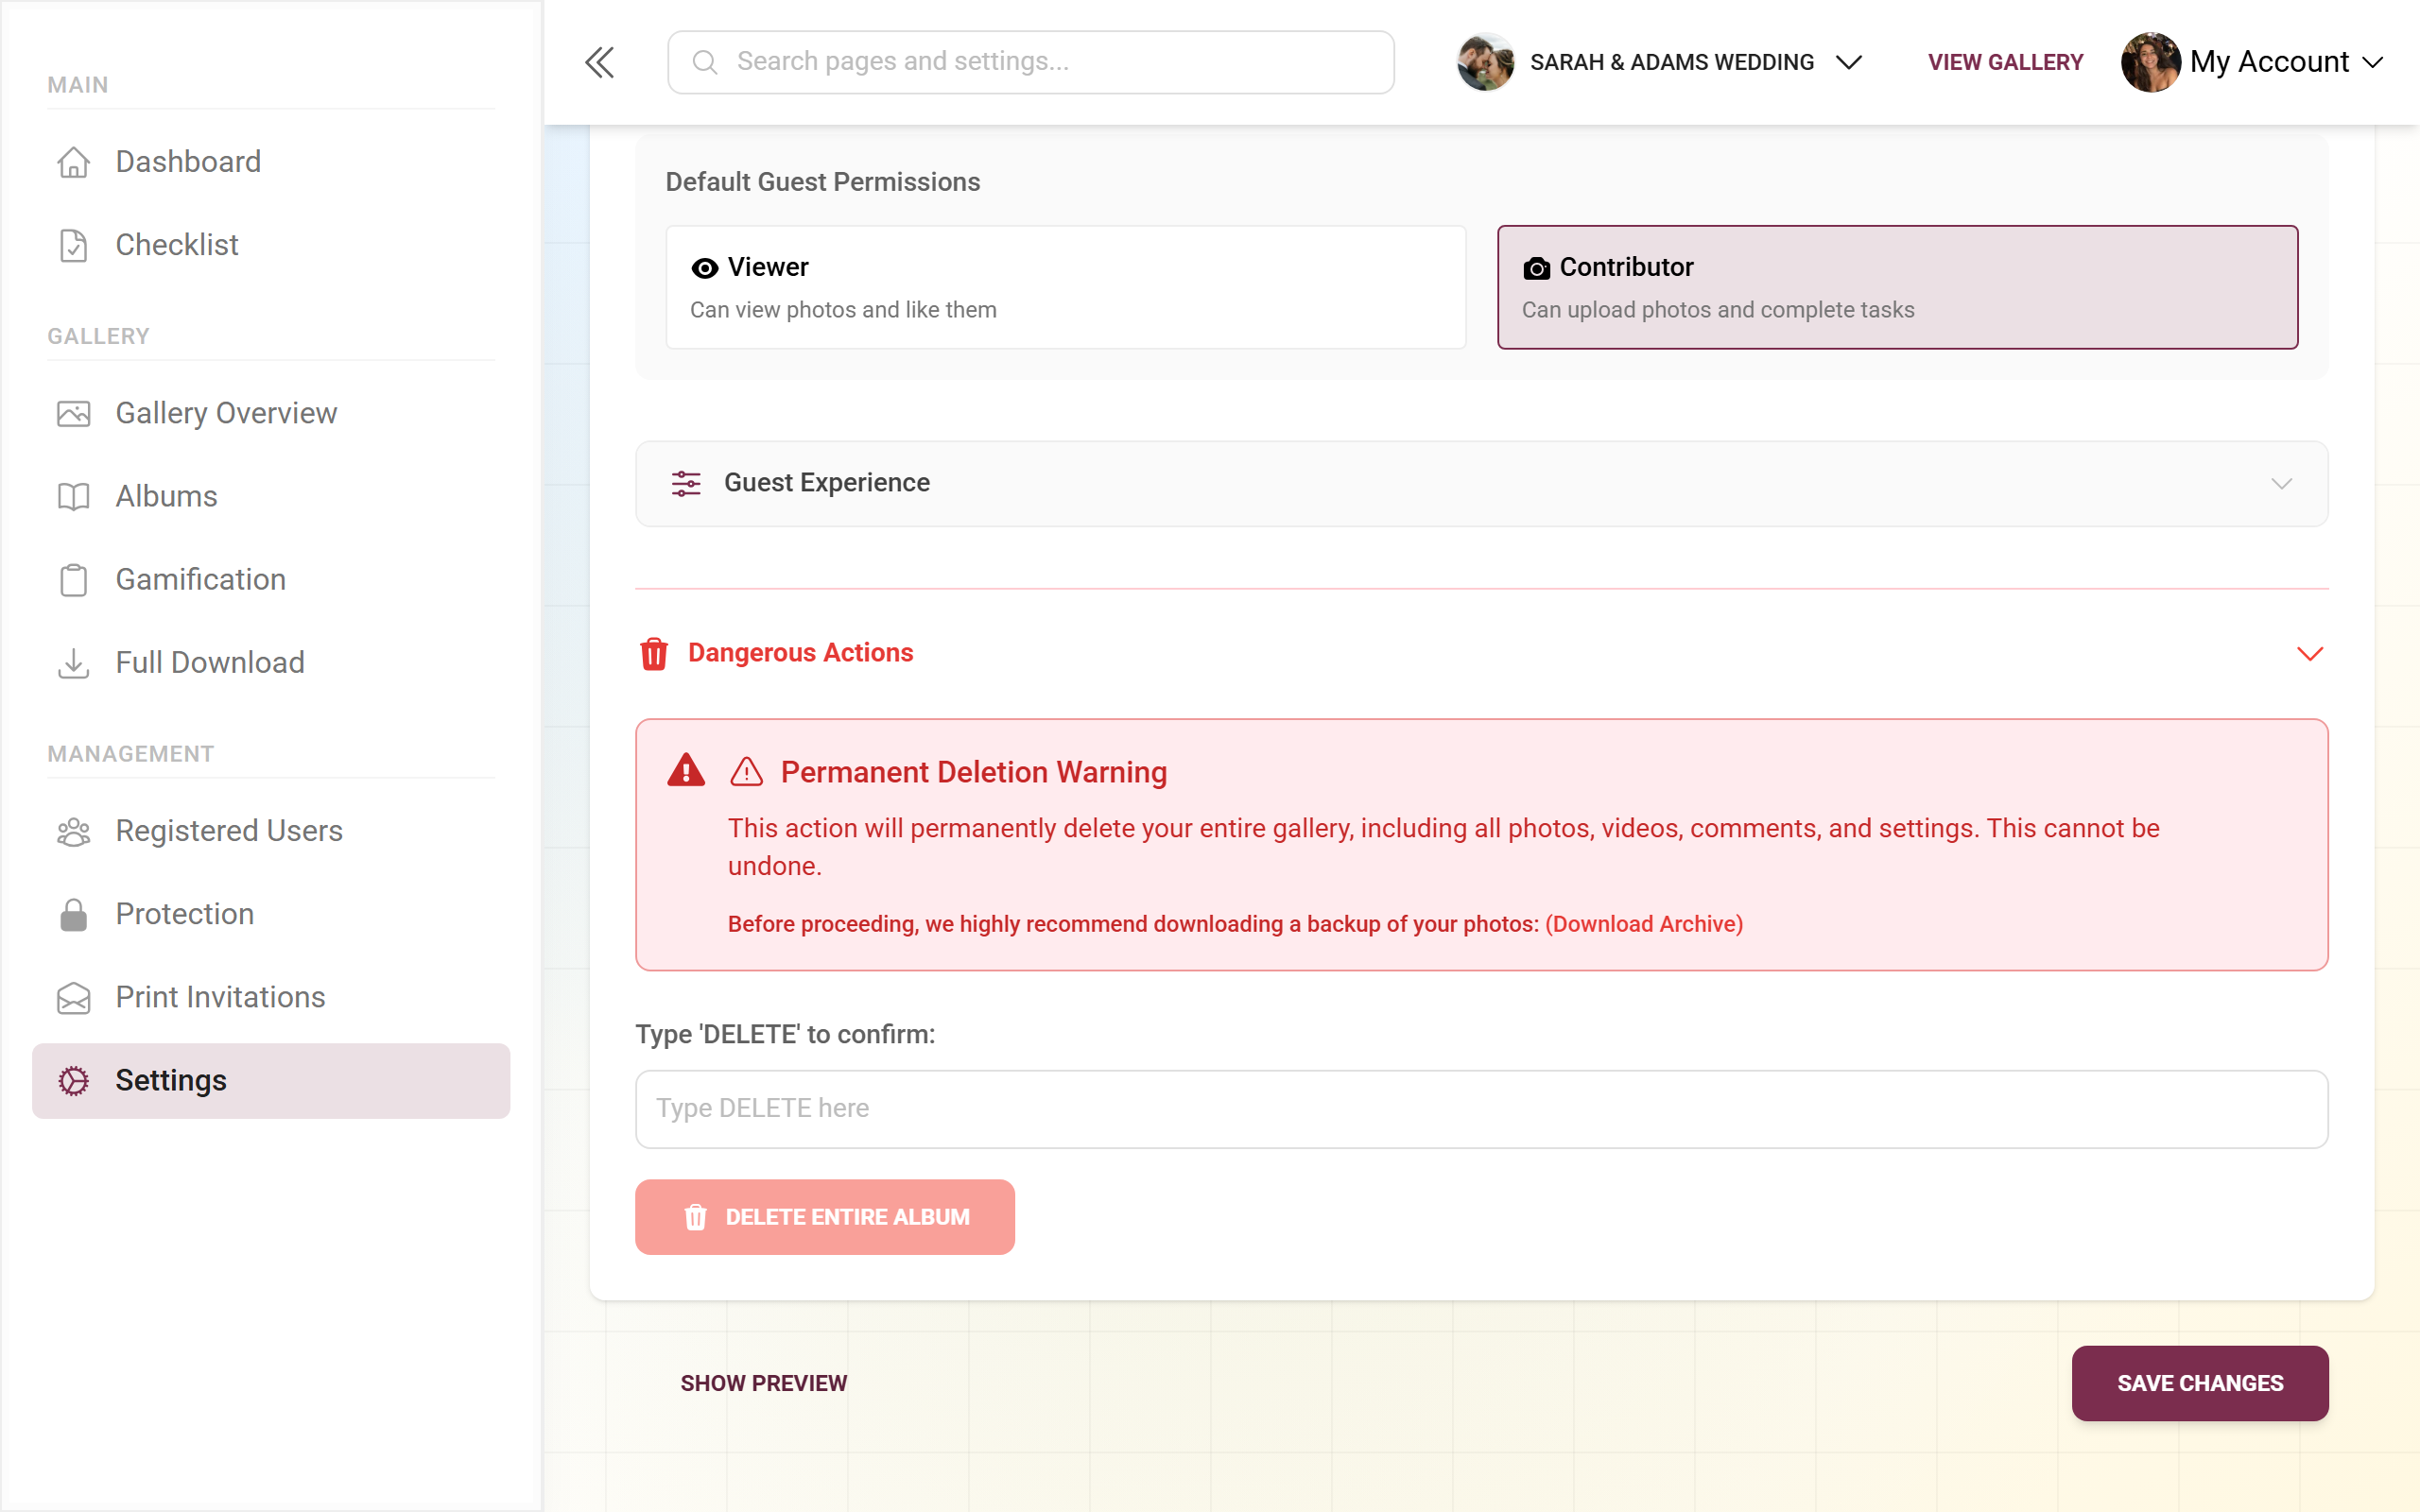
Section titled “Open access”Anyone with the link can view the gallery. When you choose this option, the Default guest permissions card appears with two role tiles that define what newly arriving guests may do:
- Viewer — can view and like photos, but not upload.
- Contributor — can upload photos and complete tasks.
For Viewer, an additional “Viewer-only access” block appears with a Manage invitations button, which lets you grant specific people more rights when needed.
Details on codes, links and QR are under Invite guests; roles are under Roles & permissions. The guest-side entry point is described in Join an event.
User permissions — allow uploads globally
Section titled “User permissions — allow uploads globally”The User permissions block is always available (not premium) and answers the question: What can non-administrators do?
- View-only gallery — guests can view but cannot add photos; only administrators upload. When selected, a yellow warning appears: even with valid invitation codes, non-admins cannot upload. The warning’s tip: if guests should contribute, choose “Open sharing” instead.
- Open sharing — guests can add photos to the gallery (mobile-friendly). This is the default choice for participatory events.
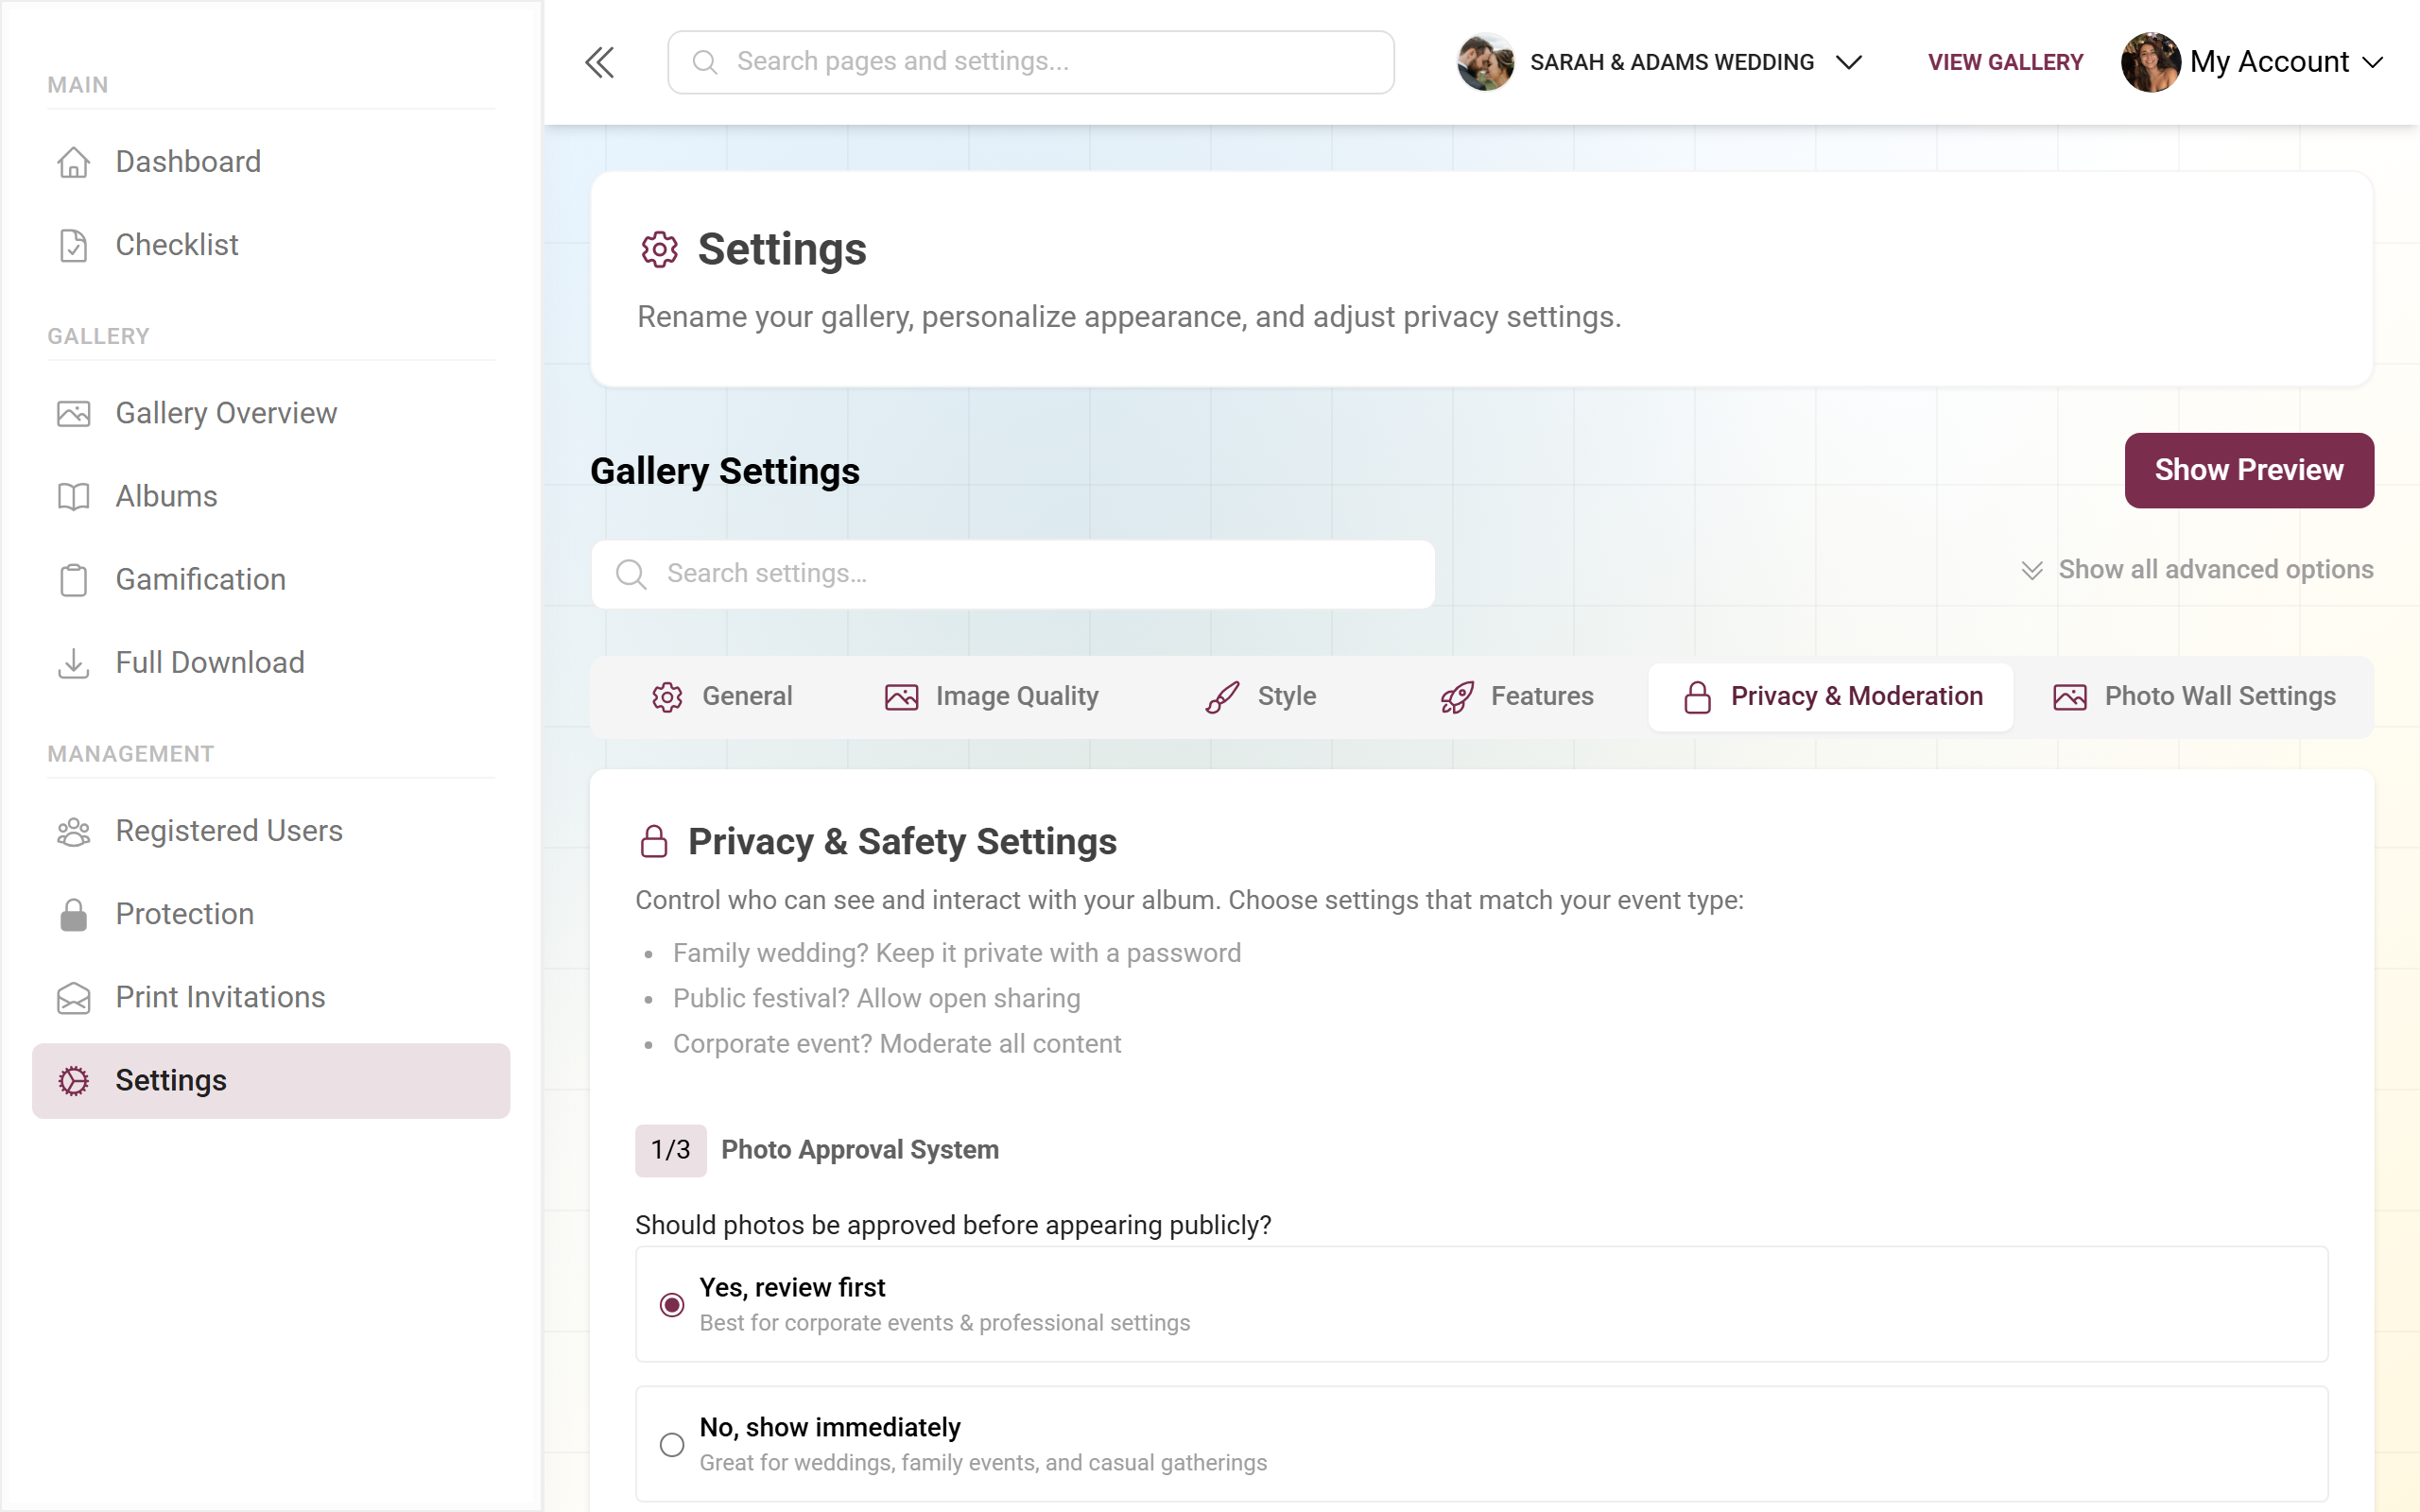
Photo approval system (pre-moderation)
Section titled “Photo approval system (pre-moderation)”Under Photo approval system you answer: Should photos be approved before they are shown publicly?
- Yes, review first — best for corporate galleries and professional settings. New uploads land as Pending review in the moderation queue and become visible only after you approve them.
- No, show immediately — ideal for weddings, family galleries and casual gatherings. Photos appear right away.
How to work through the queue is covered in Moderation.
AI content filter (NSFW)
Section titled “AI content filter (NSFW)”The Content safety filter card carries an “AI” badge and a switch. When enabled, the AI automatically filters inappropriate content.
-
Turn on the Content safety filter.
-
An info box Auto-moderation active appears. Its text depends on the photo approval system:
- Pre-moderation on: NSFW uploads are automatically not published, while other uploads wait for manual review.
- Pre-moderation off: NSFW uploads are automatically not published, while safe uploads are published immediately.
-
Optional: enable Also scan existing media / Re-evaluate existing media to run already-uploaded photos through the filter after the fact. If a scan is already running you see Scan in progress with a countdown — just wait for it to finish.
You can see the AI’s results and statistics under AI processing.
Guest experience (advanced section)
Section titled “Guest experience (advanced section)”The Guest experience section is collapsed by default. Expand it (or use “Show all advanced options” at the top).
- Quick gallery access — guests enter the gallery immediately; a random nickname is assigned automatically. For a password-protected or private event the password is still required — only the manual nickname choice is skipped.
- Show event branding on the login page — displays your logo, cover and title on the password/login page. Disabled, guests see a generic page.
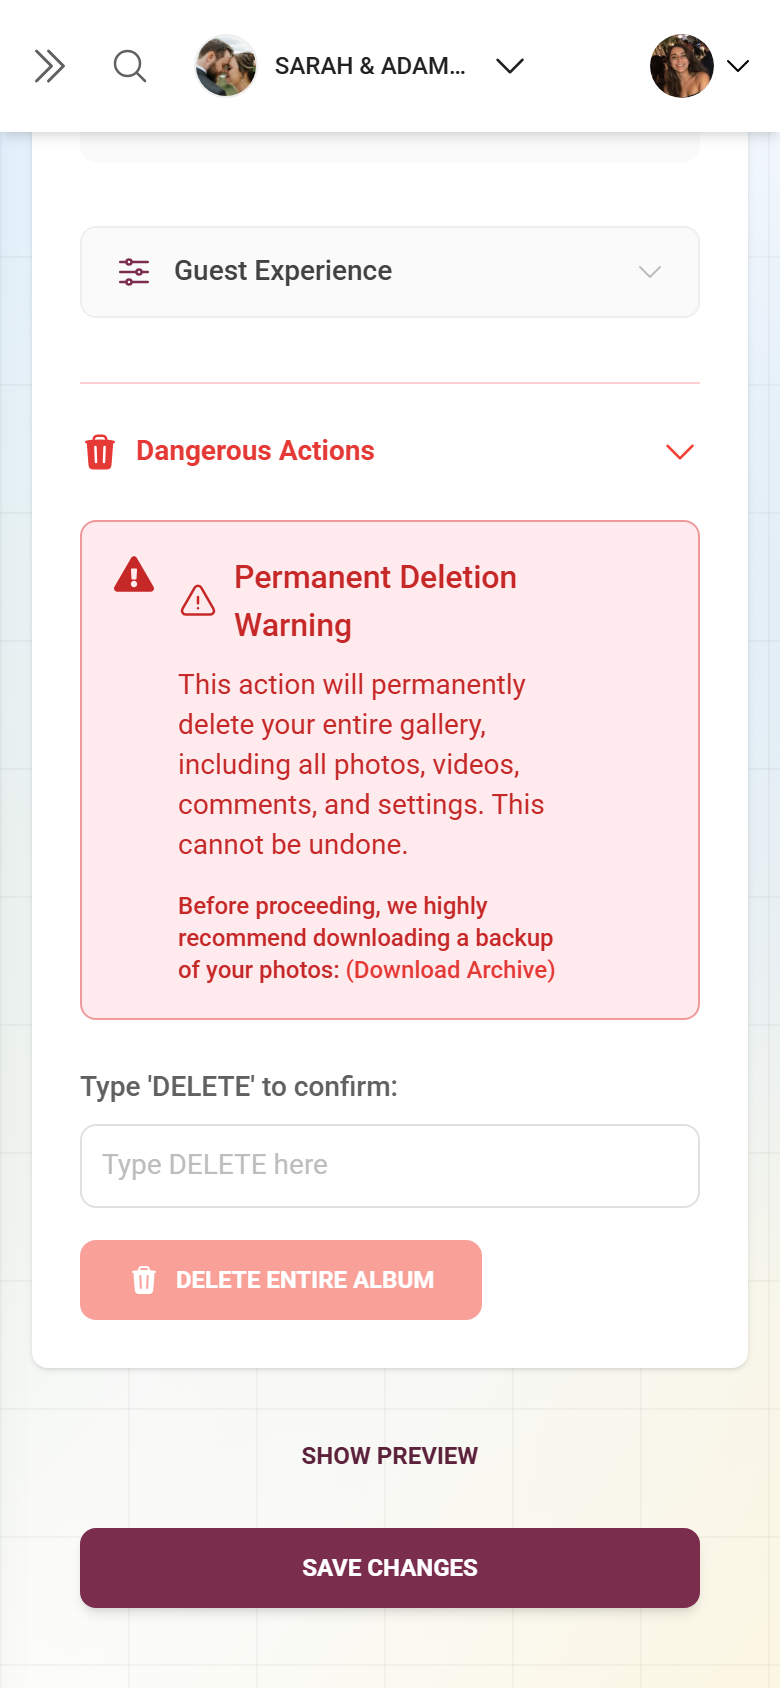
Dangerous actions — delete the gallery (owner only)
Section titled “Dangerous actions — delete the gallery (owner only)”-
Expand the red Dangerous actions section.
-
Note the permanent-deletion warning. Download a backup first — the reminder contains the (Download Archive) link, see Download & export.
-
In the confirmation field, type exactly the word DELETE. Only then does the Delete entire album button become active.
-
In the final dialog Final confirmation you again see a list of what will be deleted (photos/videos, comments, settings, invitation codes). Confirm with Yes, delete forever.
Approval workflow
Section titled “Approval workflow”As soon as pre-moderation is active or the AI filter holds content back, new media land in the moderation queue.
-
Open Moderation in the left sidebar. How you reach the management/moderation area in general is shown by the profile menu in the top right.
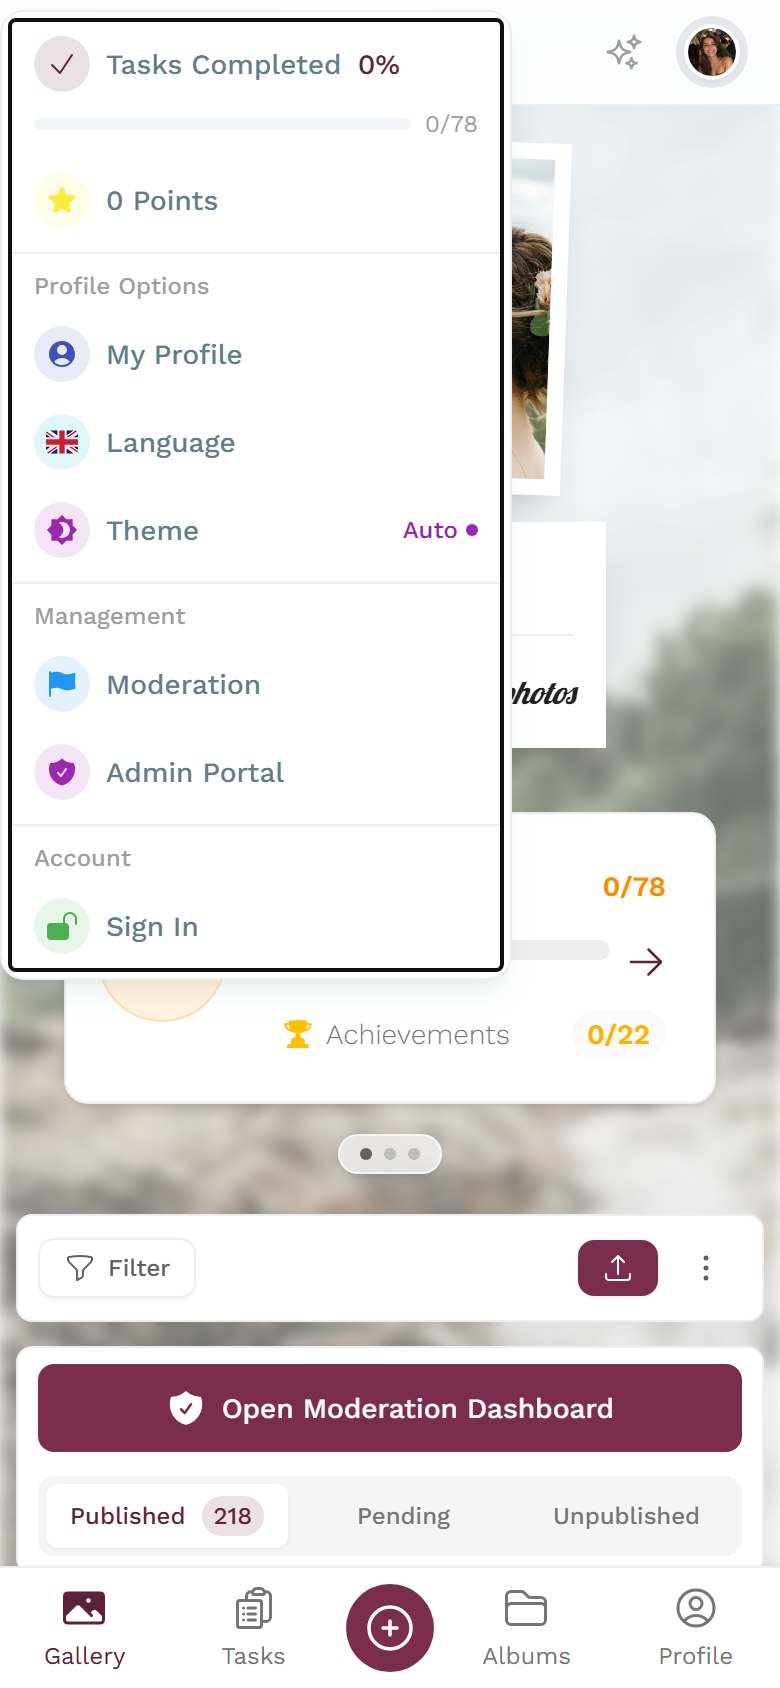
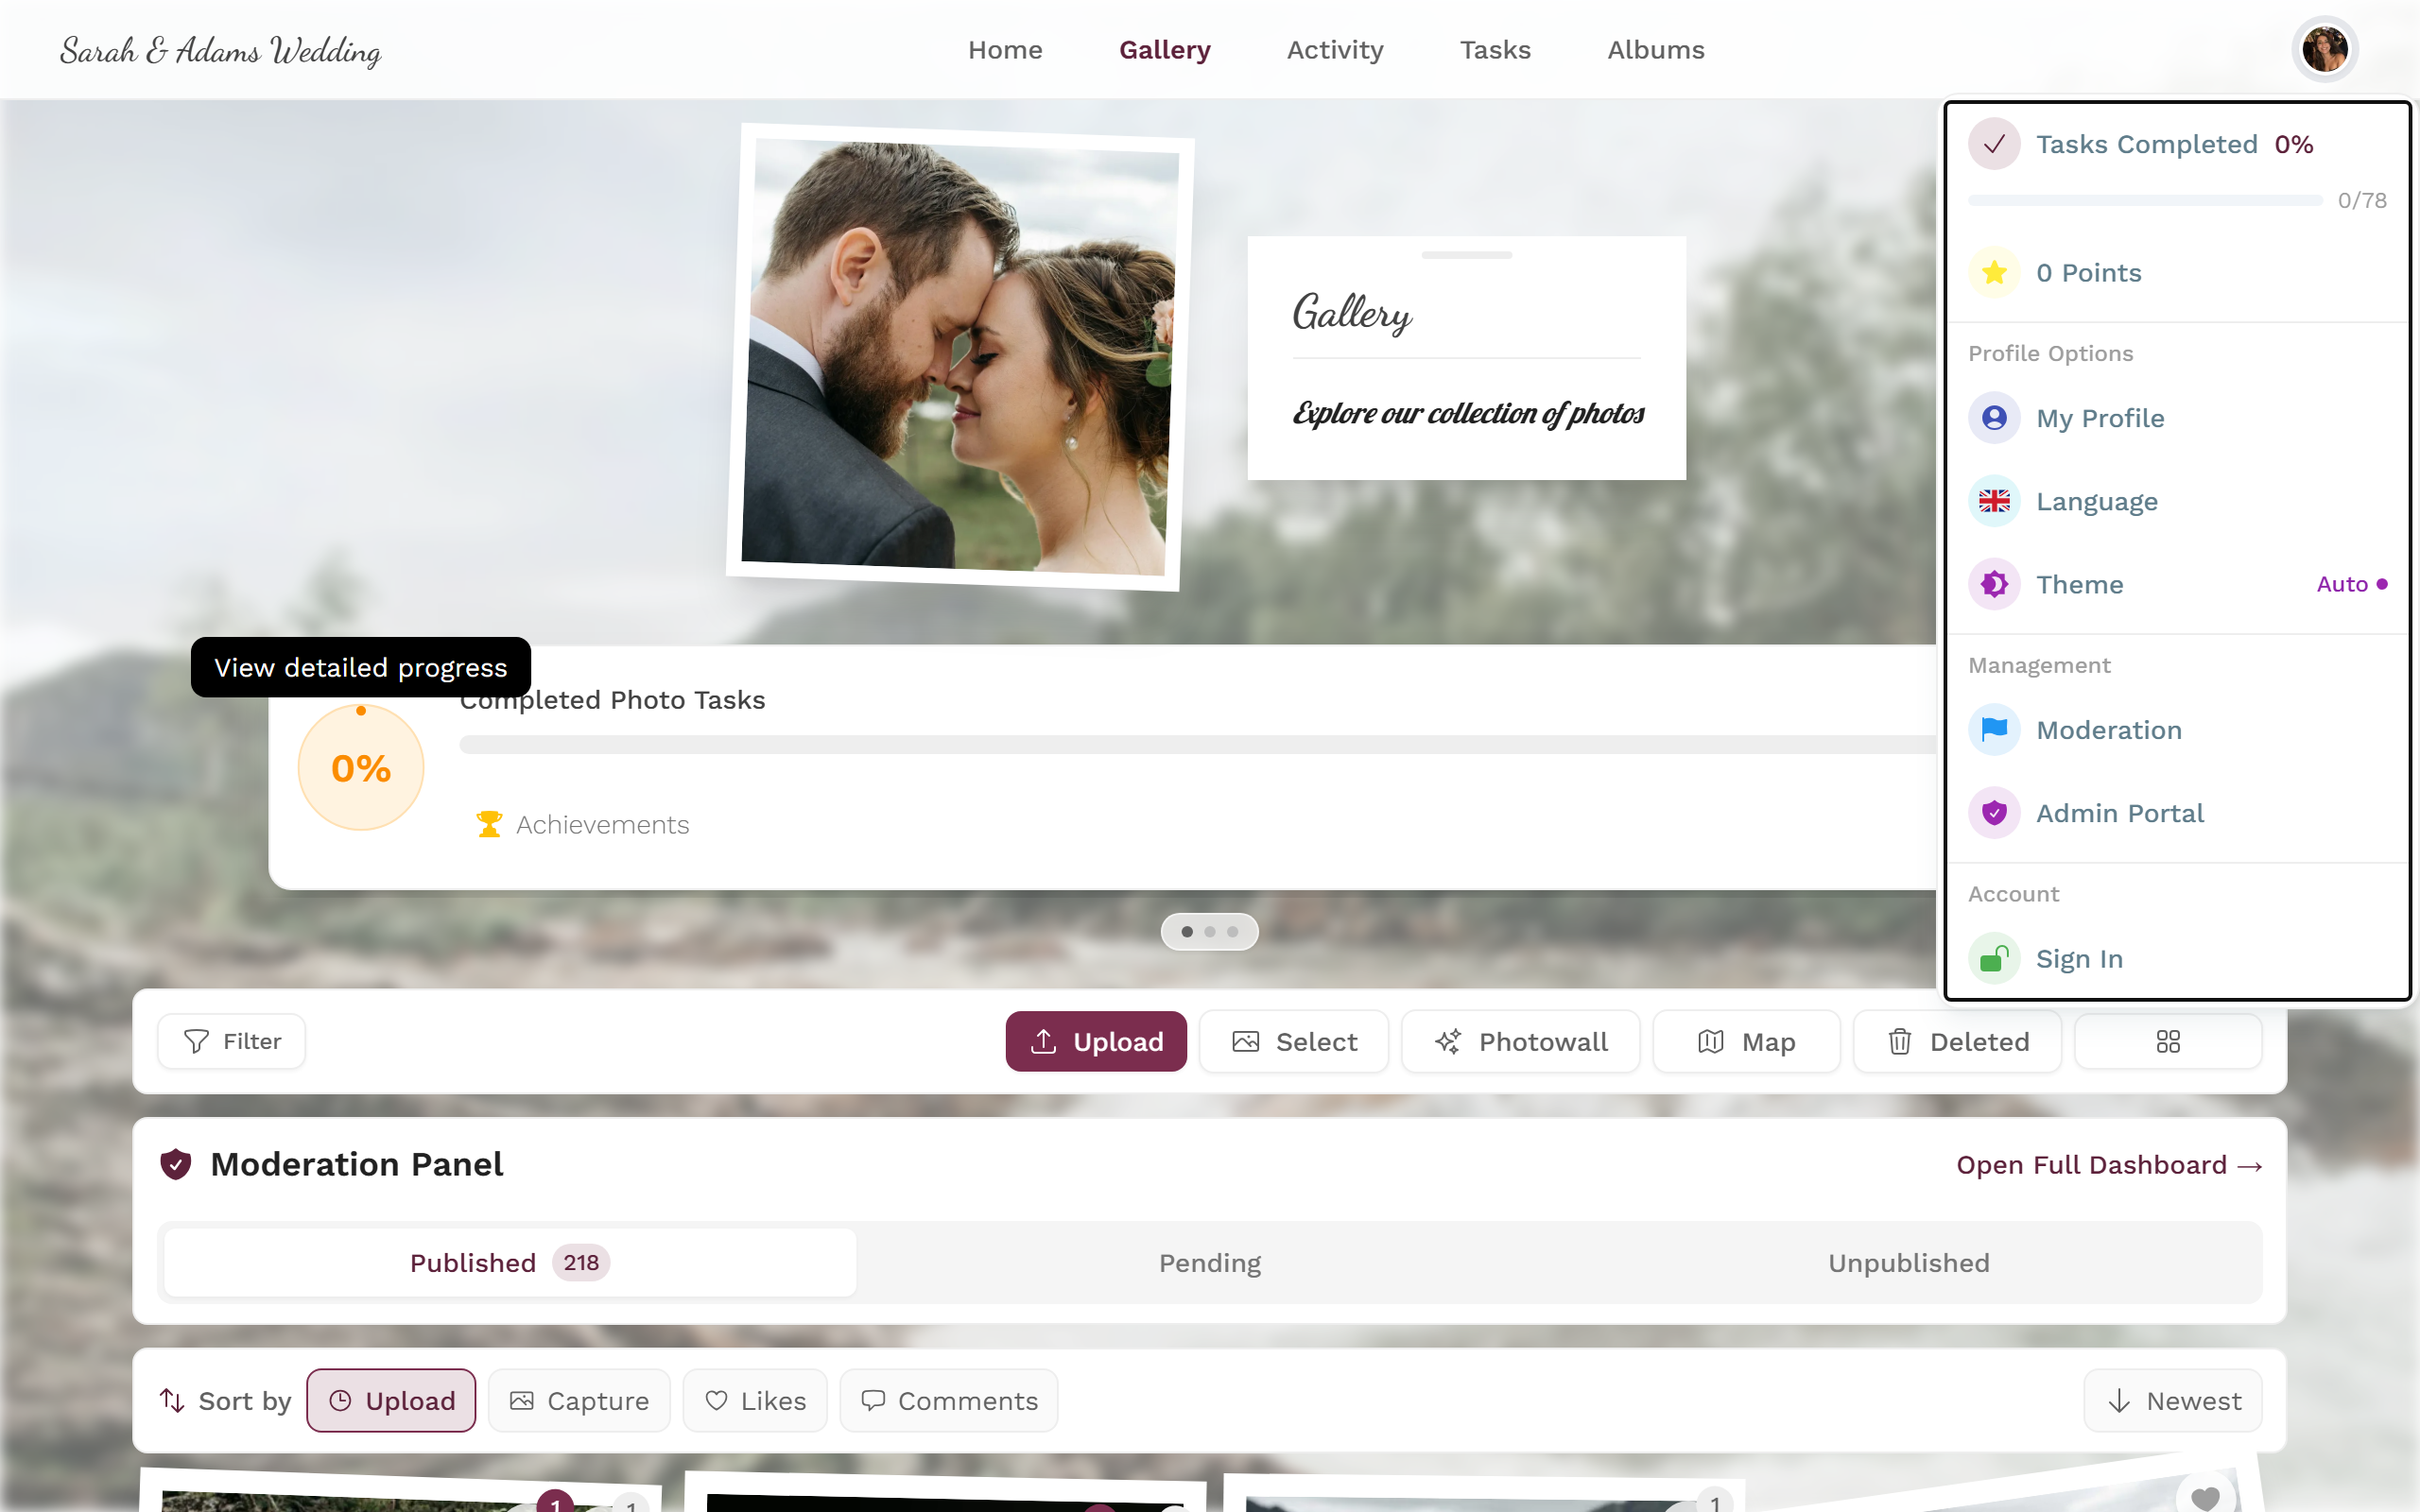
Via the profile menu in the top right you reach Management → Moderation and the admin portal. -
Use the three tabs with live counters: Pending review, Unpublished and Published.
-
Click an item and publish or reject it.
The full queue guide is under Moderation. You ban individual guests as described in Ban users.
Edge cases & troubleshooting
Section titled “Edge cases & troubleshooting”- “I can’t see the photo approval system or the AI filter, or it’s locked.” Both are premium features — check your plan under Upgrade & plans.
- “A guest can’t upload despite having a code.” User permissions are set to “View-only gallery” or the role is “Viewer”. Heed the yellow warning; switch to “Open sharing” or “Contributor”.
- “My changes are gone after switching tabs or reloading.” They weren’t saved — watch for the red dot on the tab and click “Save changes”.
- “New photos don’t appear in the gallery.” Pre-moderation is active; approve them in Moderation under “Pending review”.
- “I chose Completely private and the default QR no longer works.” That’s intended — only custom invitations from the advanced invitation manager work.
- “The AI re-scan says ‘already running’.” Wait for the displayed countdown; then you can scan again.
Best-practice tips
Section titled “Best-practice tips”- Choose access deliberately: Password protected for private celebrations, Open access + Viewer for view-only events, Completely private for sensitive corporate events.
- Set an easy-to-share default invitation code (the “Random” button gives readable codes) and enable “Include code in QR code” for one-scan access.
- For corporate and children’s events: pre-moderation “Yes, review first” plus the AI filter on.
- Before every deletion, download an archive — a deleted event cannot be restored.