Legal pages & imprint
Your gallery can show its own legal pages in the footer: an Imprint, a Privacy policy and Terms. For each of these three documents you decide individually whether it is inherited from your brand, generated as a template from your business details, written by you, linked to an external page, or hidden entirely.
Where to find the legal pages
Section titled “Where to find the legal pages”The legal pages are not a settings area of their own and they are not under “Privacy & Moderation”. They are the third and lowest section inside the White-Label tab of your event settings – and that section is collapsed. Scrolling down is therefore not enough, you have to open it.
-
Open the admin area of your event. If you are inside the gallery, reach it via the profile menu at the top right → Management → Admin portal.
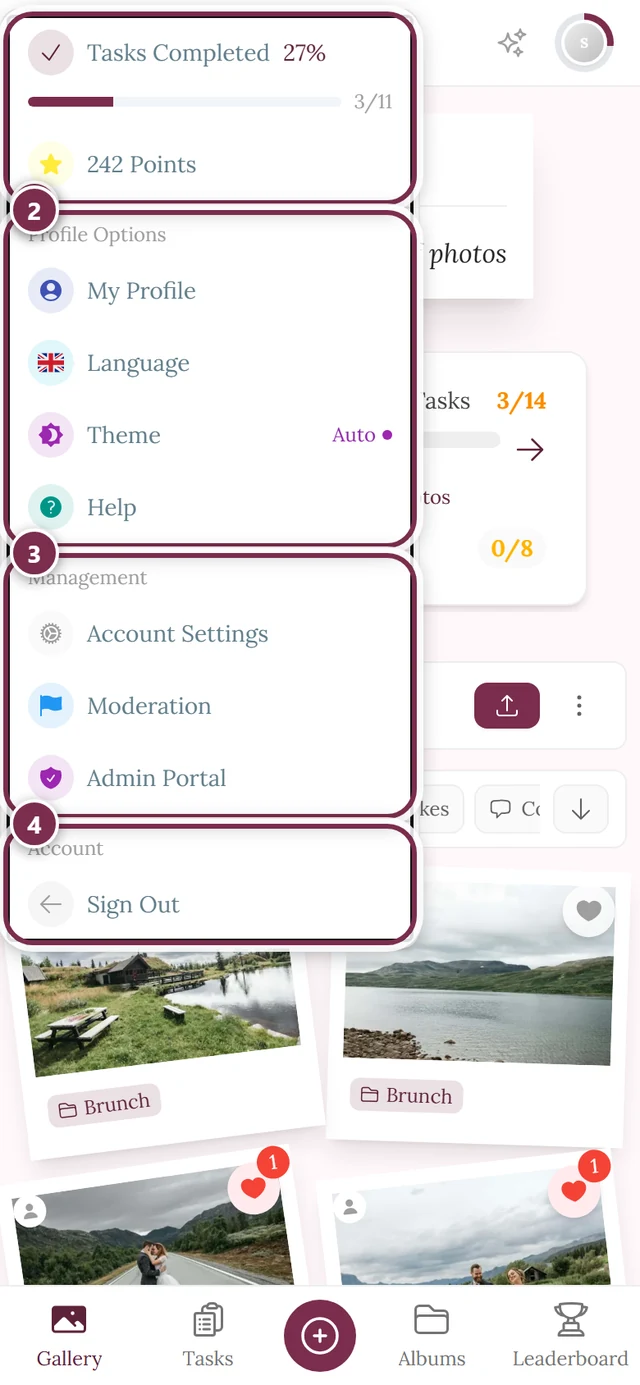
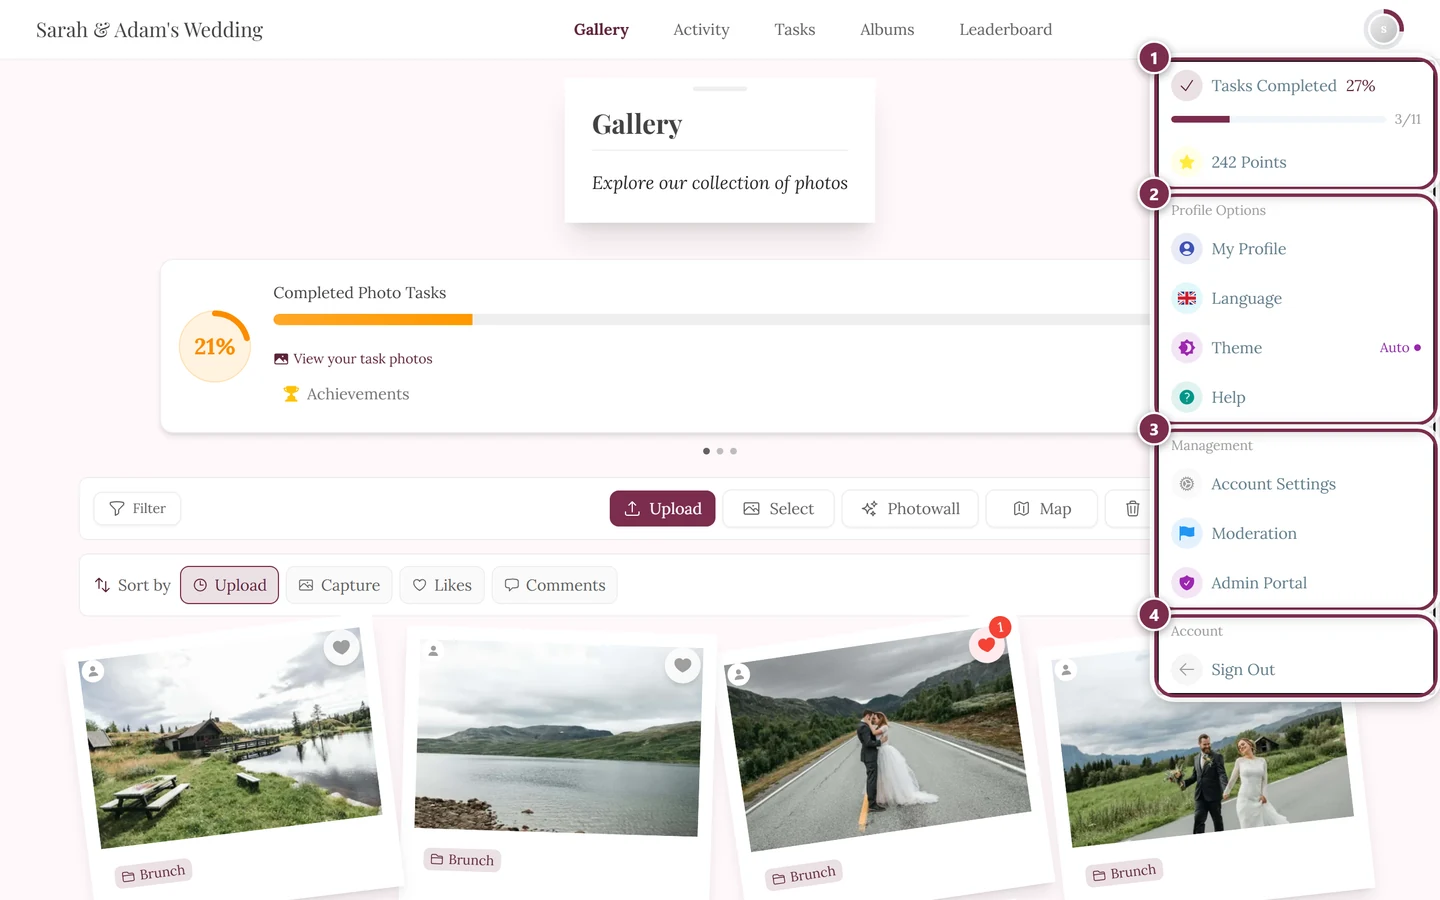
Use the profile menu at the top right to reach the admin area. ① your points and solved tasks, ② Profile options with My Profile, Language, Theme and Help, ③ Management with Account Settings, Moderation and Admin Portal – this section is missing until you hold a role for it, ④ Account with Sign out. -
In the sidebar, choose Settings (route
/admin/settings). -
At the top, click the White-Label tab (globe icon). The tab is labeled “White-Label” – not “Legal pages” – and only appears if your plan includes White-Label or a custom domain.
-
Scroll to the bottom of the tab. Below the Branding and Your Gallery URL areas sits a narrow gray header row with a document icon and the label Legal documents, and a chevron on the right.
-
Click that header row. The section unfolds, the chevron rotates – and only now do you see the intro text and the three document cards. Before that, there is nothing at this spot except the header row.
Inside the opened section the intro reads: “Configure the Impressum, privacy policy and terms shown in your gallery footer. By default each document is inherited from your brand.”
The three documents
Section titled “The three documents”There are exactly three legal cards, always in this order:
| Document | Shown in footer | Typical use |
|---|---|---|
| Imprint | Imprint | Provider identification – required in many countries |
| Privacy policy | Privacy Policy | How photo and user data is handled |
| Terms | Terms | Only needed in a contract or sales context |
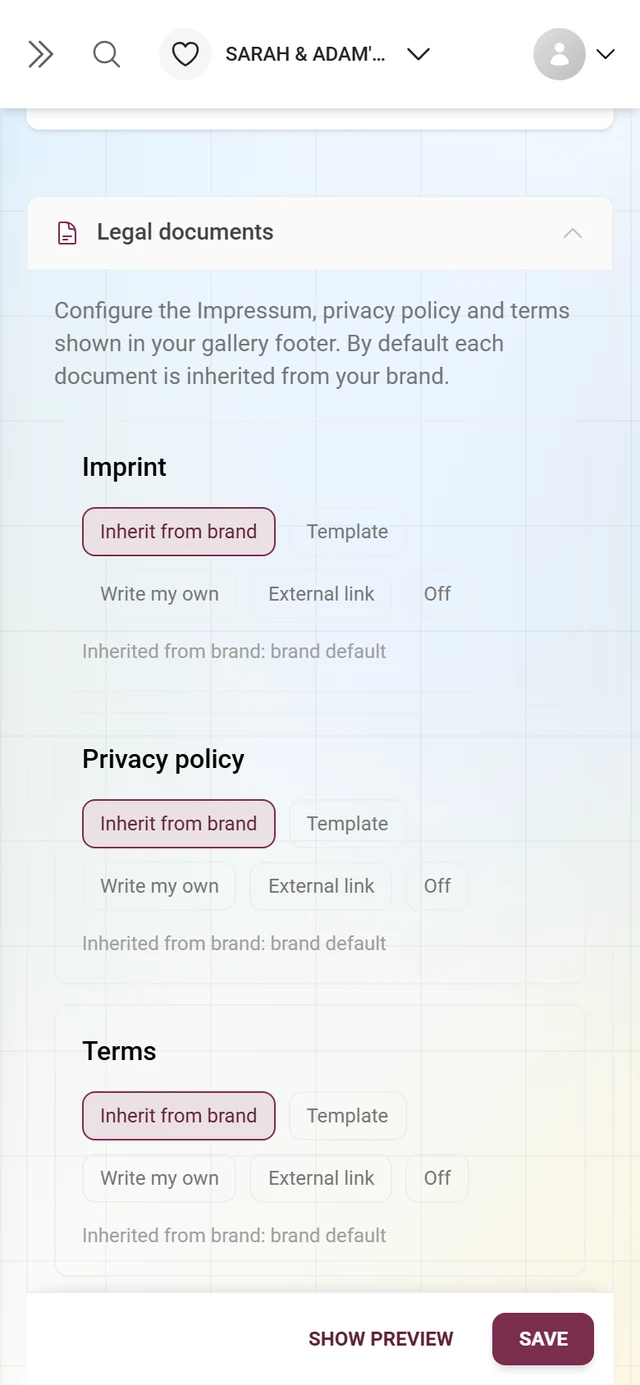
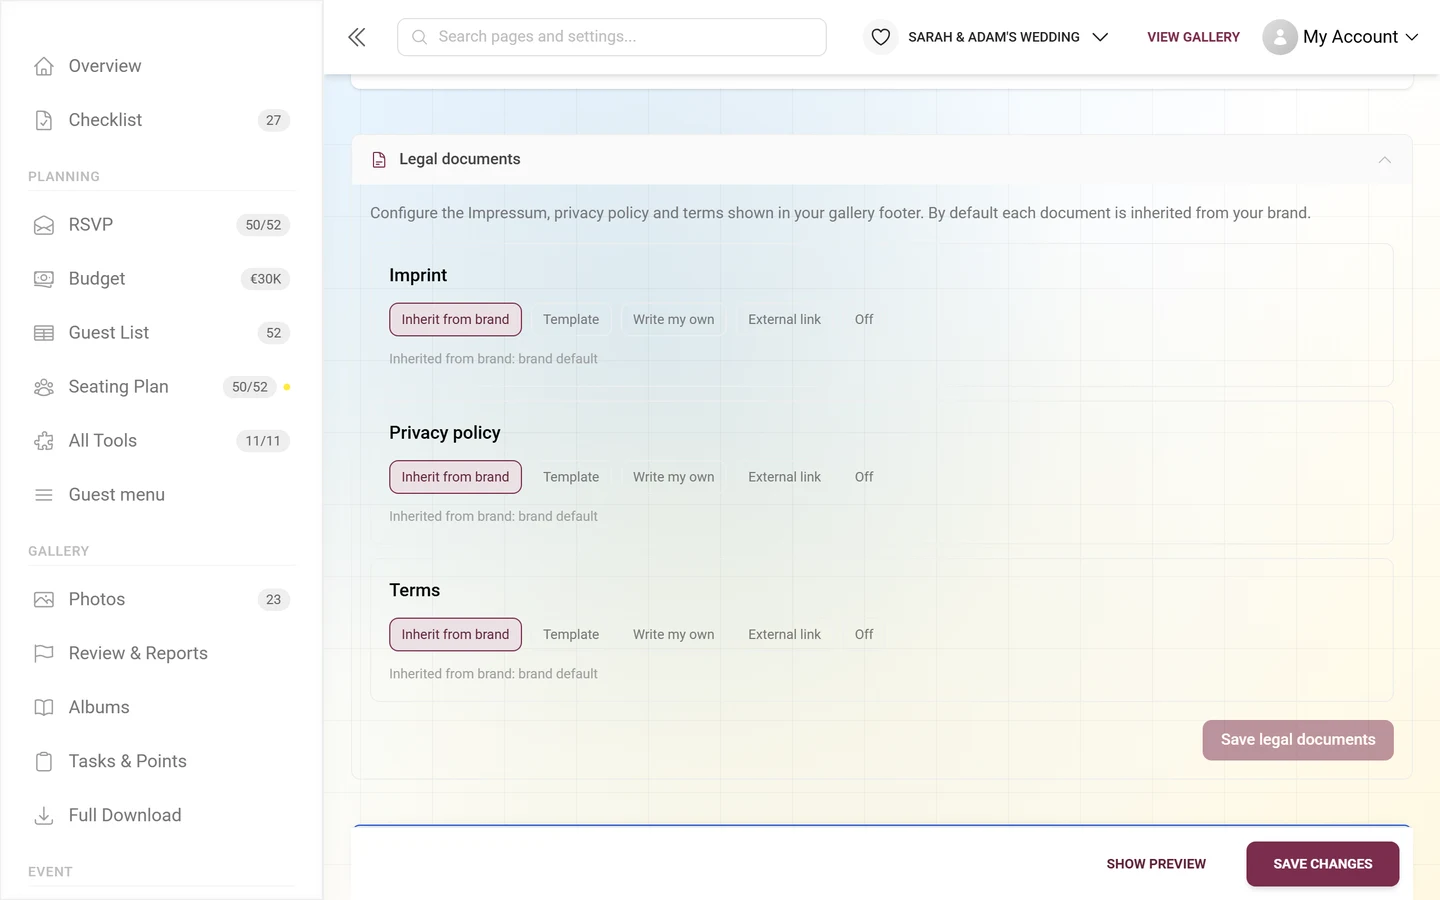
Each card works independently. You can, for example, link the imprint, generate the privacy policy from a template, and switch the terms off.
The five modes per document
Section titled “The five modes per document”At the top of each card you see a row of mode pills. The active mode is highlighted. Depending on your choice a different input area appears below. This is the heart of legal pages – each mode is explained individually here.
Inherit from brand (default)
Section titled “Inherit from brand (default)”The default for every document. The document is taken 1:1 from the parent brand. Below the pill row a hint “Inherited from brand: …” shows what the brand actually serves – e.g. “template”, “custom text”, “external link”, “off” or “nothing (brand provides no document)”. If the origin is unknown, it reads “brand default”.
- Useful if you book through a partner/reseller with their own brand and their legal pages fit you.
- As a standalone host without a brand, inherit usually serves nothing – then you must pick one of the other modes for that document.
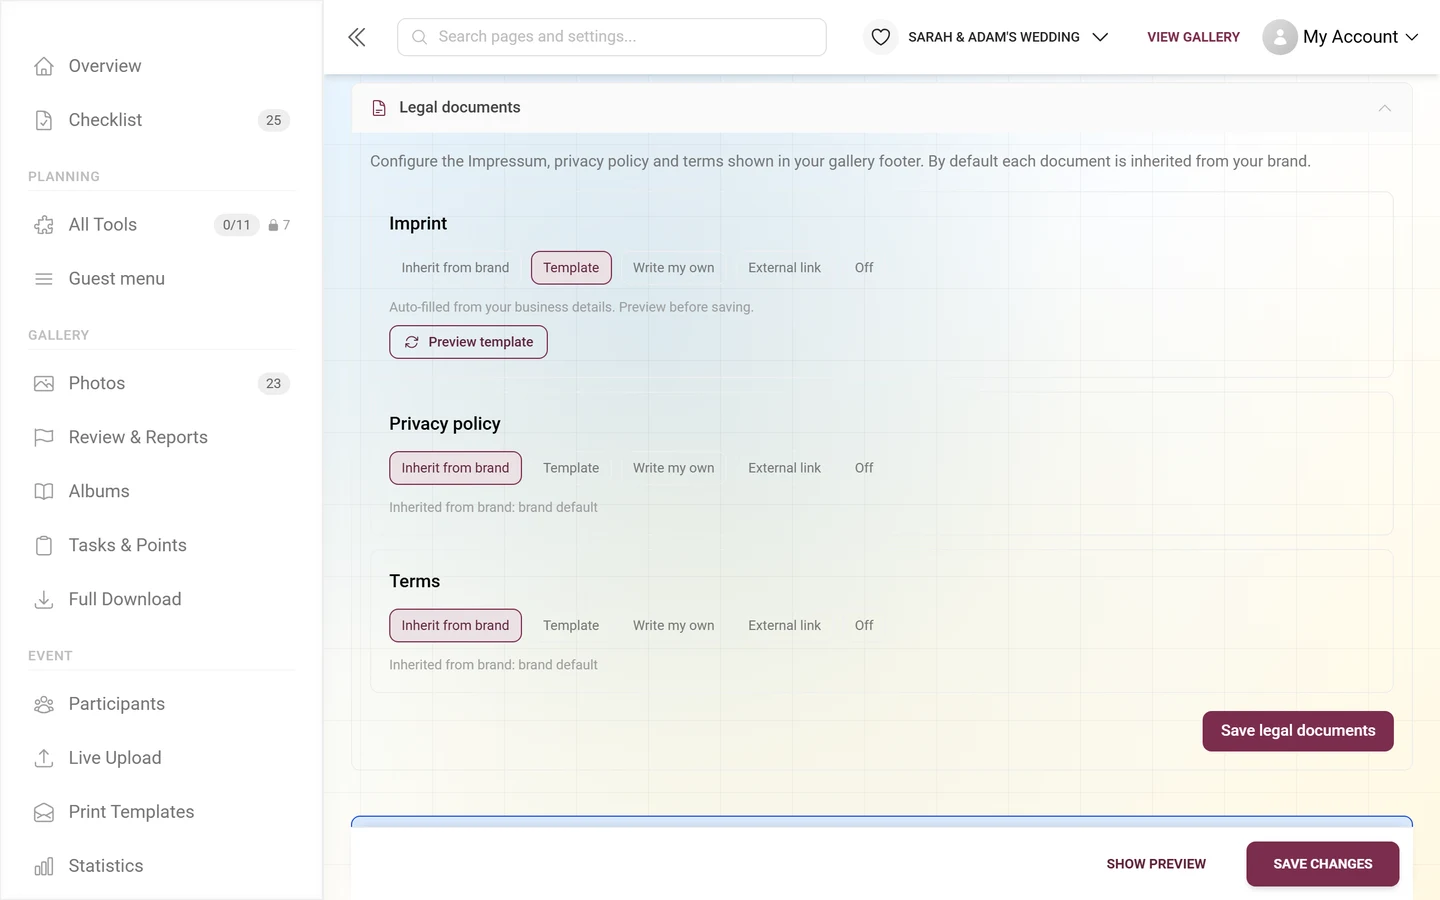
Template
Section titled “Template”Photogala generates a ready-made legal text automatically from your stored business and contact details. No typing required.
- Below it the hint reads “Auto-filled from your business details. Preview before saving.”
- Use the Preview template button to load the server-generated template and see it directly below in a preview box (headed Preview).
- Check the preview before saving – the template is only as good as your stored details.
- Edge case: If loading fails, the hint “Could not load the template.” appears.
Write my own
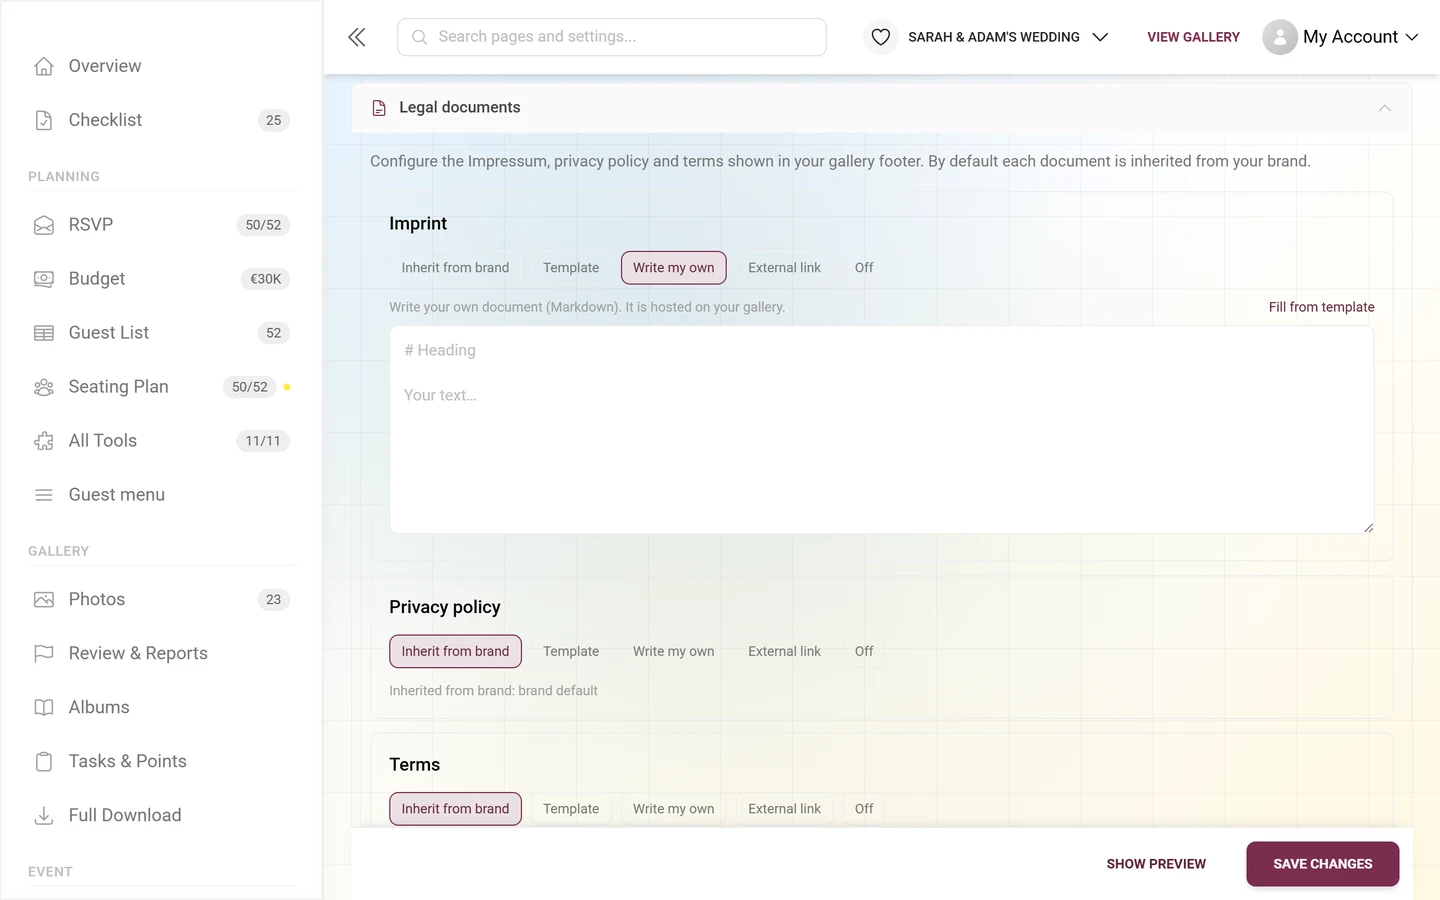
Section titled “Write my own”You write the text yourself in a large text box. It is hosted on your gallery and shown at your-gallery/legal/impressum (or /datenschutz, /agb).
- Hint: “Write your own document (Markdown). It is hosted on your gallery.”
- Format = Markdown: headings with
#, lists with-, links as[text](url), bold with double asterisks. When displayed the Markdown is rendered. - Raw HTML does not work – it is shown as plain text for security reasons (protection against malicious code). Use Markdown syntax.
- The placeholder in the field shows an example heading and a paragraph.
- Quick start: Use Fill from template (small link at the top right of the card) to pull the generated template text into the field – the mode automatically switches to Write my own, and you then edit the text freely.
- Edge case: If you save “Write my own” with an empty field, saving is blocked with “…: please add content or choose another mode.”
External link
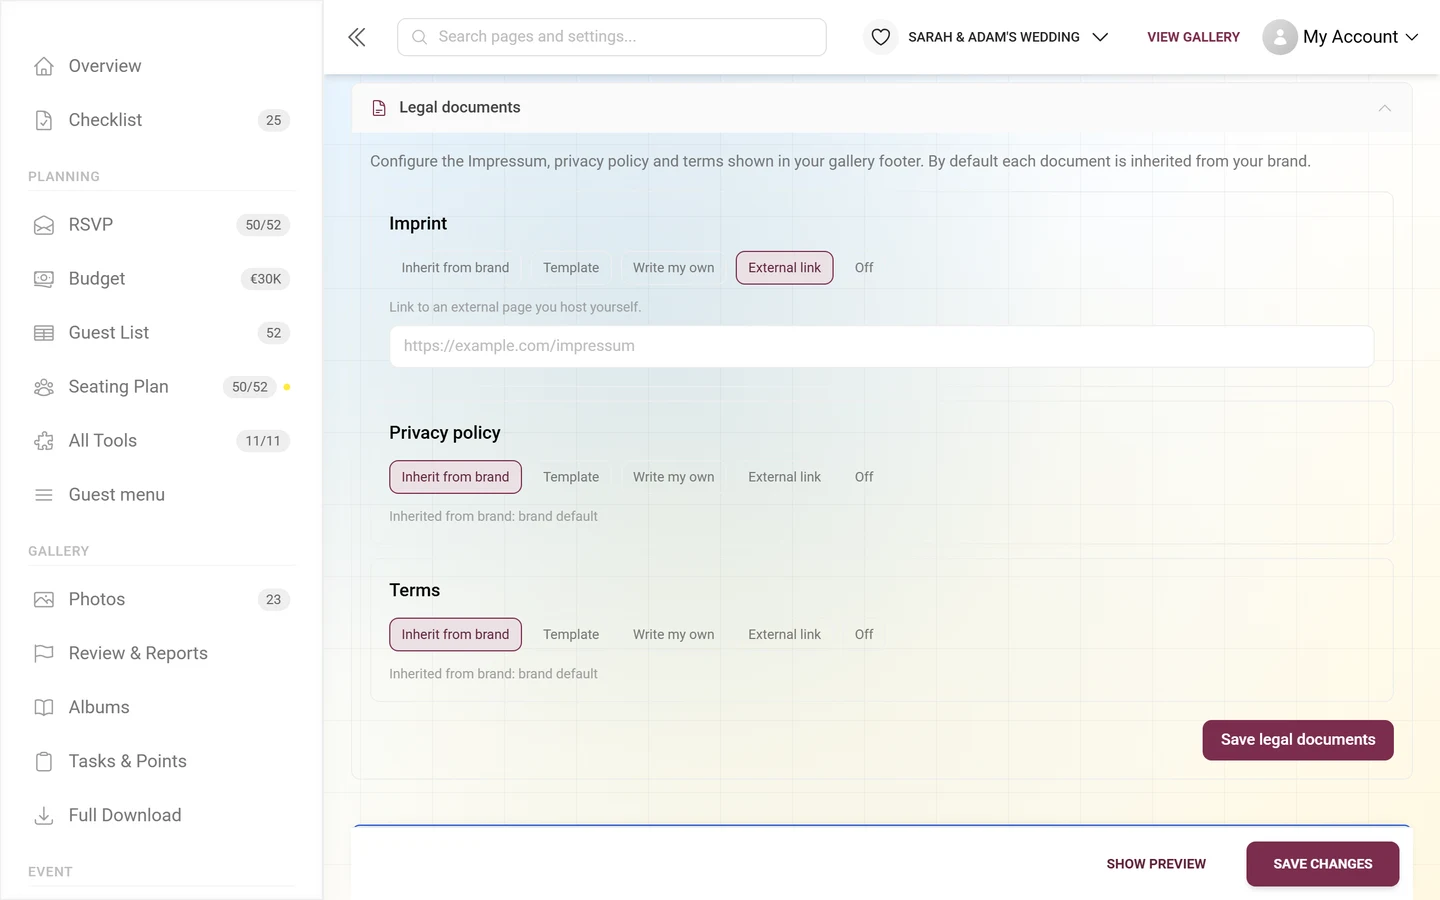
Section titled “External link”The footer link points directly to an external page you host yourself (opens in a new tab).
- Hint: “Link to an external page you host yourself.”
- Enter the full address in the URL field, e.g. an
https://link to your existing imprint. - Only
httpandhttpsaddresses are accepted and forwarded. Other schemes are discarded; the legal page then counts as unavailable. - Ideal if you already run your imprint and privacy policy on your company website.
- Edge case: If you save “External link” without a URL, saving is blocked with “…: please enter a URL for the external link.”
The document is linked or shown nowhere – not even inherited from the brand. The hint reads: “This document is not shown anywhere.” Use it deliberately, e.g. to hide the terms entirely.
Saving & preview
Section titled “Saving & preview”-
Set the desired mode for each of the three documents and fill in the related fields (text or URL).
-
For Template or Write my own, use Preview template or the preview box to check how the text looks.
-
Click Save legal documents at the bottom right. While saving it reads Saving…. On success “Legal documents saved.” appears.
Before saving, all three documents are validated. The first problem – a missing URL for “External link” or missing text for “Write my own” – blocks saving and shows the matching hint. Fix it and save again.
Where guests see the pages
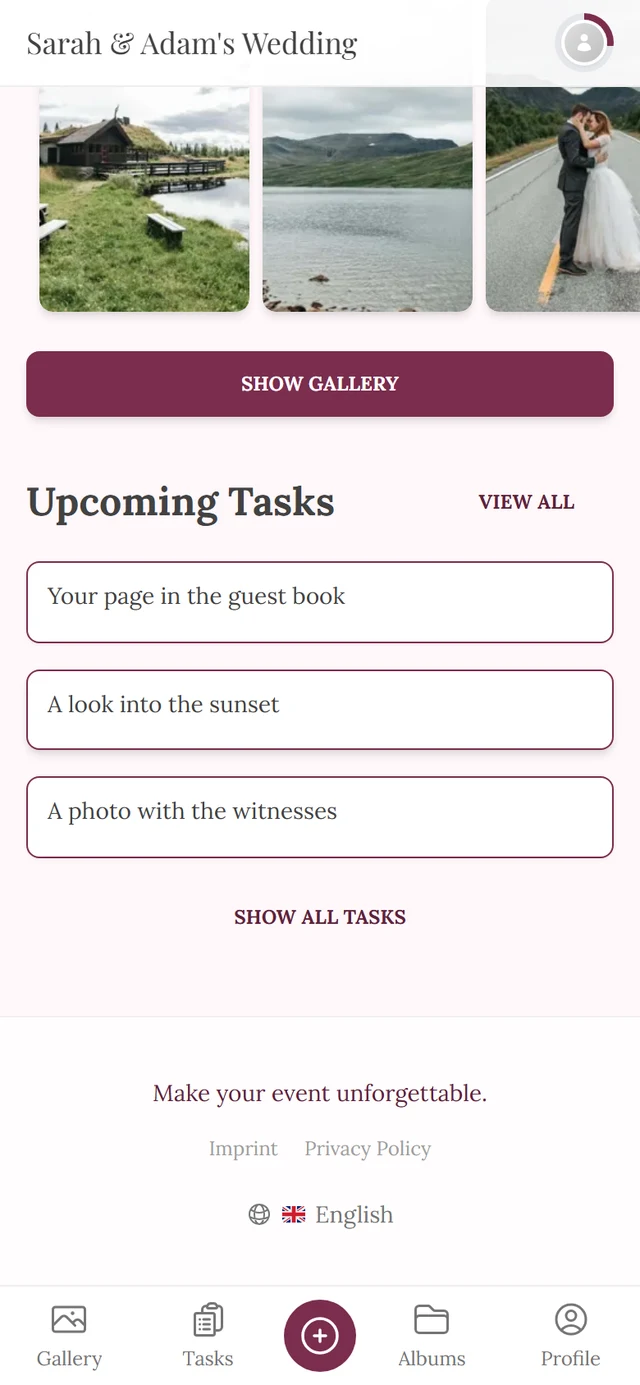
Section titled “Where guests see the pages”The configured documents appear as links in the footer of every gallery page (order: Imprint, Privacy Policy, Terms). Only documents with a valid target are shown.
- Template and Write my own open the internal page hosted on your gallery at
…/legal/impressum(or/datenschutz,/agb). At the top of that page there is a Back to gallery link. - External link opens the external address in a new tab.
- Off and an empty “inherit” hide the document from the footer.
- If a document is unavailable, the page reports “This document is not available.”
Fallback logic
Section titled “Fallback logic”- Plain photogala.net gallery without its own configuration: the footer shows Photogala’s own imprint and privacy links (platform default).
- White-Label gallery (custom domain / brand): no Photogala fallback. Here you (or your partner) are responsible; as long as nothing is configured the footer stays empty for legal pages.
- Consequence: as soon as you use White-Label or a custom domain, you must provide your own legal pages.
Who is responsible?
Section titled “Who is responsible?”Short and factual, so it is clear whose details belong here:
- Whoever runs the event is responsible for its imprint and privacy policy – that is you as the host, or your partner on partner-managed events. Photogala only supplies the technology and the text templates.
- That is why there is no fallback to Photogala’s legal pages on white-label domains: there your brand is what guests see, so your details have to be there.
- On a plain photogala.net gallery without its own configuration, the footer links Photogala’s platform legal pages. Those describe the platform – not your event, your company or your data processing.
- On partner-managed events the partner can set the legal pages centrally and lock the section for you. Then the brand’s texts appear and changes go through your partner.
Availability & permissions
Section titled “Availability & permissions”- White-Label required: the entire legal section is only visible if your plan includes the White-Label feature. Without it, neither the tab nor the section exists.
- Owner only: legal pages are set by the event owner. Moderators have no access to settings.
- On partner/reseller events: the partner may additionally manage the legal pages centrally and lock the section for you – then you do not see it and the legal pages come from the brand.
Troubleshooting
Section titled “Troubleshooting”- I cannot find a legal pages area. Either the section is simply collapsed (click the Legal documents header row at the bottom of the White-Label tab), or your plan does not include White-Label – then the tab does not exist. Check Custom domain & white-label and the Upgrade.
- The save button is gray. There is no unsaved change. Change a mode or content first.
- “Please enter a URL” / “please add content”. For “External link” the URL is missing, for “Write my own” the text is missing. Fill the field or switch mode, then save again.
- My HTML shows as plain text. Only Markdown is rendered, raw HTML is shown as text (protection against malicious code). Use Markdown syntax.
- The external link does not open. The URL must start with
http://orhttps://; other schemes are rejected. - The footer still shows Photogala’s imprint. You are on a plain photogala.net gallery without your own configuration – that is the platform default. There is no such fallback on White-Label domains.
- The template is empty or incomplete. The template draws from your business details. Add those or switch to “Write my own”.
Best practices
Section titled “Best practices”- As a standalone host with a custom domain: set at least the Imprint and Privacy policy. Start quickly with Template, then if needed switch to Write my own via Fill from template and refine – or use External link to point at your existing website.
- Use Preview template before saving to check the content.
- Set Terms only if there is a contract or sales context; otherwise use Off.
- Set the legal pages before you share the gallery link or QR code – the footer links should be live as soon as the first guests arrive.
Related topics
Section titled “Related topics”- Custom domain & white-label – same tab, directly above
- Customizing the look
- Moderation & safety
- Reseller basics – legal pages at brand level
- Plan & term
- Glossary