Seating Plan – Seating guests
Once the room stands, the people move in. This page shows how you get guests onto seats – by hand, automatically, by rule, or following the wishes from your RSVP.
The guests come from the guest list
Section titled “The guests come from the guest list”The seating plan shows the same people as your guest list – there is no second list to maintain separately. Select a guest on the plan and you edit their RSVP answer, contact details and meal choice right there.
Guests are also shared across all seating plans; each plan only assigns its own seat.
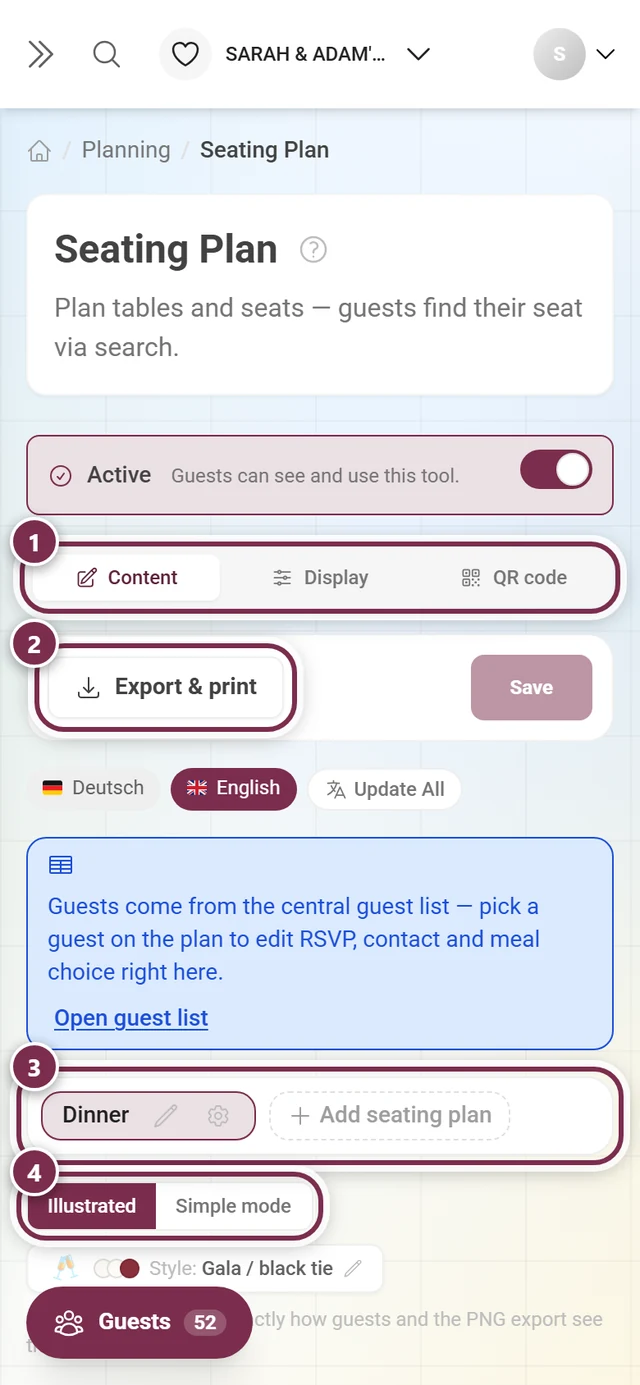
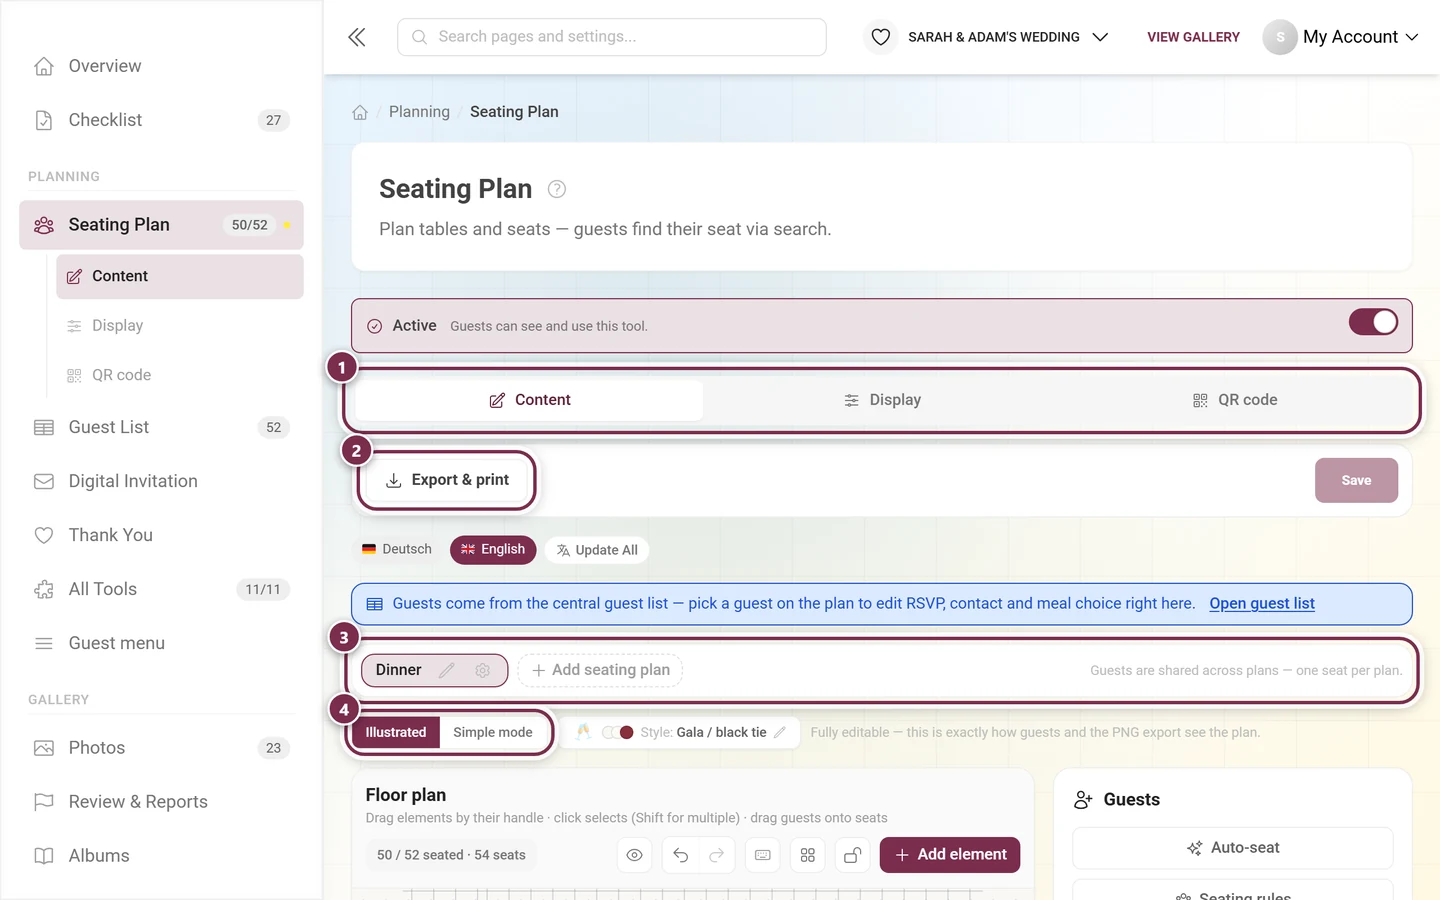
The guest panel
Section titled “The guest panel”With no element selected, the side panel shows your list under Guests. Right at the top sit the two buttons Auto-seat and Seating rules; below them you add people with Name, Group (optional) and Add guest. Only then comes the Guest list itself.
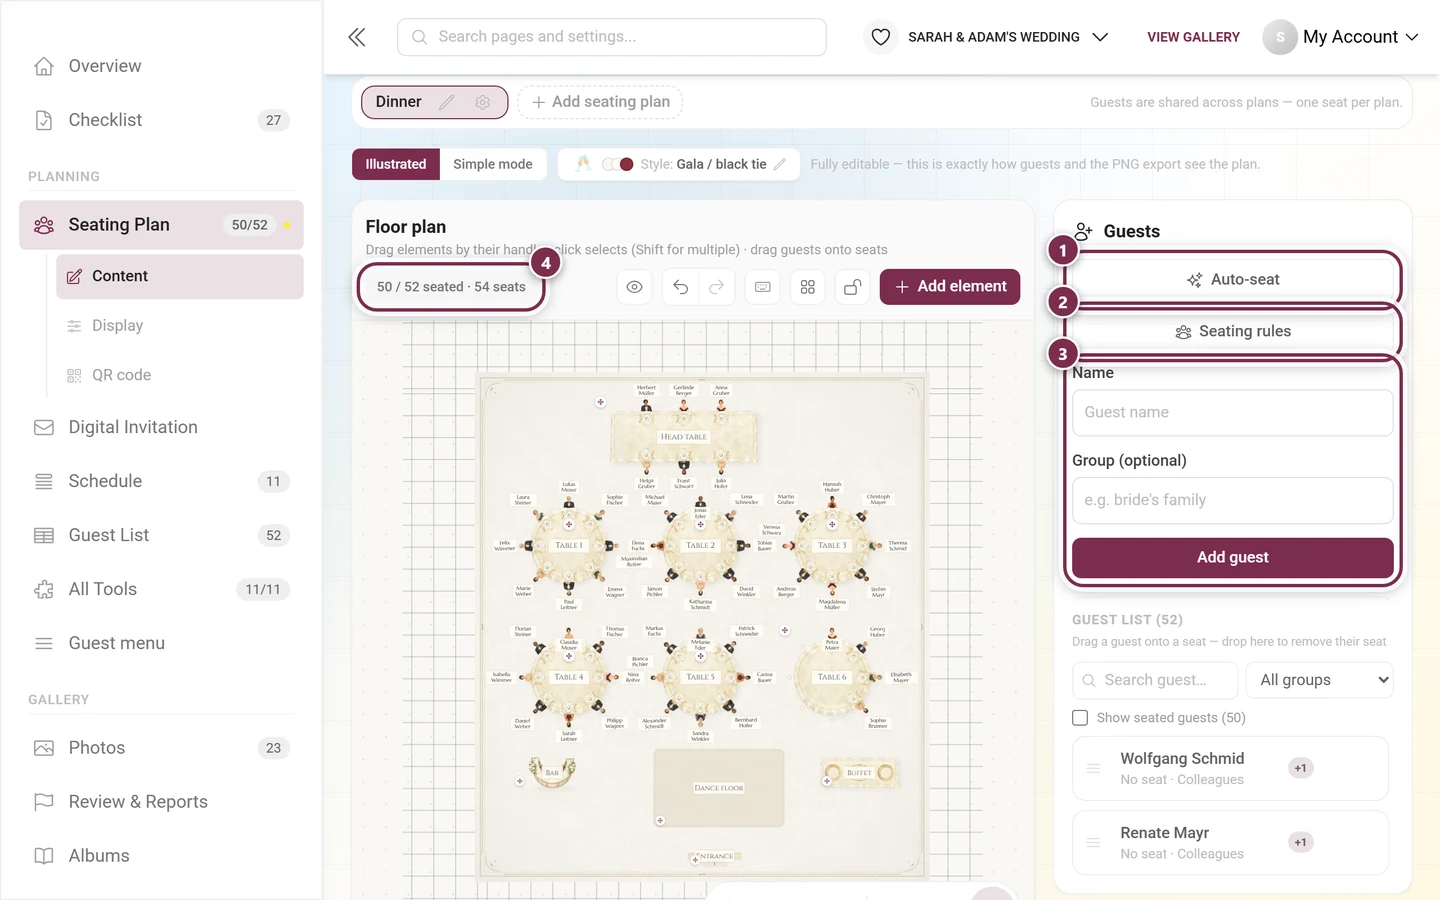
Read the progress in three parts: how many guests are seated, how many there are altogether, and how many seats the room actually offers. If there are more guests than seats, those numbers show it immediately.
Search, group filter and seated guests
Section titled “Search, group filter and seated guests”Three helpers sit above the list – and each only appears when it is needed:
- The search filters by name. It appears with more than five guests; an ✕ in the field clears the text again.
- The group filter sits next to it as soon as there are at least two different groups. All groups clears it.
- Show seated guests (N) brings the already seated people back into view. They are hidden by default so you can see who is still missing; the checkbox only appears once somebody is actually seated.
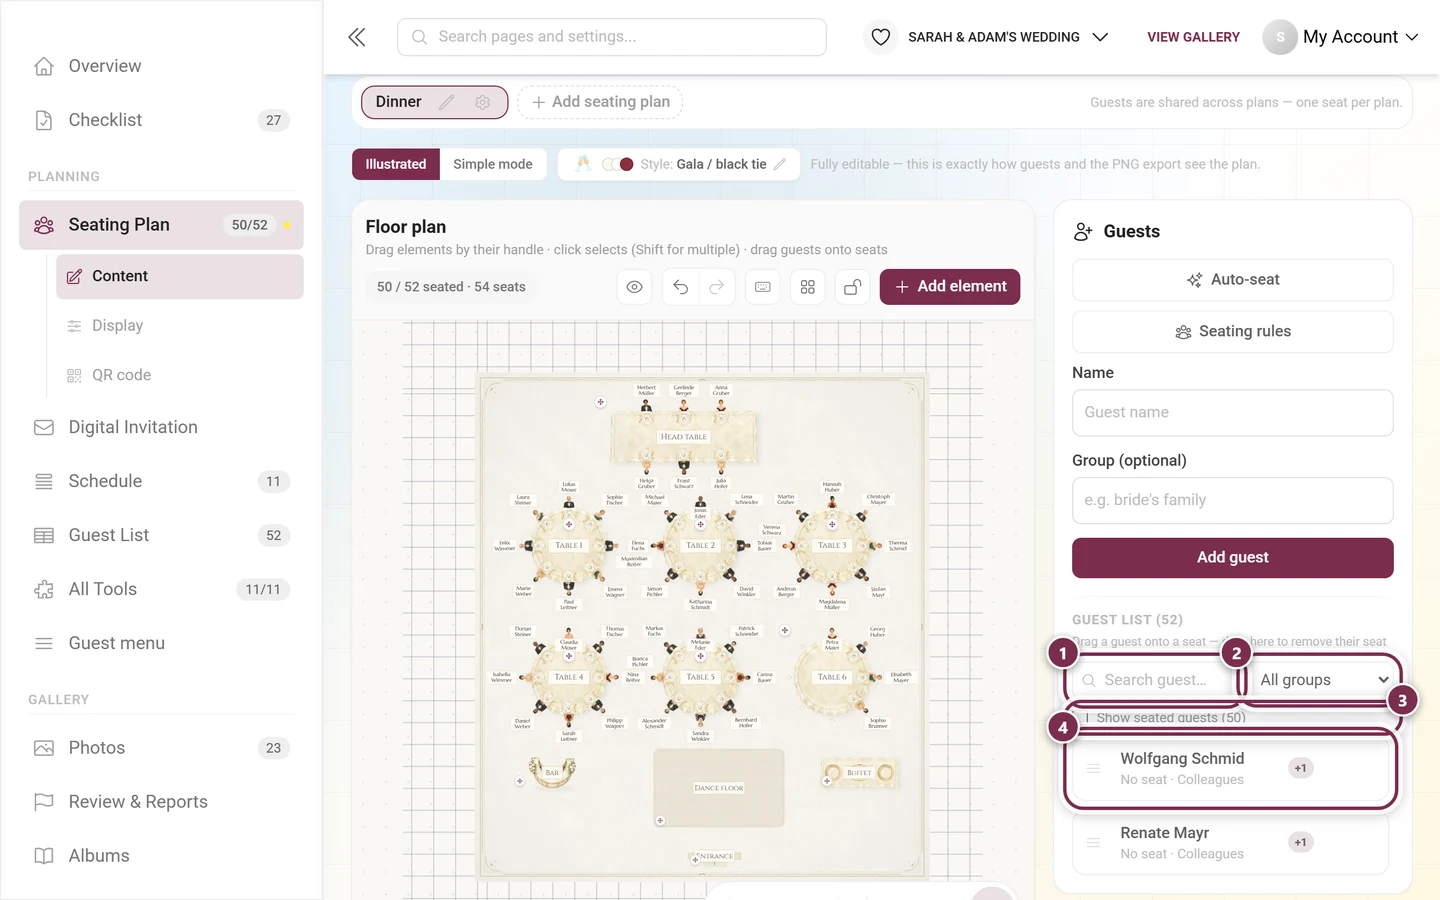
Anyone without a seat is listed as No seat – so nobody gets forgotten. Once everyone is seated, the empty list says exactly that.
Seating a guest
Section titled “Seating a guest”Several routes lead to the same result:
- Drag – drag the guest from the list onto a free seat. The quickest way on a desktop.
- Tap – tap the guest in the list, then tap the seat on the plan. A line above the plan then tells you who you are looking for a seat for (“Tap a seat to place …”). The more comfortable way on a phone.
- Via the seat – right-click or press and hold a seat, then choose Seat a guest here….
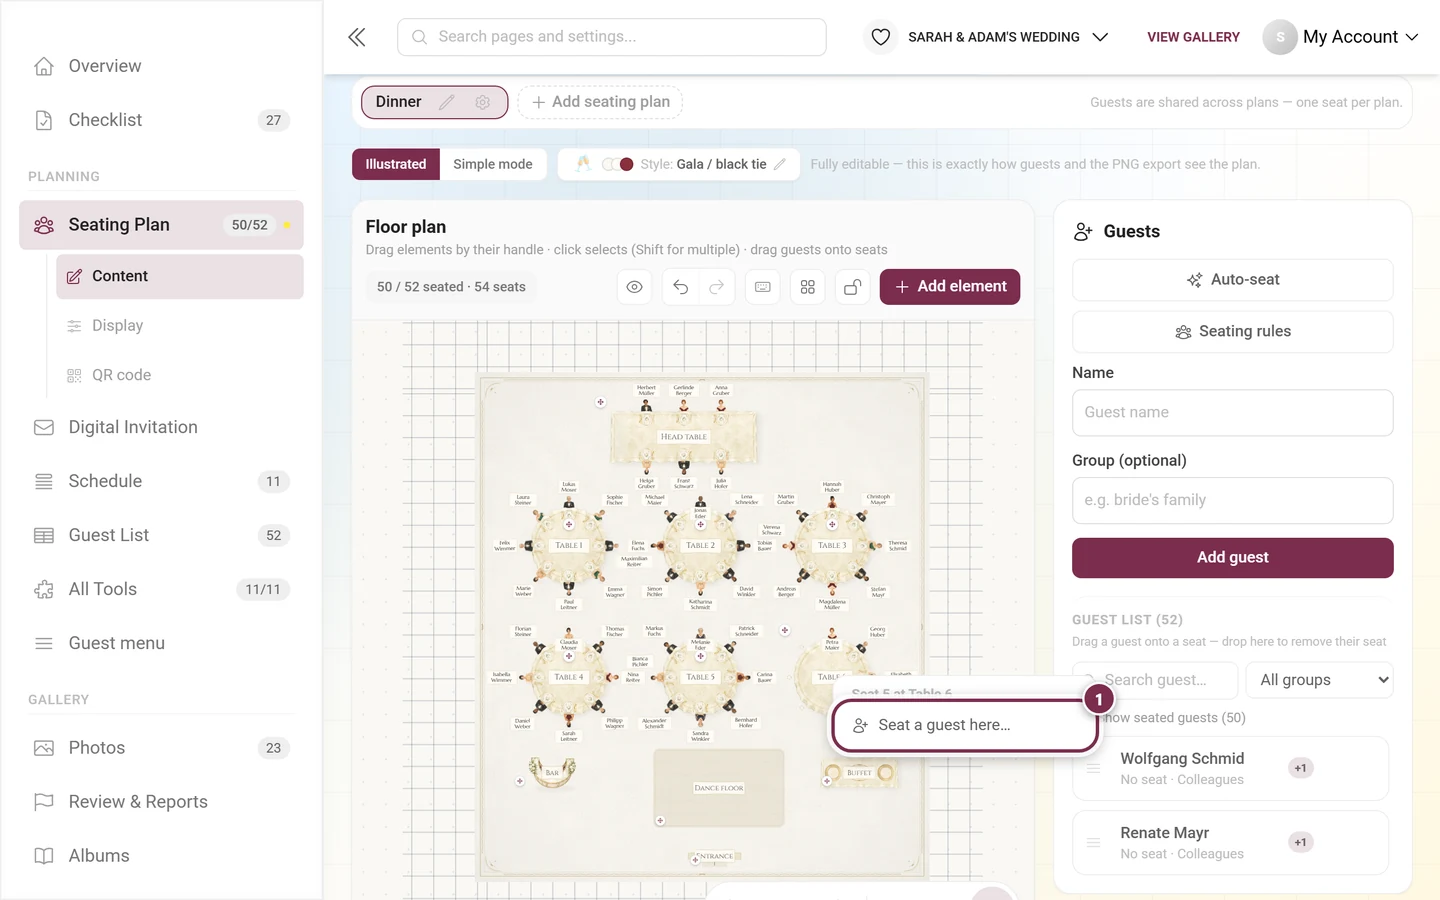
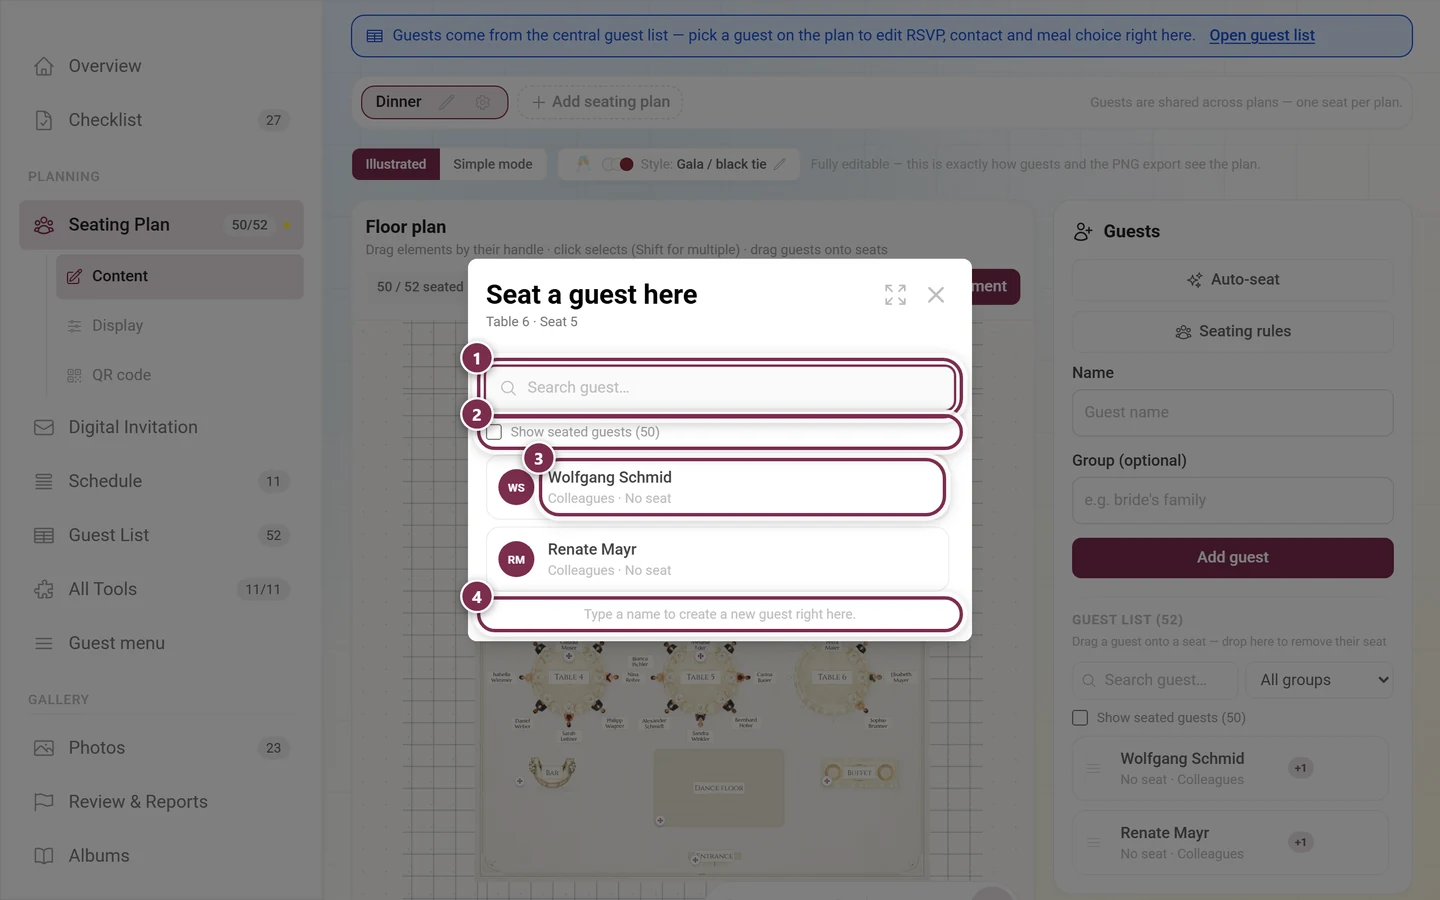
That entry opens the Seat a guest here dialog. It repeats table and seat at the top and offers the same tools as the panel:
Creating a guest right on the plan
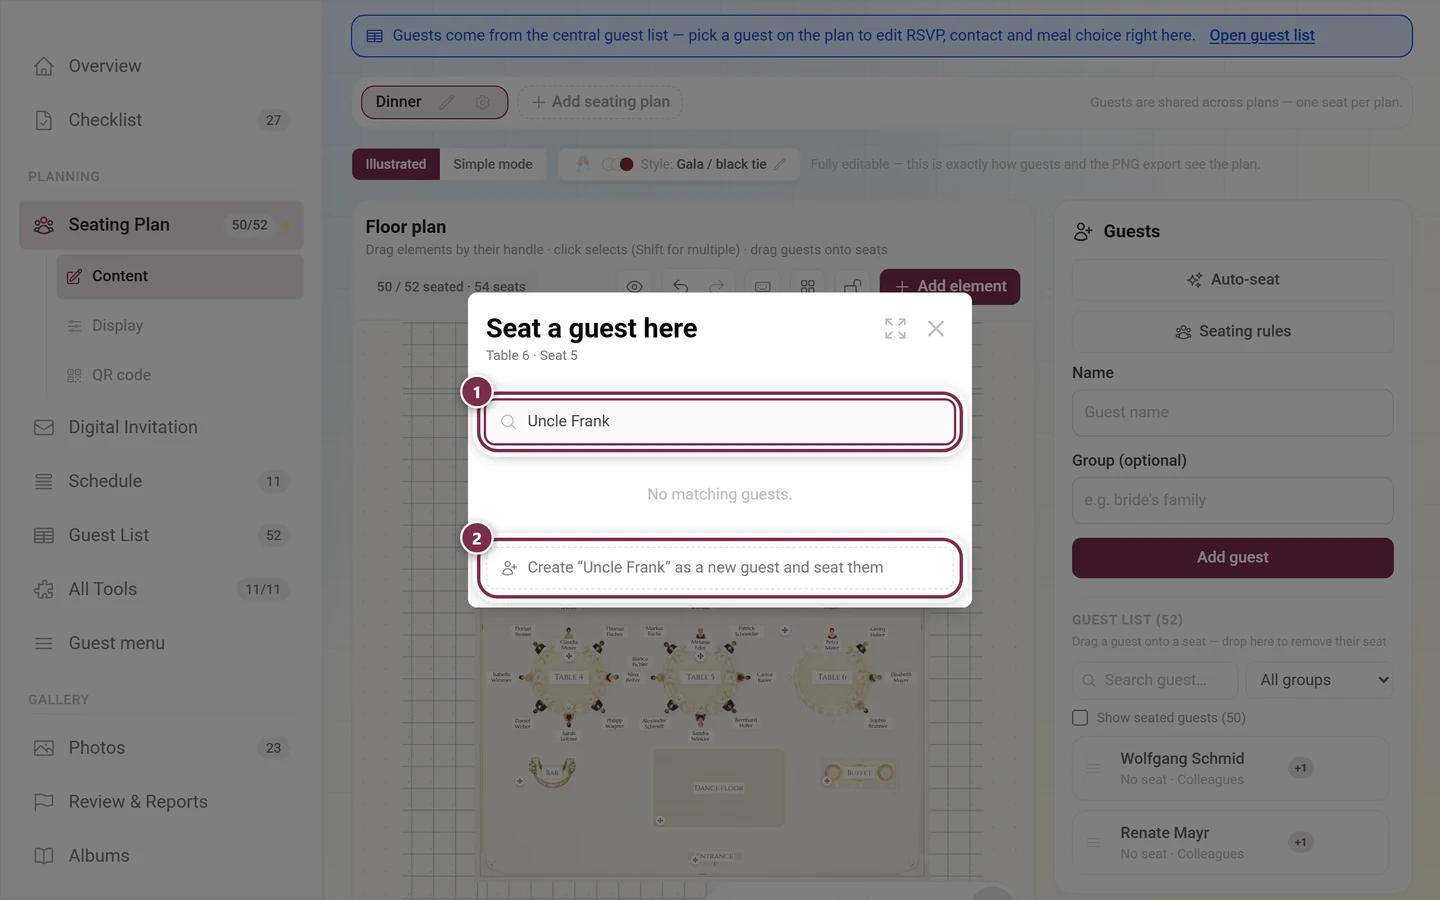
Section titled “Creating a guest right on the plan”If somebody is missing you don’t have to switch to the guest list: type the name into the seat dialog’s search field. When nothing matches, Photogala offers to create that person as a new guest and seat them. They then also appear in the central guest list.
The context menu of an occupied seat
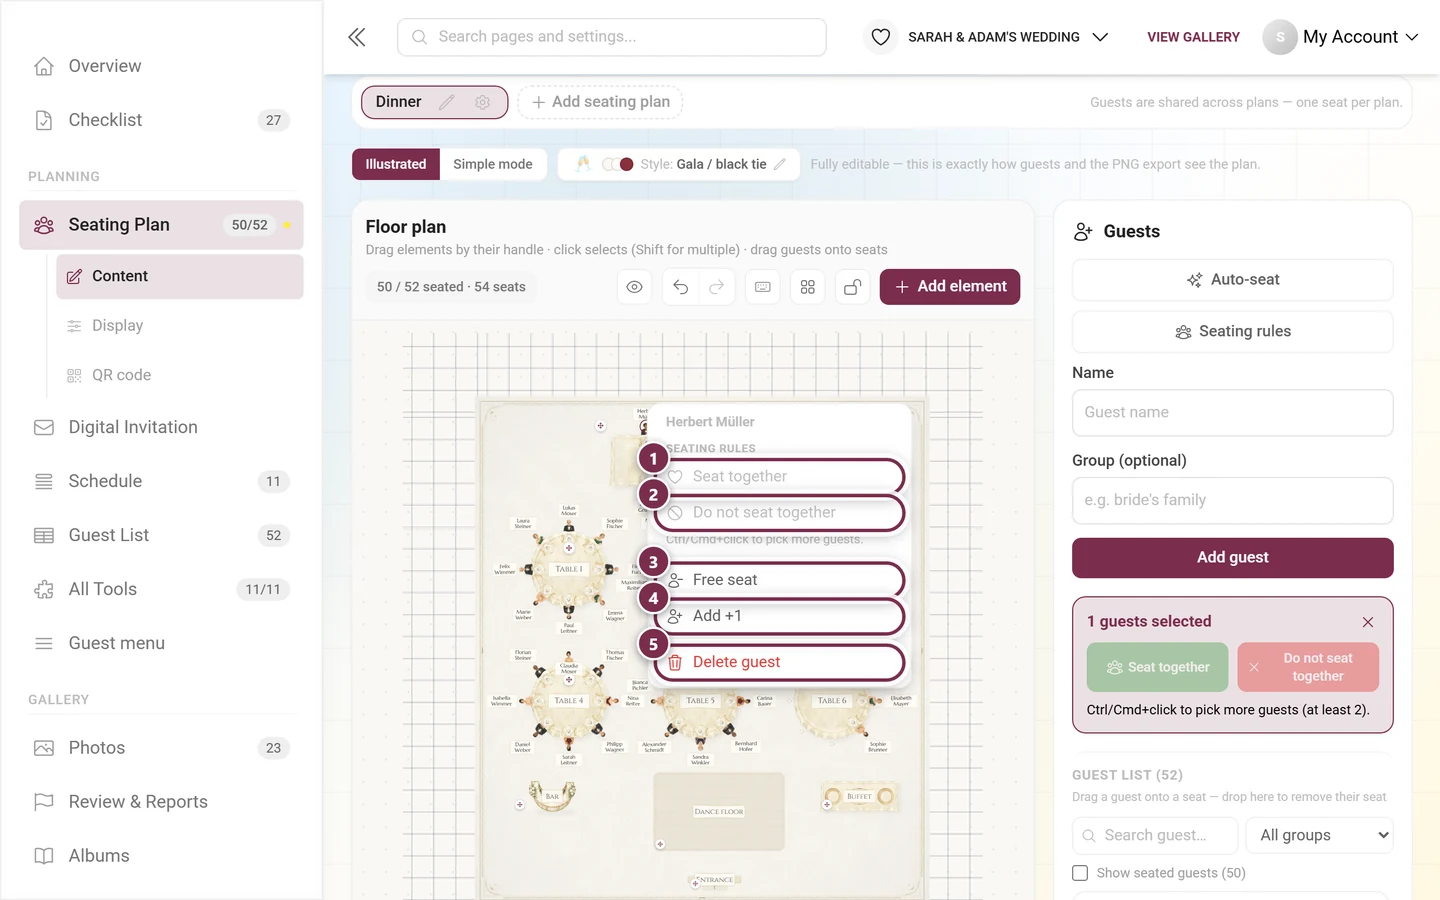
Section titled “The context menu of an occupied seat”On an occupied seat the menu is longer. Its header names the guest, followed first by the two rule entries and then by the actions for this seat:
Several guests at once
Section titled “Several guests at once”Ctrl + click (Cmd + click on a Mac) adds more guests to the selection – on the plan as well as in the list. From two guests on, the rule buttons come alive:
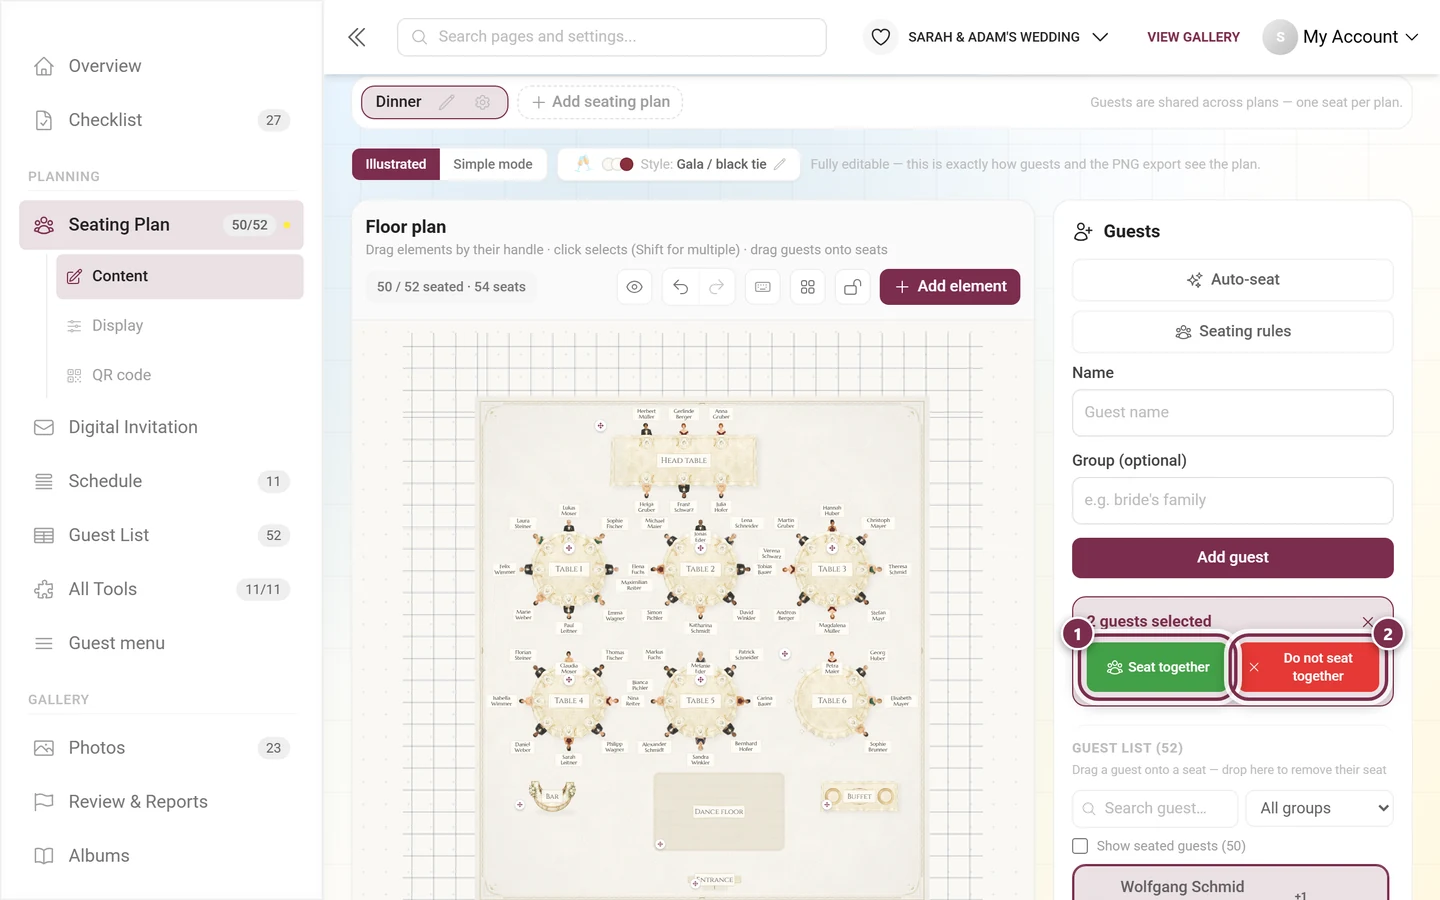
You can also seat a multi-selection together: tap a seat afterwards and Photogala spreads the group out from there. If the whole group doesn’t fit, it reports how many were seated – the rest stay selected so you can place them elsewhere straight away.
Freeing seats again
Section titled “Freeing seats again”Free seat in the context menu empties a seat; with several guests selected the entry reads Free seats. A guest you drag back onto the guest list loses their seat as well.
Adding a companion
Section titled “Adding a companion”Add +1 creates a companion for a guest. They show up as a Companion of that person and are seated right next to their guest by the auto-seater.
Swapping seats
Section titled “Swapping seats”Drag a guest onto an occupied seat and the Swap seats? dialog asks first: the two will swap places. With a multi-selection the same applies to the whole group – if there is no free seat for someone, that person goes back to the guest list, and the dialog tells you who.
While you’re reshuffling a lot, use Don’t ask again this session. The dialog then stays quiet until you reload the page.
The guest details card
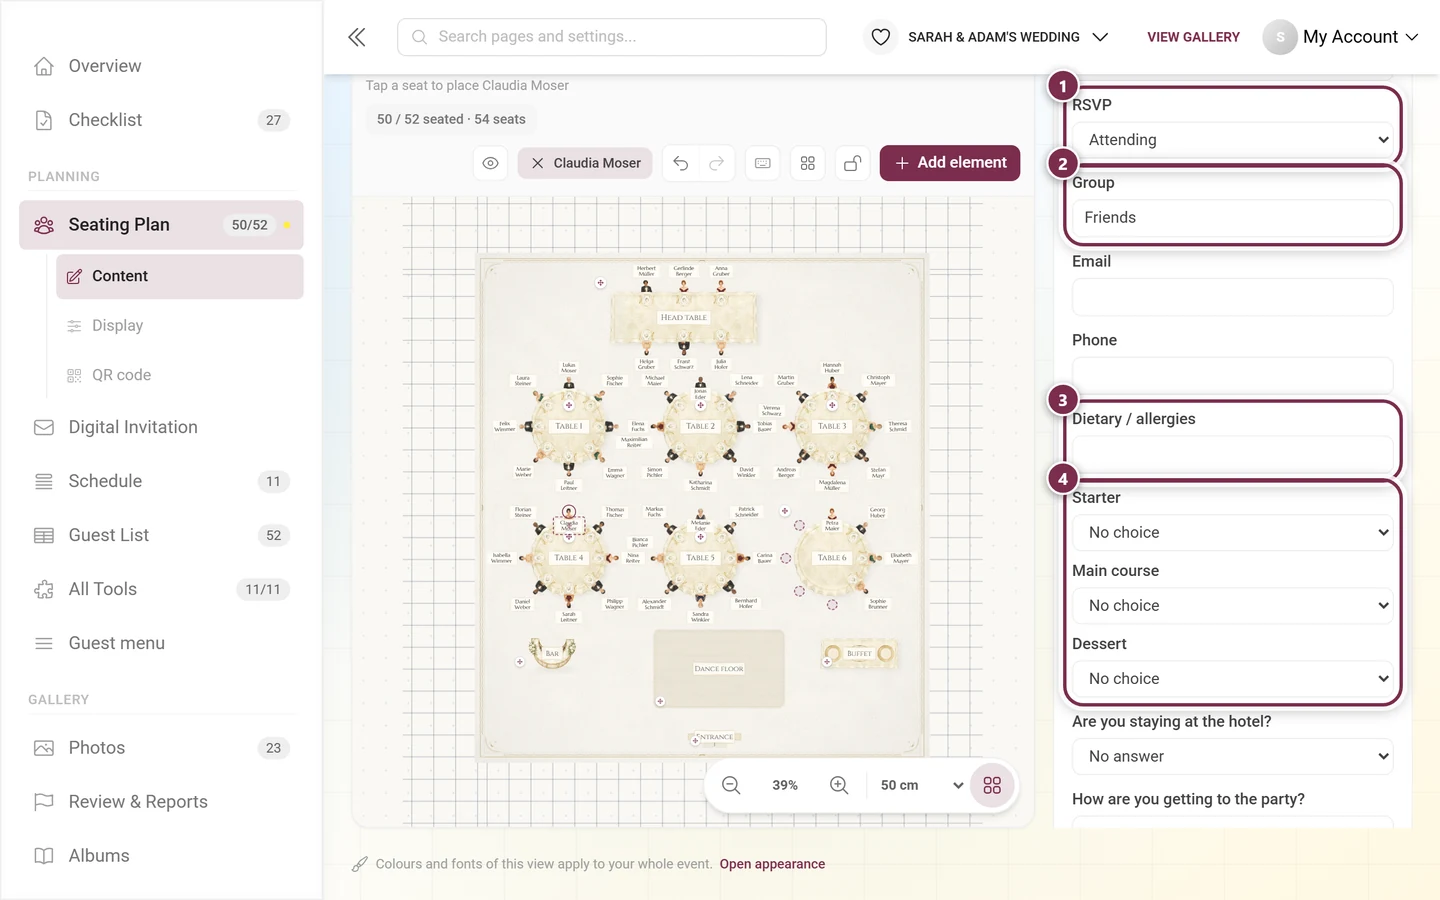
Section titled “The guest details card”Clicking a guest figure on the plan opens their card in the panel. The name and the seat are always at the top; Details unfolds everything else – and all of it is editable right there:
- RSVP – Pending, Attending or Declined, plus the reply date.
- Group – with suggestions from the groups already in use.
- Email and Phone.
- Dietary / allergies – intolerances and dietary requirements.
- The meal choice – the chosen dish per course from your menu tool; anyone who chose nothing reads No choice. Without the menu tool the section stays hidden.
- Answers to your own RSVP questions – single choice, multiple choice and free text, exactly as you defined them in RSVP.
- Your own guest-list columns – the extra fields from the guest list.
- Response message and Notes – the guest’s message and your own field.
Seating automatically
Section titled “Seating automatically”Auto-seat distributes every guest without a seat across the free seats. Guests who already have a seat stay where they are.
The three modes
Section titled “The three modes”-
Balanced – spreads guests evenly, so every table ends up about equally full.
-
Mix it up – deliberately splits groups so guests get to know each other. Companions still stay together.
-
Together – people who know each other sit together: groups at one table, side by side where possible.
In every mode: companions sit next to their guest, and your seating rules are honoured. The mode only decides which free table a guest prefers.
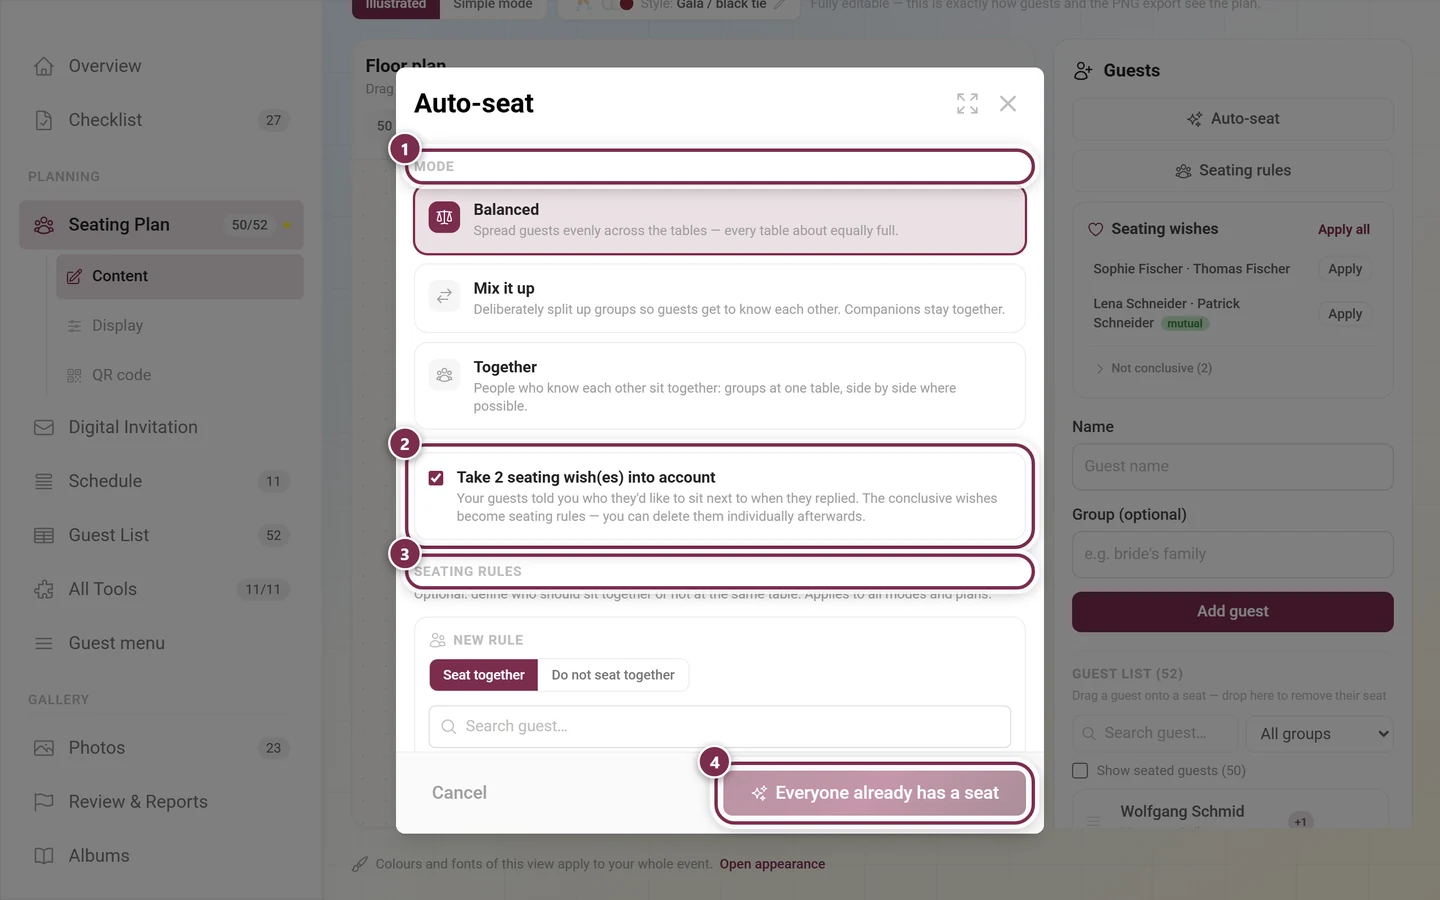
The button at the foot names the number of guests without a seat: Seat (7) means seven people will be distributed. It does not count declines – anyone who declined is never seated automatically. Once every guest who accepted or hasn’t answered has a seat, it reads Everyone already has a seat and is disabled.
What you’re told afterwards
Section titled “What you’re told afterwards”After the run you get short reports:
- How many guests were seated – and how many are still without a seat, if the seats didn’t stretch.
- Skipped declines – guests who declined their RSVP are never seated automatically. You can still place them by hand.
- Split wish groups – if a group grown from seating wishes is bigger than any table, it is cut into table-sized pieces. Rules you created by hand are never split.
- No guests without a seat – when there was nothing to do.
Seating rules
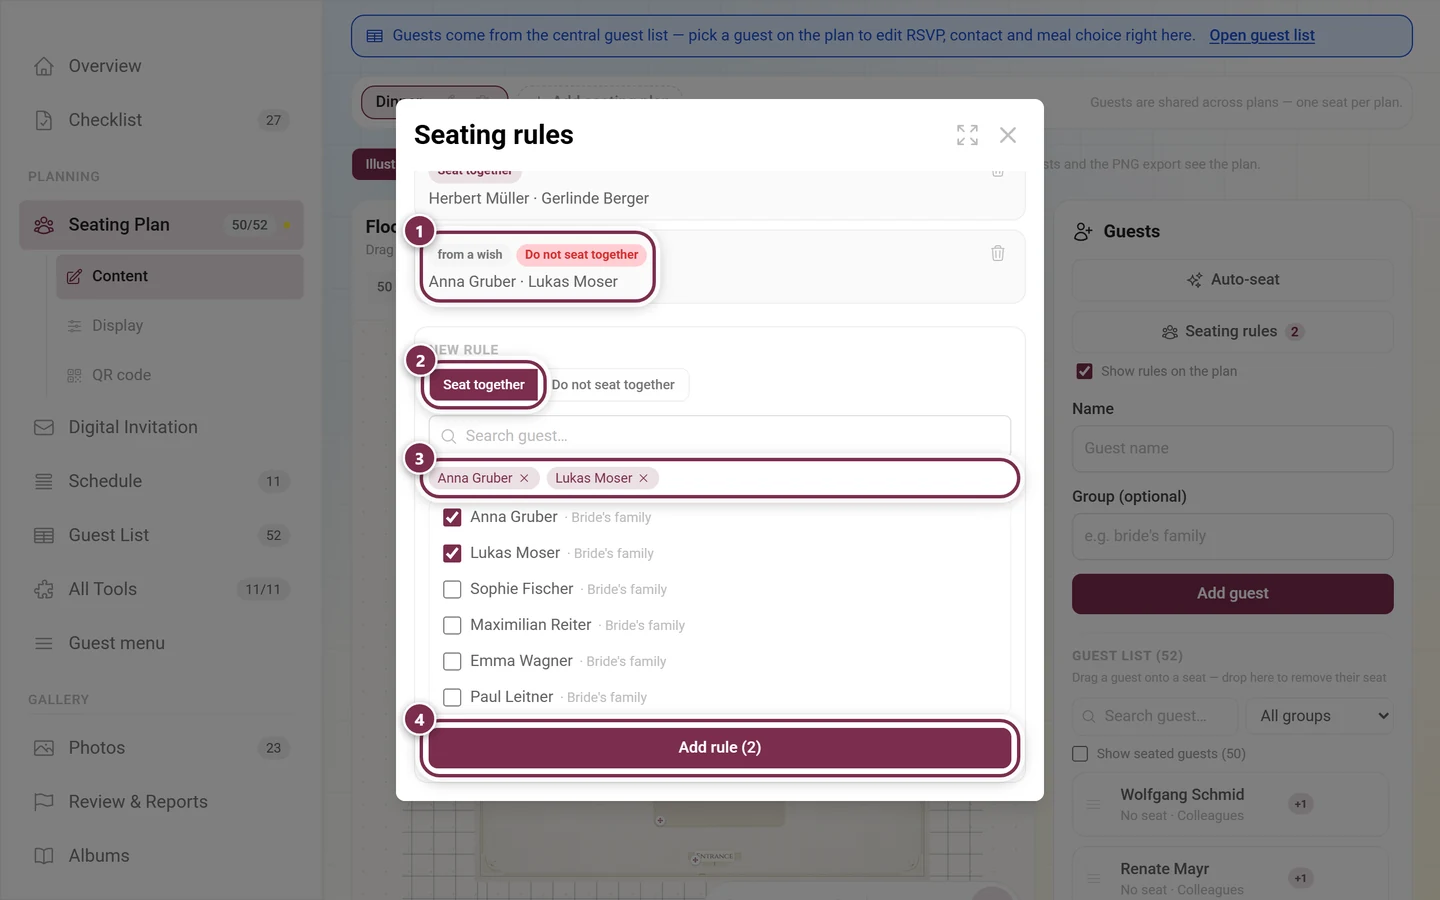
Section titled “Seating rules”Seating rules define who should sit together, or definitely not. They only steer the auto-seater – by hand you may still do anything.
- Seat together – the chosen guests end up at one table, side by side where possible.
- Do not seat together – the chosen guests never share a table. Someone who would only fit at a forbidden table stays without a seat instead.
You create a rule in the Seating rules dialog: pick the type, tick at least two guests and choose Add rule. Rules apply to all plans, so you only define them once.
It is quicker straight on the plan: select several guests with Ctrl + click and press Seat together or Do not seat together on the selection card.
Two displays help you check:
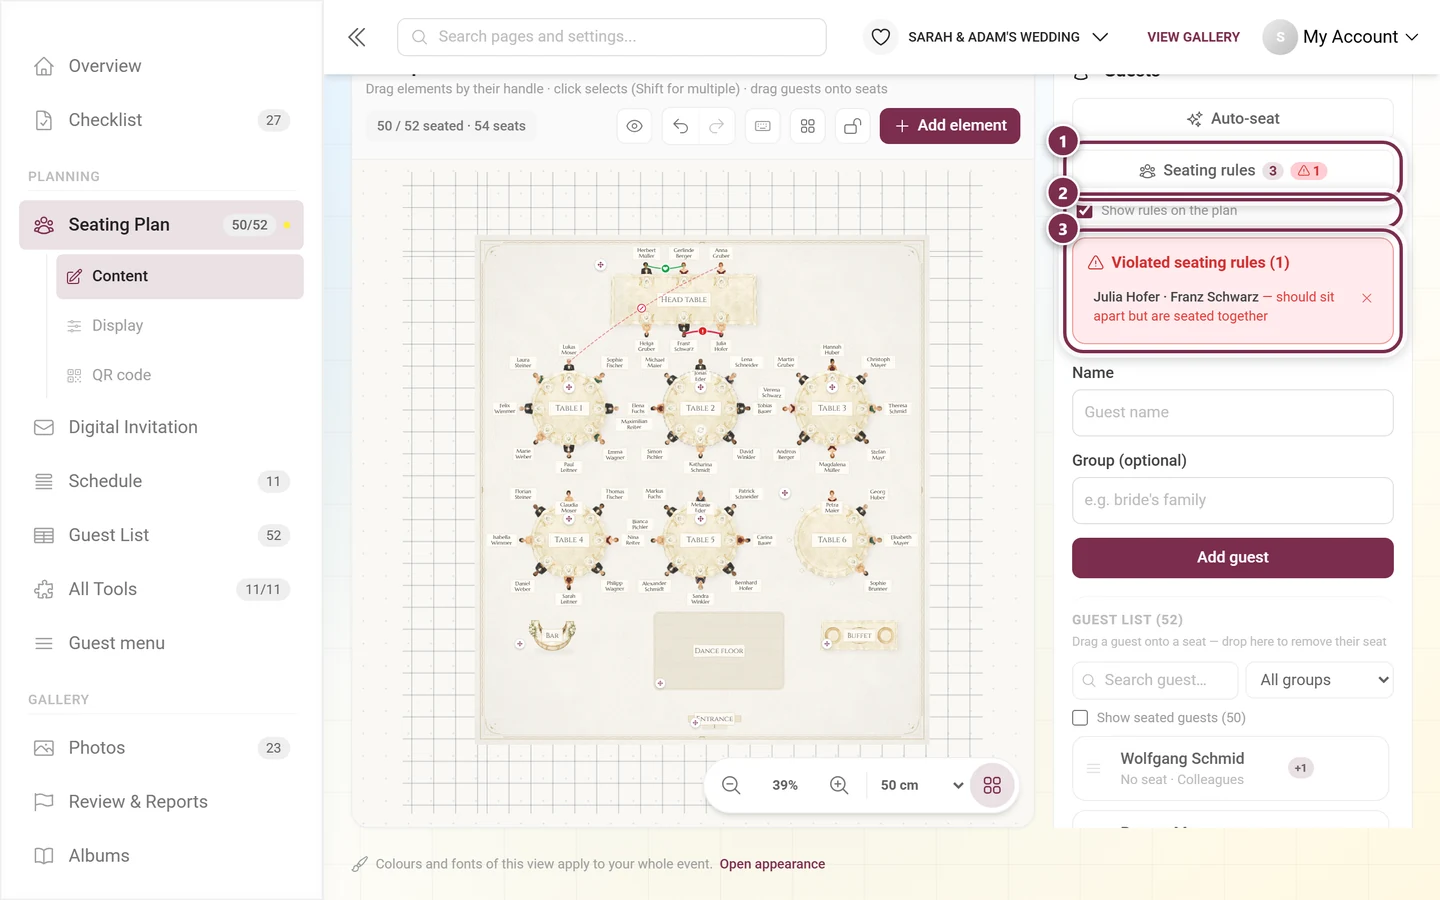
- Show rules on the plan draws the connections straight onto the plan – green for “together”, dashed red for “not together”.
- If the current seating contradicts a rule, the Seating rules button gets a red warning mark with the count, and Violated seating rules appears below it as a list.
Seating wishes from RSVP
Section titled “Seating wishes from RSVP”When replying, your guests may name up to three people they’d like to sit next to. The seating plan matches those names against your guest list – generously, so “Tom” also finds Thomas and “Mueller” also finds Müller.
The Seating wishes panel shows the result in two parts:
- The conclusive wishes form the list at the top – exactly one person fits. Apply turns a wish into a seating rule, Apply all does the lot at once. If two guests named each other, the entry also carries the green badge mutual – the strongest signal there is.
- Not conclusive (N) is a fold-out below. Two cases live there: “several guests match that name” and “nobody on the guest list matches”. Assign to … lets you pick the right person yourself, the bin icon discards the wish.
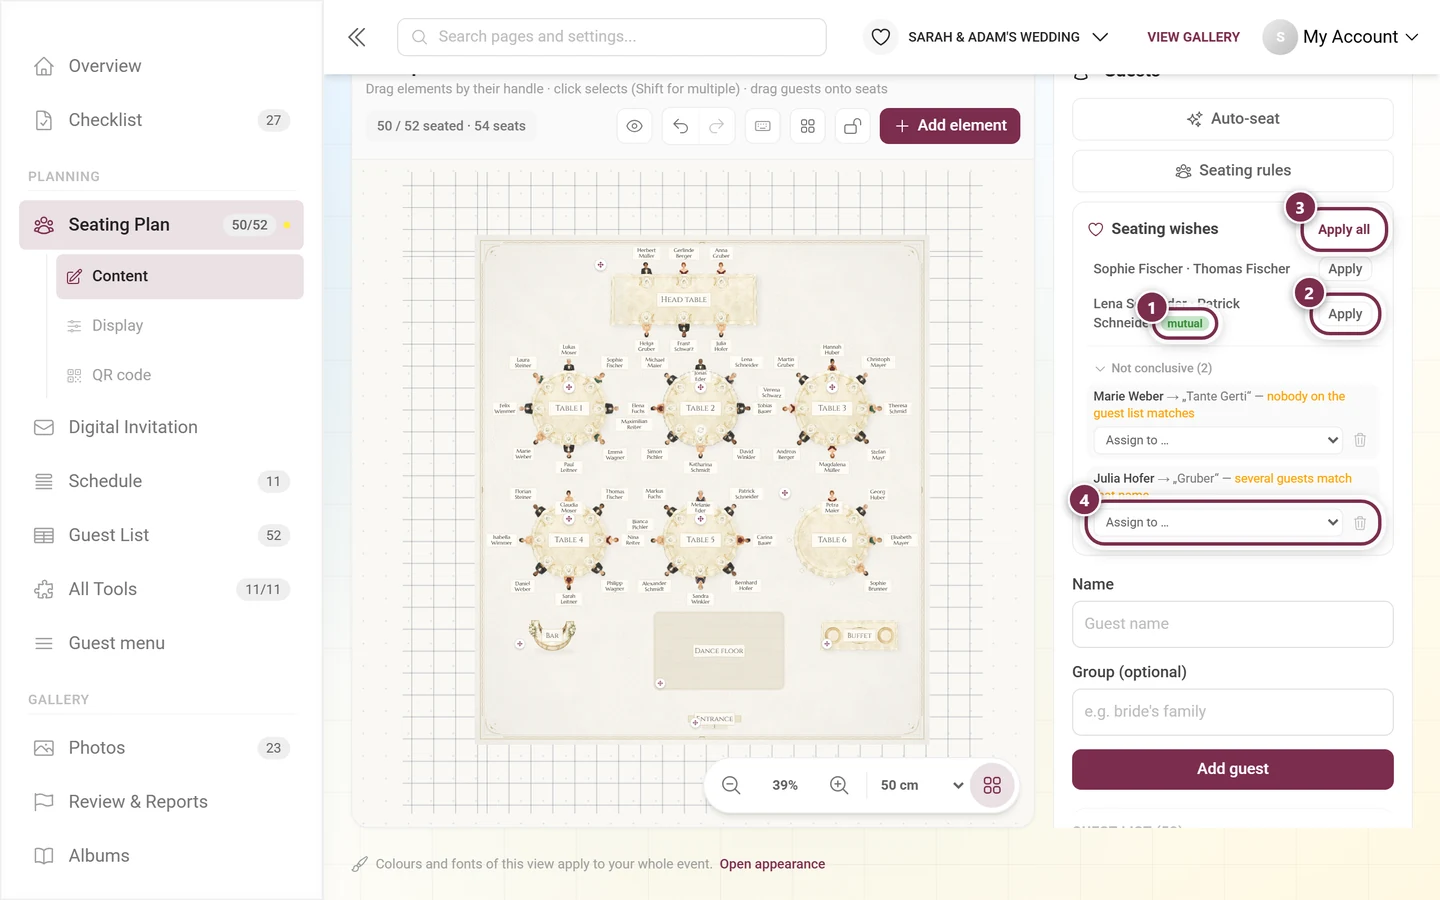
Applied wishes appear among the seating rules with the badge from a wish. They are deliberately softer than your own rules: if a whole wish chain fits no table, it may be split – a rule you created by hand never is. You can delete them individually like any other rule.
The Auto-seat dialog additionally offers to take the outstanding wishes into account right away.
Troubleshooting
Section titled “Troubleshooting”A guest doesn’t appear in the list. They are probably already seated – tick Show seated guests. Also check whether the search still contains text or a group filter is active.
I can see neither search nor group filter. Both only appear when they earn their place: the search from more than five guests, the group filter from two different groups.
The “Seat together” and “Do not seat together” buttons are gray. Only one guest is selected. Add a second one with Ctrl + click and they turn colorful.
Auto-seat skips somebody. Three common reasons: the guest declined, there was no free seat left, or a Do not seat together rule rules out every remaining table. The report after the run names the numbers.
The dialog button reads “Everyone already has a seat”. Then every guest who hasn’t declined has a seat. Declines are deliberately left out – place those people by hand if you need to.
A seating wish stays under “Not conclusive”. Either several guests have similar names – then assign it yourself via Assign to … – or the name given isn’t on the guest list at all. Add the person or discard the wish.
I can neither assign nor discard a wish. You have unsaved changes. Save first and the buttons work again.
A guest appears twice on the plan. That comes from self-registrations in RSVP. Merge the entries in the guest list before you plan further.
Related pages
Section titled “Related pages”- Seating plan: Tables & room · Illustrated view, export & print
- For guests: Find your seat – what your guests see.
- For hosts: Guest List · RSVP · Menu · Tooling – Overview