Guest or account
There are several ways into a Photogala gallery – pick the one that fits. They all get you there; they only differ in whether your contributions stay tied to this one device or travel with you.
Quick decision guide:
- Just want to look around or upload a few photos? → Join as a guest: enter the code (if needed) and your name, done. No email, no sign-up.
- Want to keep your contributions, carry on across devices, or join several events? → Sign in with an existing account.
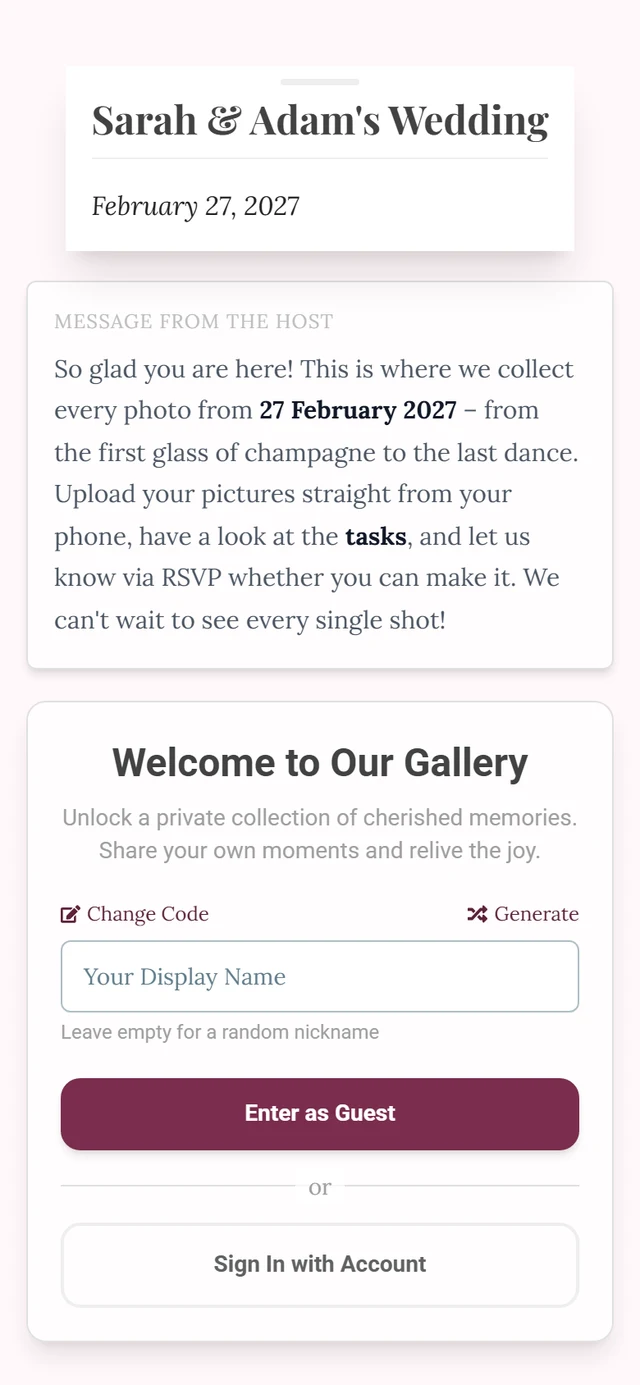
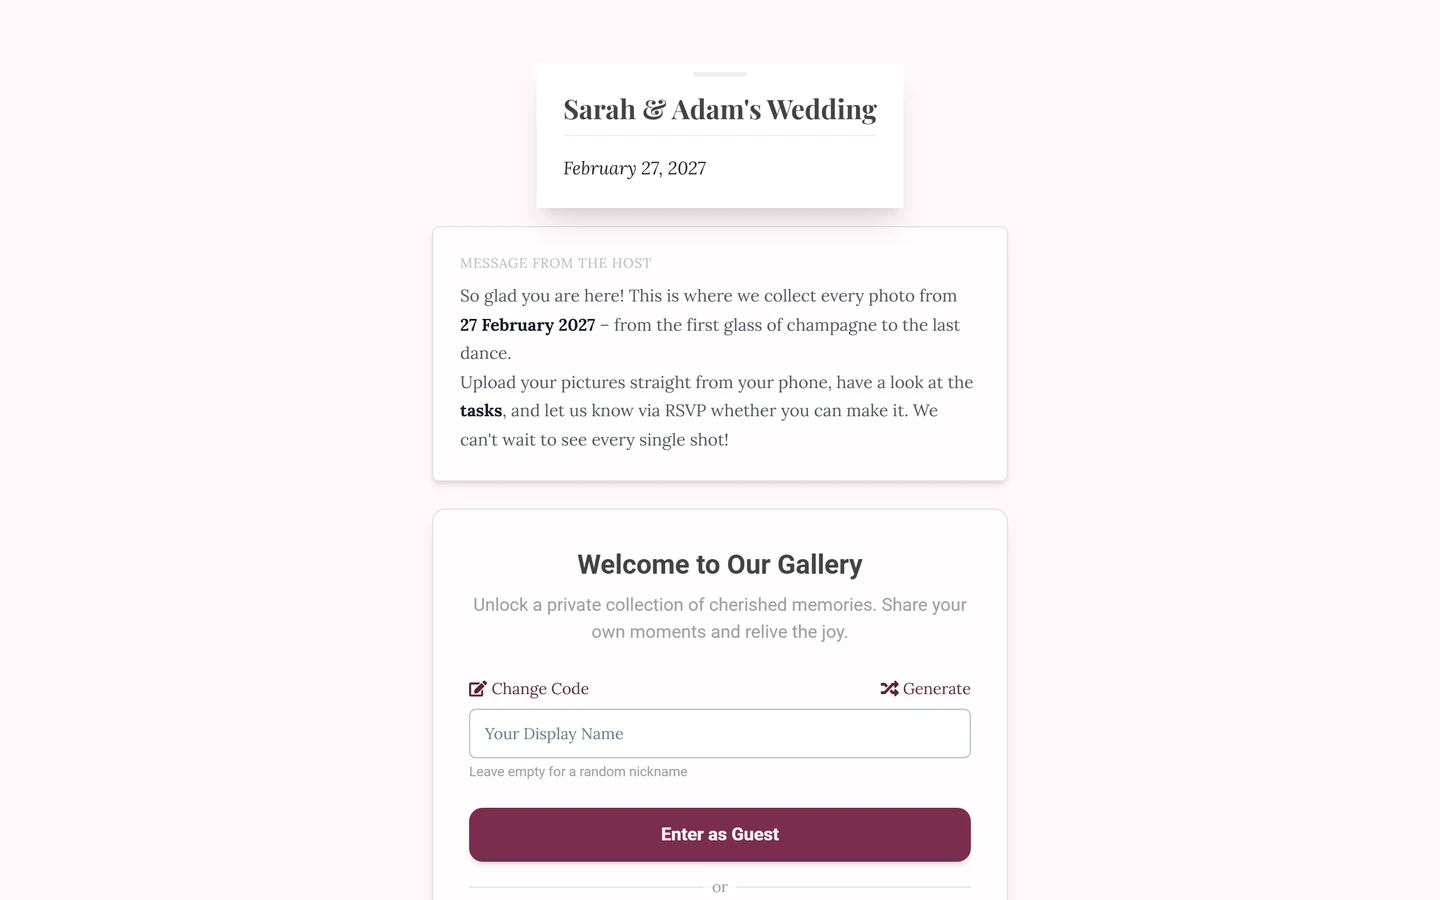
The entry point is a single-column welcome screen titled Welcome to Our Gallery. Below it sits the main button, whose label changes depending on the step. If you are signed out or only browsing as a guest, the small link Sign in with an existing account appears underneath as well.
The quick way: join as a guest
Section titled “The quick way: join as a guest”Perfect when you do not want to reach for your inbox and just want to get going. Depending on how the host protected the event, it takes one or two short steps.
-
Open the gallery. Scan the QR code at the event or open the shared link. If the event is password protected, you first see the Gallery Password field with the placeholder “Enter shared password”. Type the code the host handed out – or use the camera icon inside the field (Scan QR Code) to scan an access QR directly. If the event is set to open access, this step is skipped entirely and you go straight to the next one.
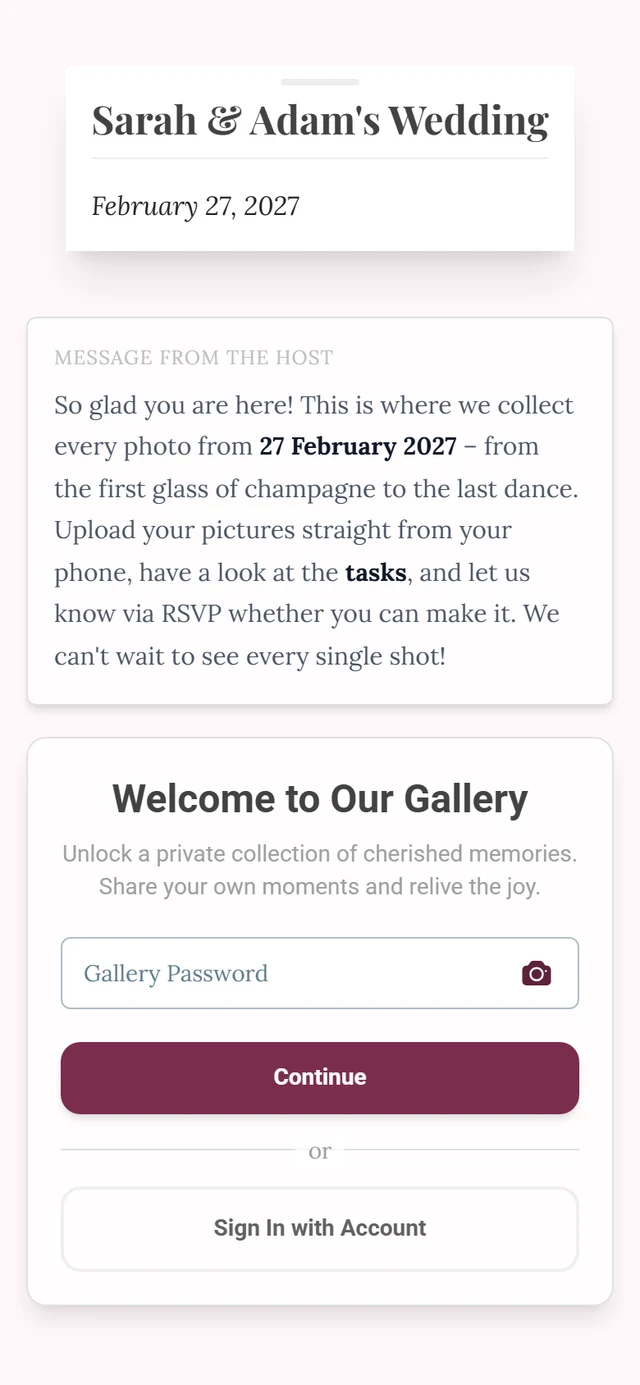
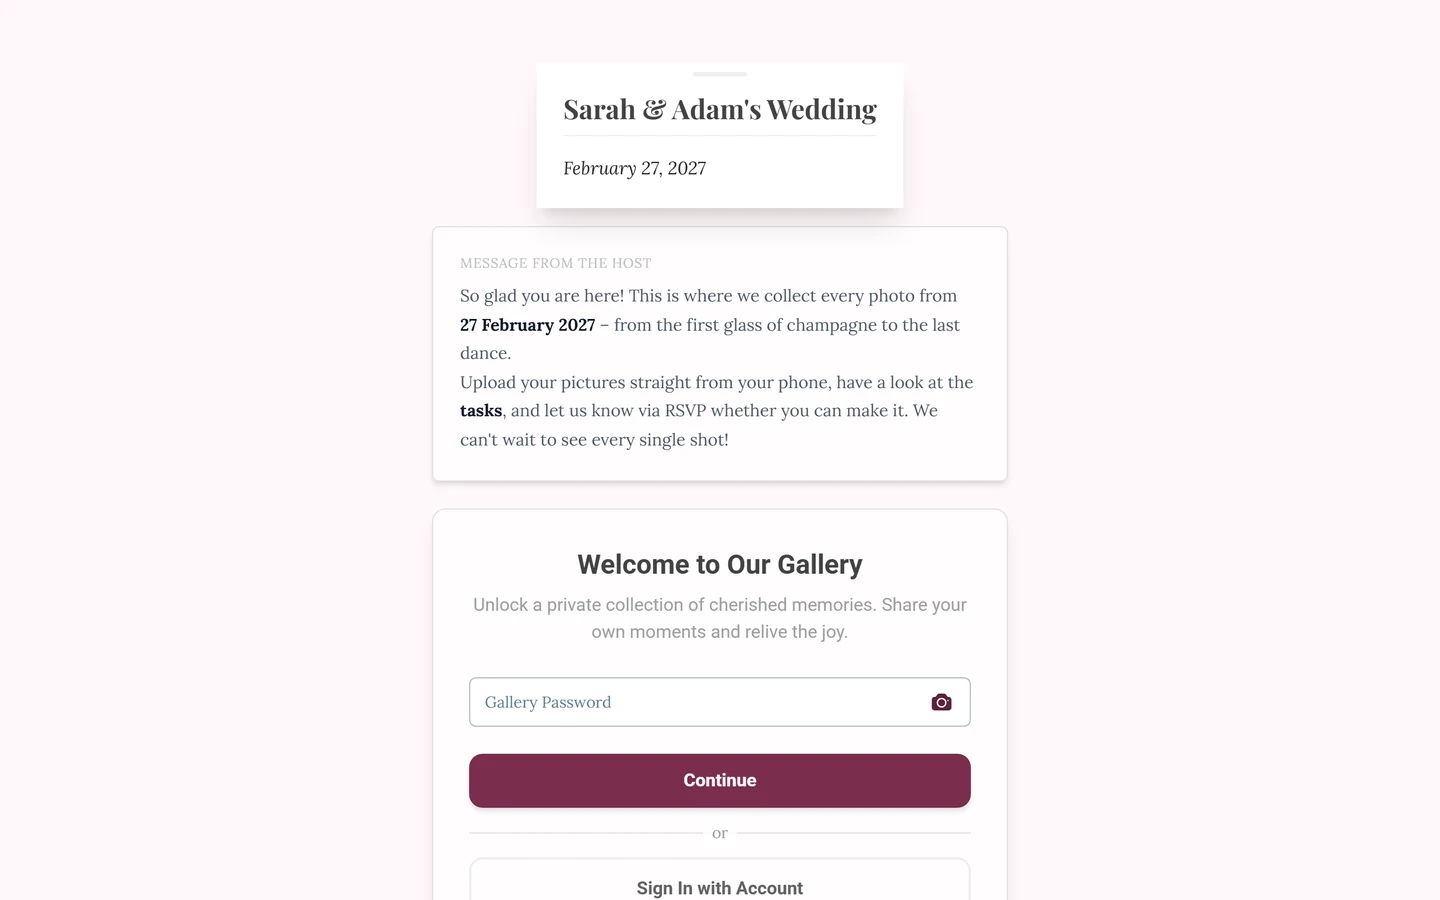
For password events, enter the code first or scan it with the camera icon. -
Tap Continue. In the first step the main button reads Continue. This validates the code and takes you to the name step.
-
Enter your name. In the Your name field (placeholder “e.g. Anna Miller”) you enter how you’d like to appear in the gallery. If you leave it empty, the app reminds you with “Please enter your name.” – via Continue without a name anyway you can also join without a name (your photos then appear as “Anonymous”), unless the host requires one. Change Code takes you back to the password step if you mistyped.
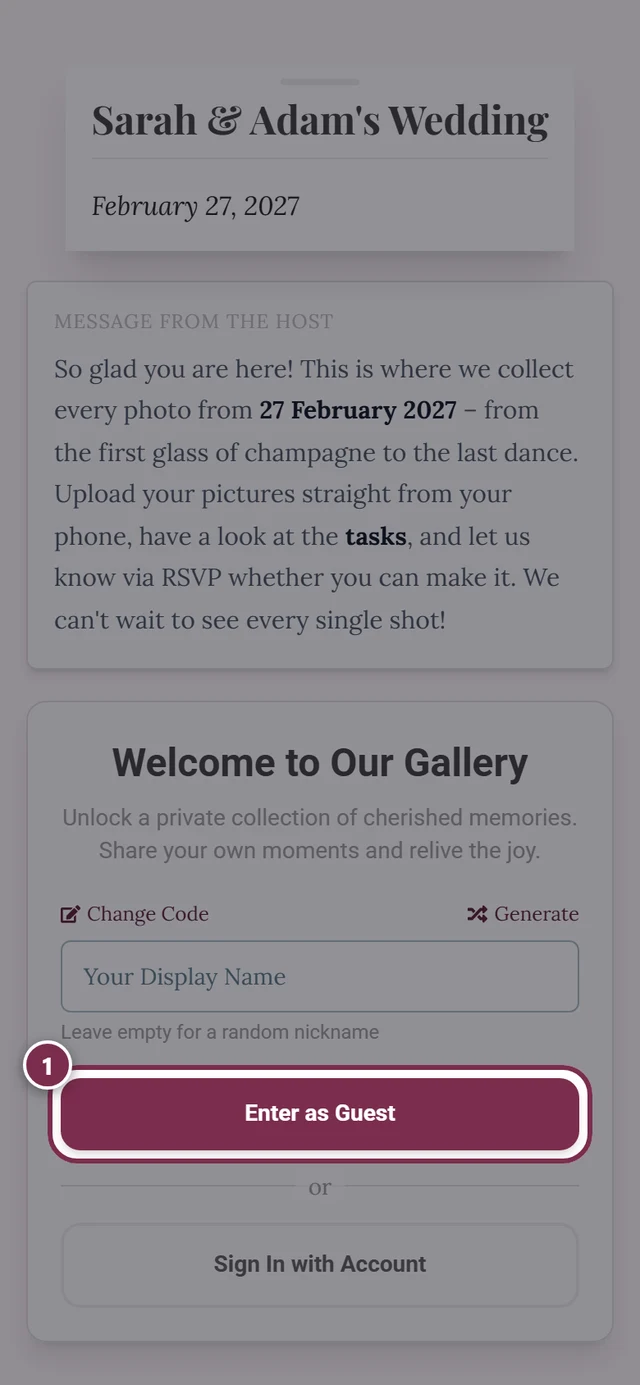
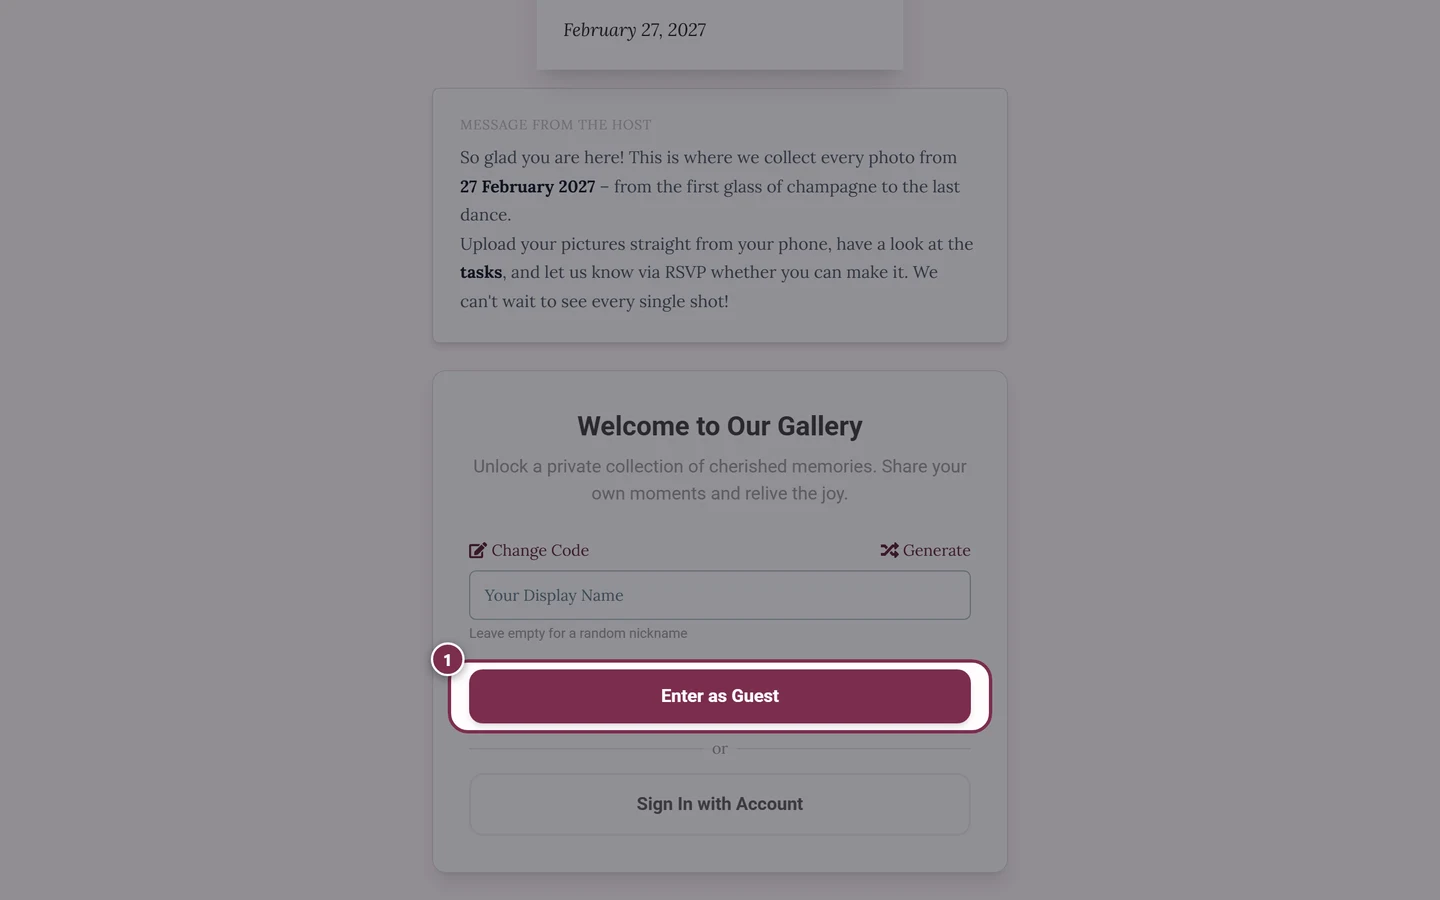
Enter your name and join with Continue to photos. -
Tap Continue to photos – or press Enter. One tap and you are in the gallery.
With an account: sign in via email link or password
Section titled “With an account: sign in via email link or password”An account is worth it when you want your uploads, points, and achievements to stay, when you want to continue on a second device, or when you join several events. Signing in is email-first: you enter just your address and Photogala automatically detects how your account is set up.
-
Open sign-in. On the entry screen, tap the link Sign in with an existing account (it appears when you are signed out or only browsing as a guest). Photogala redeems an access code you already entered automatically after you sign in. If you are already in the gallery as a guest, use the avatar at the top right → Sign In (see Switching from guest to account).
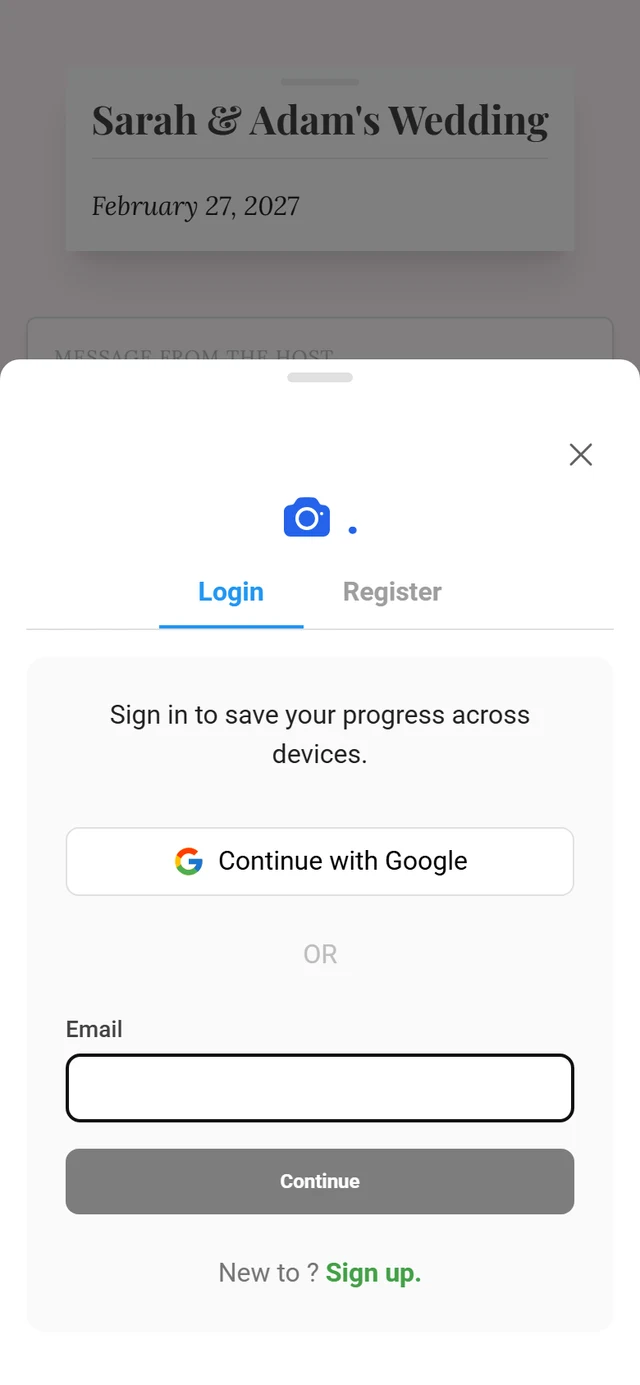
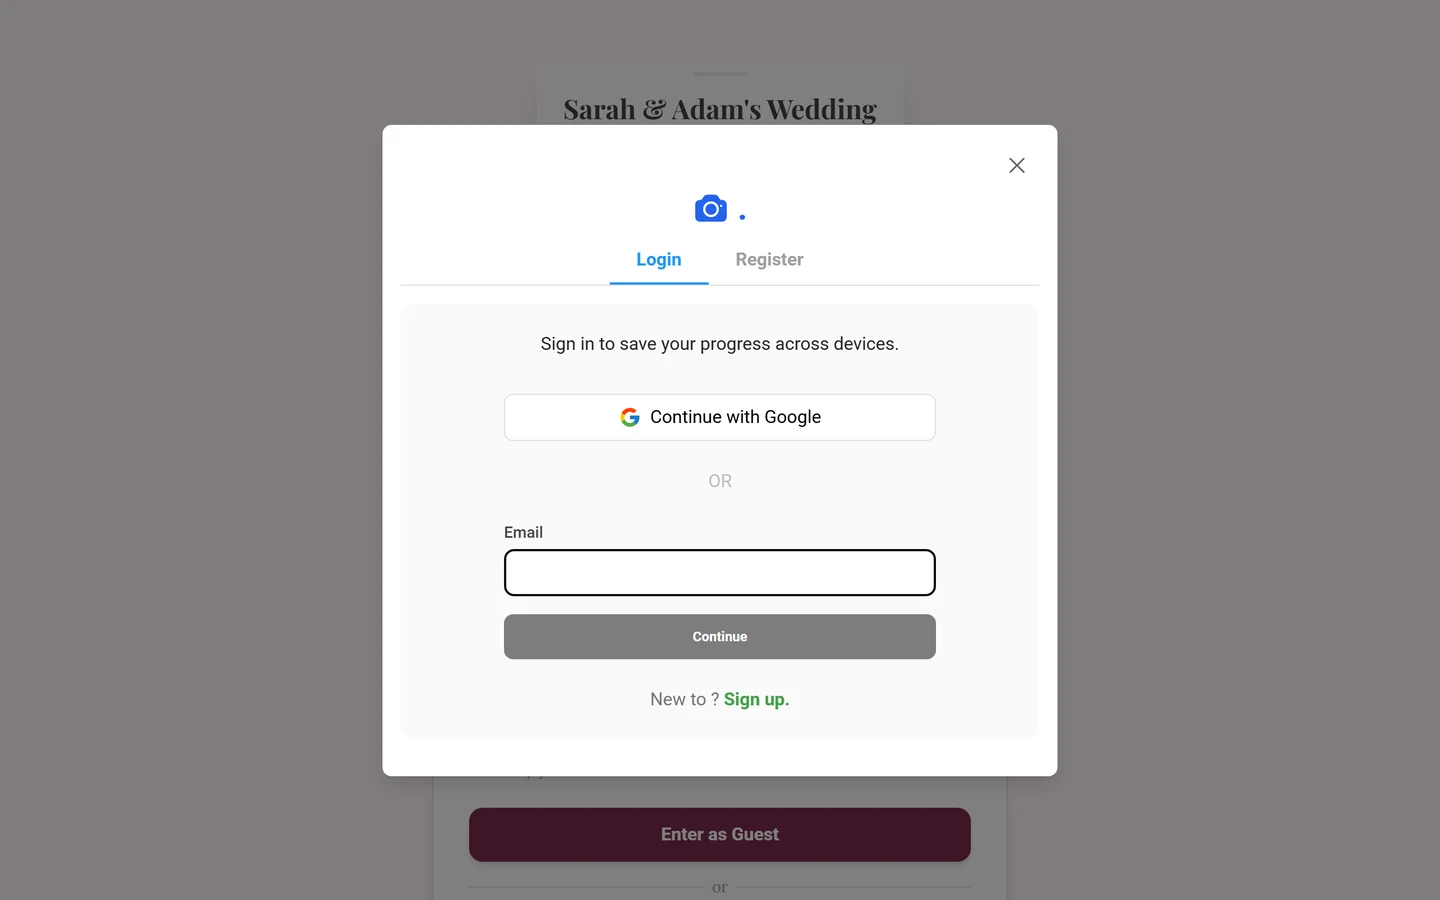
The sign-in dialog: Continue with Google at the top, then the email field with Continue. -
Optional: use Google. At the very top of the dialog is a Continue with Google button. One click and sign-in runs through your Google account – no password and no email link.
-
Enter your email and Continue. Type your address in the Email field and tap Continue. While Photogala looks it up, it briefly shows “Checking…”. It then automatically decides which case applies:
- Account with a password → a Password field and a Sign in button appear. Forgot your password? Tap Forgot password?. Using the email chip with Change, you can enter a different address.
- Passwordless account → you land on Check your inbox: “We sent a login link to
{{email}}. Click it to sign in.” Open your inbox (including the spam folder) and tap the link – see the next section. Use Use a different email to fix a typo. - No account found → No account found. Tap Create an account to set one up directly (see Create a new account).
- Linked only to Google → Use your social login. Use the Google button at the top instead.
Confirming the email login link
Section titled “Confirming the email login link”If you have a passwordless account, the link arrives by email. Important: you must actively click it – otherwise an automatic preview scanner in your inbox burns the one-time token.
-
Tap the link in the email. It opens the Log in to your account page with a note that the link can only be used once.
-
Tap Sign in. Only this click actually signs you in. After that you are in.
Create a new account
Section titled “Create a new account”You create an account via Sign up – either in the footer of the sign-in dialog (“New to Photogala?” Sign up.) or via the Sign Up button on your profile page.
-
Switch to sign-up. Tap Sign up. You can also use Continue with Google here instead of choosing a password.
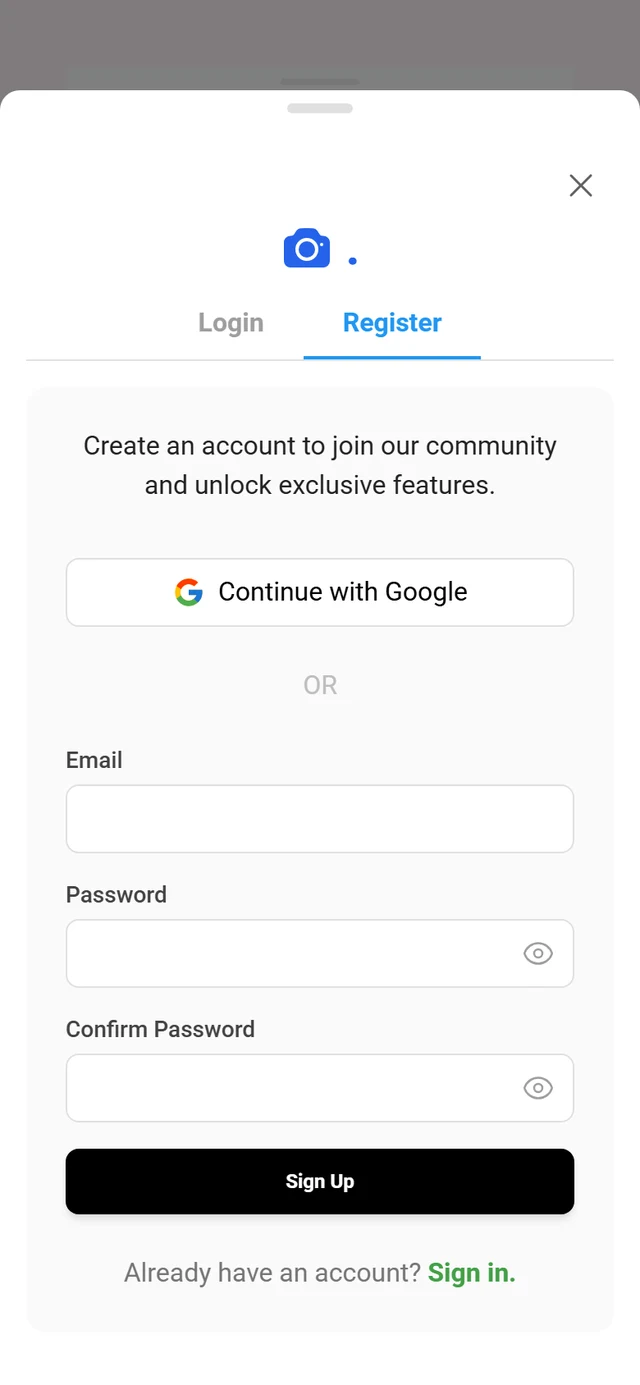
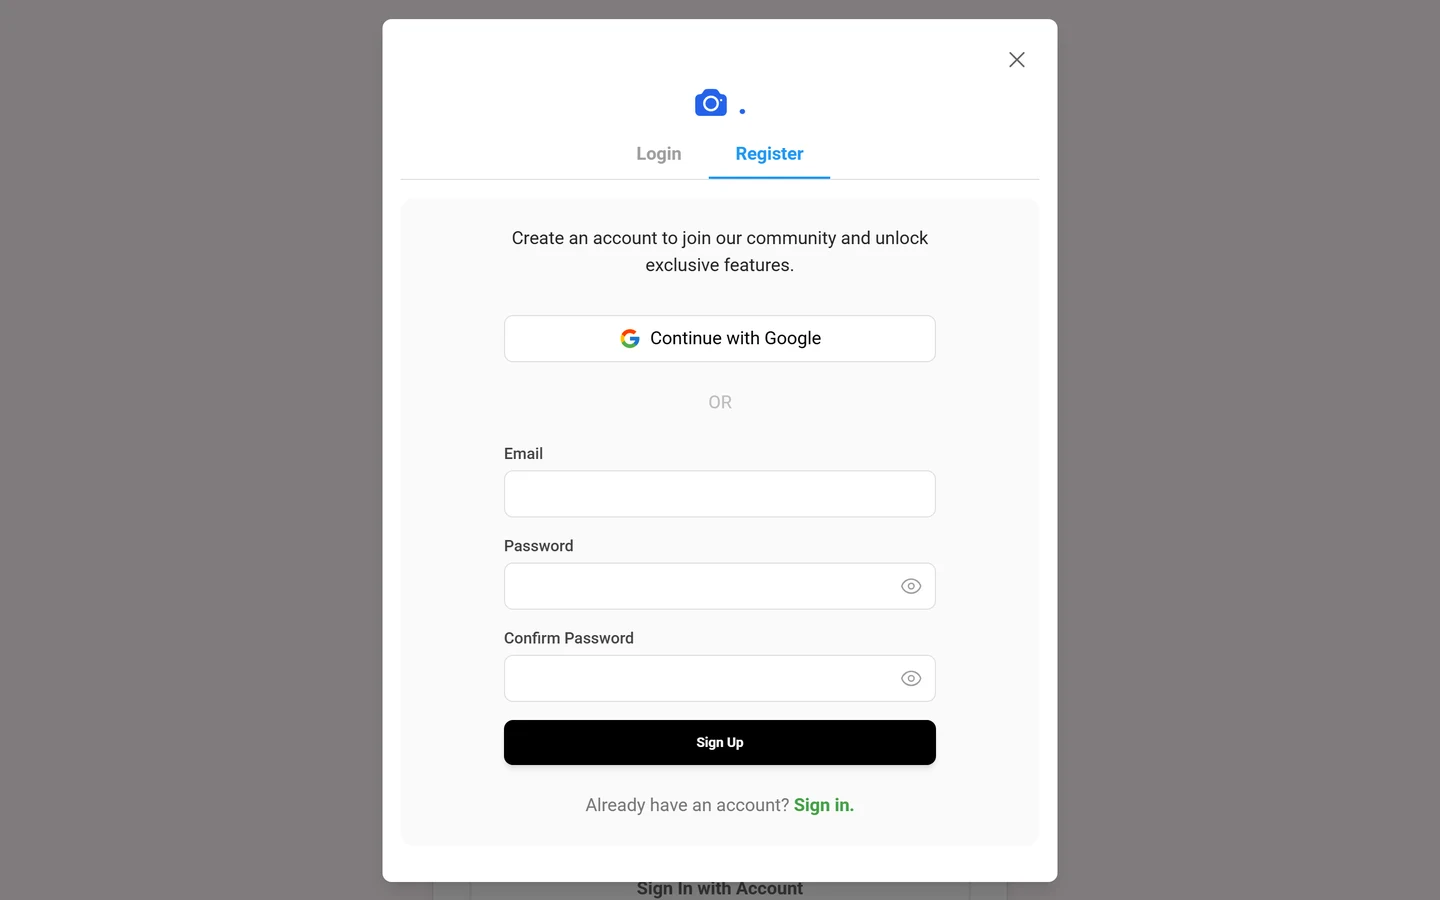
Sign up: email, password, and confirmation – or use Google straight away. -
Enter email and password. Type your Email and a Password. A live indicator shows the password strength; very weak passwords, or ones that contain your email, are rejected.
-
Confirm the password. Repeat it in the Confirm Password field. If it matches, “Passwords match!” appears; otherwise “Passwords do not match!” and the button stays disabled.
-
Tap Sign Up. Done – your account is created and you are signed in.
Switching from guest to account (later)
Section titled “Switching from guest to account (later)”Started as a guest and now want to secure your contributions? No problem – your existing uploads, points, and achievements are kept and merged into the account.
-
Option A – via the profile menu. Tap the avatar at the top right. For guests, the Account section shows a Sign In entry. It opens the sign-in dialog where you sign in or register.
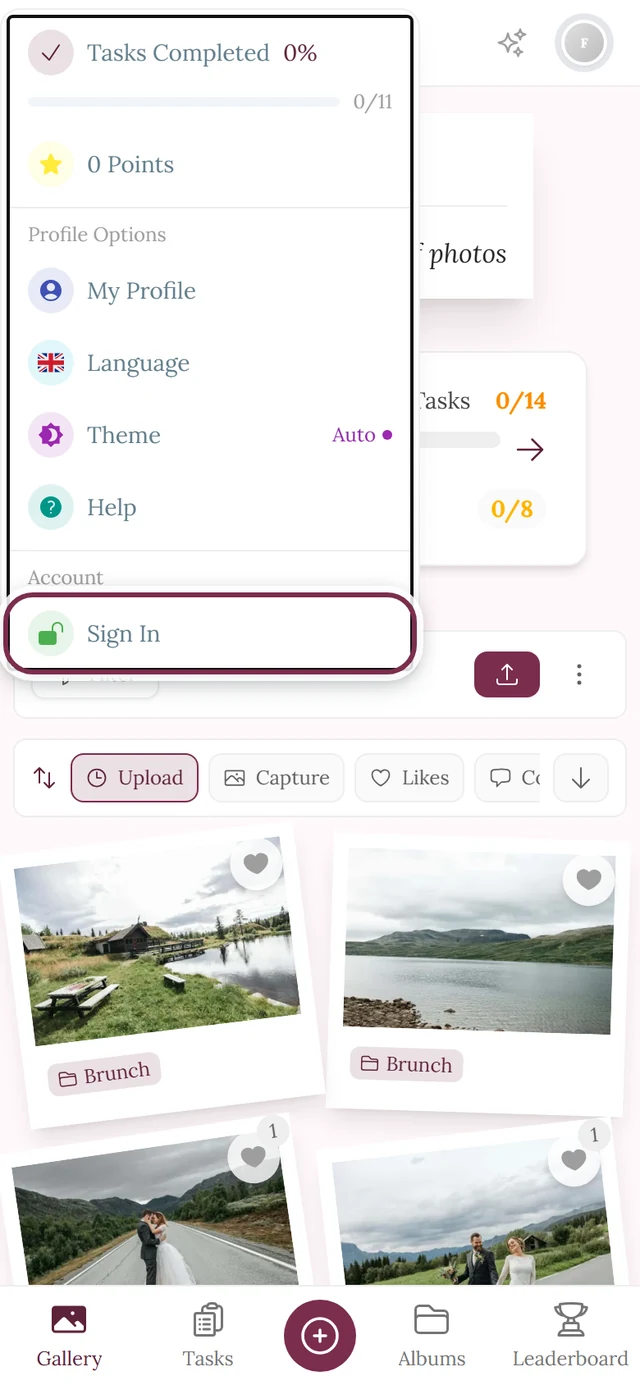
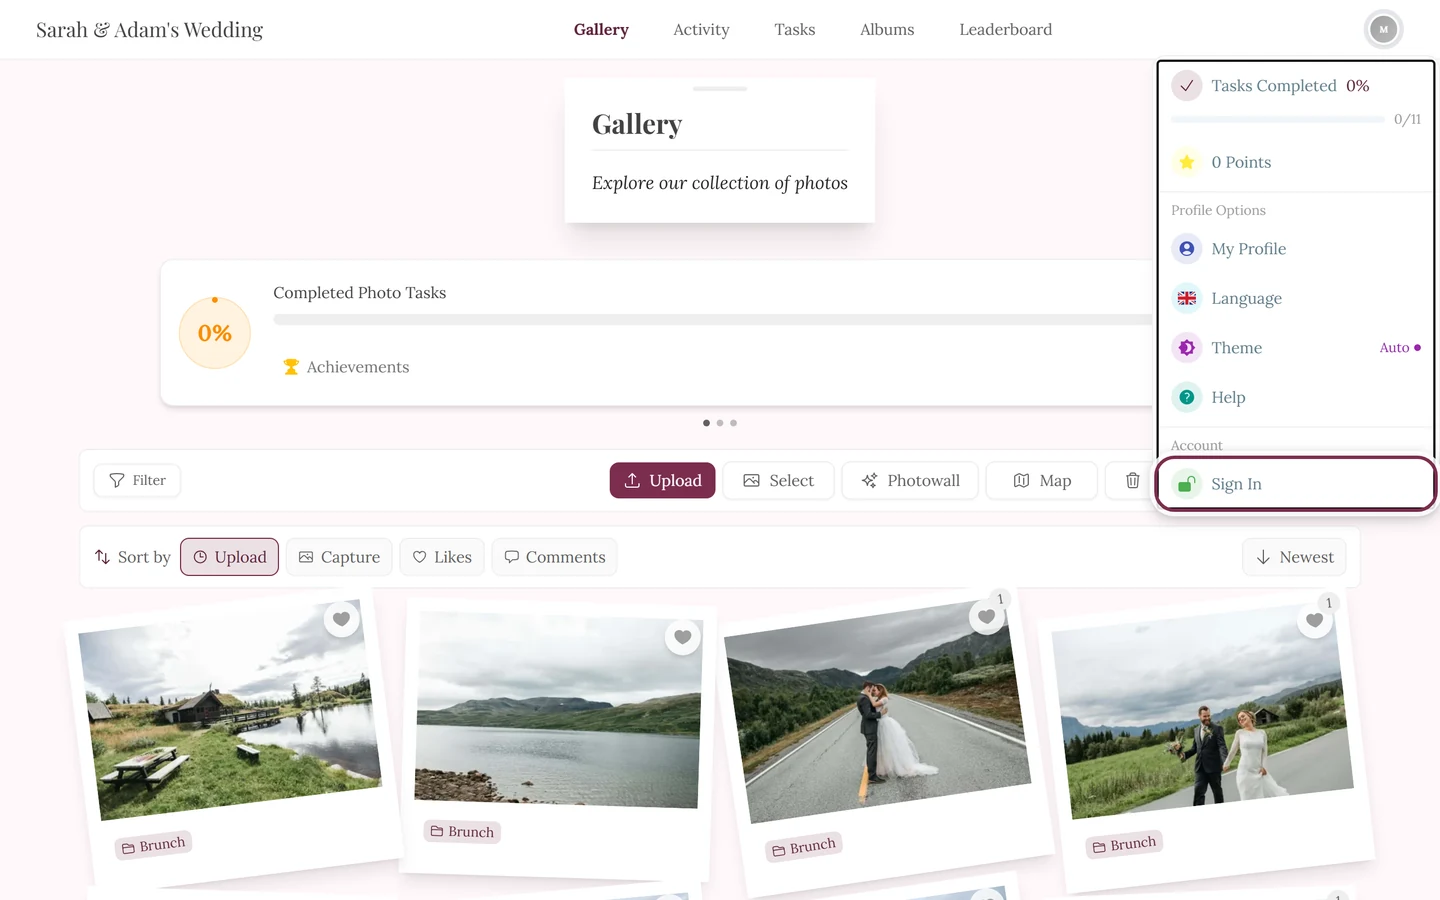
Via the avatar at the top right: guests find Sign In here. -
Option B – via your profile page. Open your profile. There you find the Sign Up button with the note “Store your progress and sync across all devices effortlessly.” A tap starts sign-up.
Managing your account
Section titled “Managing your account”As soon as you have a registered account, you get a dedicated area for everything account- and security-related: email address, password, signed-in devices, the Google link, timezone, language, notifications – and deleting the account.
Where Account Settings live
Section titled “Where Account Settings live”There are two ways in – both open the same Account Settings dialog with the subtitle “Configure your account preferences and settings”.
-
Option A – profile menu. Tap the avatar at the top right and pick Account Settings in the Management section.
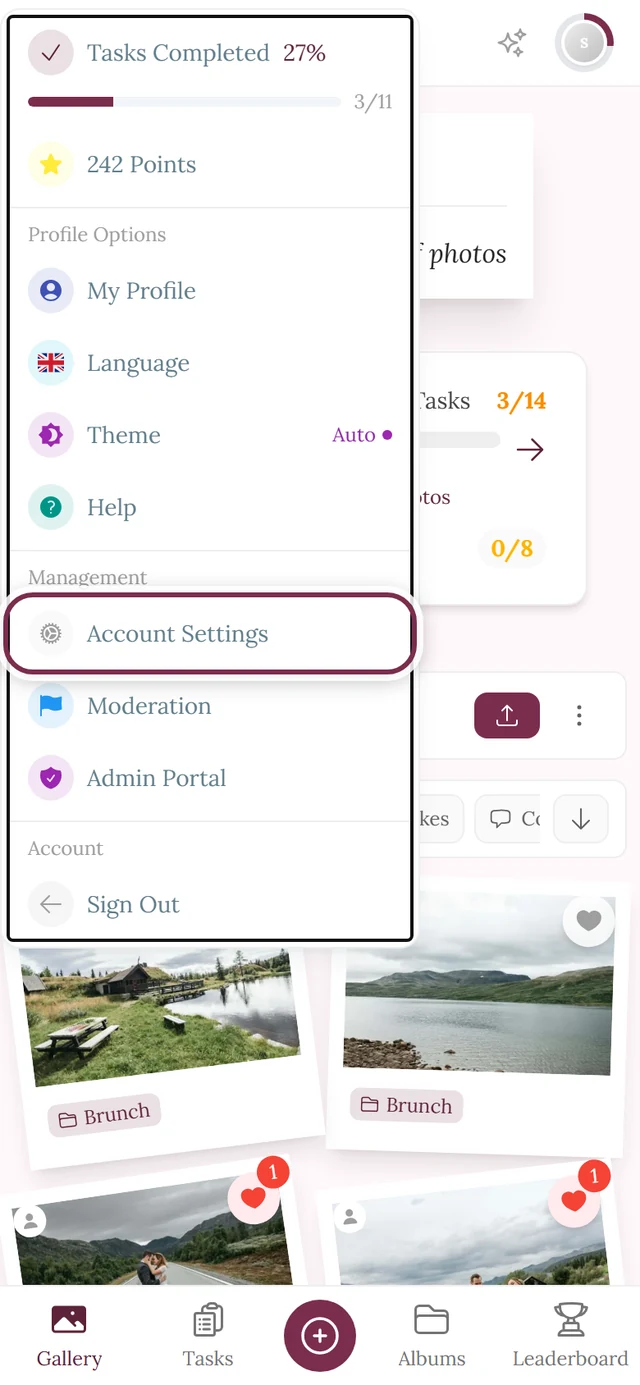
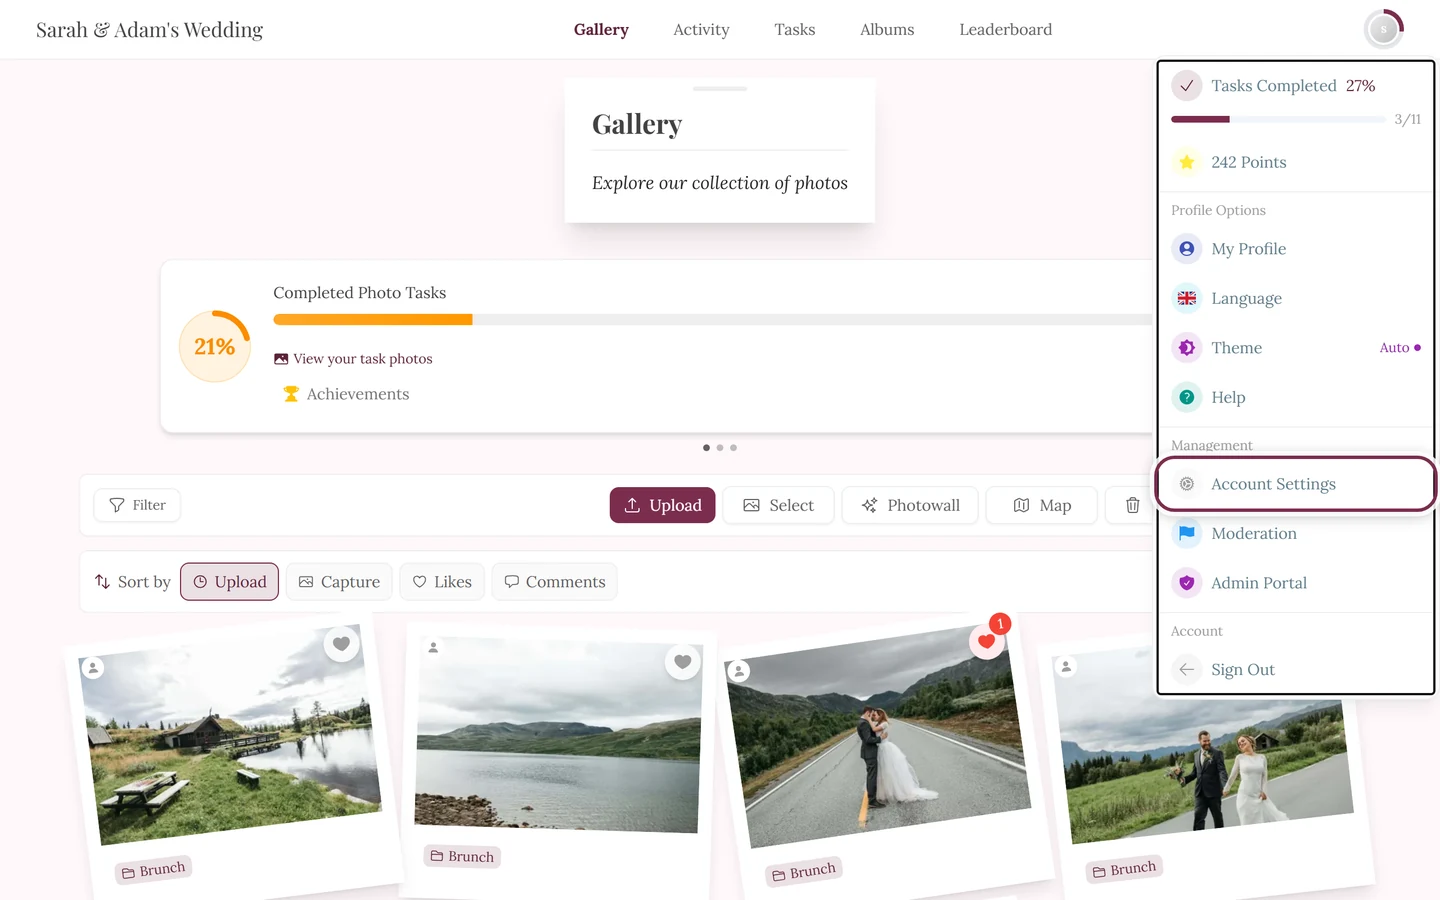
In the profile menu, Account Settings sits in the Management section – signed-in users only. -
Option B – profile page. Open your profile. Where guests see Sign Up, signed-in users find the Account Settings button.
The tabs at a glance
Section titled “The tabs at a glance”| Tab | What you do there |
|---|---|
| General | Change your email address, timezone, language, connect or unlink your Google account |
| Security | Set or change your password, manage active sessions, delete your account |
| Billing | Payment history and invoices – only appears when your account has payments |
| Notifications | Email notifications on/off, plus every single in-app notification type |
Changing your email address
Section titled “Changing your email address”Your email is your sign-in identity – which is why the change runs through a confirmation in the new inbox.
-
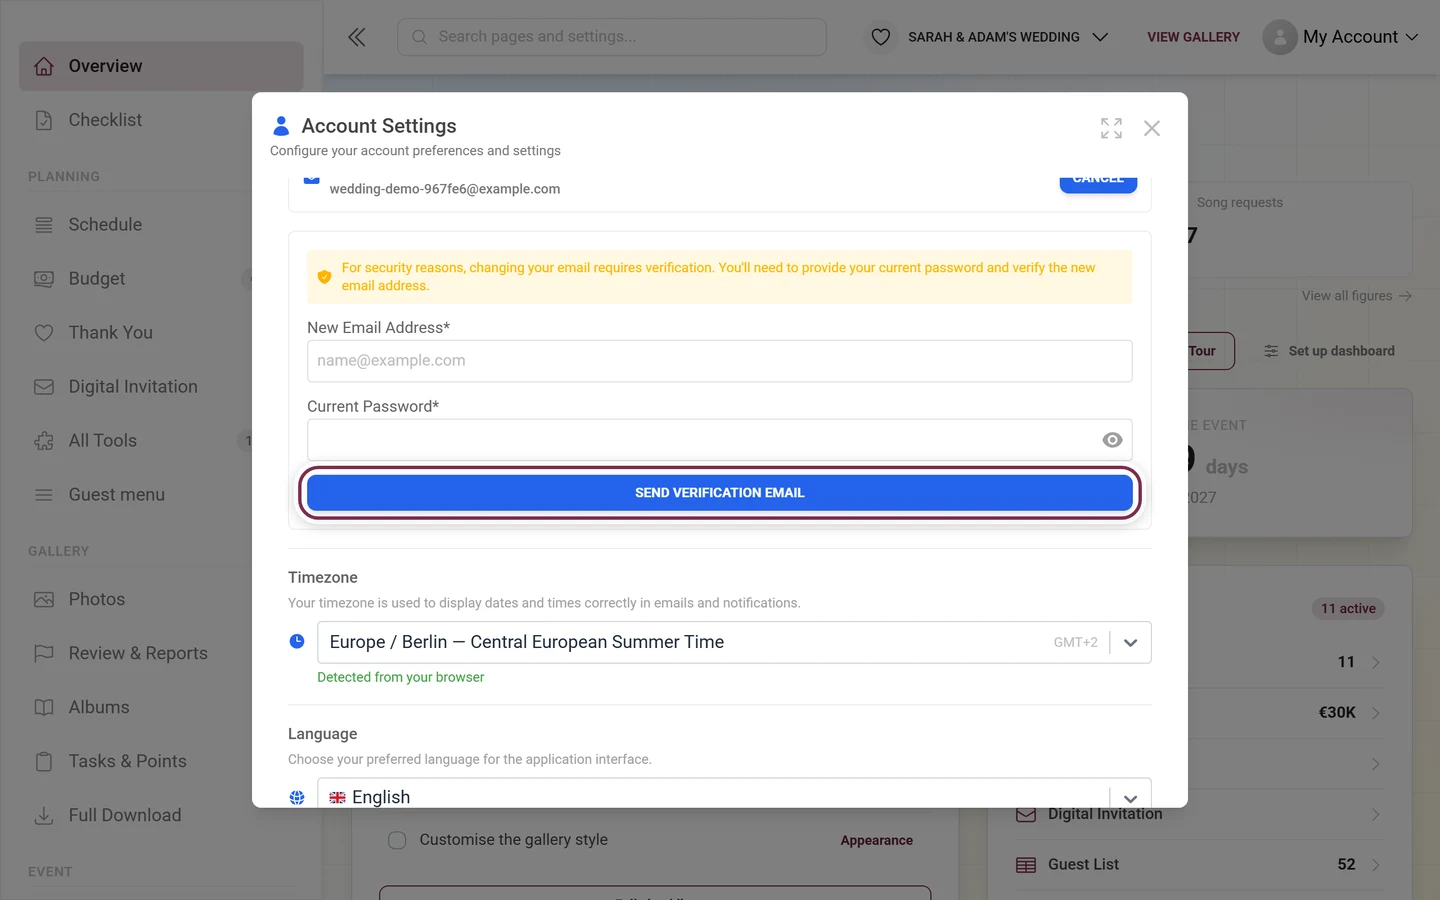
Open Account Settings, tab General. Under Account Information you see your Current Email.
-
Tap Change Email. A form unfolds, with the note that, for security reasons, changing your email requires verification.
-
Type the new address into New Email Address and, below it, your existing password into Current Password. The eye icon reveals what you typed.
-
Tap Send Verification Email. You then see Verification email sent, telling you an email is on its way to the new address.
-
Open the new inbox and click the confirmation link. Only then does the change take effect.
Setting or changing your password
Section titled “Setting or changing your password”This section sits at the top of the Security tab and expands when you tap it. Its name depends on whether you have a password at all:
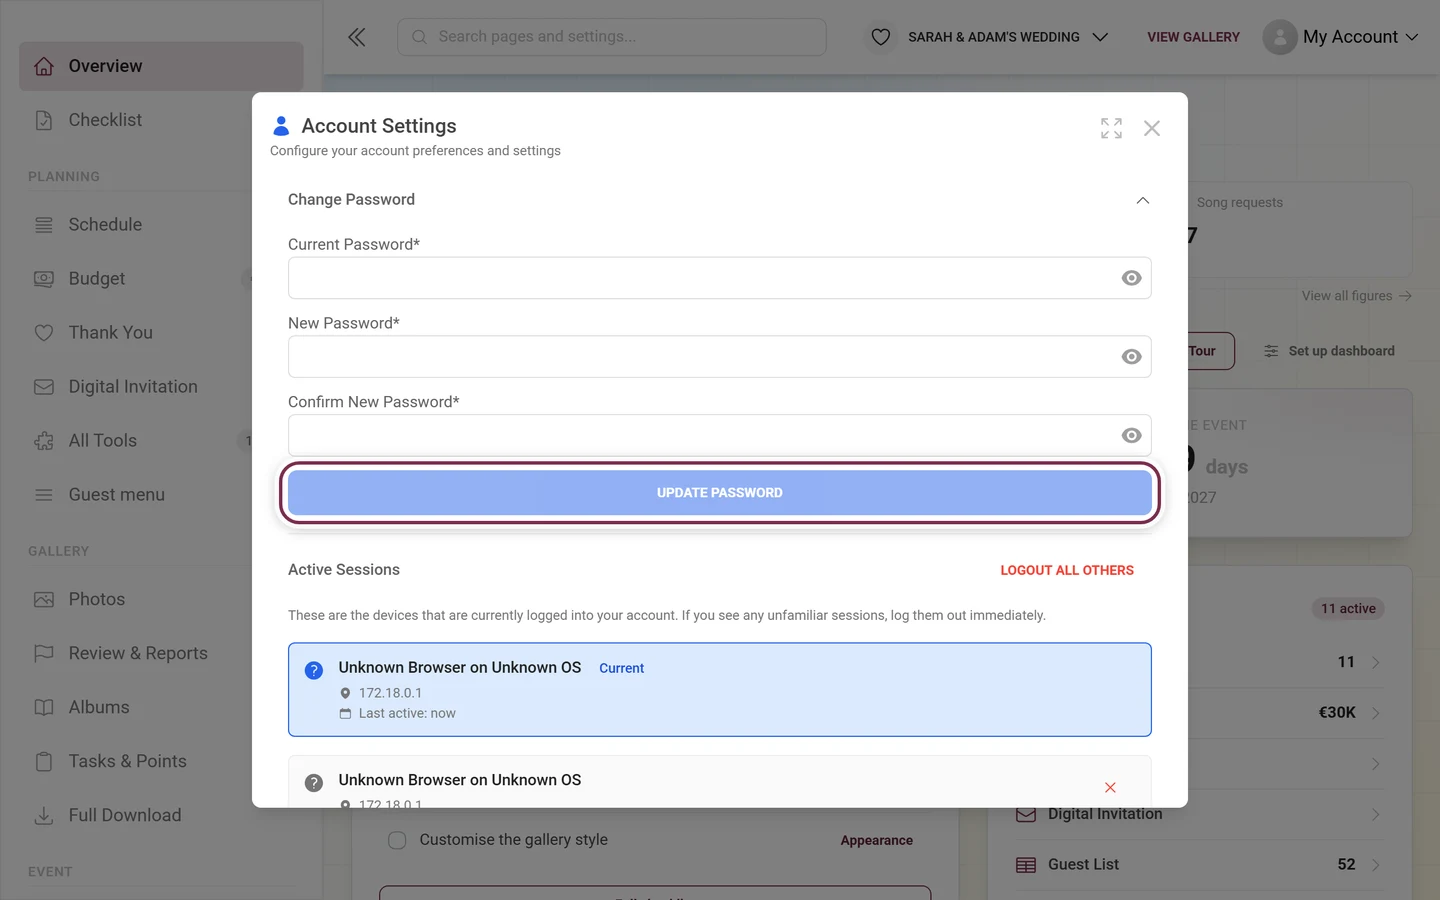
- Set Password – you have none yet. That is the normal case if you have always signed in via a login link or with Google. You then set a new password; no old one is asked for.
- Change Password – you already have one and are replacing it. In that case an extra Current Password field appears.
-
Account Settings → Security tab → tap Set Password or Change Password so the section expands.
-
Only when changing: enter your Current Password.
-
Enter the New Password. Right below, a colored bar shows the password strength and lists concrete complaints as long as the password is too weak. If it contains your email address, it is downgraded.
-
Repeat it in Confirm New Password. If the two do not match, it says “Passwords don’t match” and the button stays disabled.
-
Tap Set Password or Update Password. A short confirmation appears at the top: “Password set successfully” or “Password updated successfully”.
If you cannot get into your account at all, Forgot password helps.
Active sessions: sign out other devices
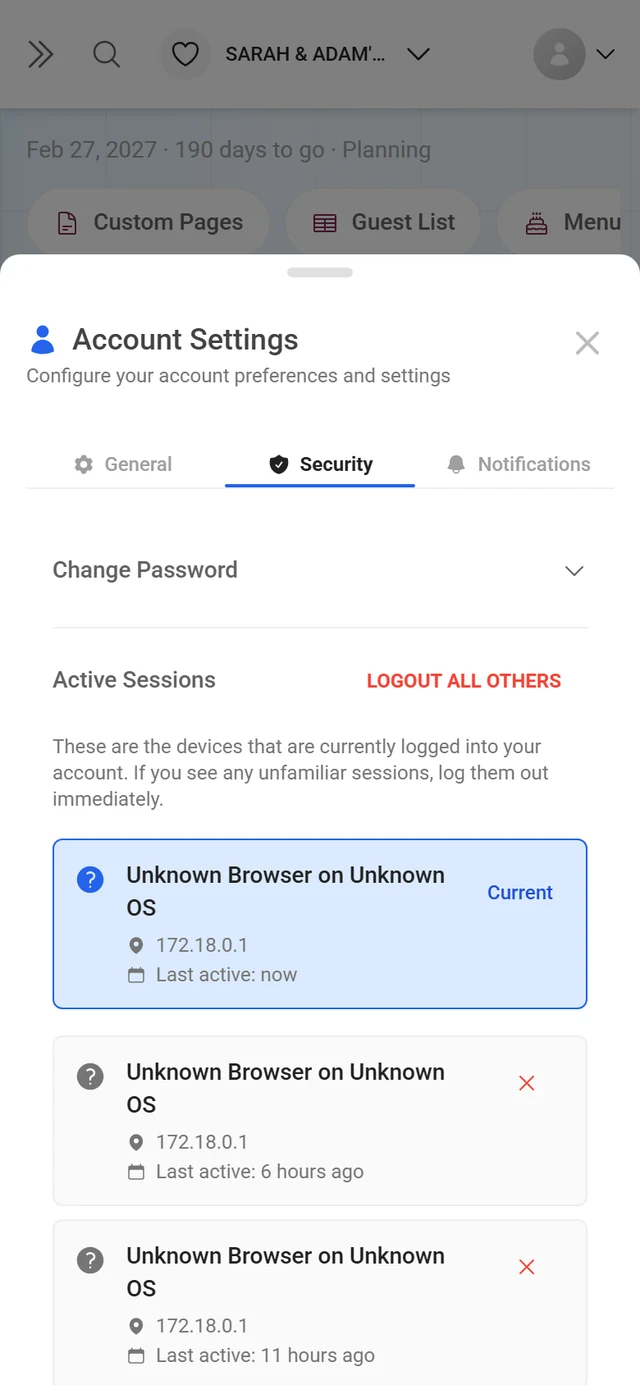
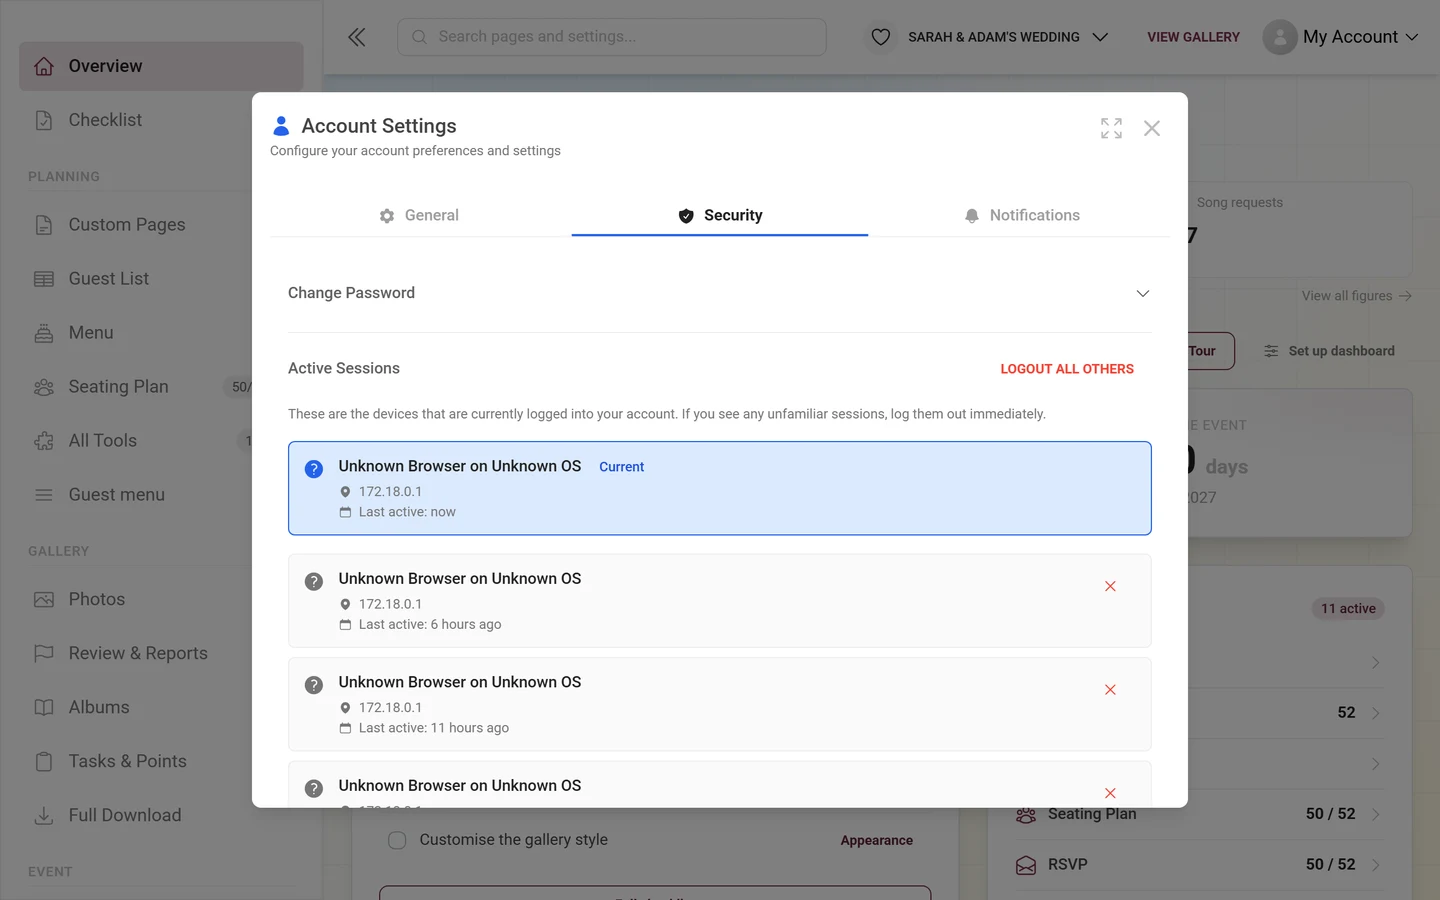
Section titled “Active sessions: sign out other devices”Further down the Security tab sits Active Sessions – the list of every device currently signed in to your account. The note reads: “These are the devices that are currently logged into your account. If you see any unfamiliar sessions, log them out immediately.”
Every entry shows:
- a device icon (phone, tablet, desktop, or a question mark for unknown),
- browser and operating system,
- the location with a country flag (falling back to the IP address or “Unknown location”),
- Last active with how long ago that was.
Your own session sits at the top, highlighted and marked with the Current chip – it cannot be signed out from here.
-
Sign out a single device. Tap the X at the right edge of the row. The confirmation Logout Session? explains that the device will have to sign in again. Confirm with Logout.
-
Sign out all the others. Logout All Others sits next to the heading (it only appears when other sessions exist). The confirmation is Logout All Other Sessions? – your current device stays signed in, everything else is thrown out.
-
Paging through many devices. If there are more sessions than fit on one page, Previous and Next appear at the bottom, along with “Page
{{current}}of{{total}}”.
Connecting or unlinking your Google account
Section titled “Connecting or unlinking your Google account”In the General tab you find the Connected Accounts section with the Google Account row. Below it, the current state: Connected or Not connected.
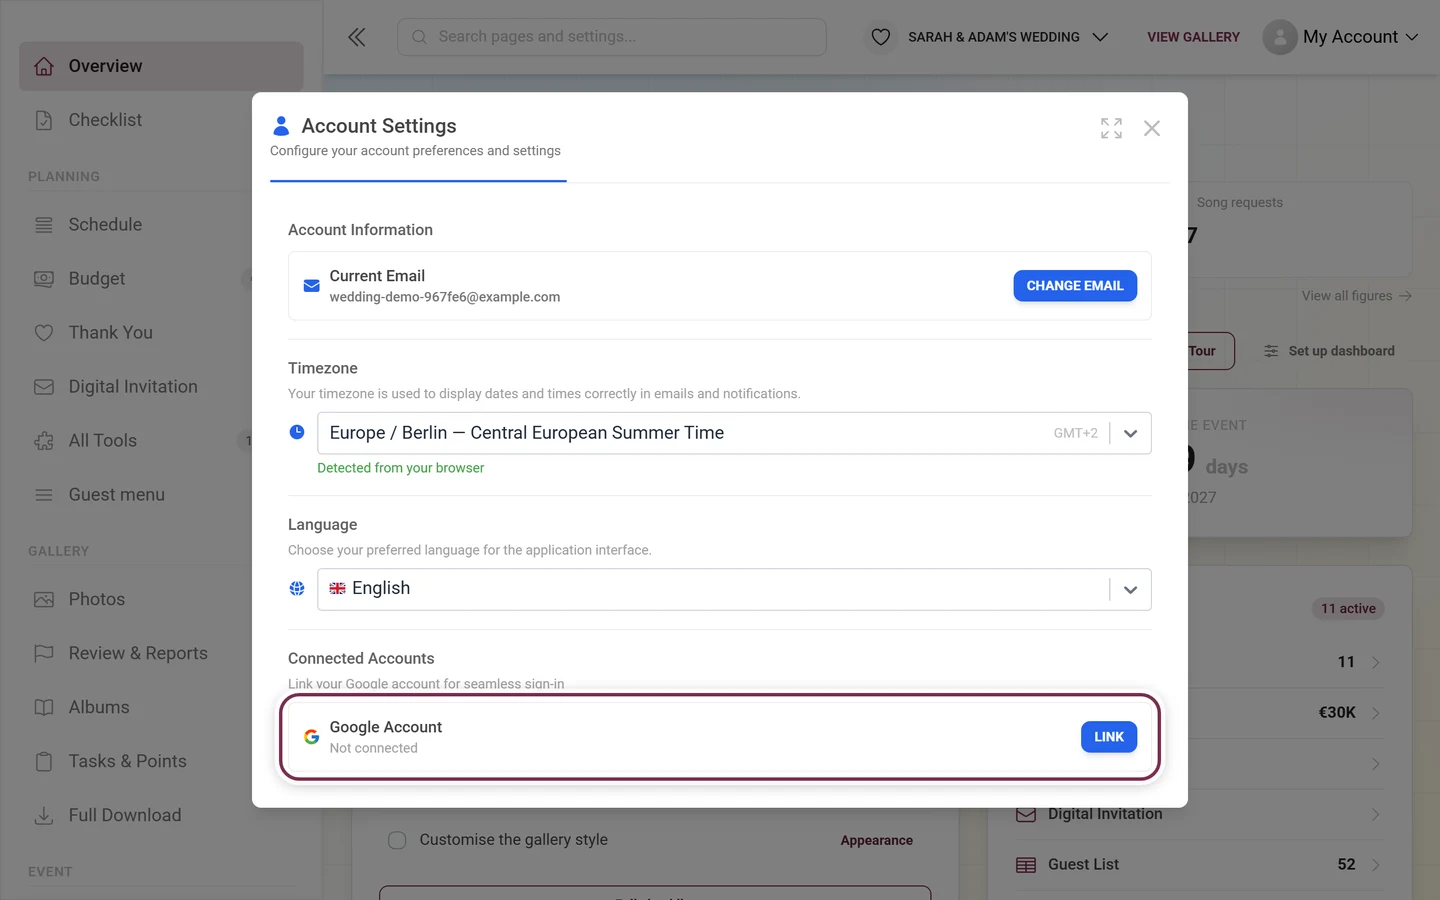
- Connect: tap Link. A small Google window opens. After you confirm, your Google account is linked and you can sign in with it from then on. If the window is blocked, Photogala reports: “Popup blocked. Please allow popups for this site.”
- Unlink: tap Unlink. The confirmation Unlink Google Account? warns that you will no longer be able to sign in with Google. Confirm with Unlink.
Timezone and language
Section titled “Timezone and language”Both settings also live in the General tab.
Timezone. A searchable picker (“Search timezones…”) listing every timezone with its current UTC offset. The in-app description: “Your timezone is used to display dates and times correctly in emails and notifications.” In short: it decides which local time Photogala uses when it shows you a date or time – for example in reminders and notices about deadlines.
Language. Right below: “Choose your preferred language for the application interface.” The language you pick here is stored in your account and therefore applies on your other devices too. Every way to switch language is covered in Changing the language.
Notifications
Section titled “Notifications”The Notifications tab controls what actually reaches you: one switch for Email Notifications and, grouped into categories below it, every single notification type for the in-app bell. Details in Notifications.
Deleting your account
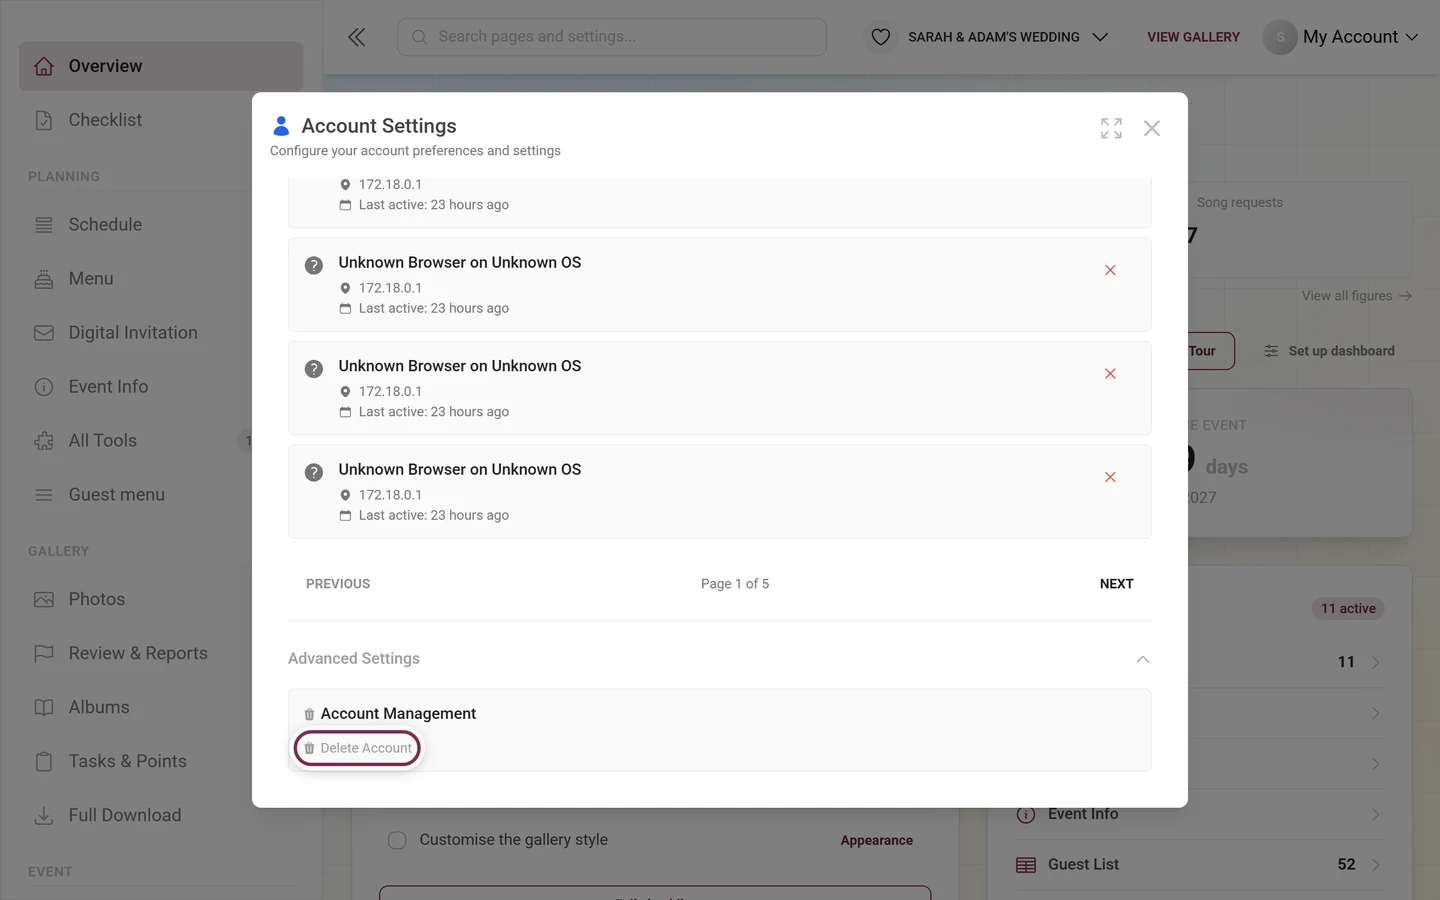
Section titled “Deleting your account”Deletion is deliberately tucked away and runs in two stages.
-
Account Settings → Security tab → expand Advanced Settings at the very bottom. Inside it sits the Account Management area with the Delete Account link.
-
Stage 1 – checking your events. Photogala first looks (“Checking for events you own…”) whether you are the sole owner of any event.
- If you are not, the green box No events to handle appears and you can continue straight away with Proceed to Delete Account.
- If you are, you get Events That Need Your Attention with the list of those events including their media and uploader counts. For each event you have to decide: Transfer or Delete Event. Only once every event is handled does Proceed to Delete Account become clickable – otherwise it says “Please transfer or mark all events for deletion before proceeding”.
-
Stage 2 – confirm. You get Delete Account Confirmation: “This action cannot be undone. All your data will be permanently deleted. Please type your email address to confirm.” Type your email address exactly into the field – only then does Confirm Delete become active.
Everything else, and what happens to your data afterwards: Deleting your account.
Signing in as the host
Section titled “Signing in as the host”Host access works differently from guest access. If you want to manage or unlock your own event, see Accessing your event. A magic link for unlocking an event lands, after confirmation, on the event list (/admin) – that is the host path, not the guest gallery. If you cannot get back into your account, Forgot password helps.