Recycle bin & restoring
On Photogala, a deleted photo isn’t gone right away. Instead of being removed permanently, it moves to the recycle bin – a safety zone where it stays for a limited time (the grace period). During that window you can restore it with a single click. Only after the grace period ends is it removed for good.
As the host, this is where you manage the deleted media of the entire event – whether you, a moderator, or a guest deleted it. You can restore items individually or in large batches, filter by uploader or by whoever deleted them, and clean up expired items.
How to reach the recycle bin
Section titled “How to reach the recycle bin”-
Open your event’s admin area. If you’re currently in the gallery: use the profile menu at the top right, where Management leads into the admin portal.
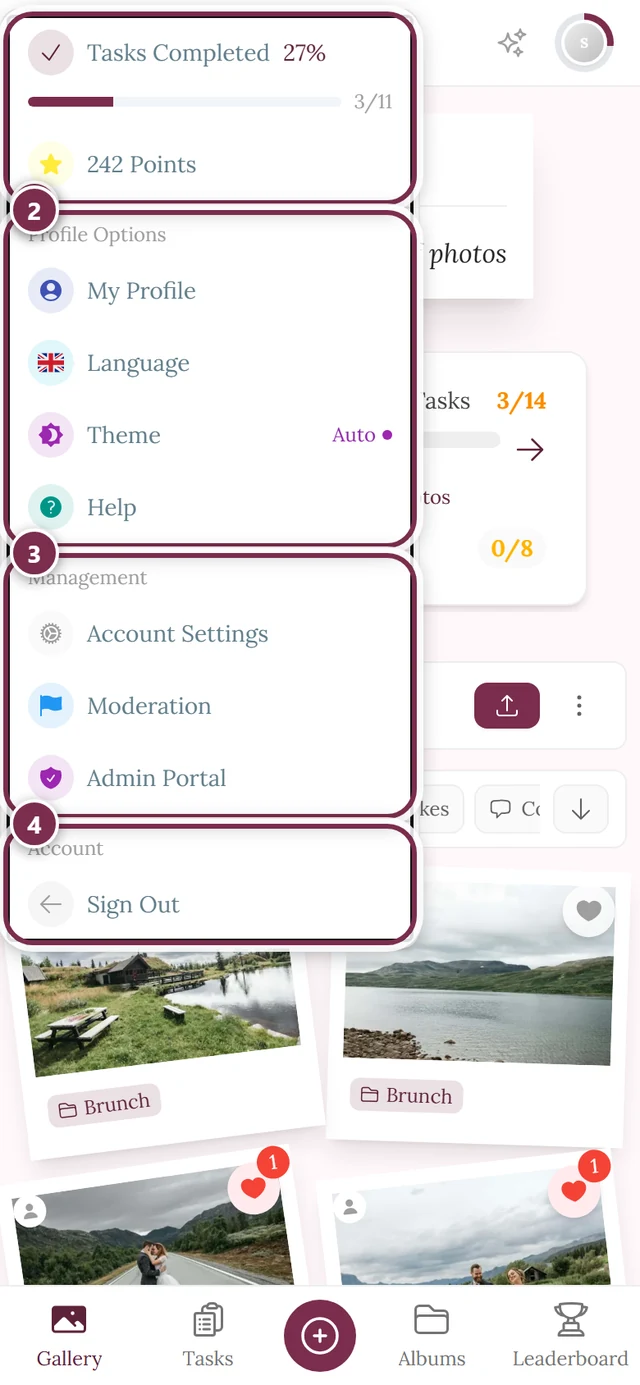
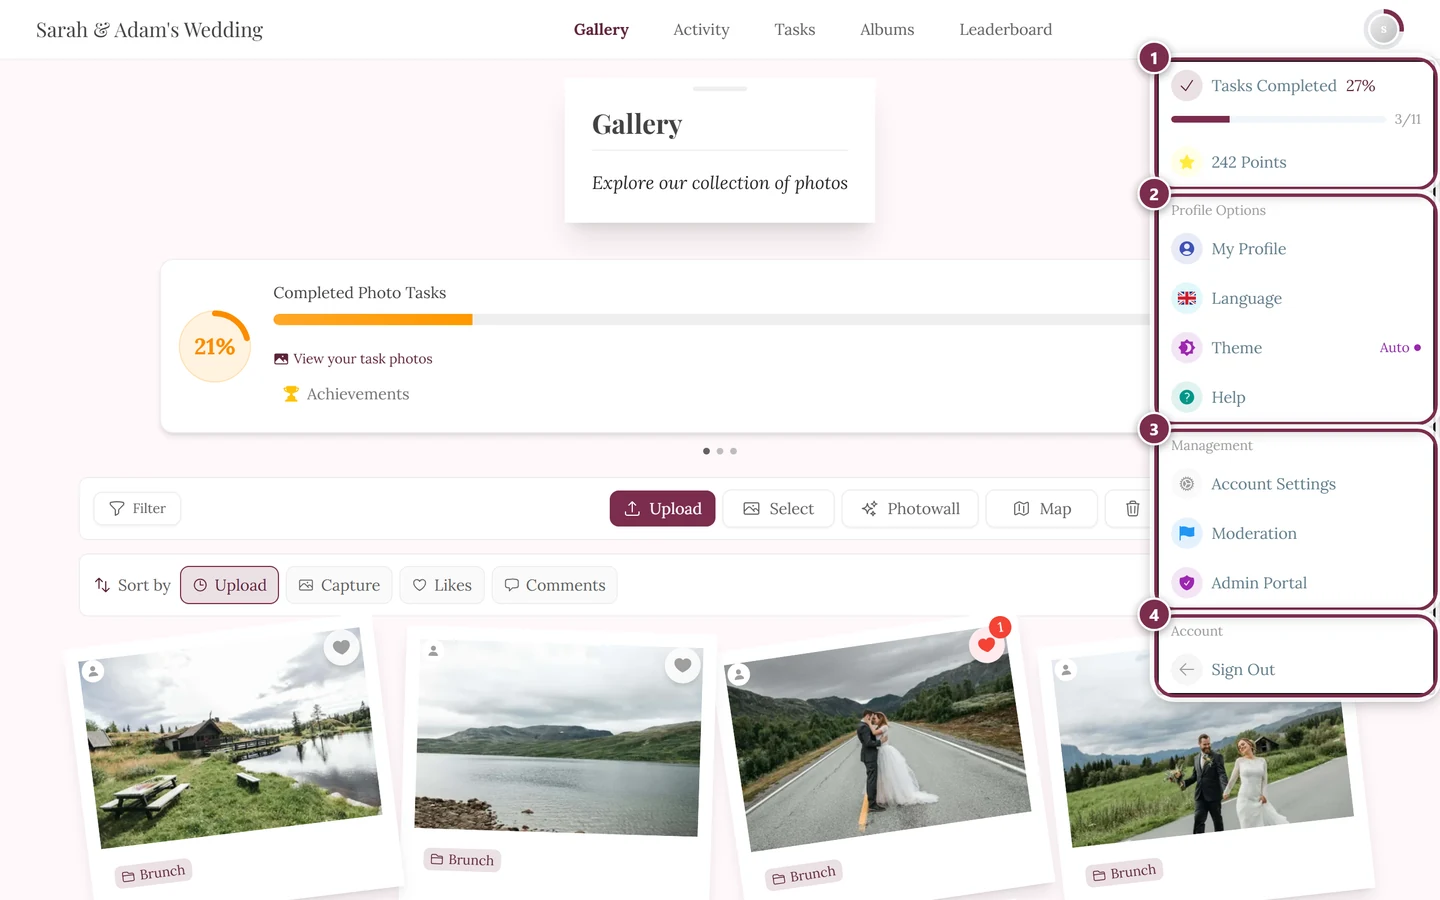
The profile menu at the top right takes you into the management and admin portal. ① your points and solved tasks, ② Profile options with My Profile, Language, Theme and Help, ③ Management with Account Settings, Moderation and Admin Portal – this section is missing until you hold a role for it, ④ Account with Sign out. -
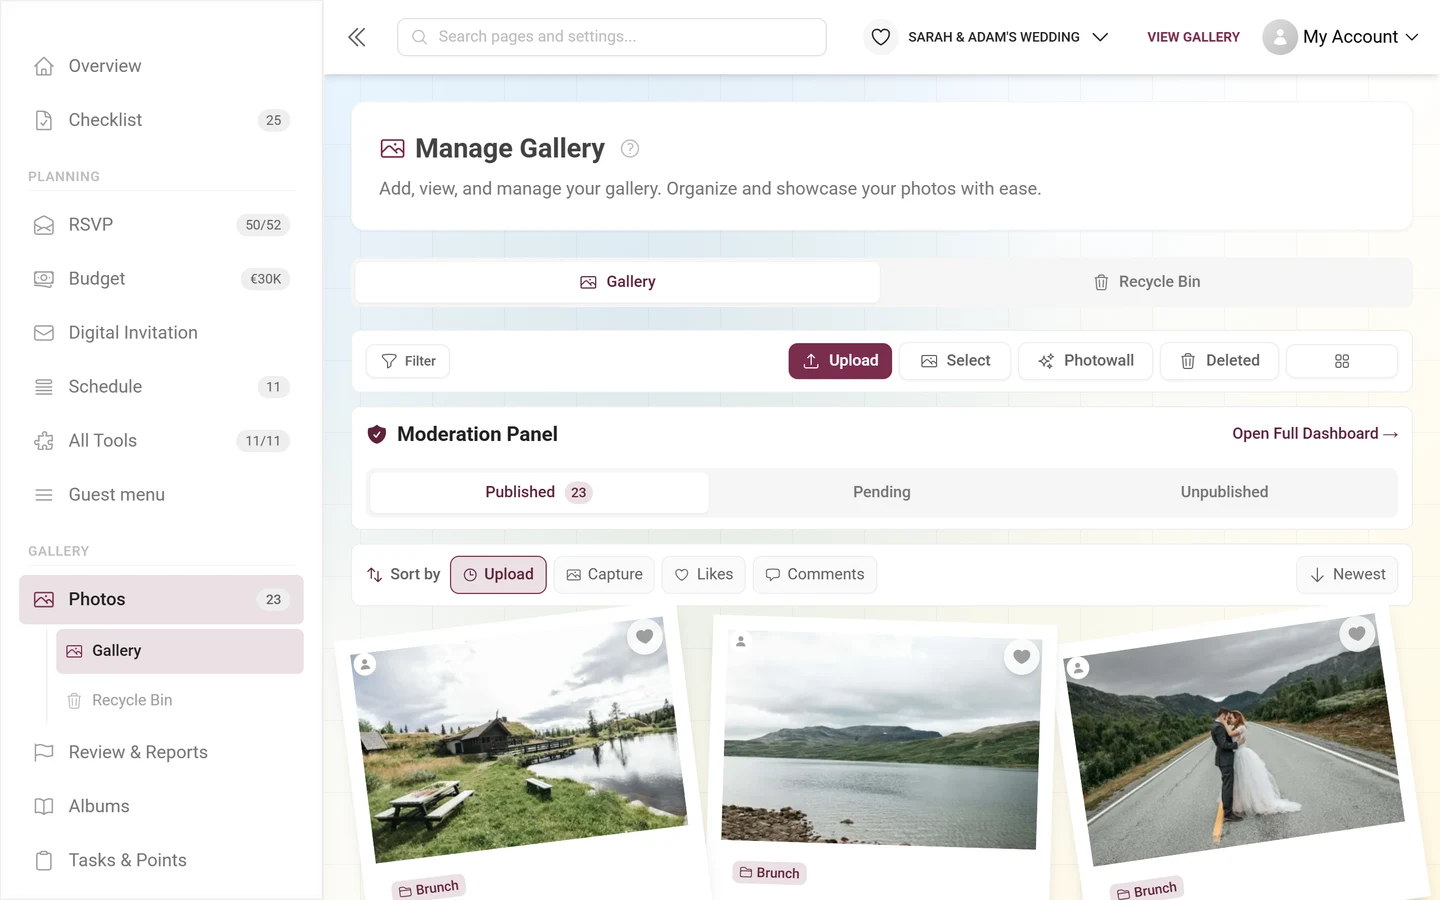
In the left-hand menu, in the Gallery group, click Photos (the entry used to be called “Gallery Overview”). The page itself is still titled Manage gallery and lives at the route
/admin/gallery- what it holds is explained in Manage your gallery. -
At the top you’ll find the tab bar Gallery · Recycle Bin · Reports. Click Recycle Bin (direct link:
/admin/gallery?tab=recycleBin). Once you are there, the sidebar lists the same tabs as sub-entries of Photos.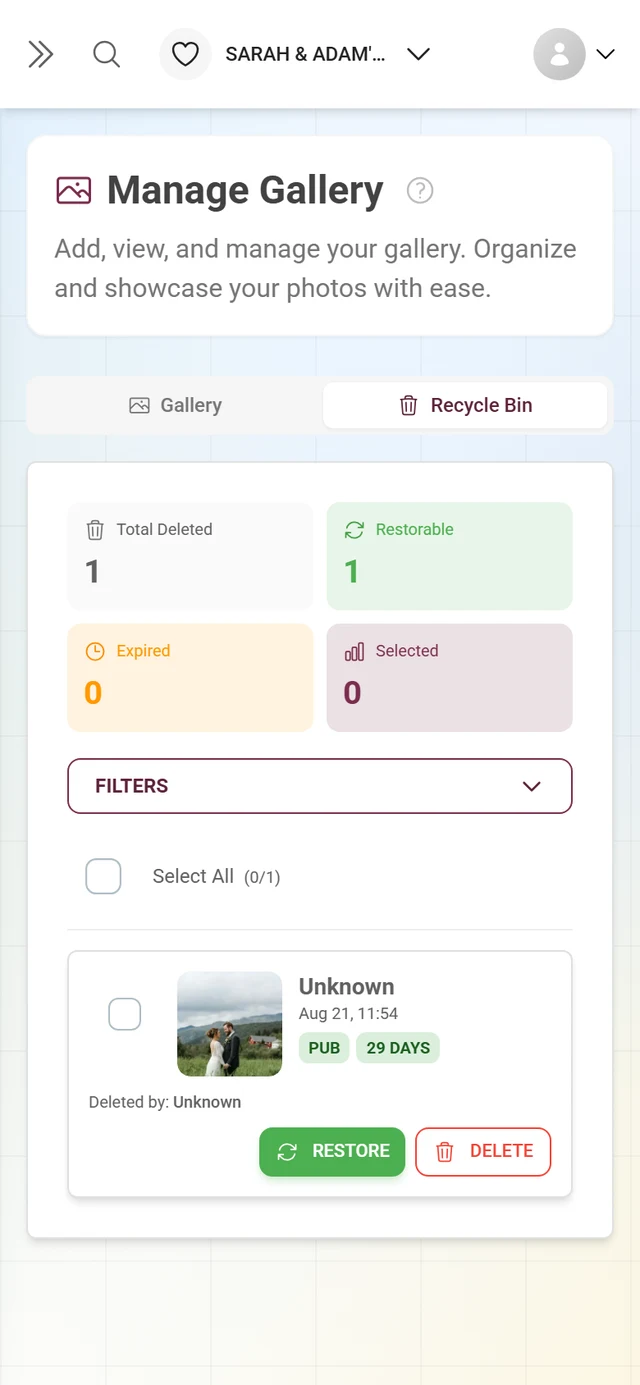
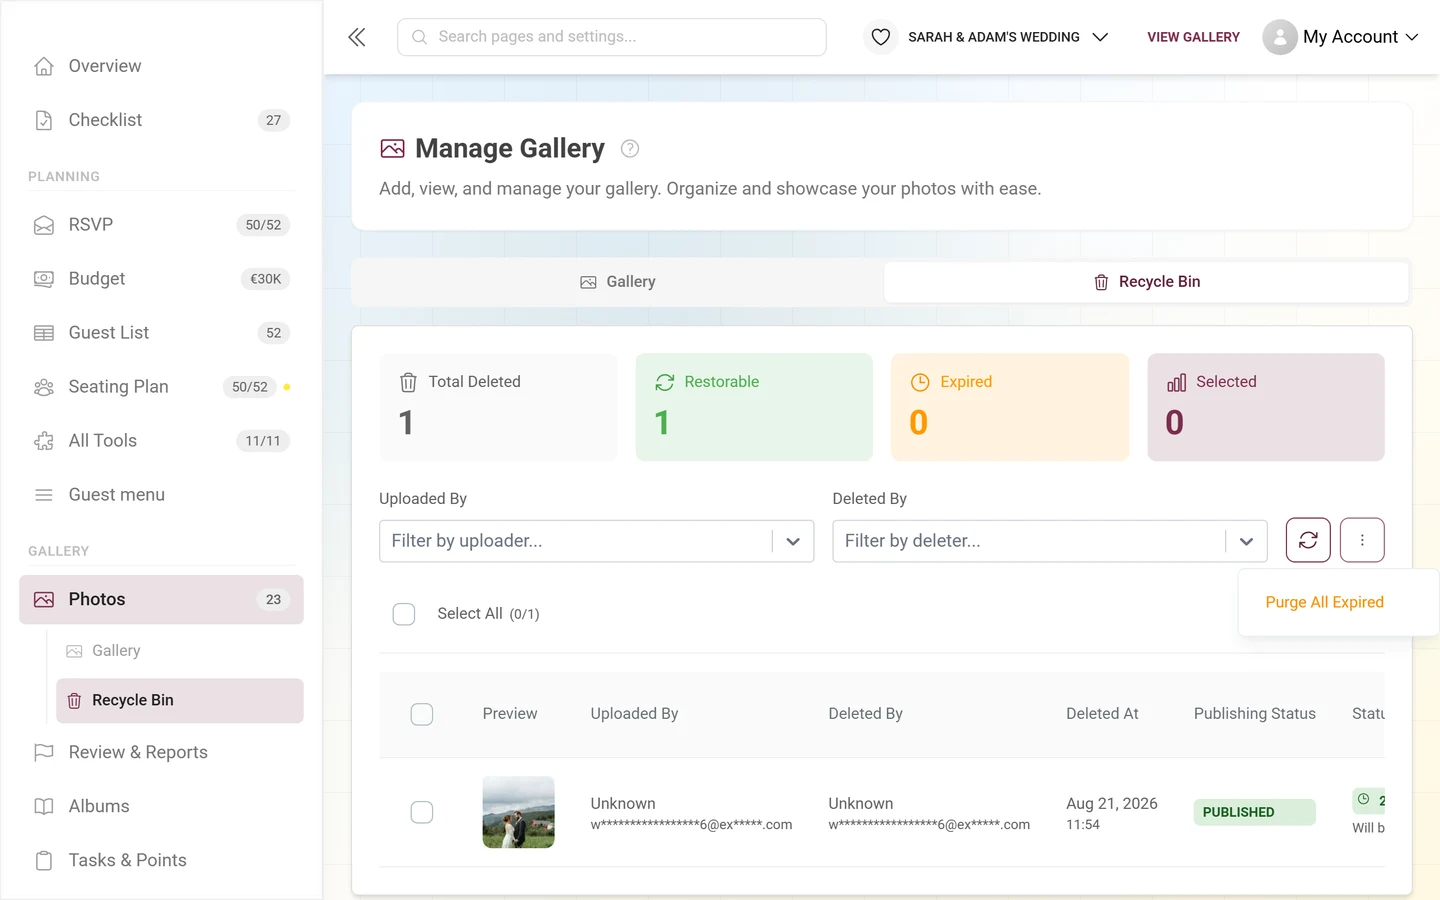
The recycle bin shows all deleted media of the event, with statistics, filters, and actions.
The recycle bin as a metric
Section titled “The recycle bin as a metric”You don’t have to open the page to see whether anything is in the bin. The count exists as its own Recycle Bin metric in two places:
- on the dashboard, in the metric band at the top. It is off by default there: switch it on via the Set up dashboard button, in the Figures at the top block – the optional tiles are marked “optional — off”.
- in the event statistics, at the bottom of the Overview tab as the small In the recycle bin tile.
The counter is not a maintained number but is derived server-side on every read. It therefore cannot drift from what the recycle bin actually holds. It counts every deleted item that is not yet being permanently removed – including those whose grace period has already expired.
Layout of the recycle bin view
Section titled “Layout of the recycle bin view”The view is arranged top to bottom: first warnings about soon-to-expire items, then statistics, filters, the selection tools, and finally the list of deleted media.
Warning banners: items expiring soon
Section titled “Warning banners: items expiring soon”At the very top, orange banners with a clock icon may appear:
- Items expiring today – shows that a number of items will be permanently deleted within 24 hours. This is your cue to act now.
- Items expiring tomorrow – appears when nothing expires today but something does tomorrow.
Once items have expired, you can no longer recover them. So respond to these banners while the photos are still restorable.
Statistics tiles
Section titled “Statistics tiles”Four tiles summarize the state of the recycle bin:
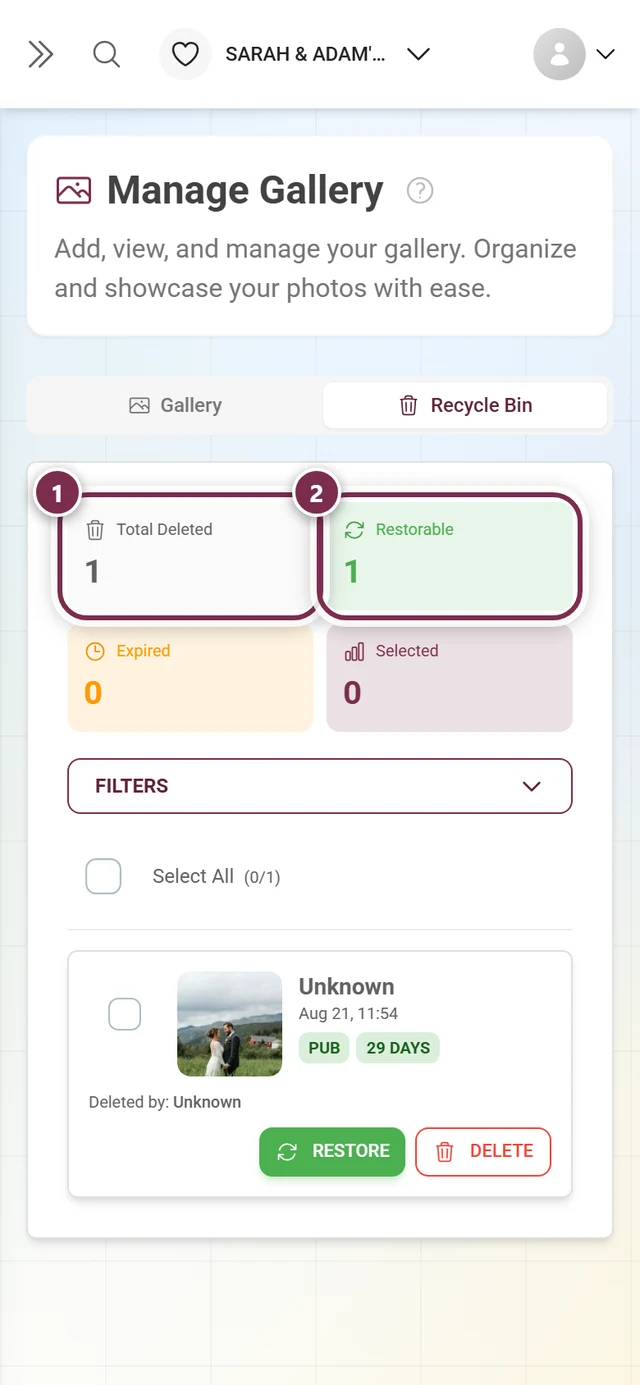
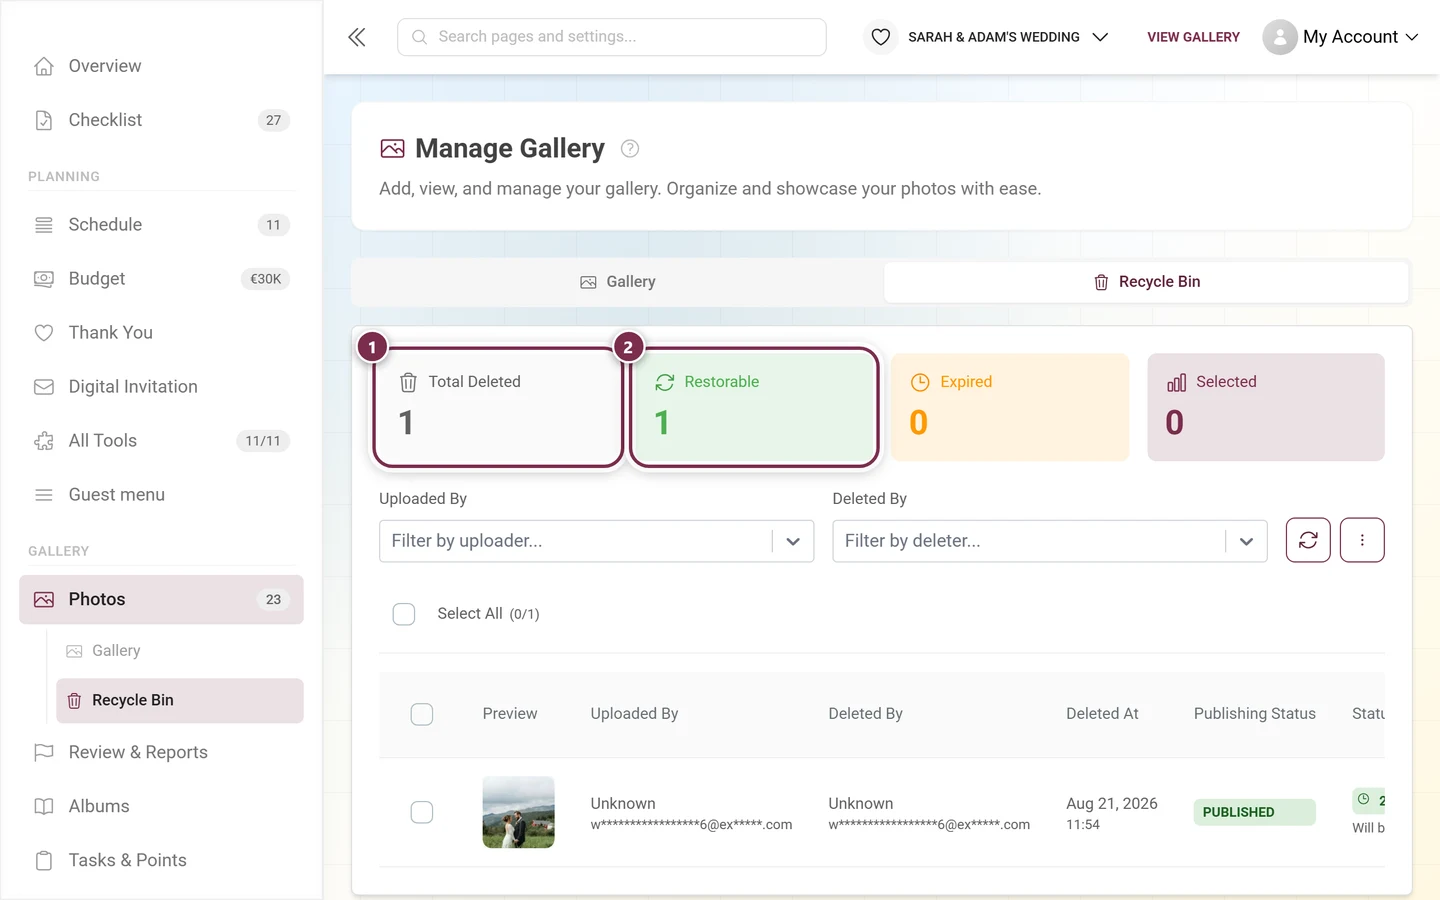
- Total deleted – all items in the recycle bin.
- Restorable (green) – items still within the grace period.
- Expired (orange) – items whose grace period is over. These can only be permanently deleted.
- Selected – how many items you currently have marked.
Filters
Section titled “Filters”Use the filters to narrow the list. On mobile you show and hide the filter area with the Filters button; on desktop it’s always visible.
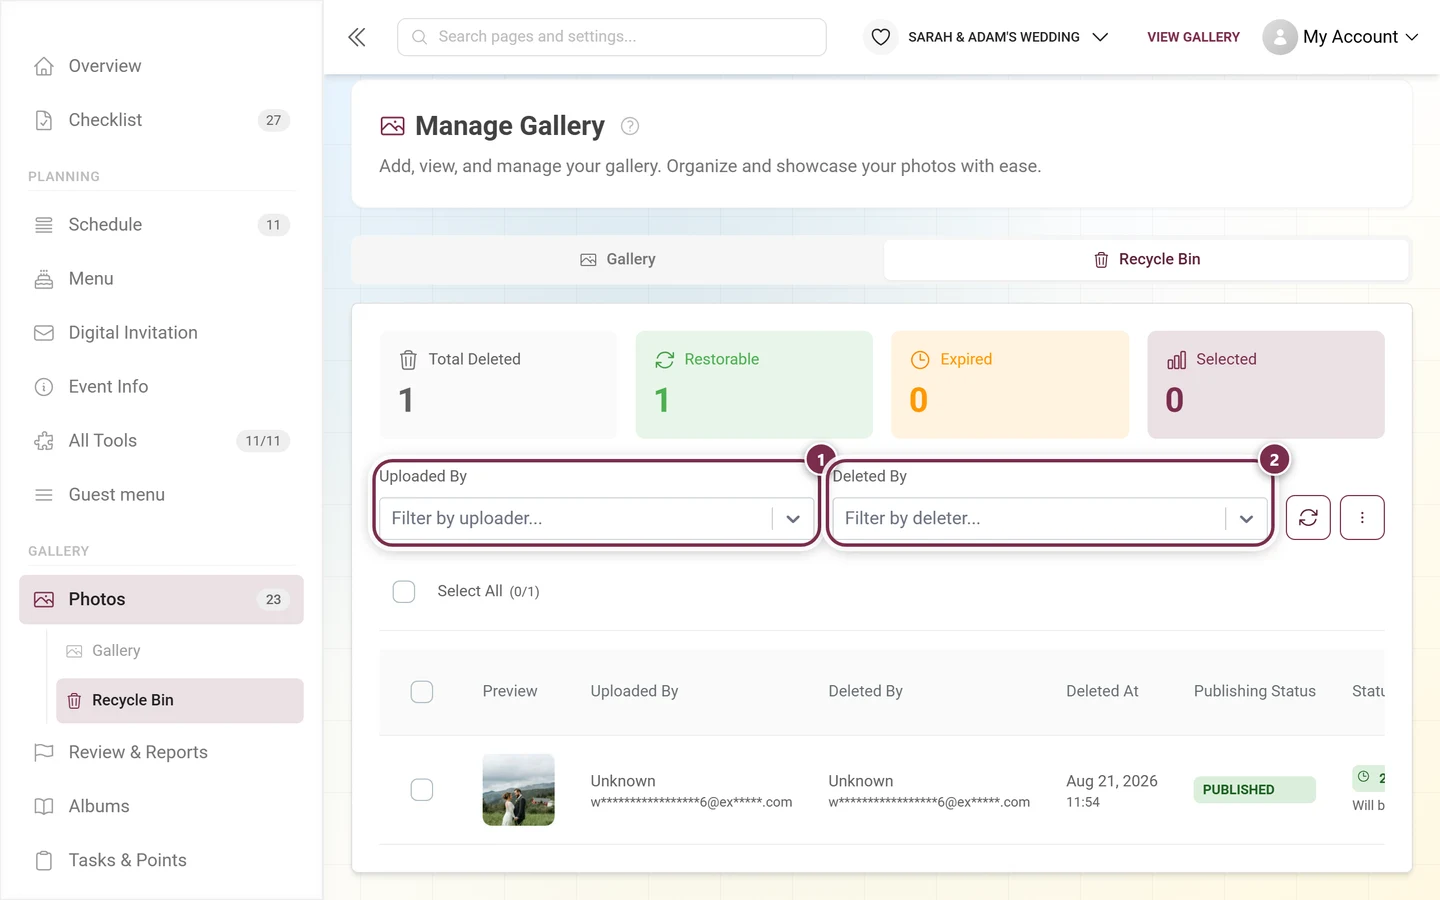
- Uploaded by – a search dropdown. Type a name to search the event participants (with nickname and email). This shows only the deleted photos of one specific person.
- Deleted by – the same dropdown, but by whoever deleted the item. Ideal for tracing what a particular moderator or guest removed.
To the right you’ll find:
- a Refresh icon (circular arrow) that reloads the list,
- a three-dot menu (⋮) with the entry Purge All Expired,
- and – as soon as a filter is active – a Clear button that resets the filters.
When filters are active, a blue info box Filters Active: appears below, with removable chips per filter and a Clear All button. Filtering runs server-side; as soon as you set a filter, the list jumps back to the first page.
Selection and bulk actions
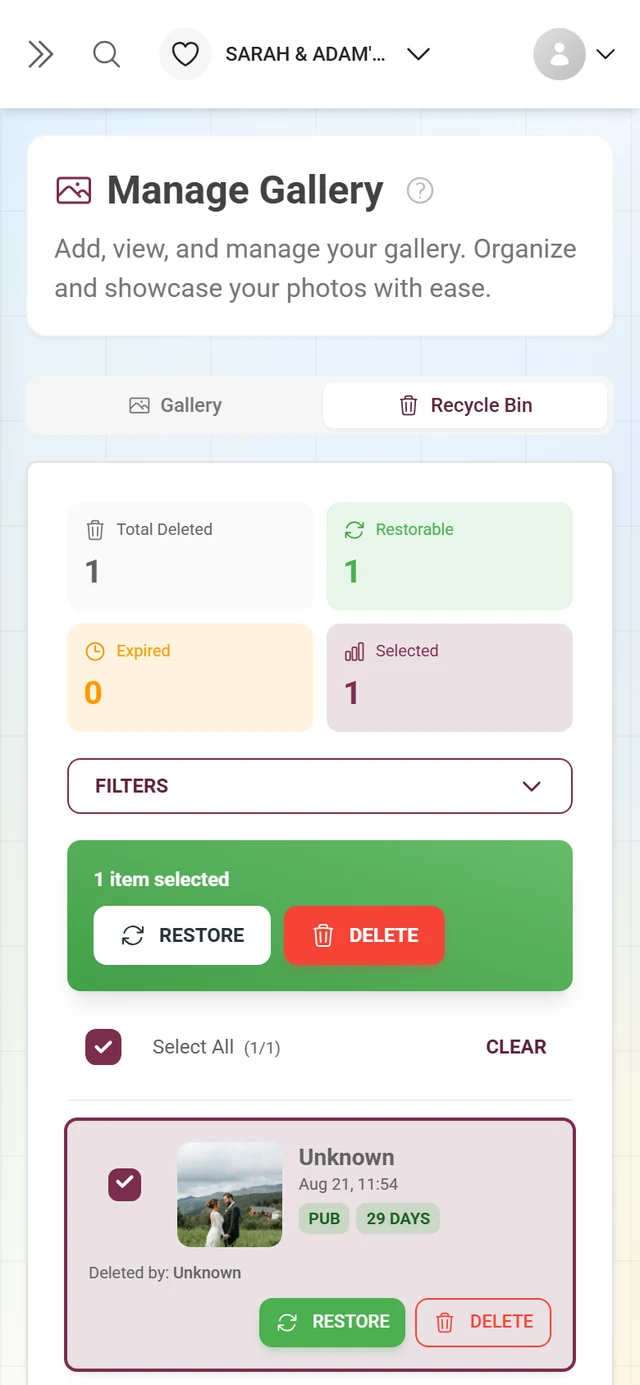
Section titled “Selection and bulk actions”Above the list is Select All with a counter (selected/total) and a checkbox with three states (empty, partial, full). As soon as you mark at least one item, a Clear link also appears to undo the selection.
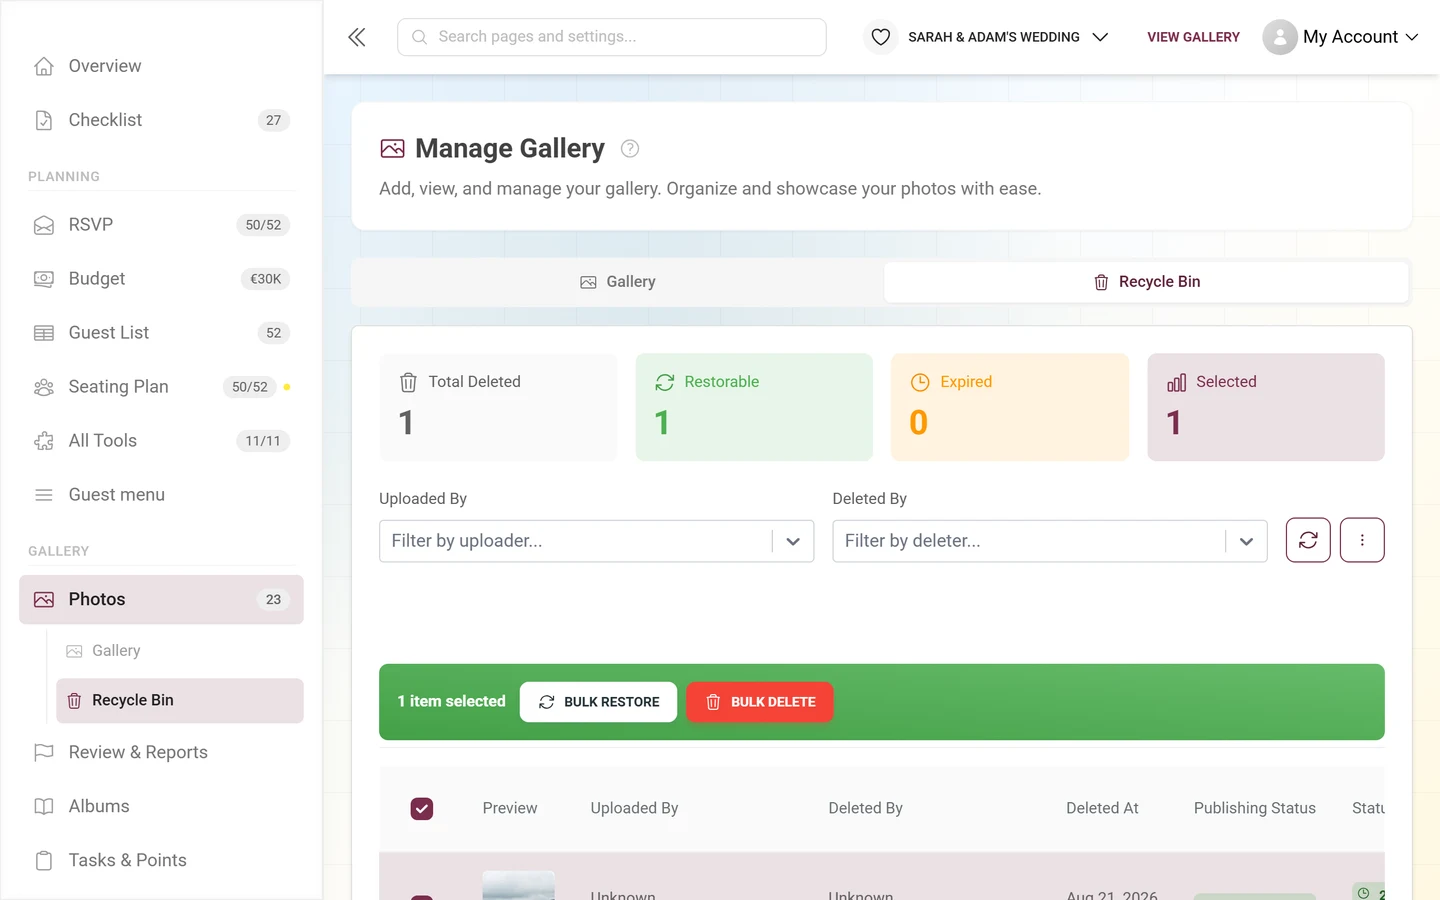
Once at least one item is selected, a green action bar appears at the top (on mobile it stays stuck at the top as you scroll):
- Bulk Restore (circular arrow) – brings all marked items back.
- Bulk Delete (red, trash can) – permanently deletes all marked items.
Both first open a confirmation dialog before anything actually happens.
The list of deleted media
Section titled “The list of deleted media”On desktop the list appears as a table, on mobile as cards. Key columns and details:
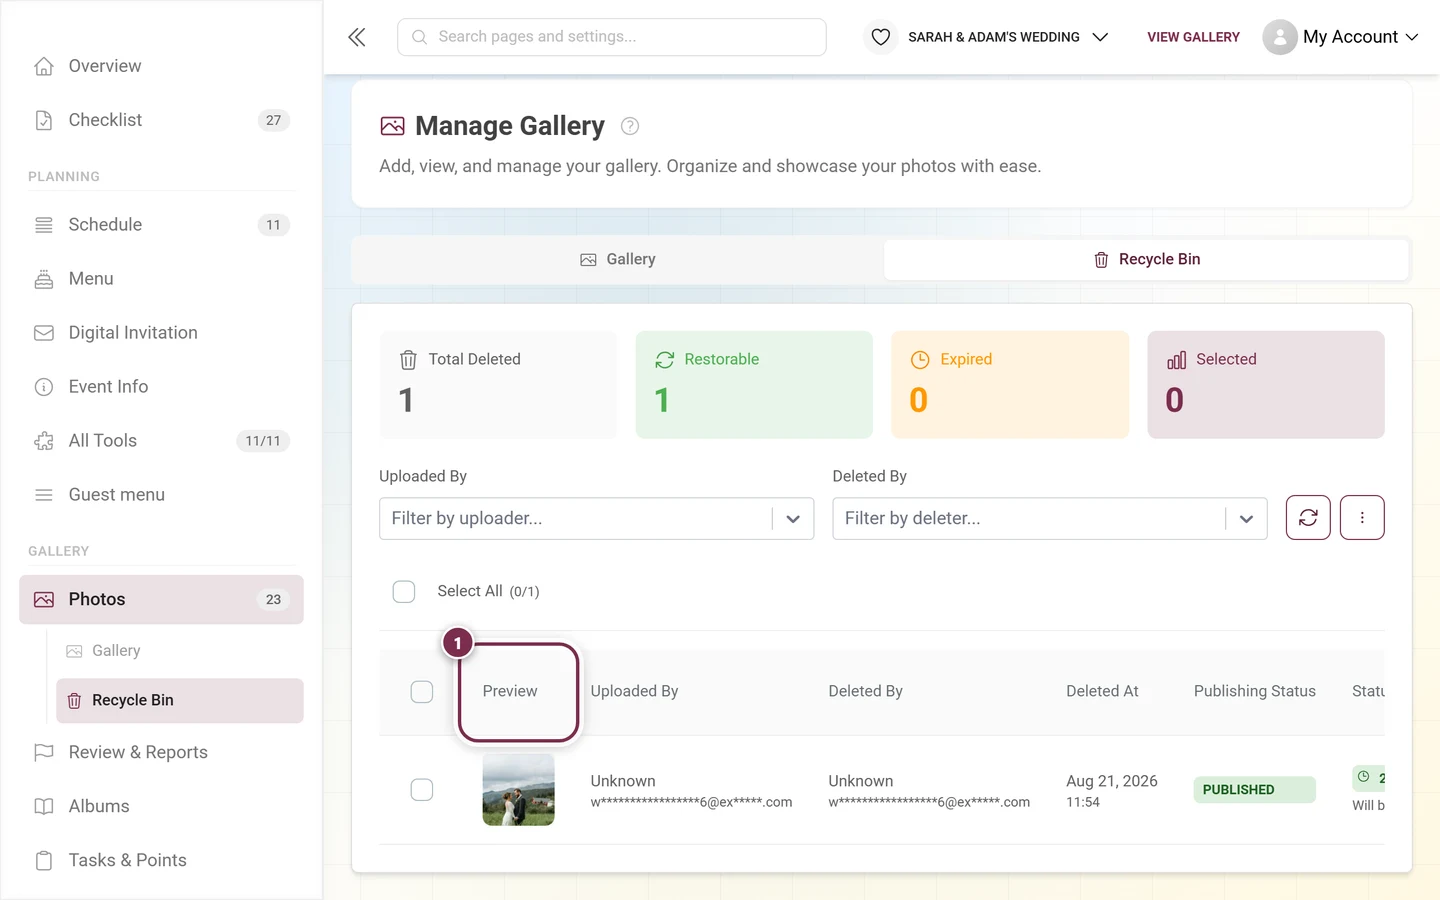
- Preview – clicking the image opens the full-screen preview with zoom. The whole card is clickable, even while the thumbnail is still loading.
- Uploaded by and Deleted by – who originally contributed the media and who removed it.
- Deleted at – the time of deletion.
- Publishing status – the chip Published (green), Pending (orange), or Unpublished (red) shows the state the photo was in at the moment it was deleted. After restoring, it returns to exactly that state.
- Status – the grace-period countdown chip: Expired (red), Less than 24 hours (red), Tomorrow (orange), or a number of days (orange for three days or fewer, otherwise green). Below it a detail line reads something like “Will be deleted in X hours” or “Ready for permanent deletion”. Under 24 hours, the red note Urgent action required also appears.
Each row offers actions: a green circular arrow Restore (only for items still restorable) and a red trash icon Delete permanently. Both are also available via right-click or long-press through a context menu.
The list shows 50 items per page. At the bottom you navigate with Previous / Next and the page numbers; a “Showing X–Y of Z” line keeps you oriented.
Restoring photos
Section titled “Restoring photos”-
Select the items you want to bring back – either individually via checkbox, or all at once with Select All.
-
For a single photo, click the green circular arrow Restore directly in the row. For several items, use Bulk Restore in the green action bar.
-
In the Bulk restore media dialog, Photogala confirms how many items are affected. A blue info box notes: “The media will be restored to the gallery and become visible to users again.” Click Confirm restore.
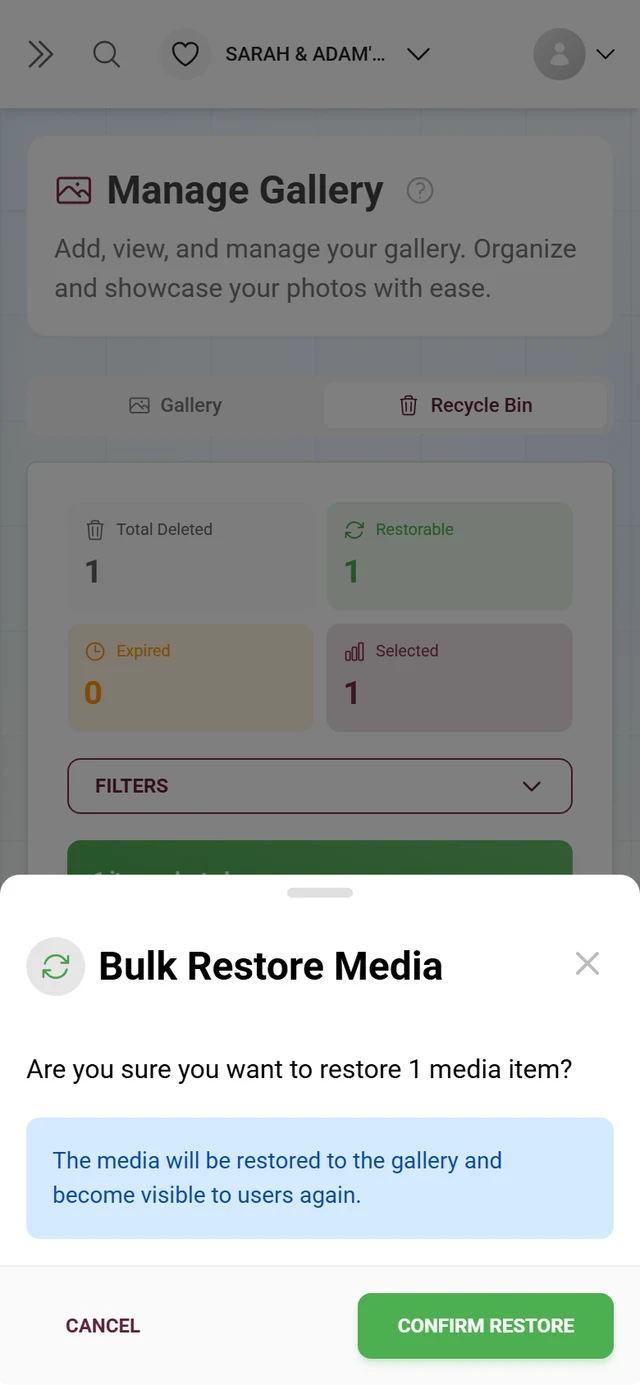
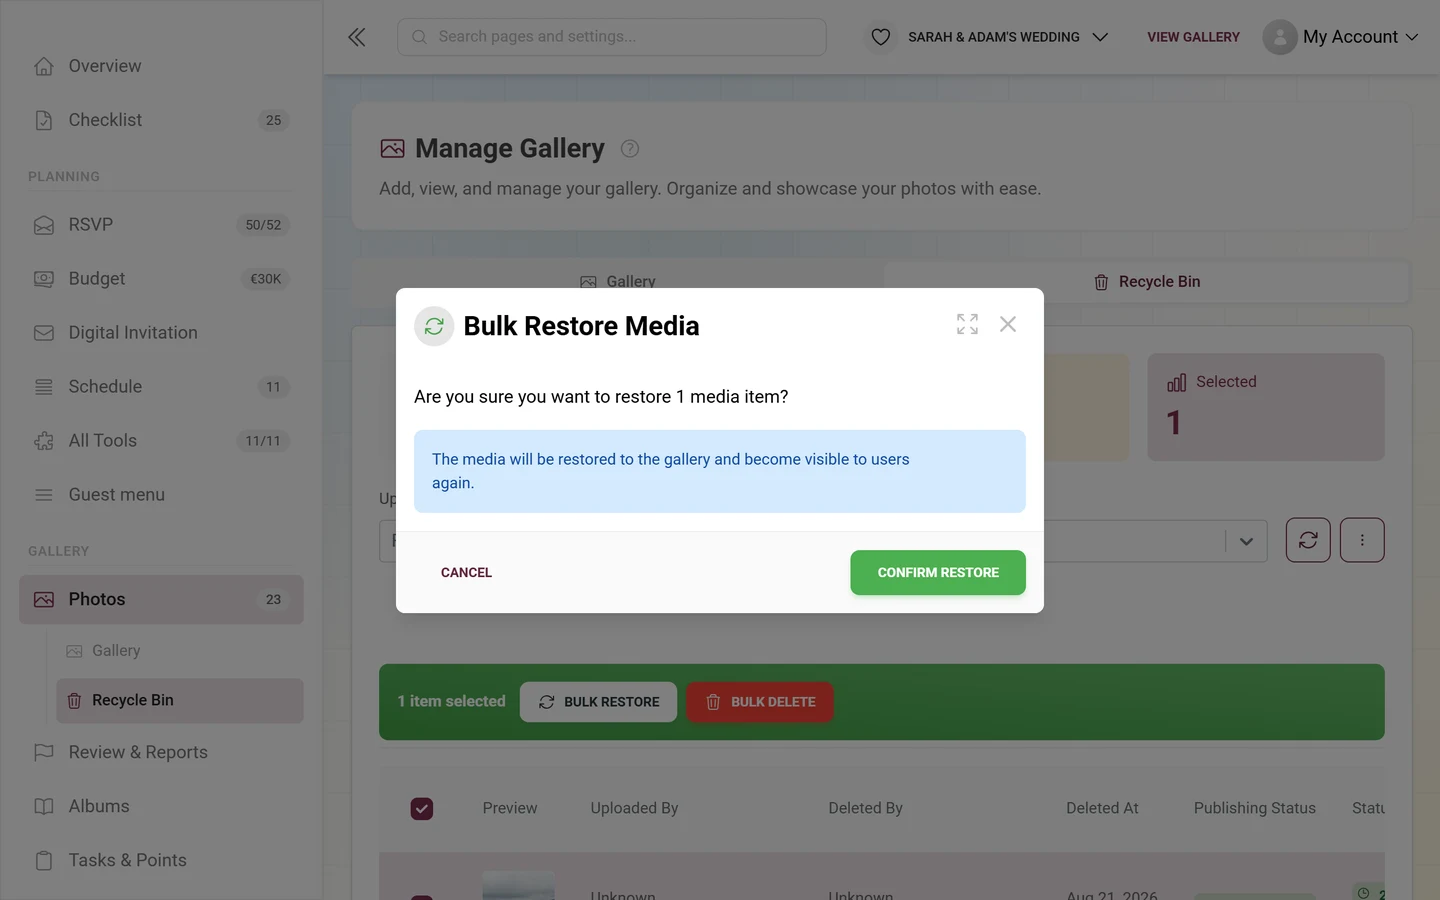
The dialog names the count and notes that the media become visible again – only then tap “Confirm Restore”. -
The photos return to the gallery – in exactly the publishing status they had before deletion. If they were “Pending” or “Unpublished”, you may still need to approve them via moderation.
Deleting photos permanently
Section titled “Deleting photos permanently”-
Select the items you want to remove permanently.
-
Click the red trash icon Delete permanently in the row, or – for several – Bulk Delete in the action bar.
-
In the Bulk delete media dialog, a red box warns: “This action cannot be undone. All selected media will be permanently removed from our servers.” Confirm with Confirm delete.
Cleaning up expired items
Section titled “Cleaning up expired items”Items whose grace period is over (counted in the Expired tile) keep taking up storage until they’re permanently deleted. One action clears them all at once.
-
Open the three-dot menu (⋮) on the right in the filter area.
-
Choose Purge All Expired.
-
The Purge Expired Media dialog shows how many expired items are affected and warns: “Only expired items that are past their grace period will be deleted. This action cannot be undone.” Confirm with Confirm Purge.
Including deleted photos in a download
Section titled “Including deleted photos in a download”When you download your whole event you decide what happens to the recycle bin. The advanced download has the section Include deleted photos from recycle bin? with three options:
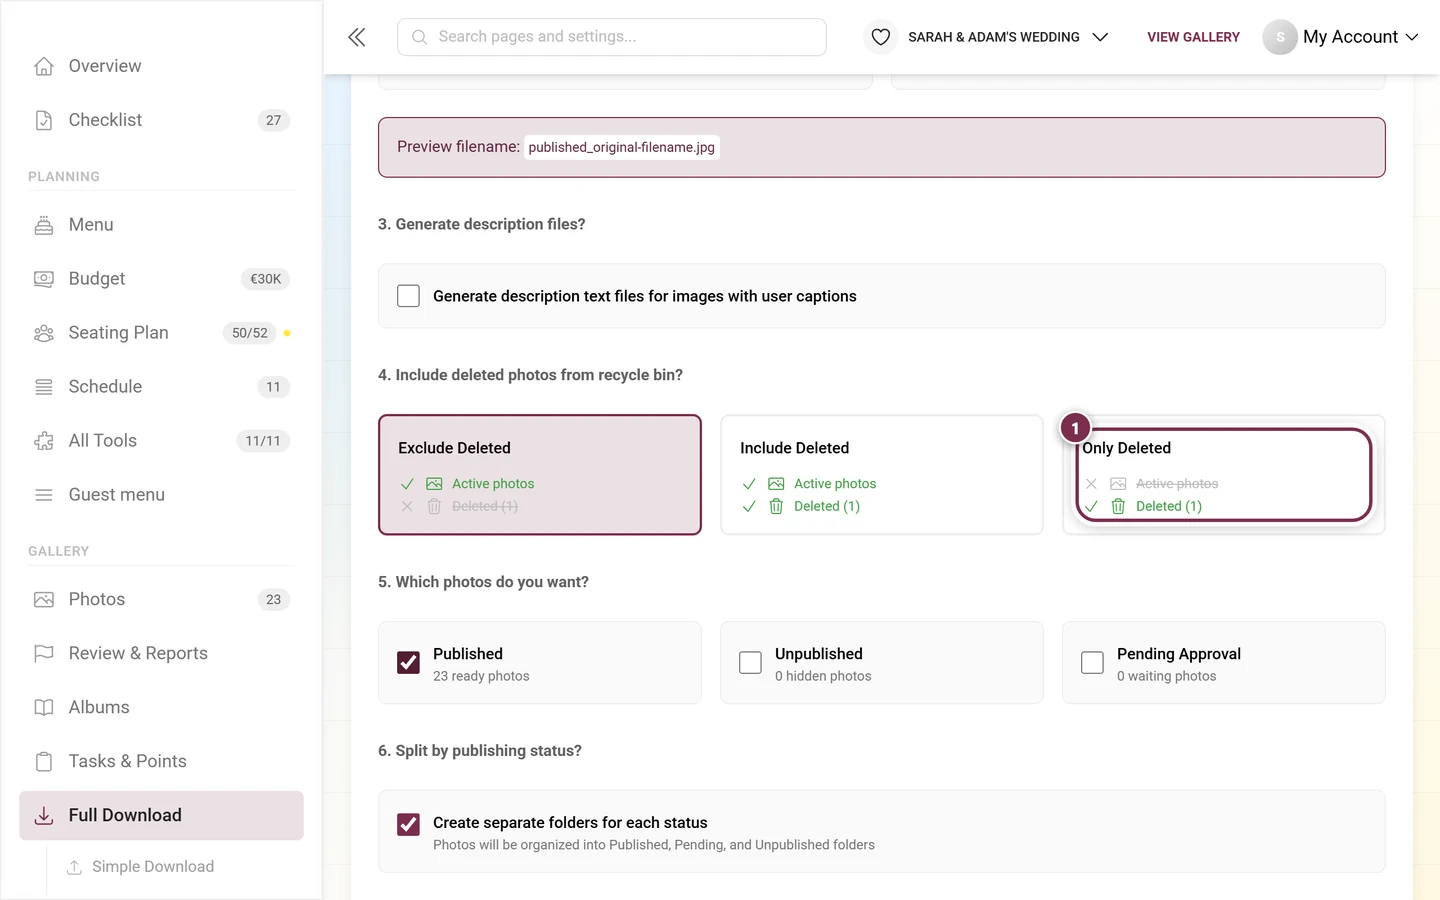
- Exclude Deleted – “Only include active photos (default)”. This is the preset.
- Include Deleted – “Include both active and deleted photos”. The ZIP then also contains everything from the recycle bin.
- Only Deleted – “Only include photos from recycle bin”. Handy when you only want to back up the discarded shots.
Each card also shows how many deleted items would be affected. The full flow is explained in Download & export.
Guests have their own recycle bin
Section titled “Guests have their own recycle bin”An important distinction: there are two recycle bins.
- Your host recycle bin – the page described in this guide. It holds the deleted media of the whole event, no matter who deleted them.
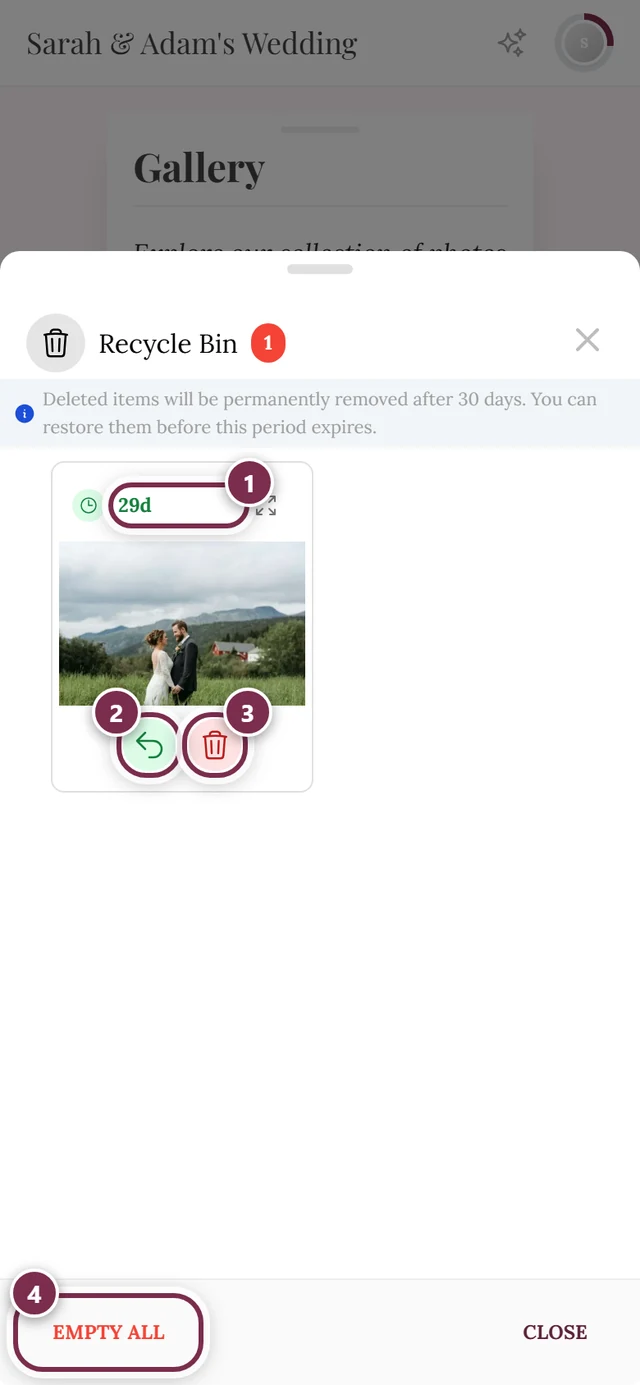
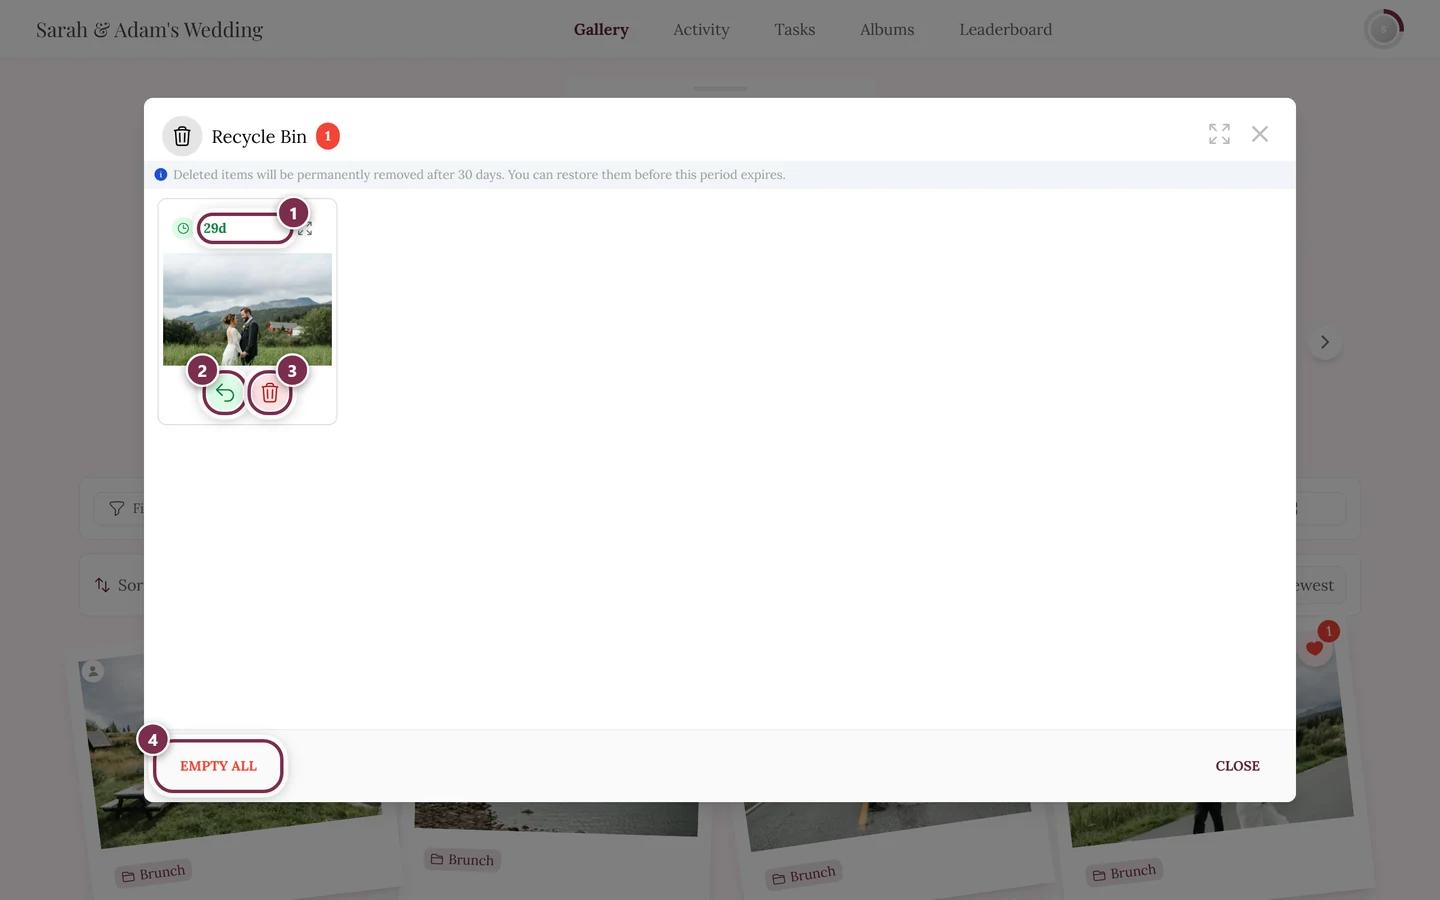
- A guest’s personal recycle bin – a separate dialog in the gallery. There a guest sees only the photos they both uploaded themselves and deleted themselves, and can restore or permanently remove them on their own.
If you, a moderator or another admin delete a guest photo, it does not show up in that guest’s personal recycle bin – it lands exclusively in your host recycle bin. Only you can restore it then.
The guest perspective is covered in Restoring deleted photos.
Saving & feedback
Section titled “Saving & feedback”Every action in the recycle bin is an immediate operation – there’s no separate Save button. After you confirm, the button briefly shows a loading state, then the dialog closes, the list reloads, and your selection is cleared. A short success message confirms how many items were restored, deleted, or purged.
Roles & visibility
Section titled “Roles & visibility”- The recycle bin is part of the standard gallery management and is not a premium feature – it’s available to every event.
- The tab appears purely data-driven: only while at least one item sits in the recycle bin. There is no manual toggle.
- The Restore button appears per item only while it’s within the grace period. Expired items can only be permanently deleted.
- The length of the grace period is set server-side and can’t be configured in the frontend. Watch the countdown chip rather than relying on a fixed number of days.
- Moderators with access to gallery management also see the recycle bin. Exactly who may delete and restore is controlled through roles – see Roles & permissions.
Problems & solutions
Section titled “Problems & solutions”- “I can’t find the recycle bin.” Nothing has been deleted yet, so the tab is hidden. It appears as soon as a photo is deleted.
- “Some photos are missing the Restore button.” Those items have expired – their grace period is over. Only permanent deletion is possible.
- “Restoring reports a duplicate.” The same photo was re-uploaded in the meantime. The original stays deleted to avoid duplicates.
- “The recycle bin won’t load.” On a loading error, the card “Failed to load recycle bin” appears with a Retry button.
- “I accidentally deleted something permanently.” Permanent deletion and purging expired items are irreversible – there’s no going back. So check carefully which items are marked before confirming.
Best-practice tips
Section titled “Best-practice tips”Related topics
Section titled “Related topics”- Moderation & reports – the neighboring tab; this is where photos are reported and removed, which then land in the recycle bin.
- Dashboard – the recycle bin metric, once you switch it on in the metric band.
- Event statistics – the same metric in a statistics context.
- Download & export – exclude or include deleted photos.
- Restore deleted photos (guest view) – your guests’ personal recycle bin.
- Roles & permissions – who may delete and restore.
- Banning users – when a user mass-deletes or causes trouble.