Tips for a great gallery
A lively gallery doesn’t happen by itself – but with a few deliberate moves you make sure your guests love contributing photos. This page is your best-practice hub: for every tip you get the exact route into the right admin area, the key fields and a link to the in-depth guide.
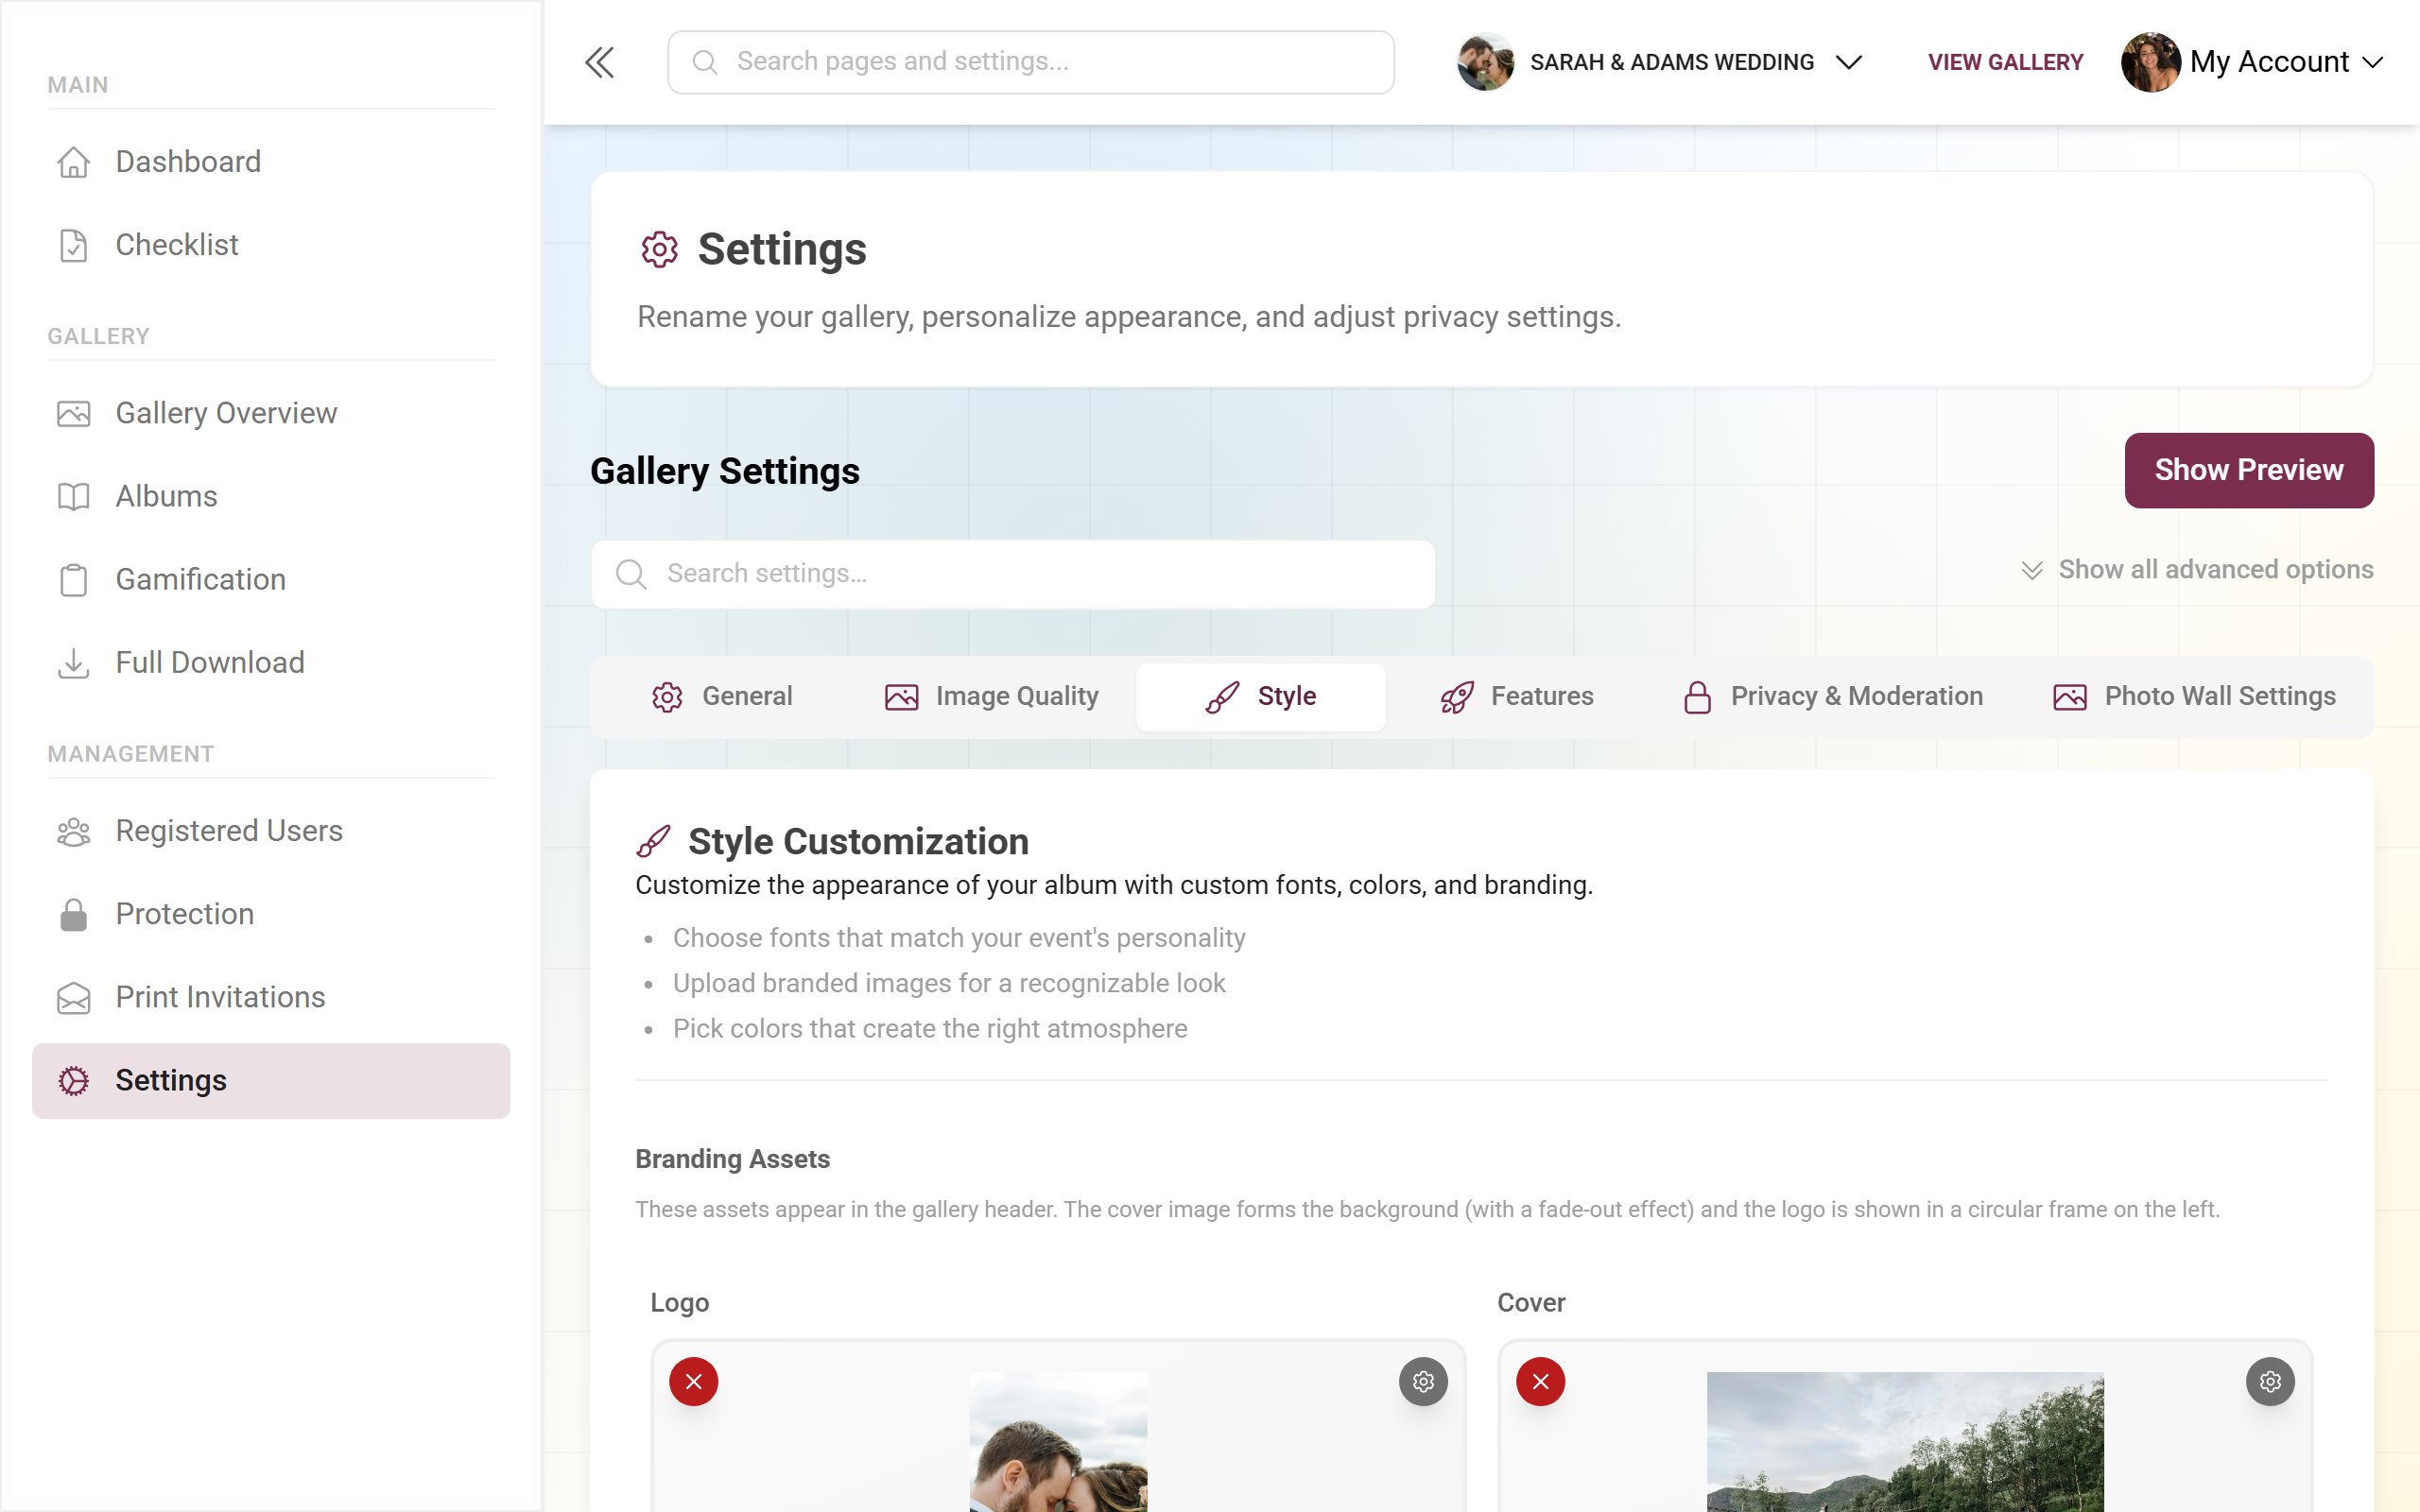
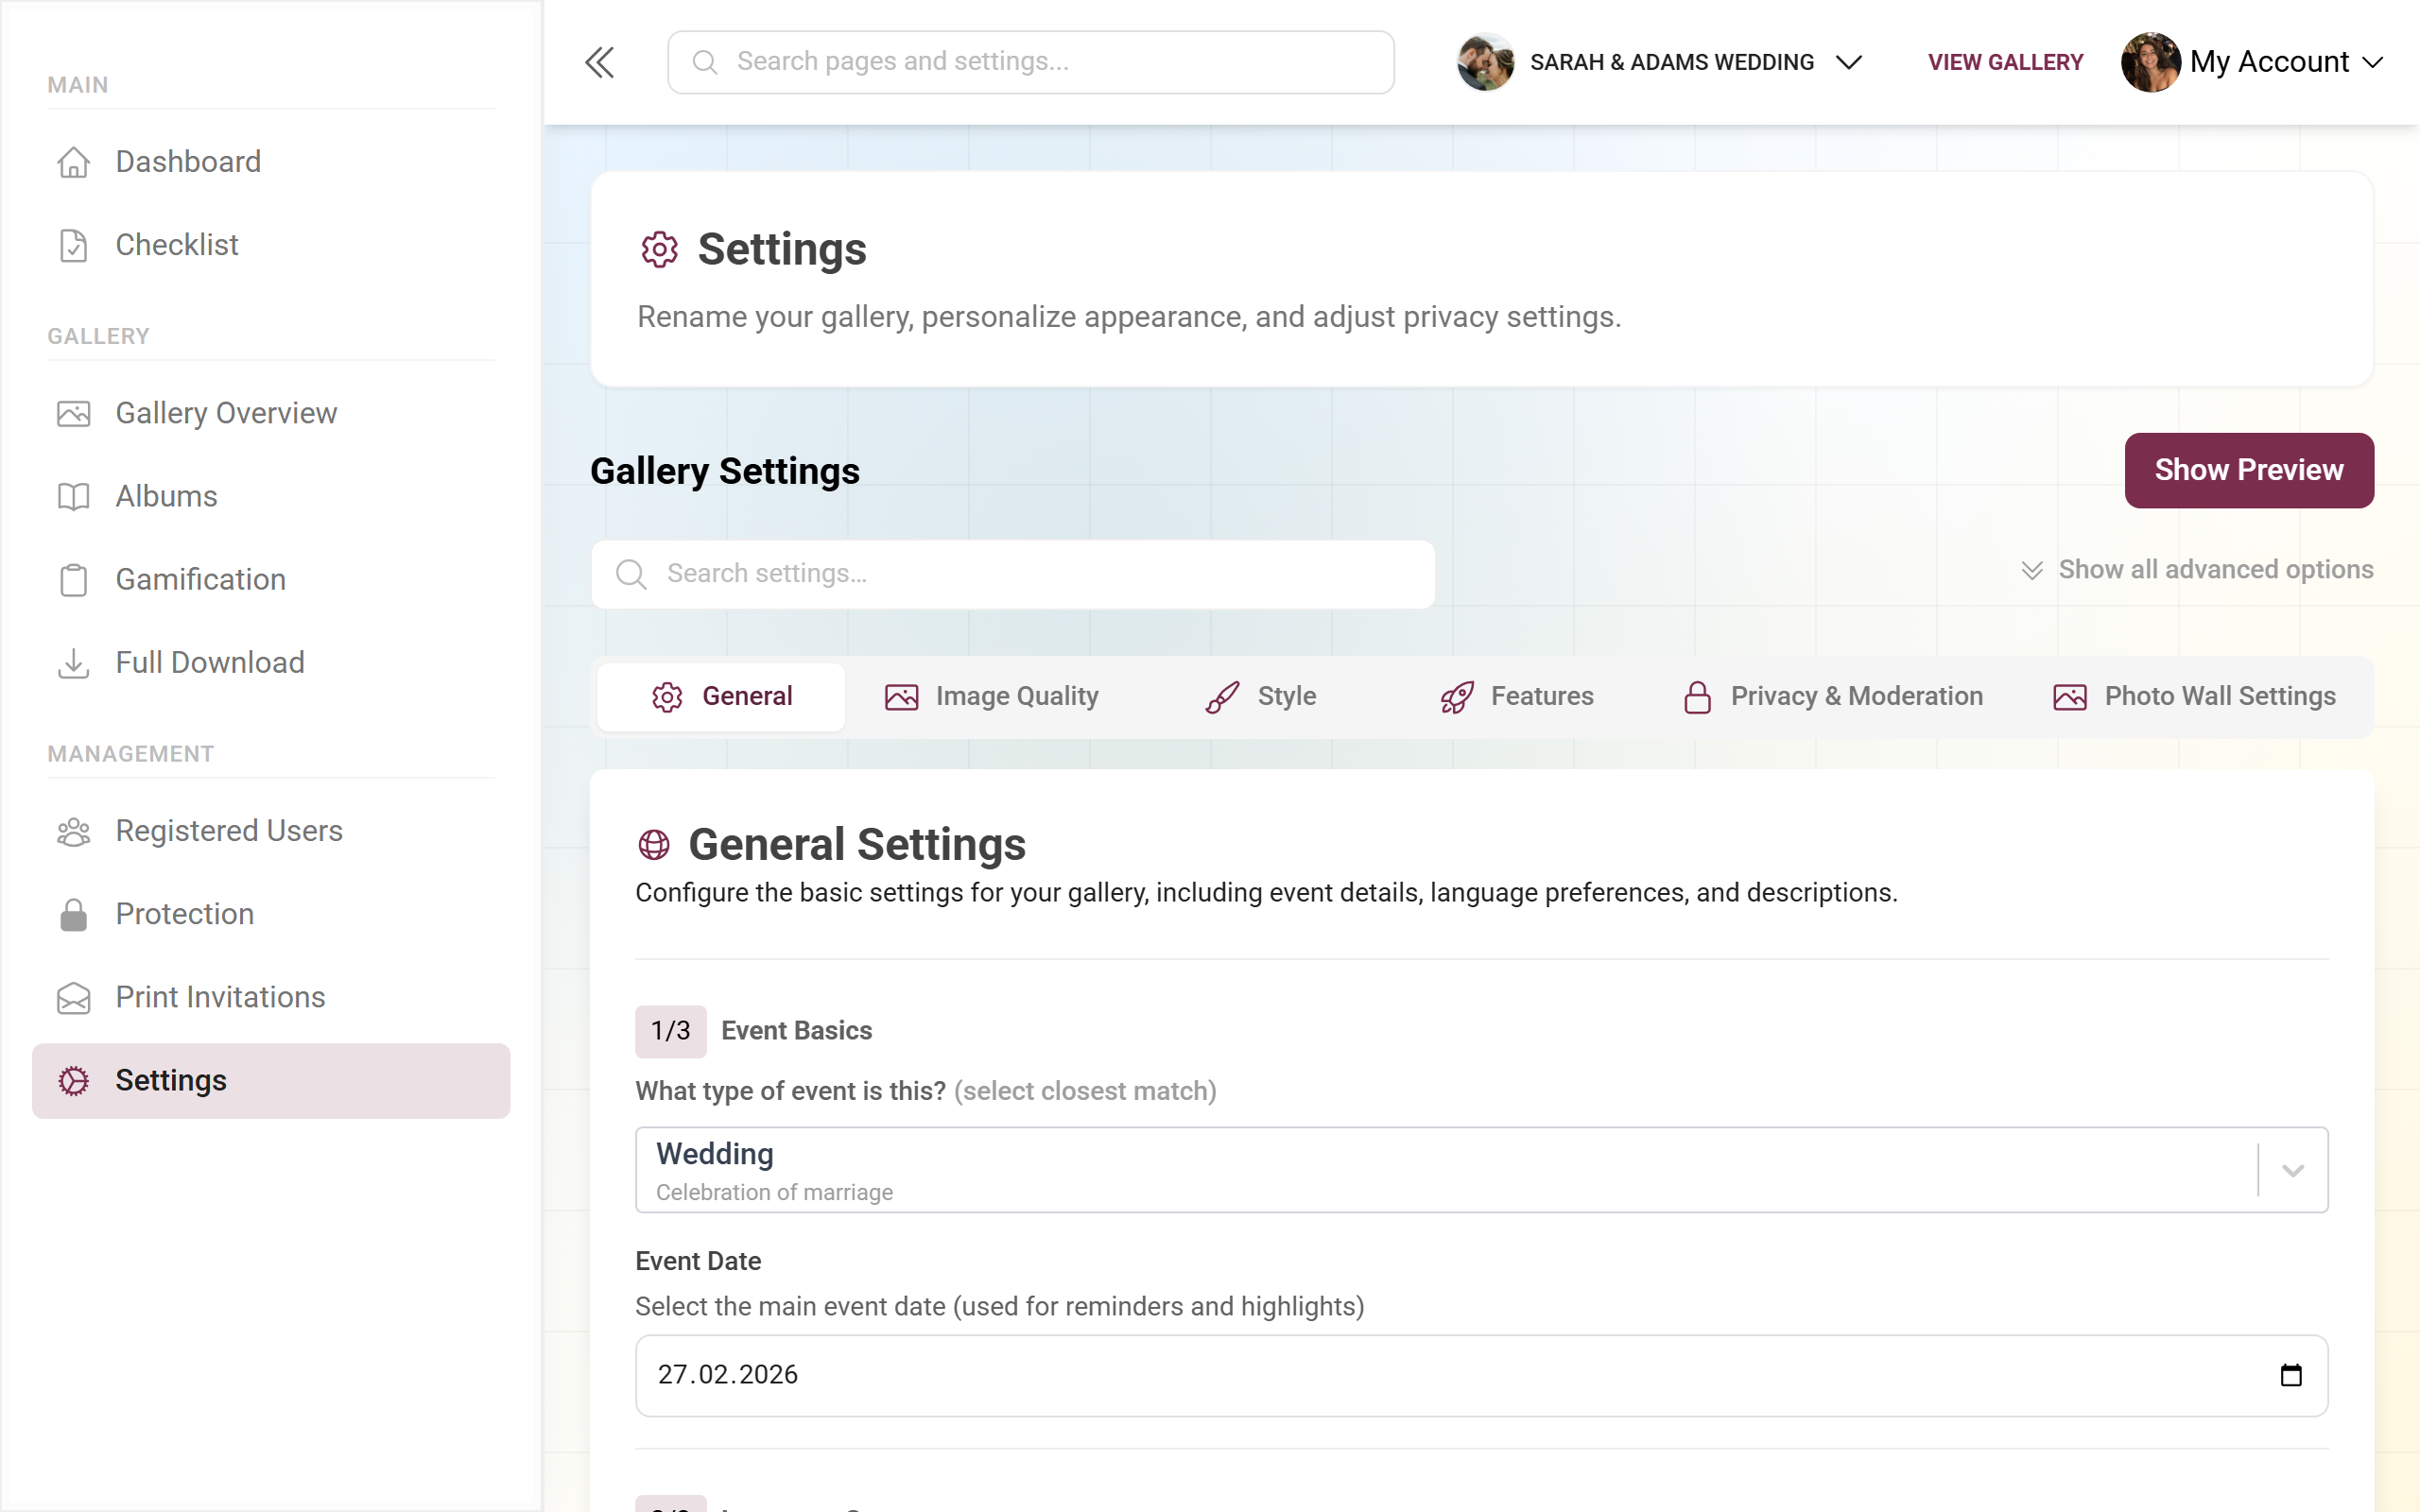
How to reach the admin portal
Section titled “How to reach the admin portal”All of the areas below live in your event’s admin portal.
-
Open your gallery and tap your profile menu in the top right.
-
Under Management choose Admin portal (or go straight to the
/adminroute). -
On the left the sidebar groups everything into categories: Main (Dashboard, Checklist), Gallery (Gallery Overview, Albums, Gamification, Full Download) and Management (Registered Users, Protection, Print Invitations, Settings).
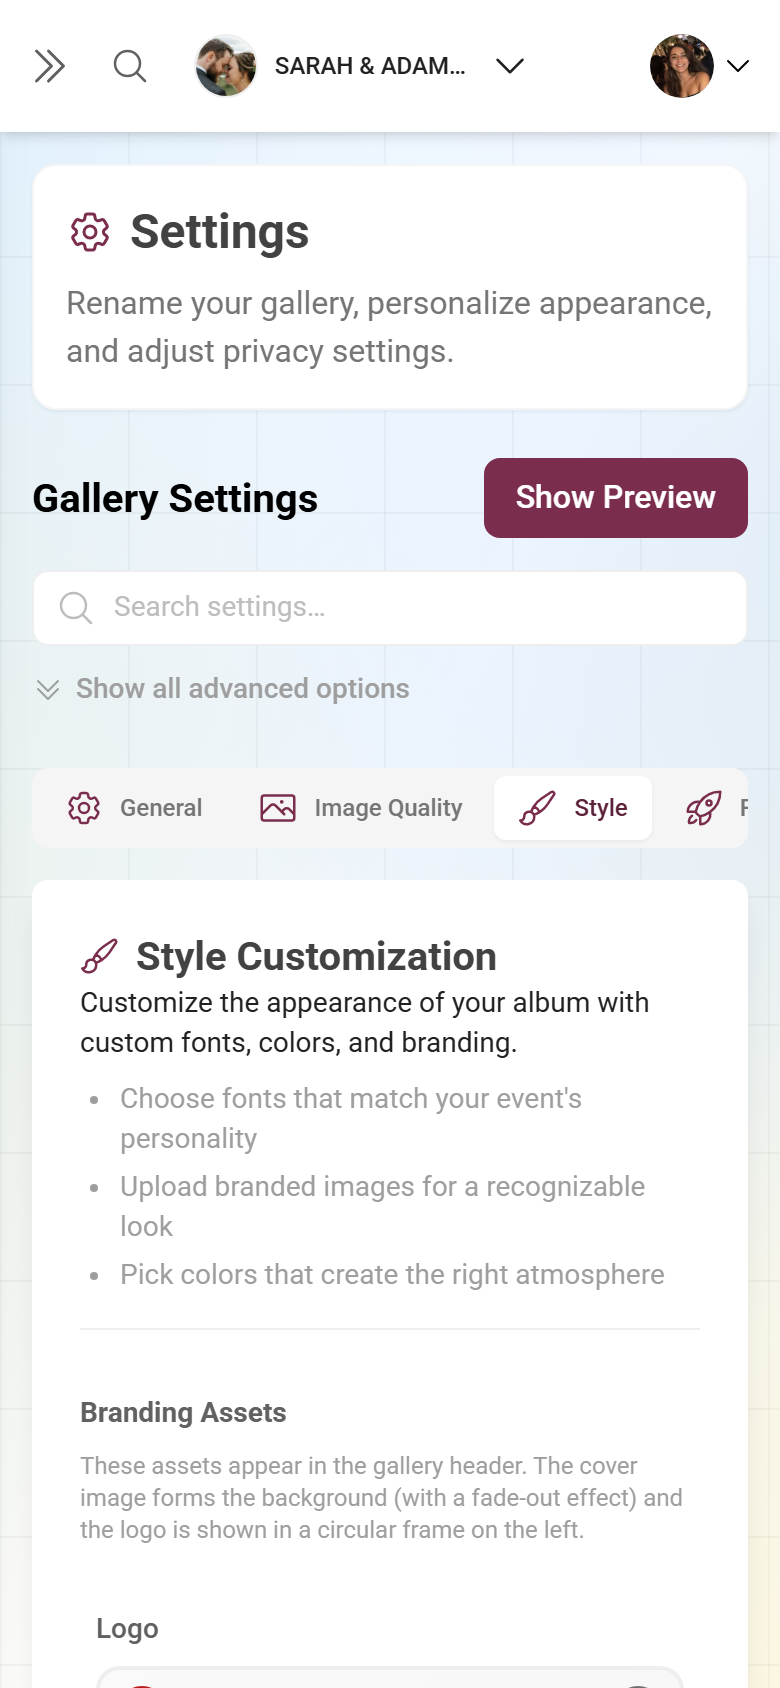
1. Start with an inviting look
Section titled “1. Start with an inviting look”First impressions count. Give your event a fitting cover image, a logo and colors that match the occasion – romantic for a wedding, playful for a birthday.
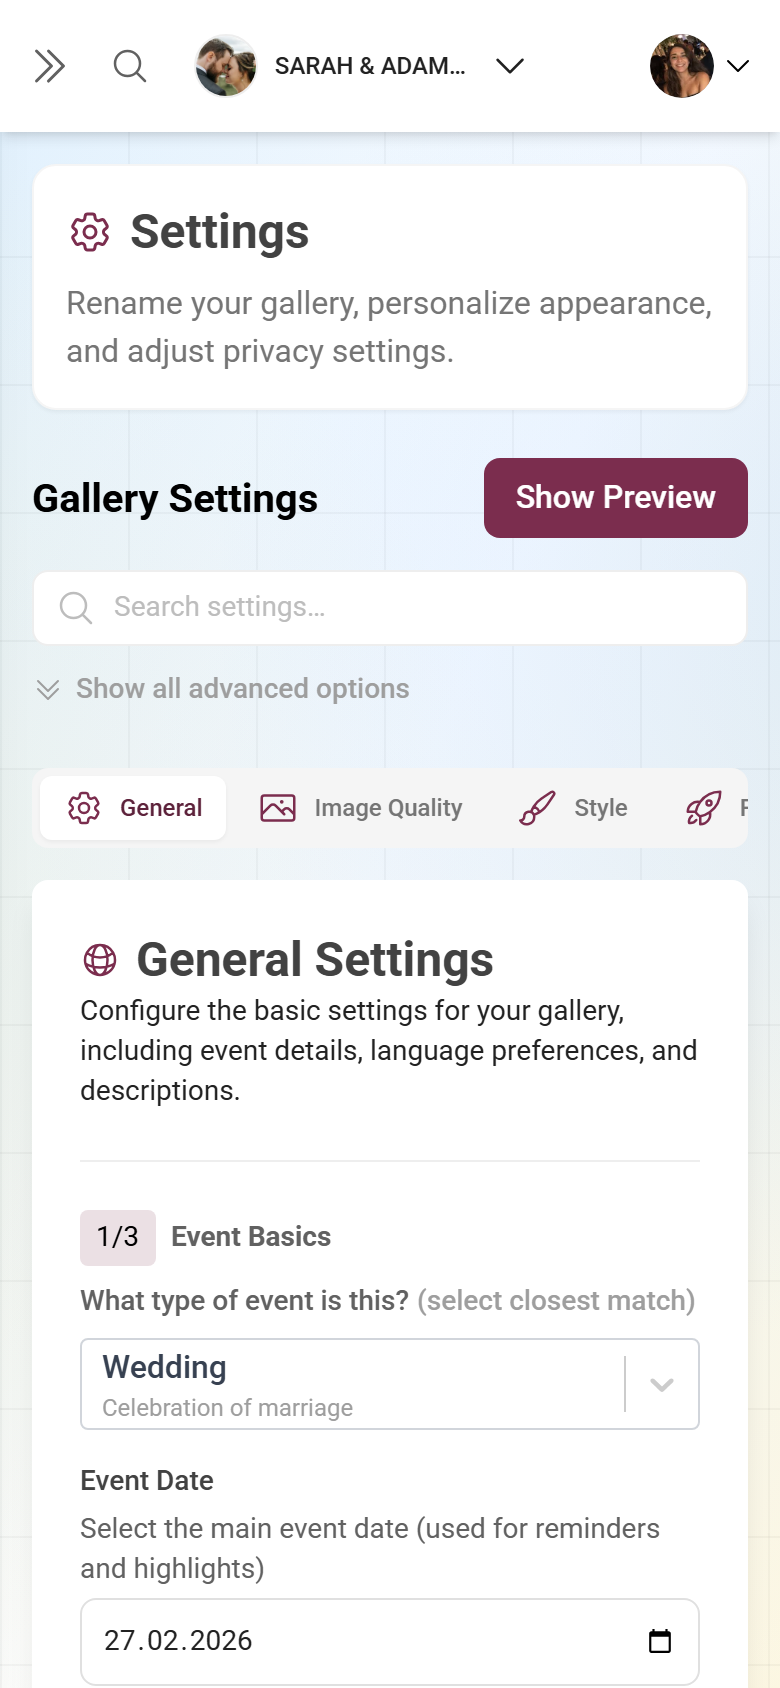
Open Settings and switch to the Style tab. There you’ll find, stacked: Branding assets (upload cover image & logo), Appearance (accent colors – the color picker only appears with the matching plan), Fonts, Header style plus the gallery’s layout, sorting and QR-code settings. Check your look with the Preview button before you save at the bottom with Save Changes. Unsaved changes mark the tab with a red dot; if you navigate away, a dialog warns you.
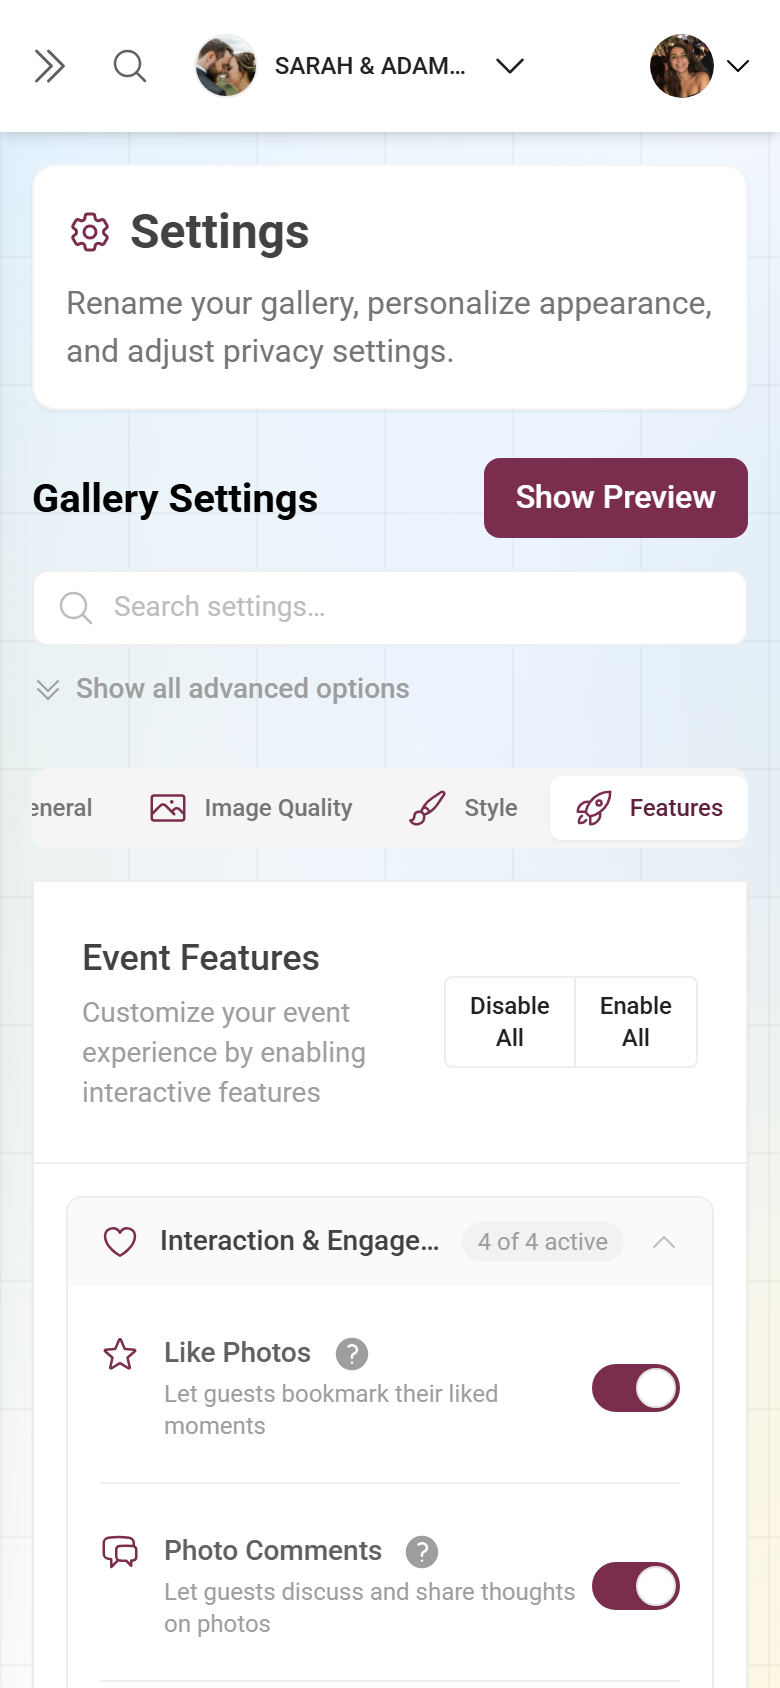
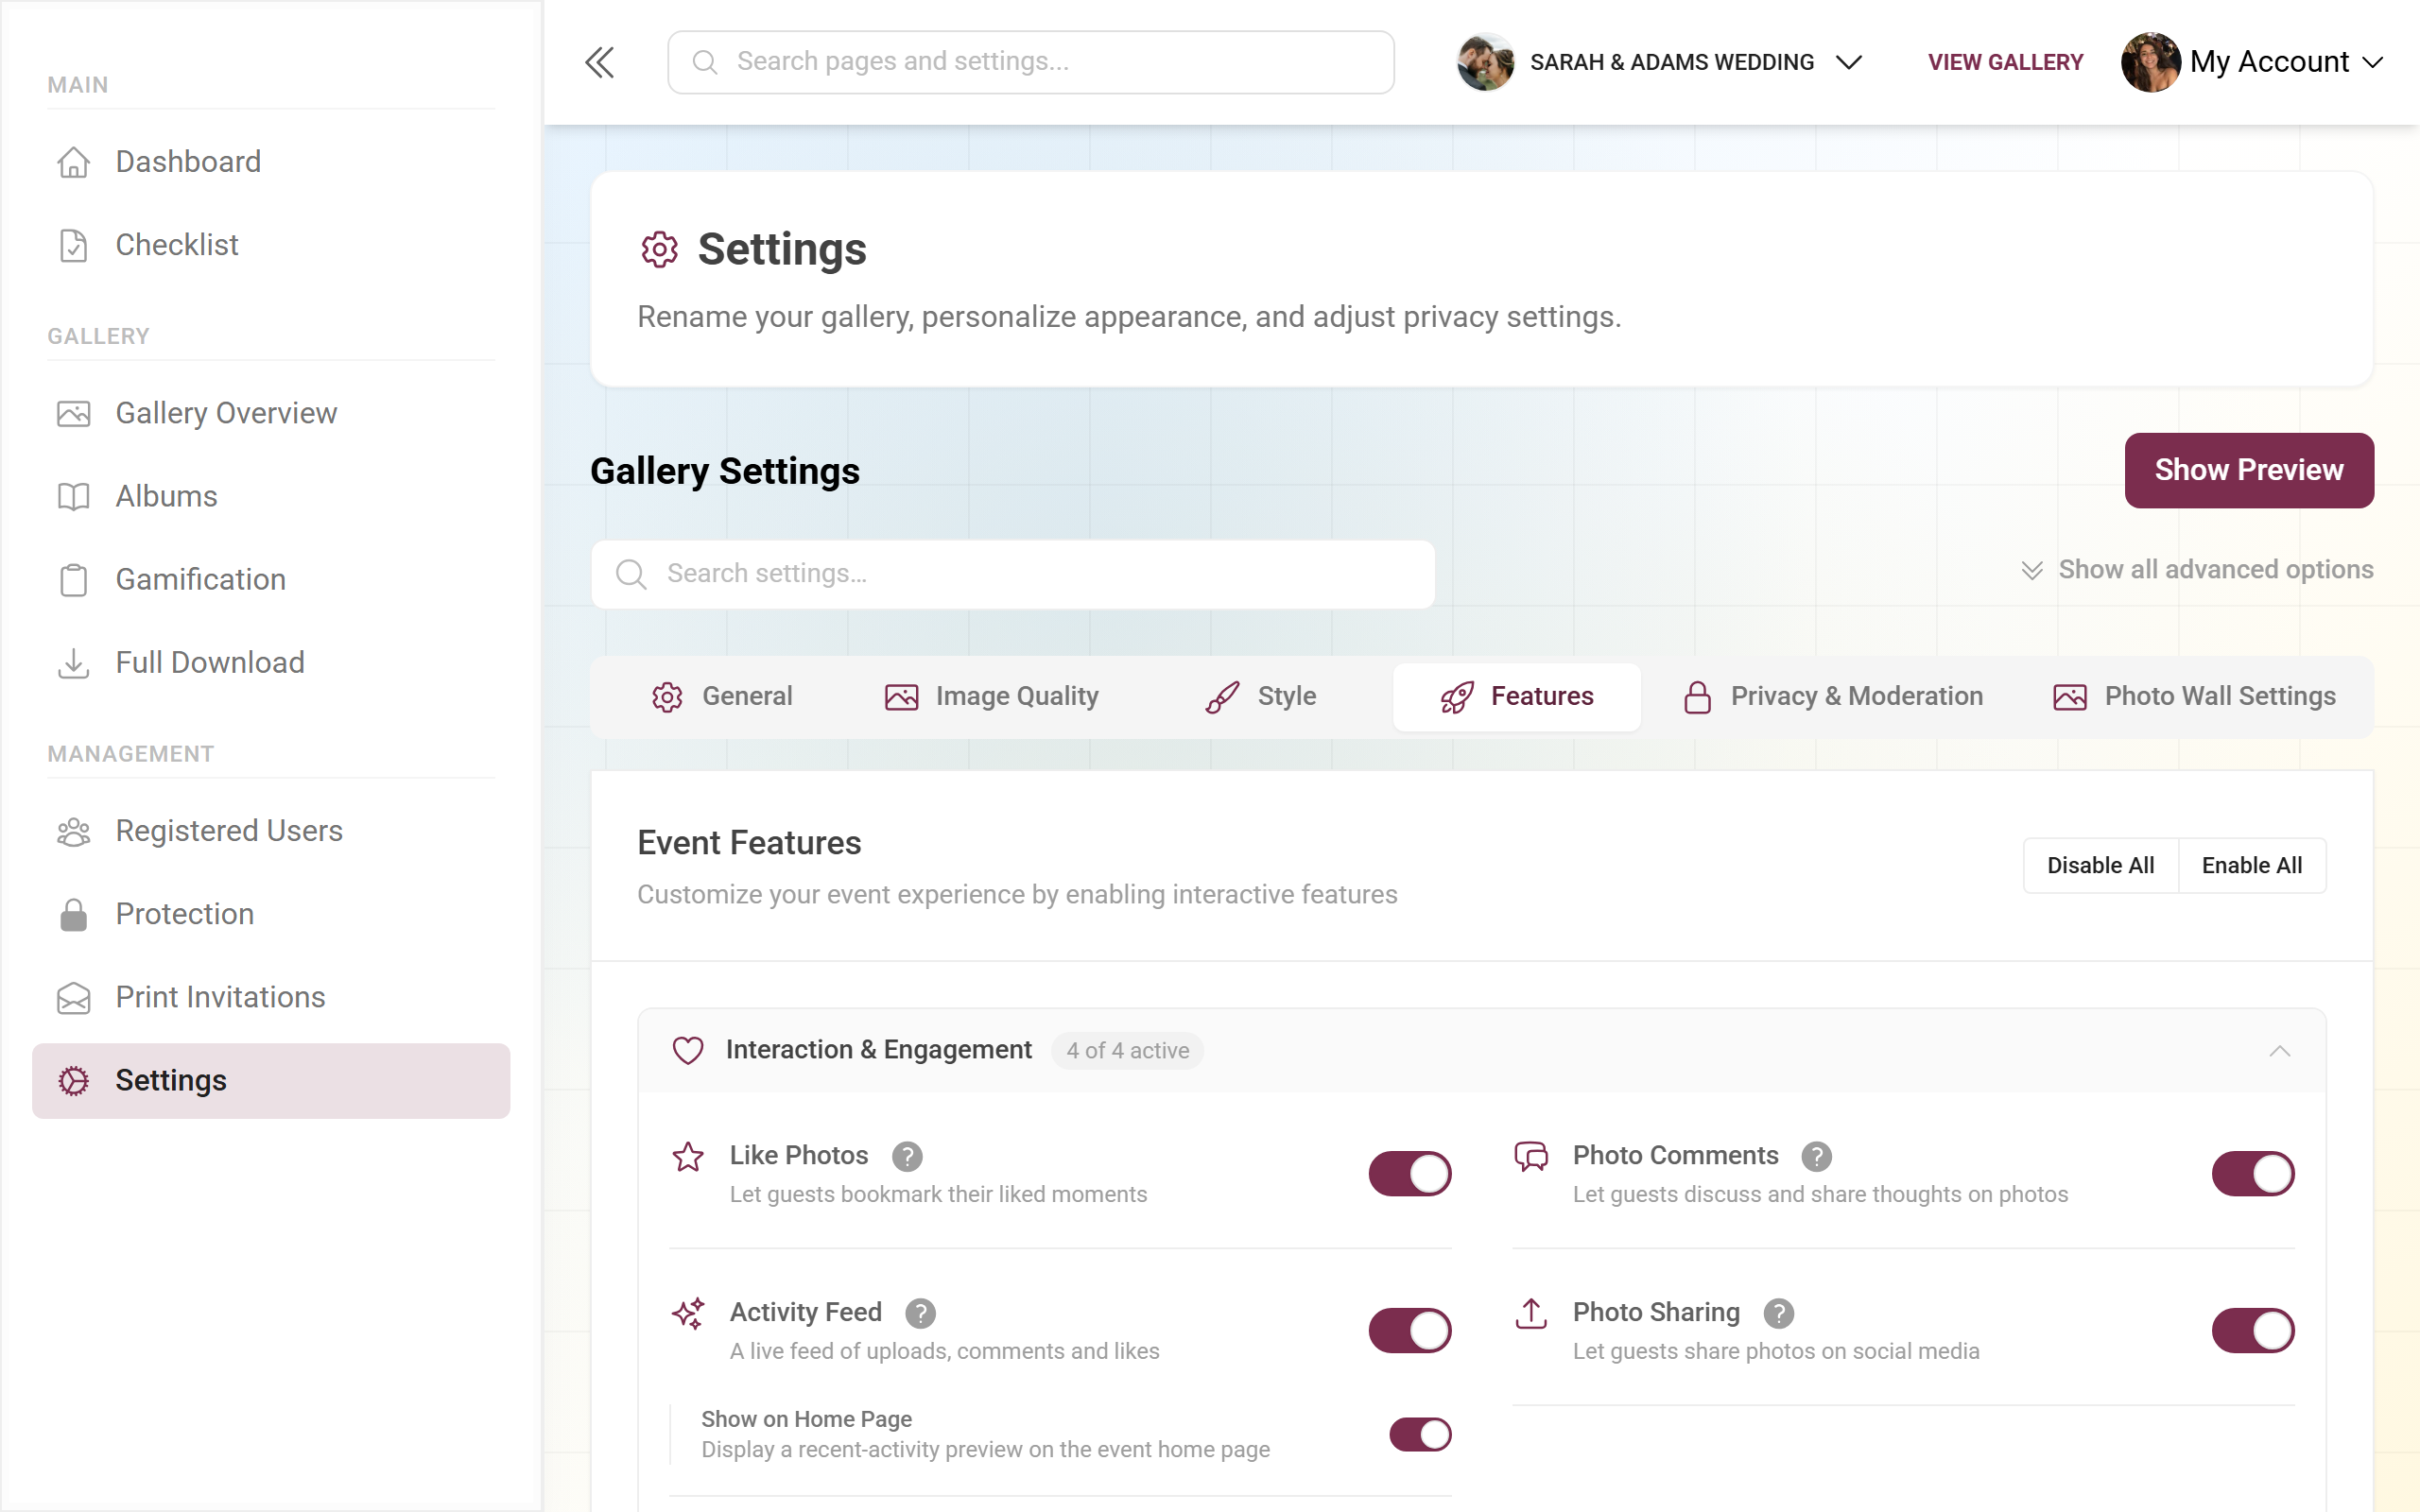
2. Enable the right features
Section titled “2. Enable the right features”Think about what suits your event: likes and comments for interaction, challenges and rewards for fun, the map for travel events, video uploads for moving moments.
Open Settings ▸ Features. The toggles enable, among others, liking, comments, tasks, achievements, points, leaderboard, photo wall, map view, sharing, single and bulk download, video upload and the activity feed – plus sub-toggles such as “show challenge progress in the gallery”. Only turn on what you really want – too many features quickly feel cluttered.
3. Add energy with challenges & rewards
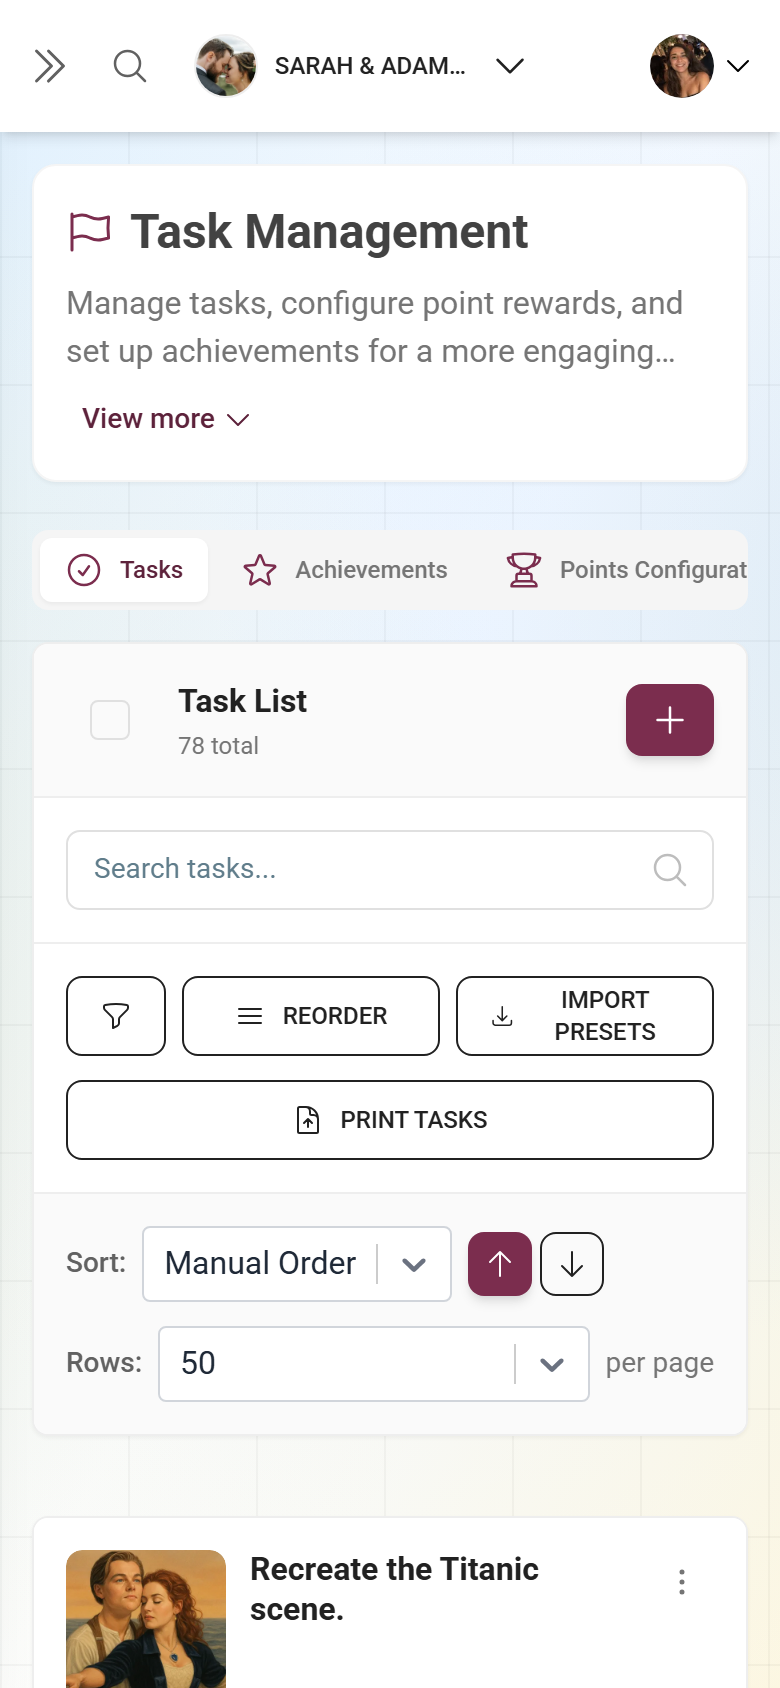
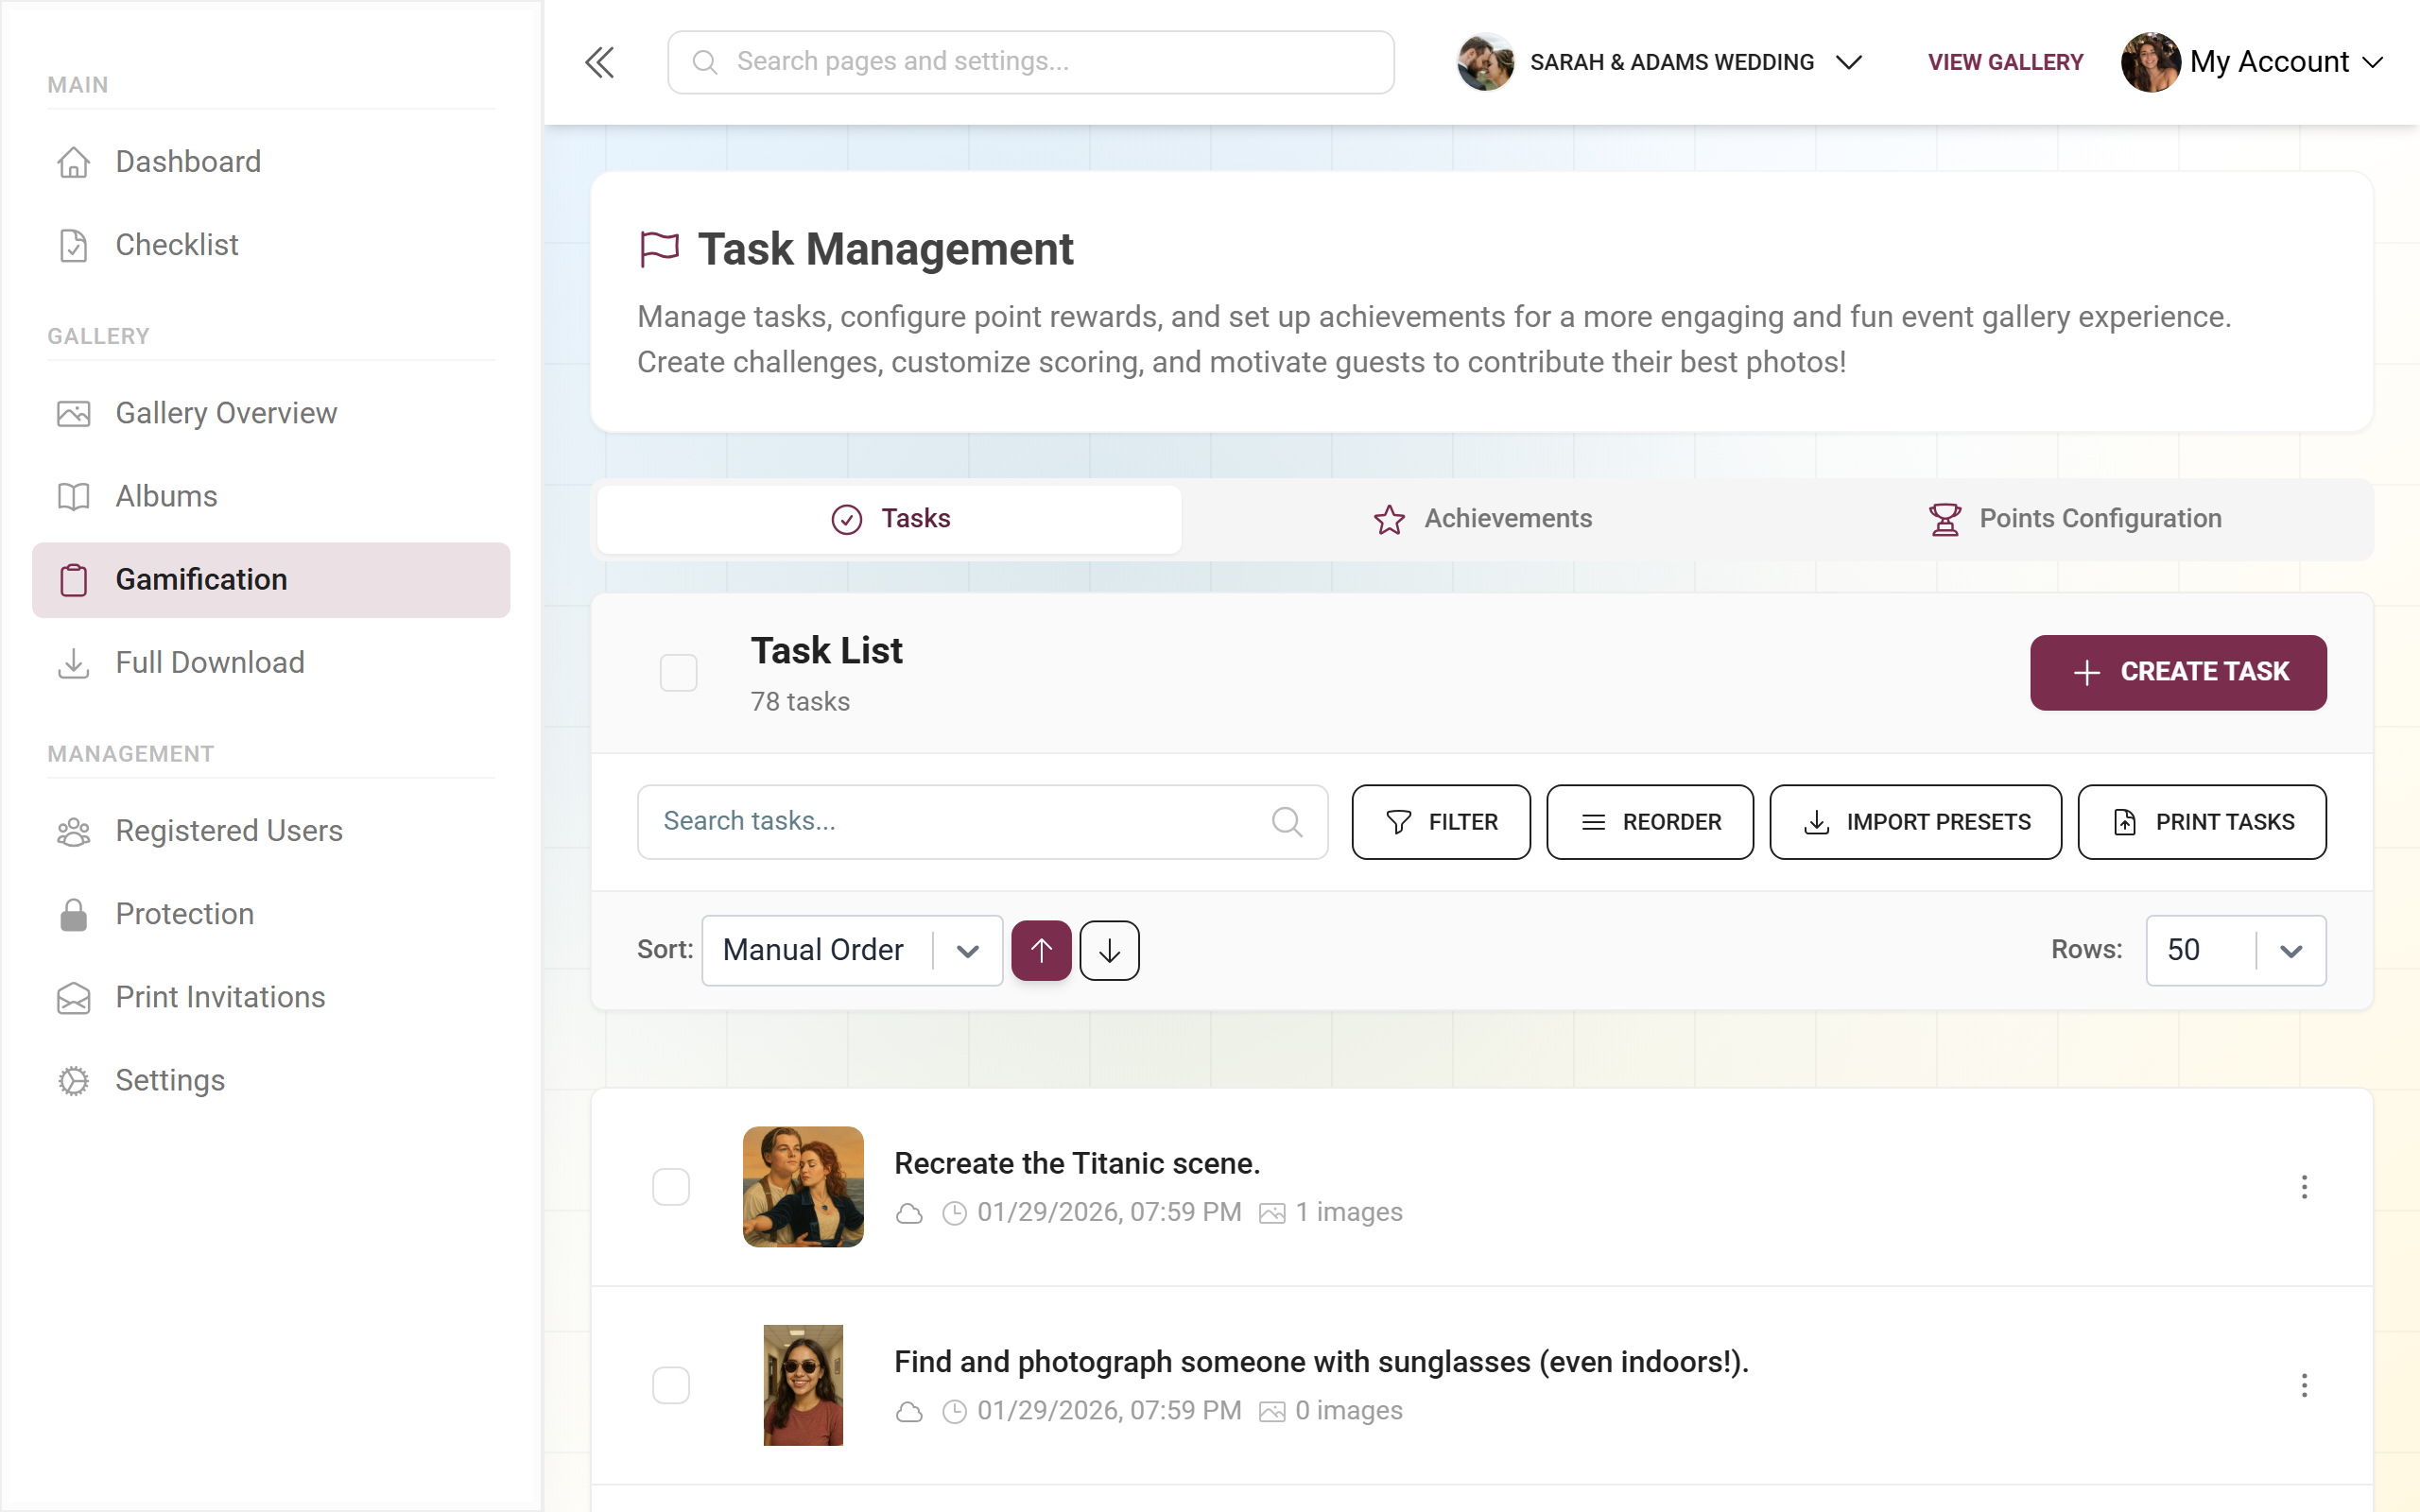
Section titled “3. Add energy with challenges & rewards”The gamification area is the strongest lever for more photos. Reach it via the sidebar Gallery ▸ Gamification (/admin/gallery/tasks-manager). At the top you’ll find three tabs: Tasks (your challenges), Achievements (badges) and Points Configuration. Every tab is always visible; if the feature isn’t in your plan, it shows a premium overlay.
3a. Create a challenge
Section titled “3a. Create a challenge”-
In the Tasks tab click New Task in the top right (mobile: “New”).
-
The Add Task dialog opens with its own inner tabs. In the General tab, describe the challenge in the Task field (e.g. “The best smile of the night”). For multilingual events pick the language at the top.
-
Optionally upload an image under Task Image or choose a template.
-
Under Auto-assign to Albums you decide that photos for this challenge automatically land in certain albums. If no suitable album exists yet, the dialog offers to create one with the task’s name in a single click.
-
Use Sort photos by and Order to set the default sorting of the task gallery (event default, upload date, capture date, likes, comments; newest/oldest first).
-
In the Points tab you grant initial and repeat points (only with the points feature active). In the Conditions tab you set availability conditions, toggling between Basic (time windows, dependencies on other tasks/albums) and Advanced (Max Points, Min Achievements and more – plan-dependent).
-
Save with Add (or Save when editing).
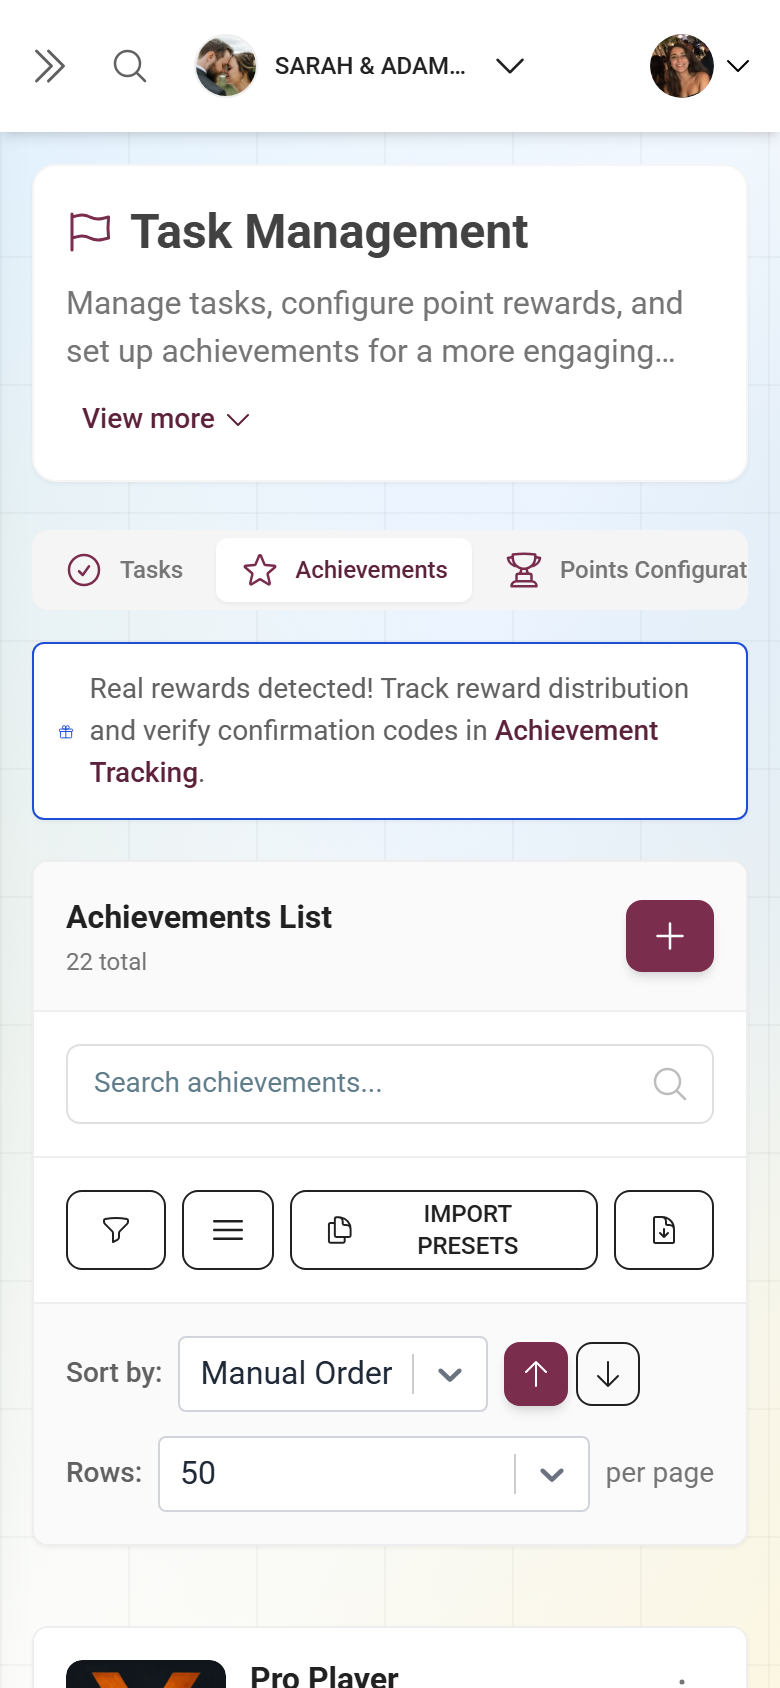
3b. Create an achievement
Section titled “3b. Create an achievement”-
In the gamification area switch to the Achievements tab and click New Achievement.
-
In the Create New Achievement dialog fill in Basic Information: Name and Description are required (multilingual). If one is missing, a red warning appears.
-
Under Visual Identity give the achievement an image or badge.
-
Under Reward Type you optionally enable a real reward (e.g. a free drink): with Inventory (quantity) and a Reward Description. This section is plan-dependent.
-
Under Unlock Conditions you define how the achievement unlocks. If you leave the conditions empty, the dialog warns you: you’ll then have to grant the achievement manually in Registered Users.
-
Save with Create Achievement.
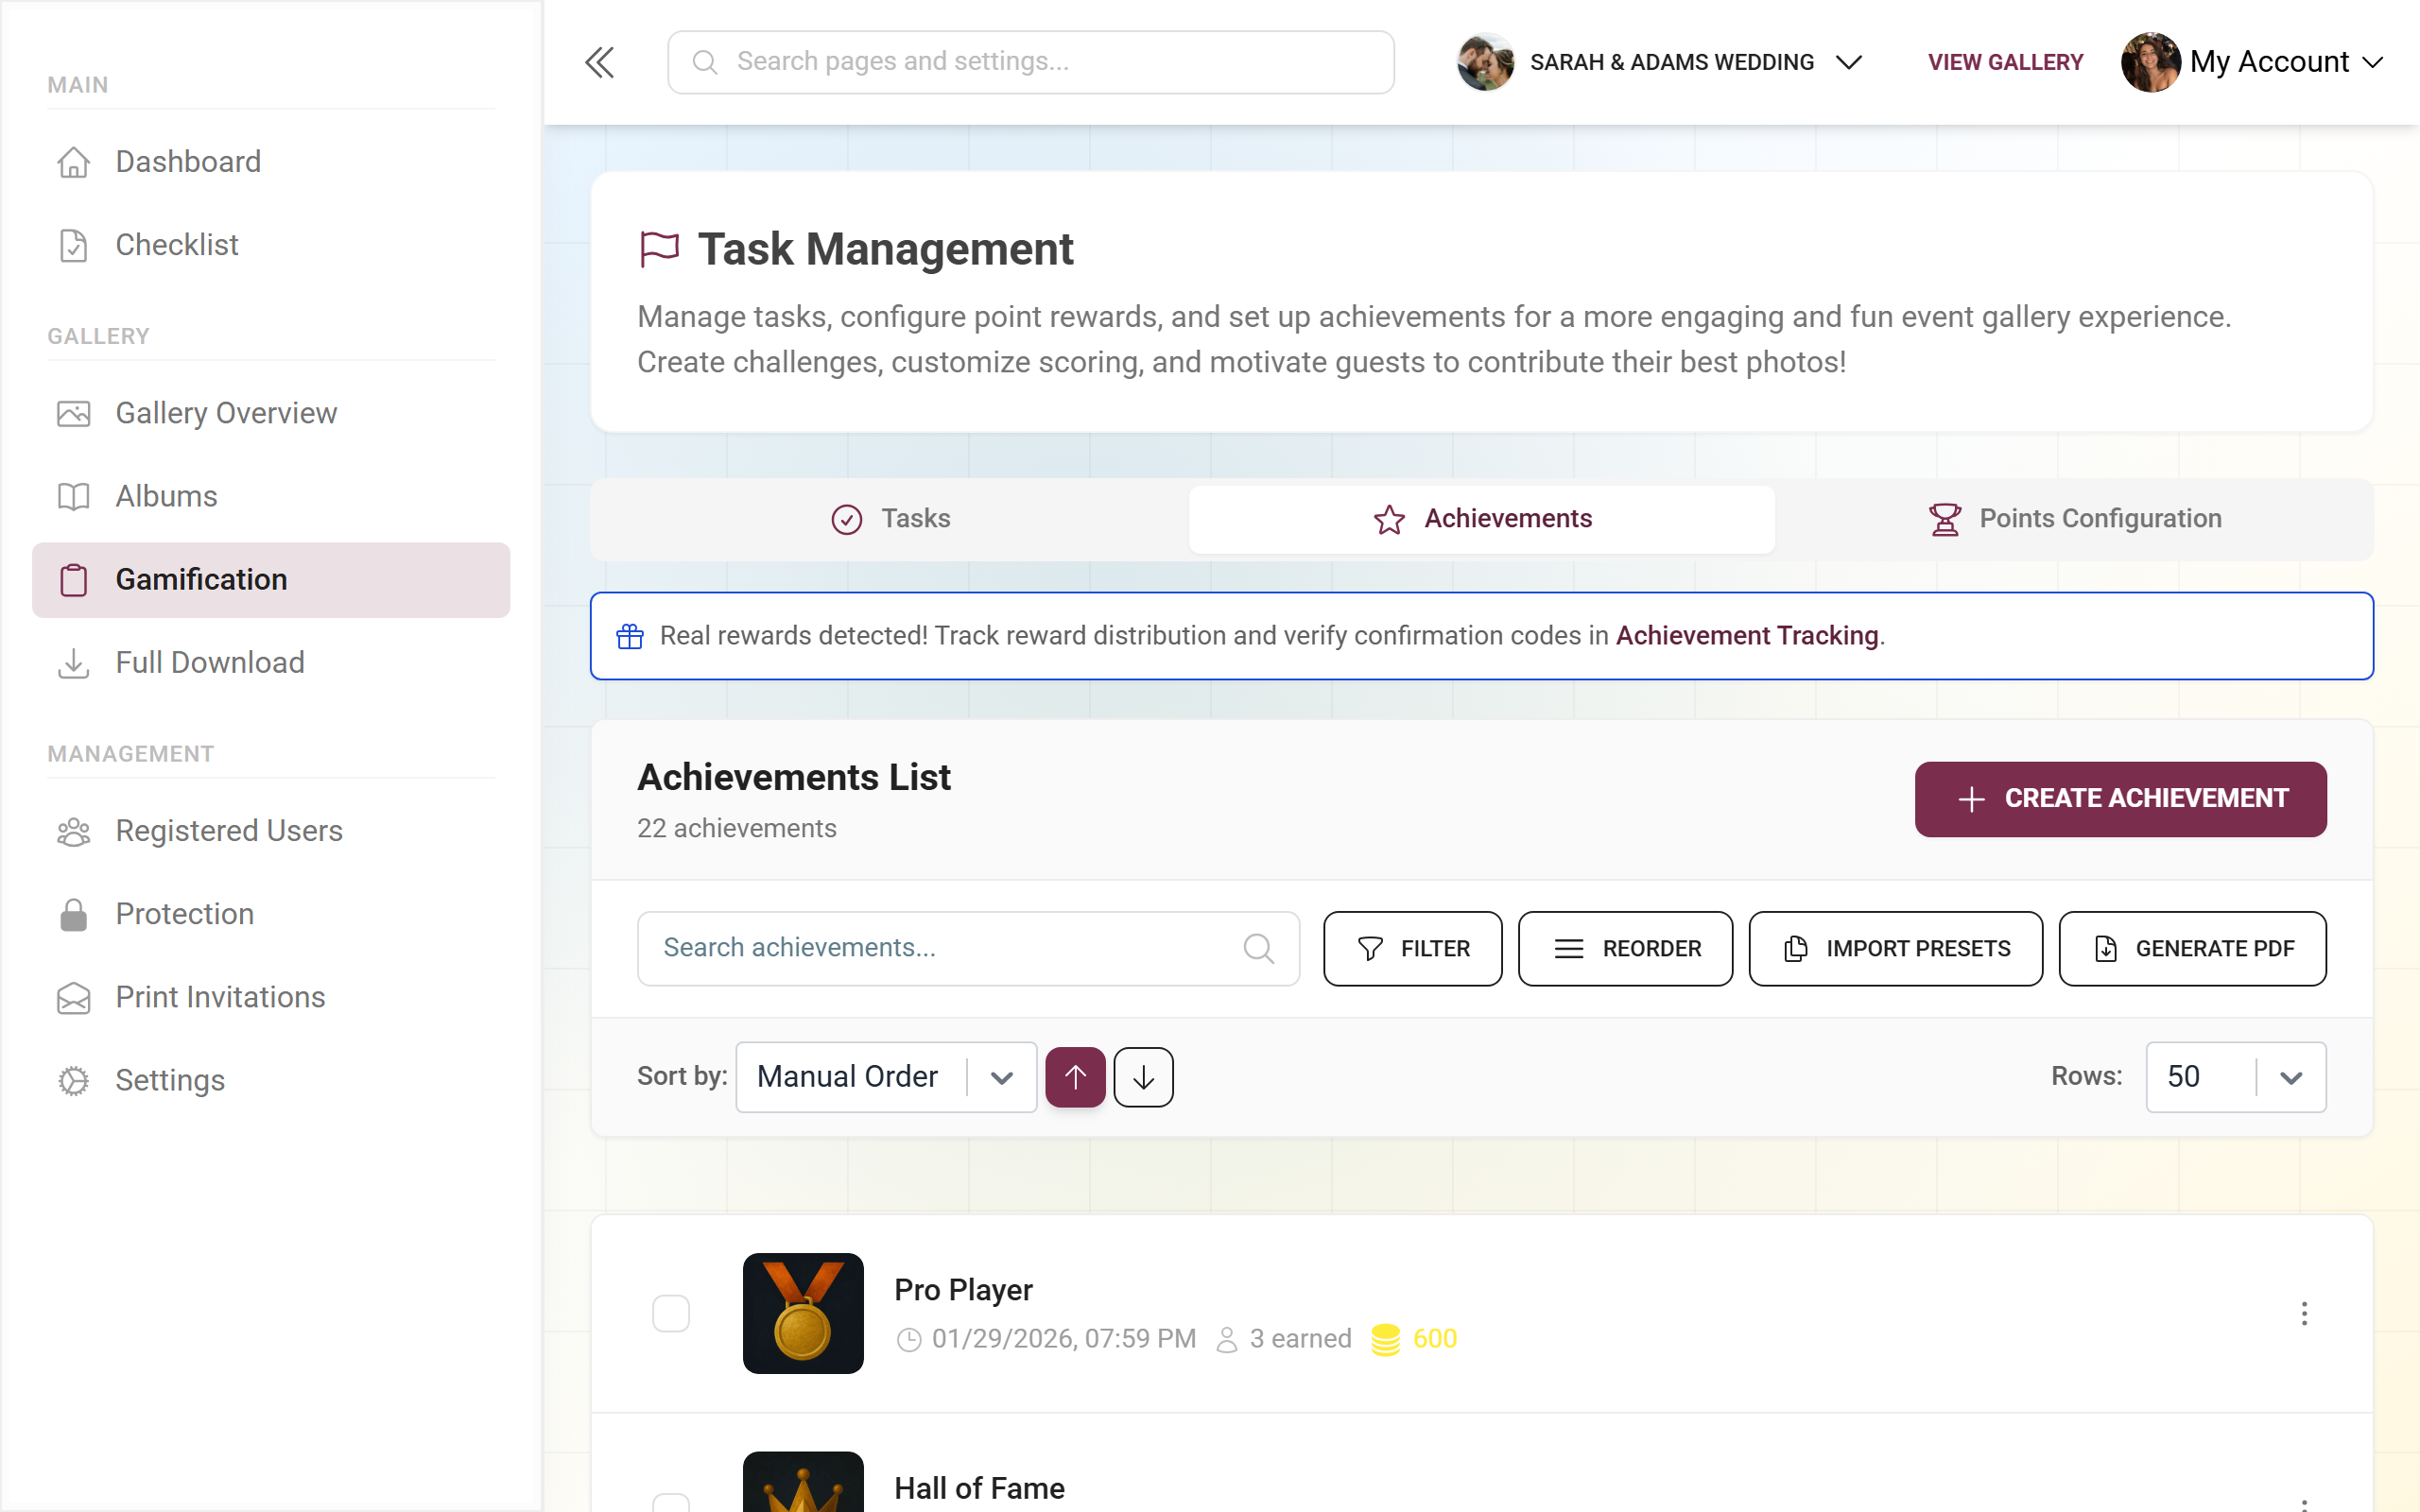
3c. Configure points
Section titled “3c. Configure points”In the Points Configuration tab you set up the points system. Best practice: start low and tie points to challenges and achievements – a lively leaderboard is hugely motivating.
You hand out real rewards later via reward tracking using a code, and keep an eye on the inventory there.
→ Challenges · Achievements & rewards · Redeeming rewards
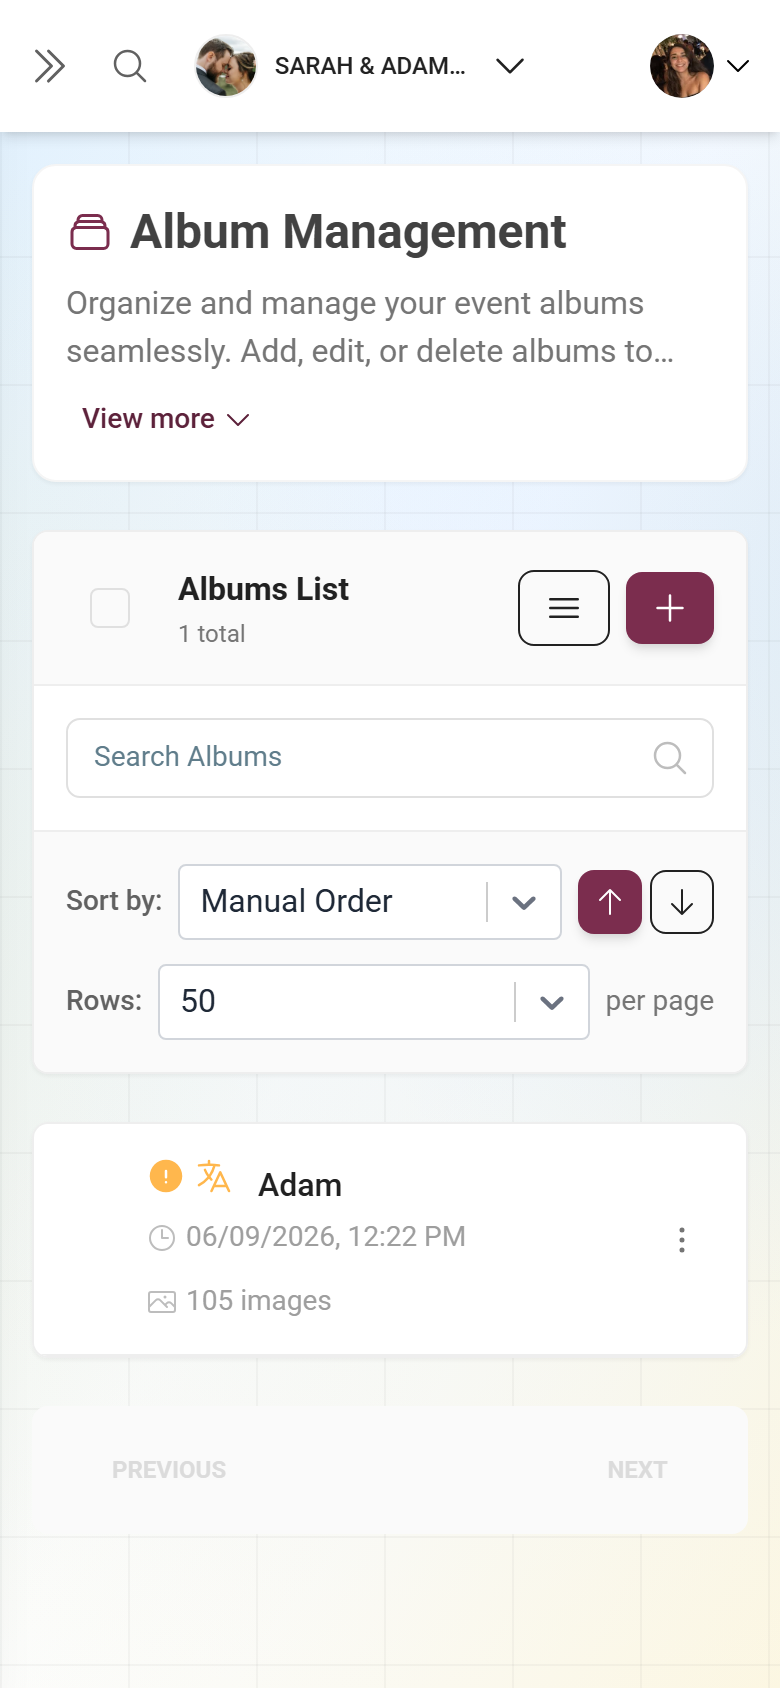
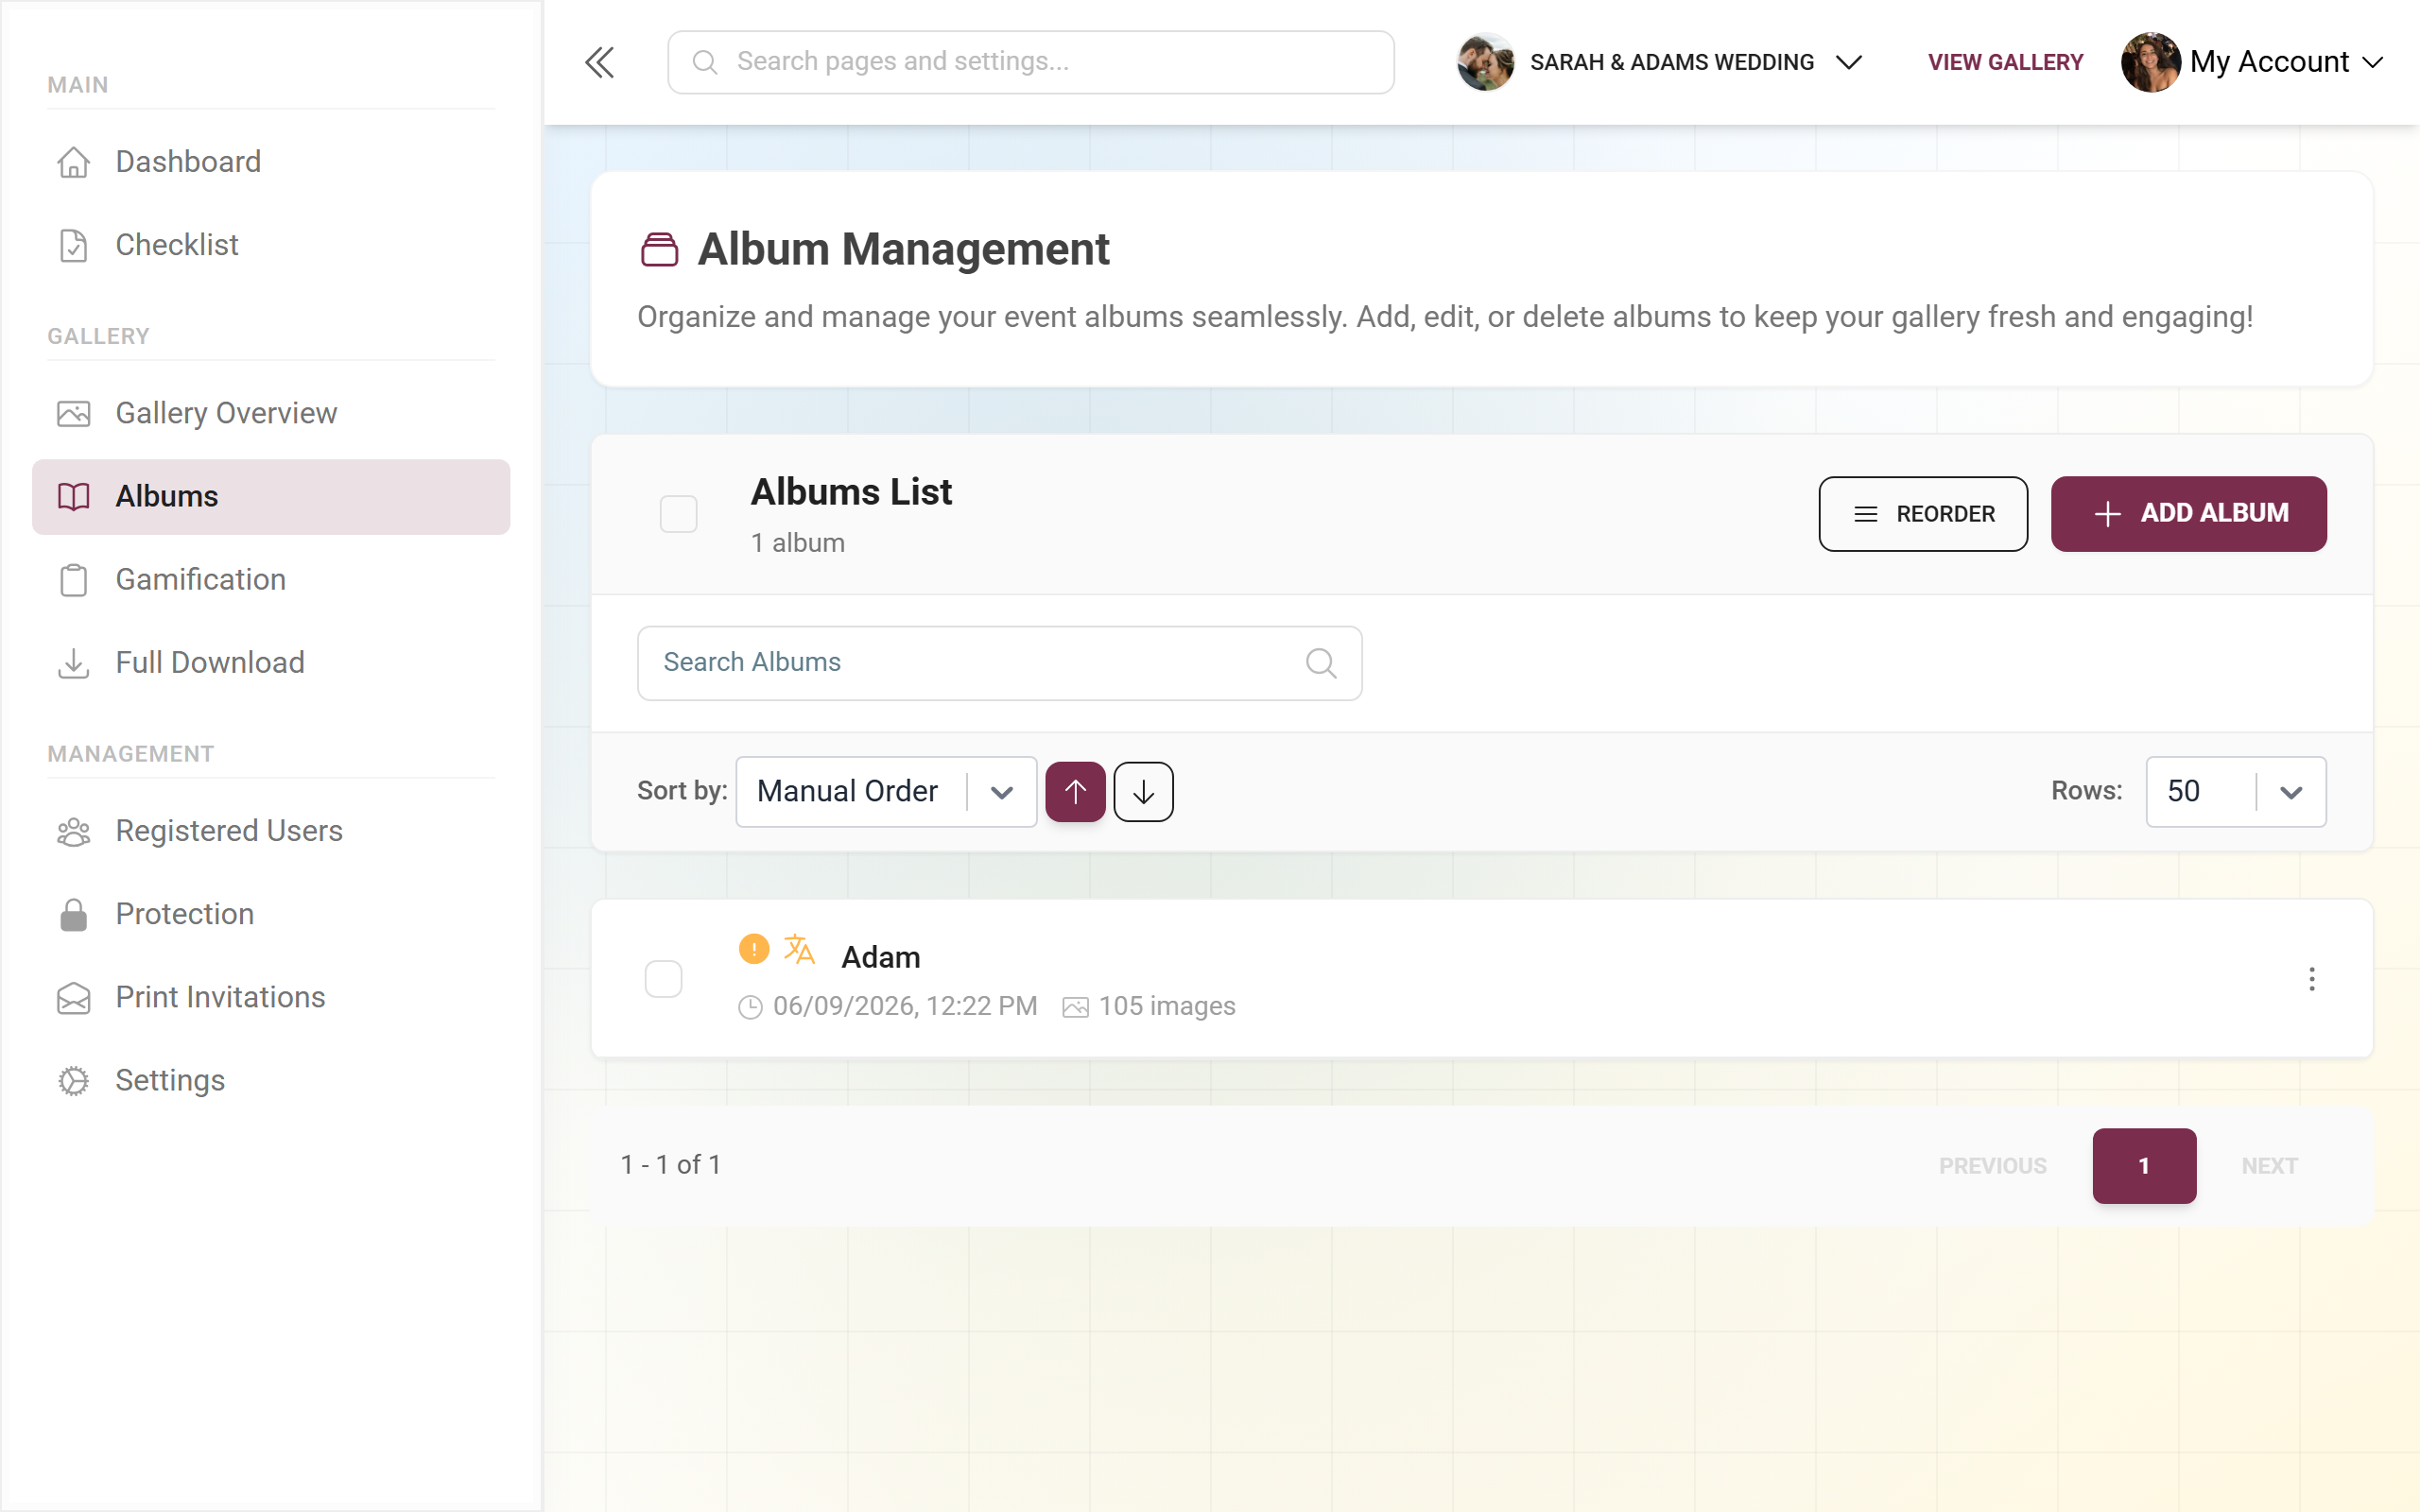
3.5 Use albums to organize
Section titled “3.5 Use albums to organize”Albums keep the gallery tidy. Via the sidebar Gallery ▸ Albums (/admin/gallery/album-manager) click New Album. In the Add Album dialog you choose:
- Album type – Manual (you sort yourself) or Smart (photos land automatically by rules; plan-dependent).
- Title (required) and optionally a Description, multilingual.
- For smart albums, a rules builder with criteria (including “Person”/faces) and an AND/OR combiner.
- Sort photos by / Order just like in the task dialog.
- Cover – automatic, uploaded or (for existing albums) chosen from the gallery; applied only when you save.
Save with Save.
4. Place QR codes where guests gather
Section titled “4. Place QR codes where guests gather”Access has to be easy to find. Print your QR codes and put them where guests are anyway:
- on the tables
- at the bar
- next to the buffet
- at the entrance to welcome people
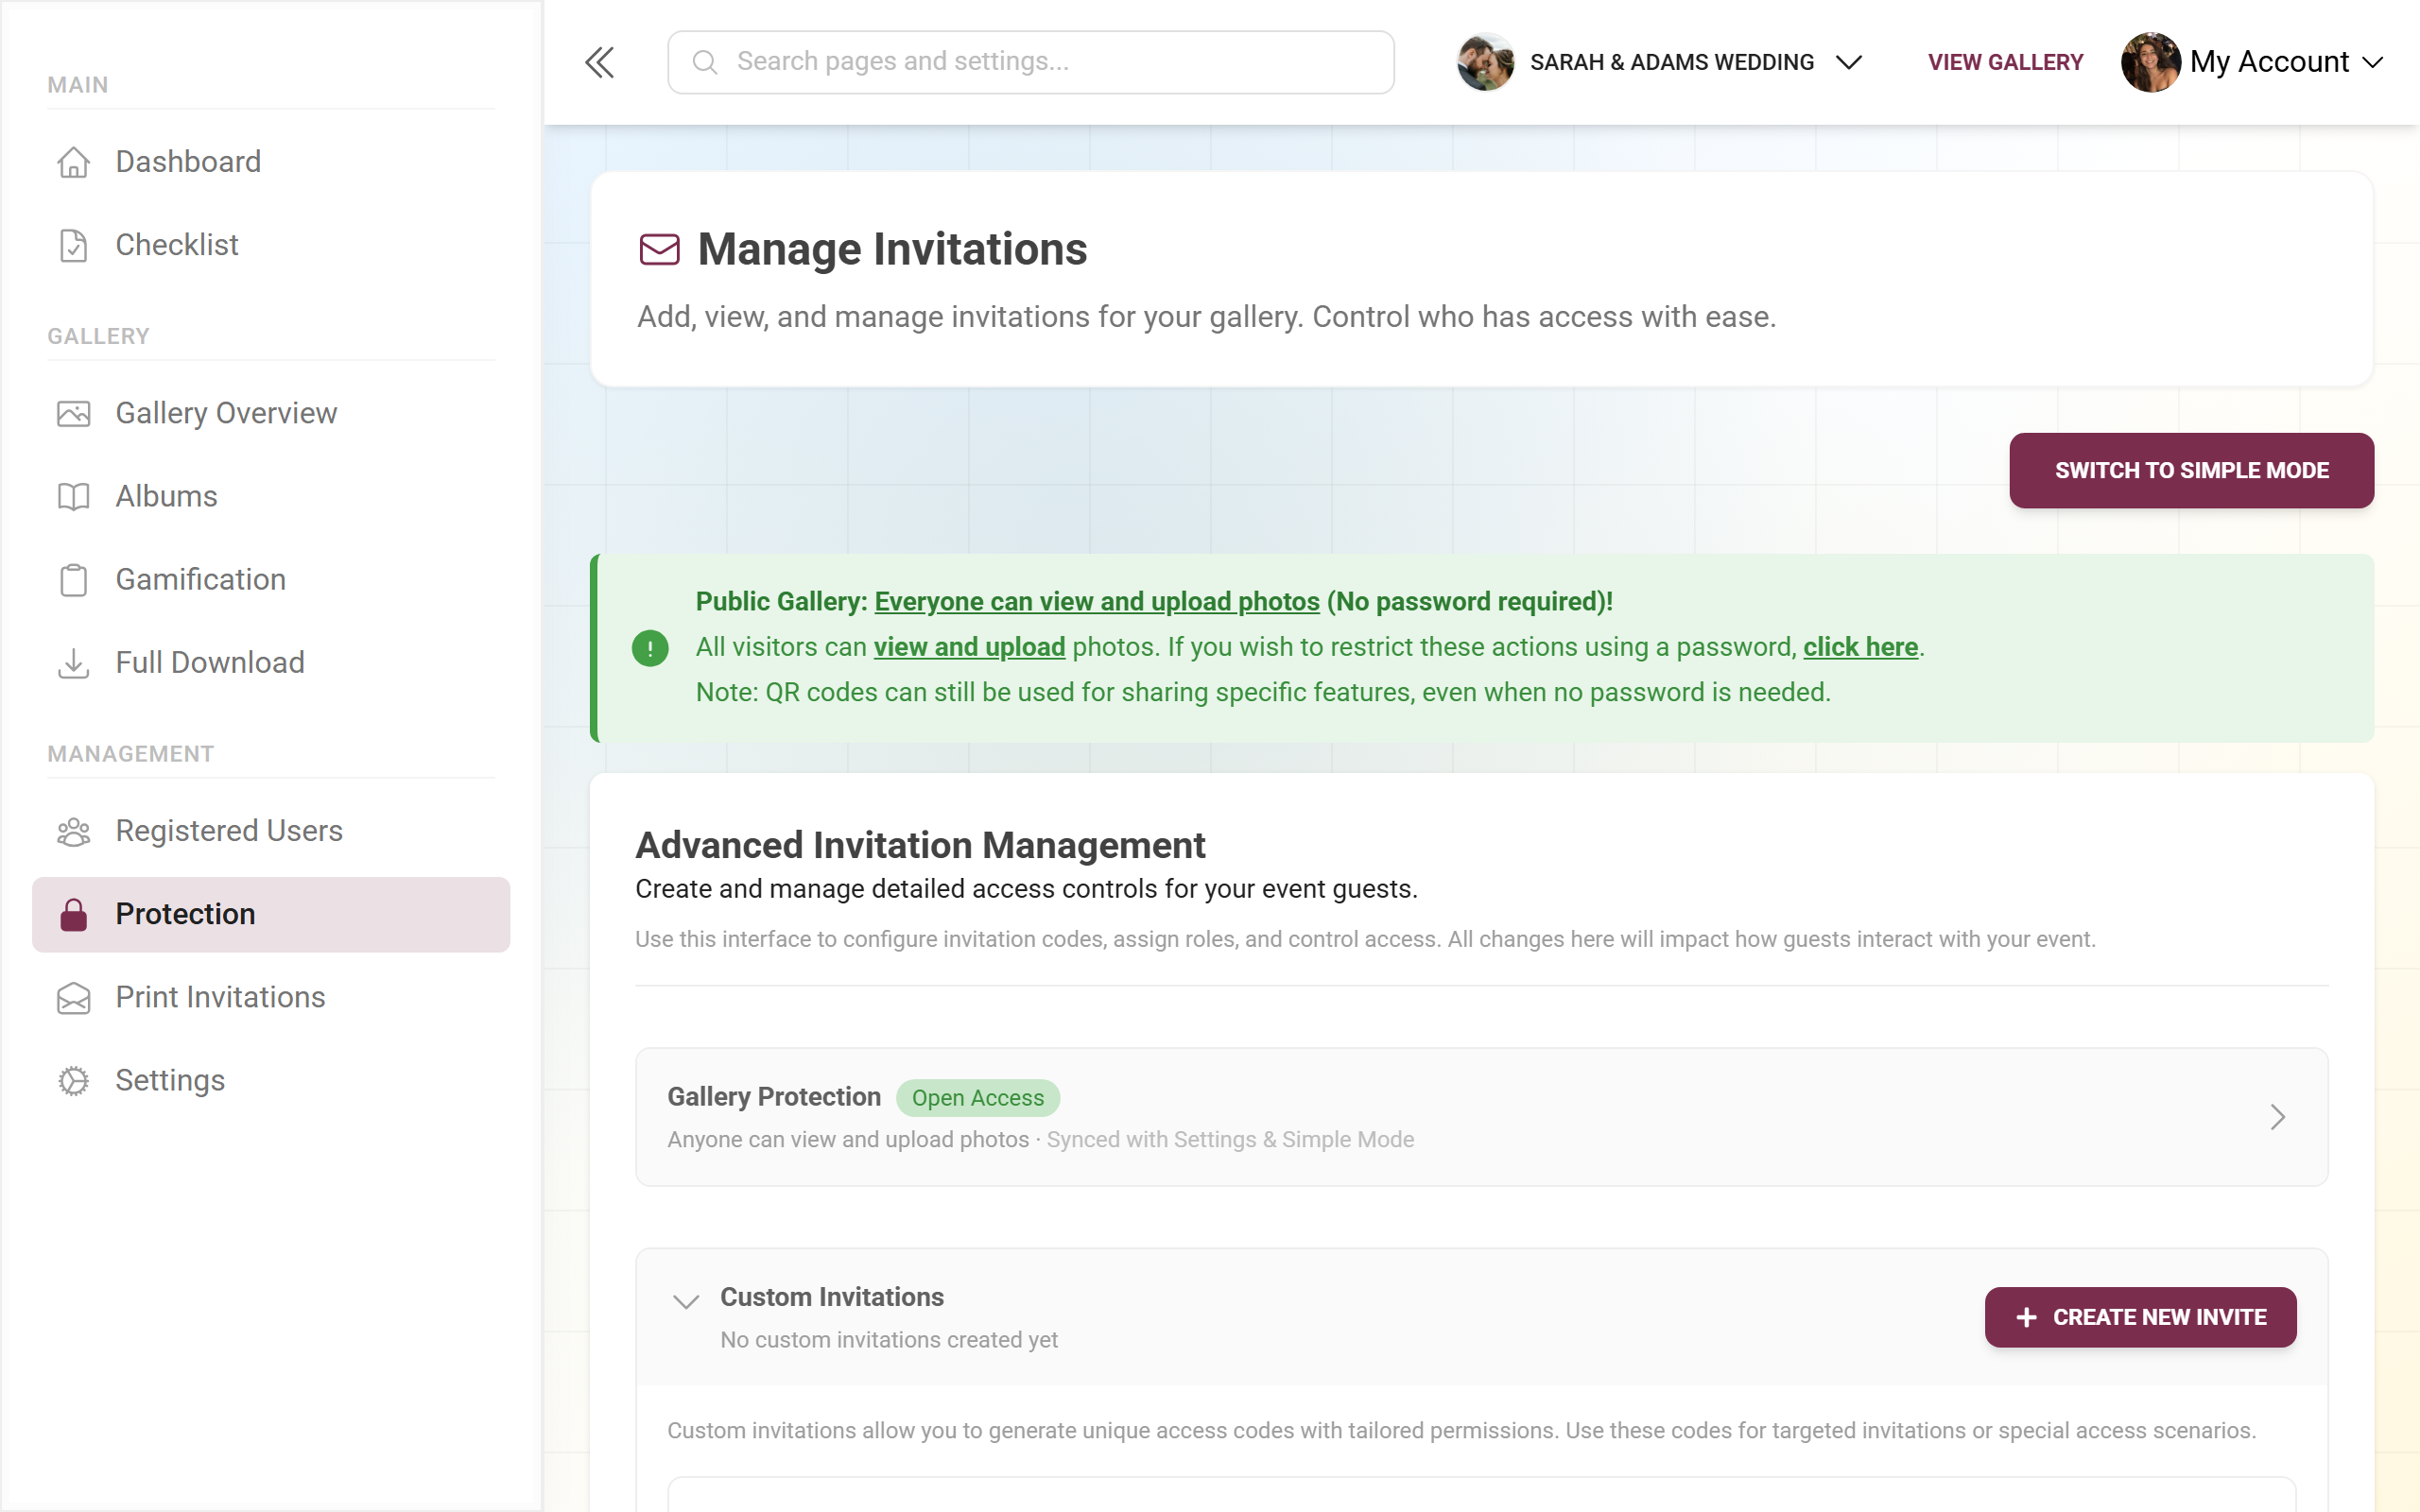
You design cards and posters via the sidebar Print Invitations in the Design Studio. Access itself (link, QR, codes) you share via Protection ▸ invitations.
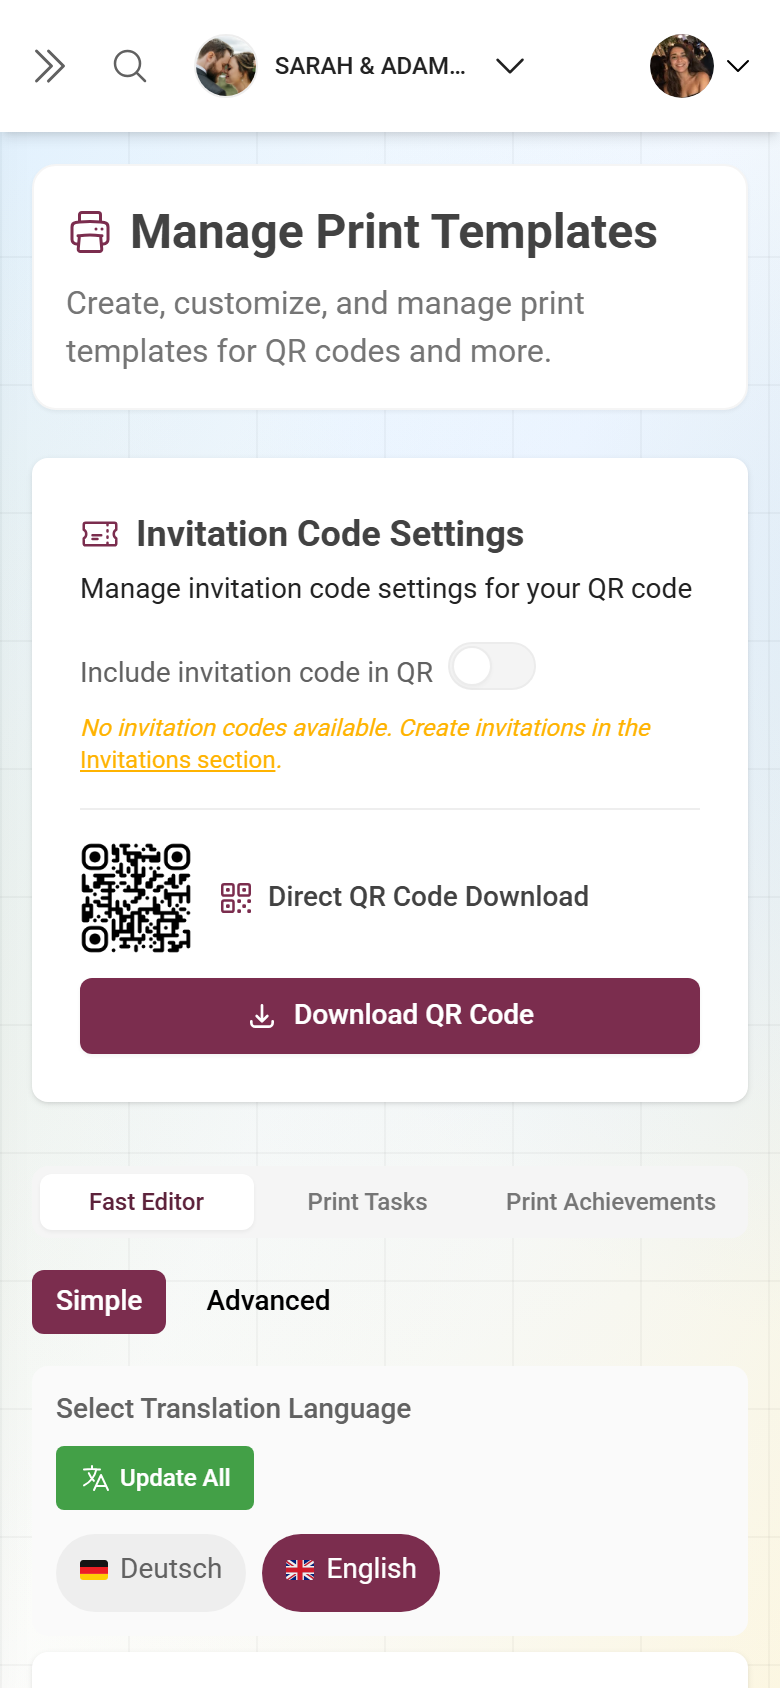
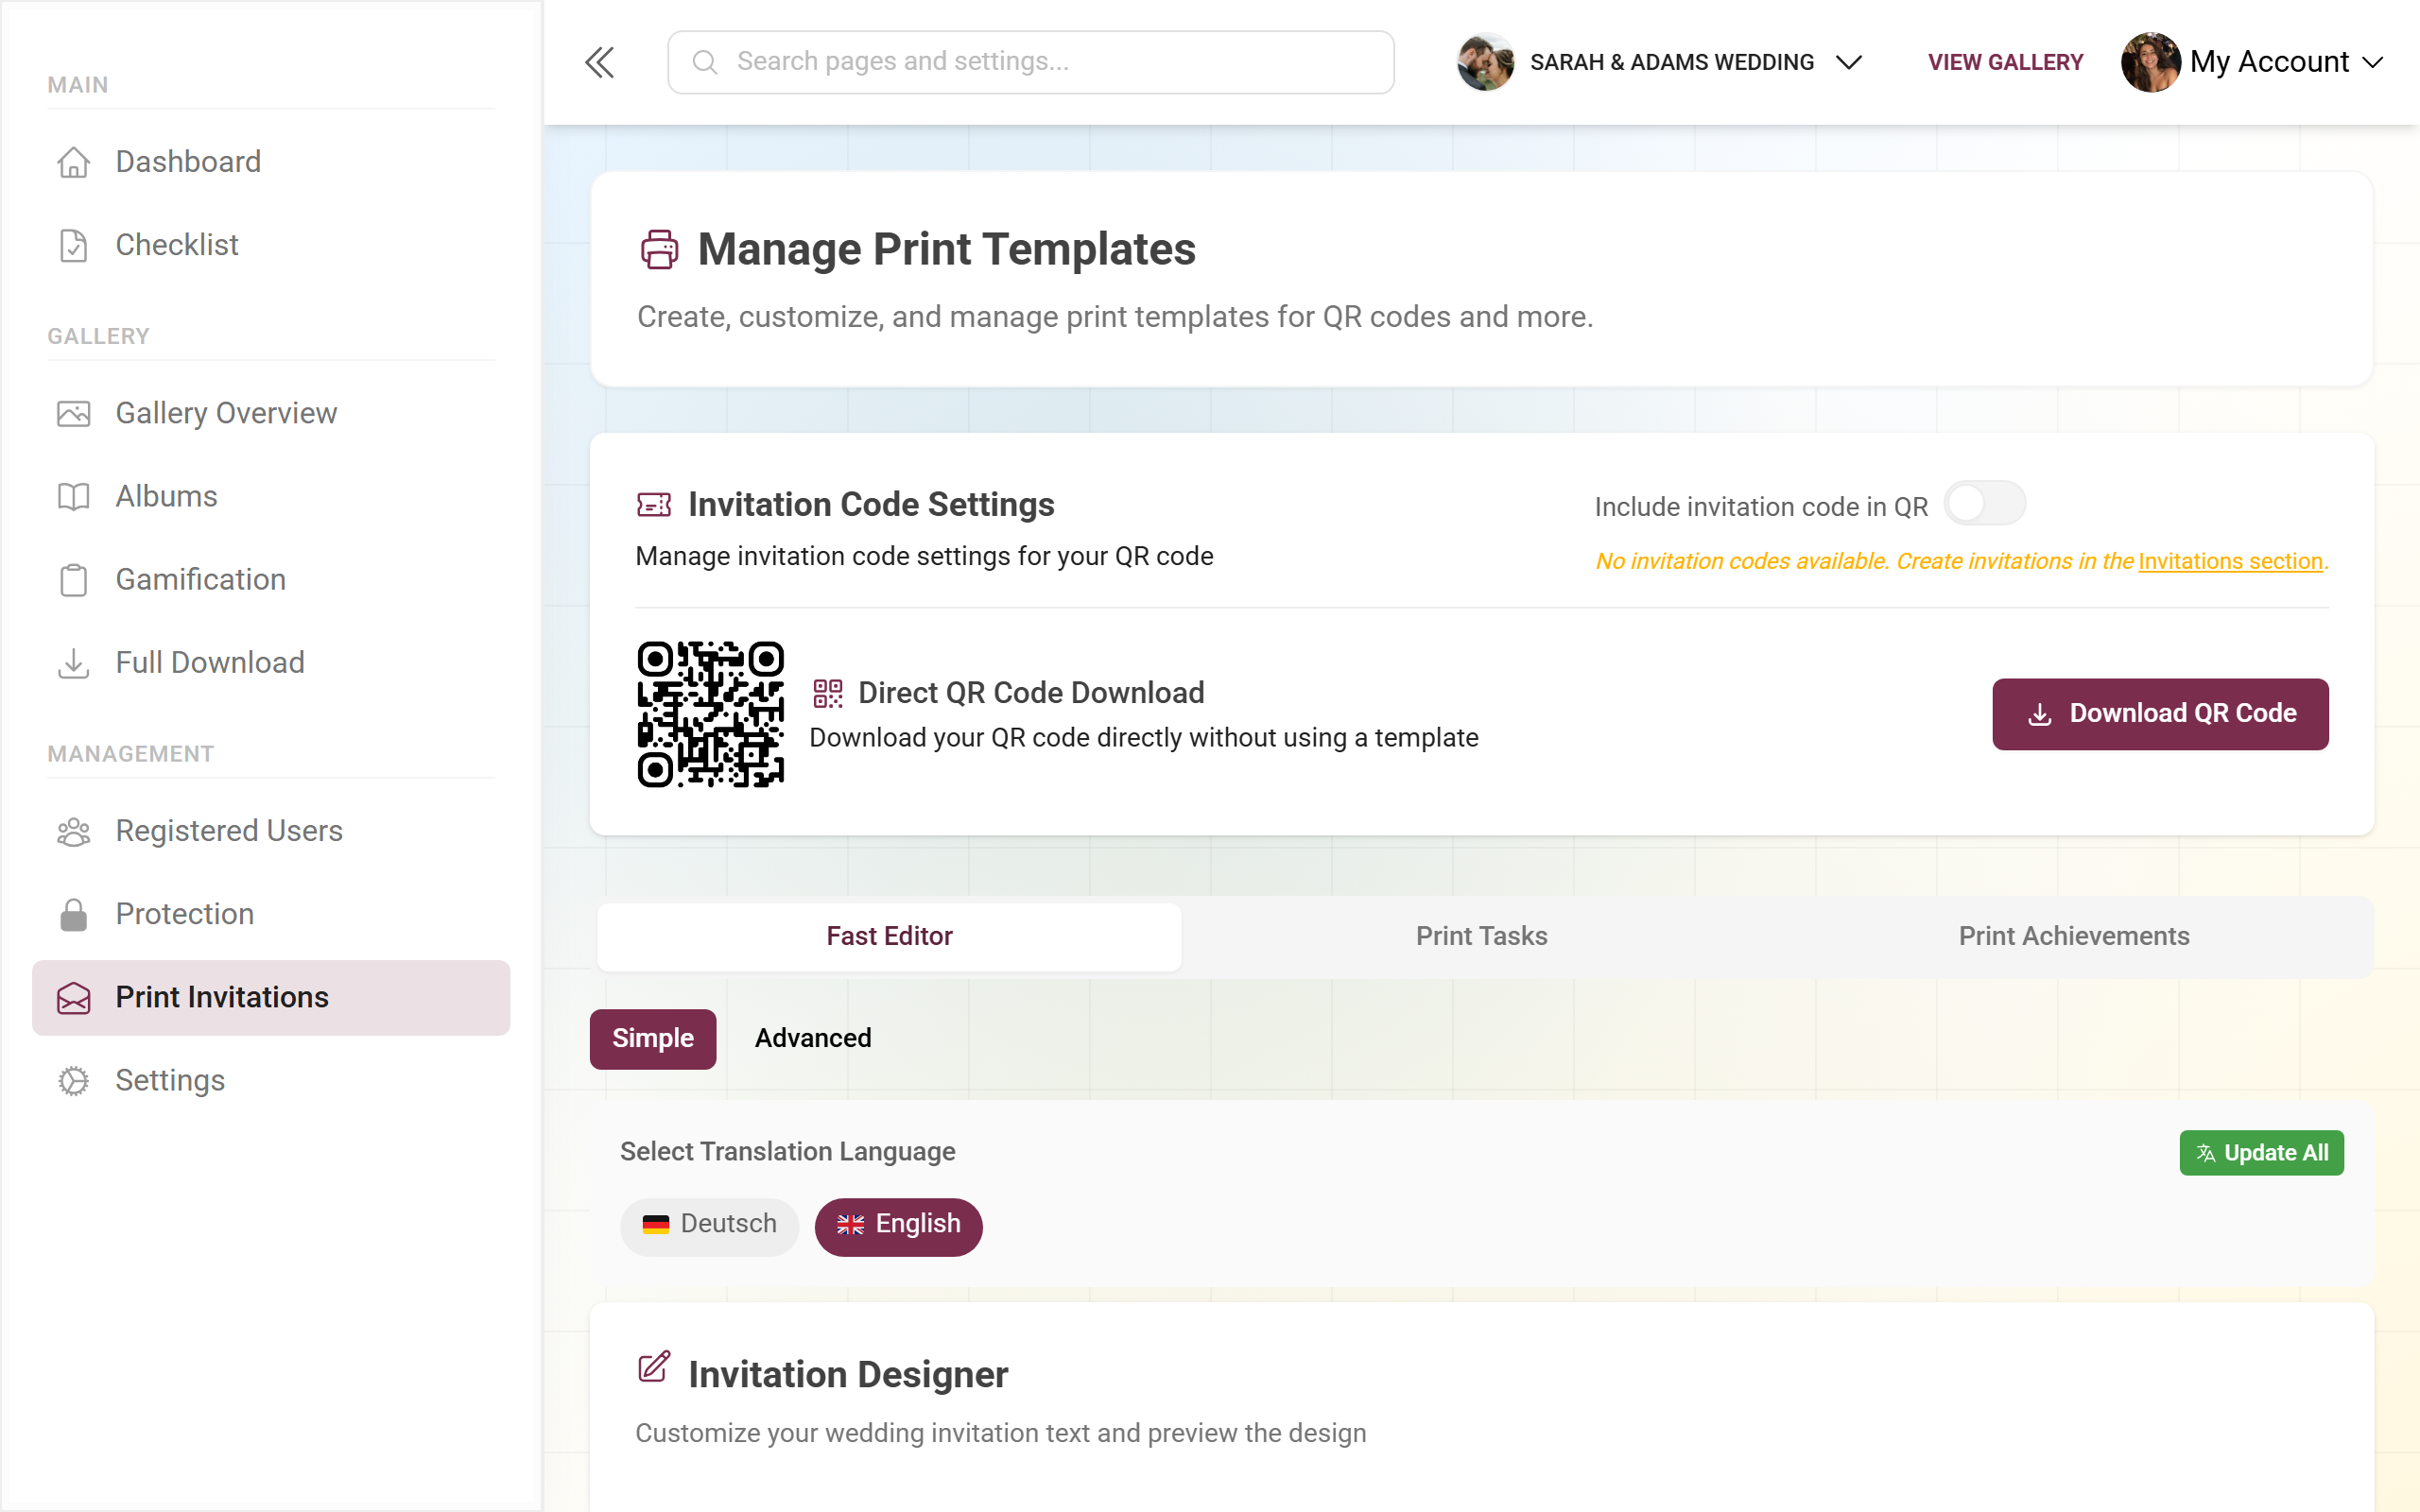
→ QR cards & posters · Inviting guests
5. Use the photo wall as an eye-catcher
Section titled “5. Use the photo wall as an eye-catcher”A live photo wall on a big screen next to the dance floor shows new photos in real time – hugely motivating, because everyone spots themselves right away.
Enable the photo wall under Settings ▸ Features and fine-tune it in Settings ▸ Photo Wall: display duration for images and videos, captions, QR-code overlay, highlights only, display mode and Ken Burns effect.
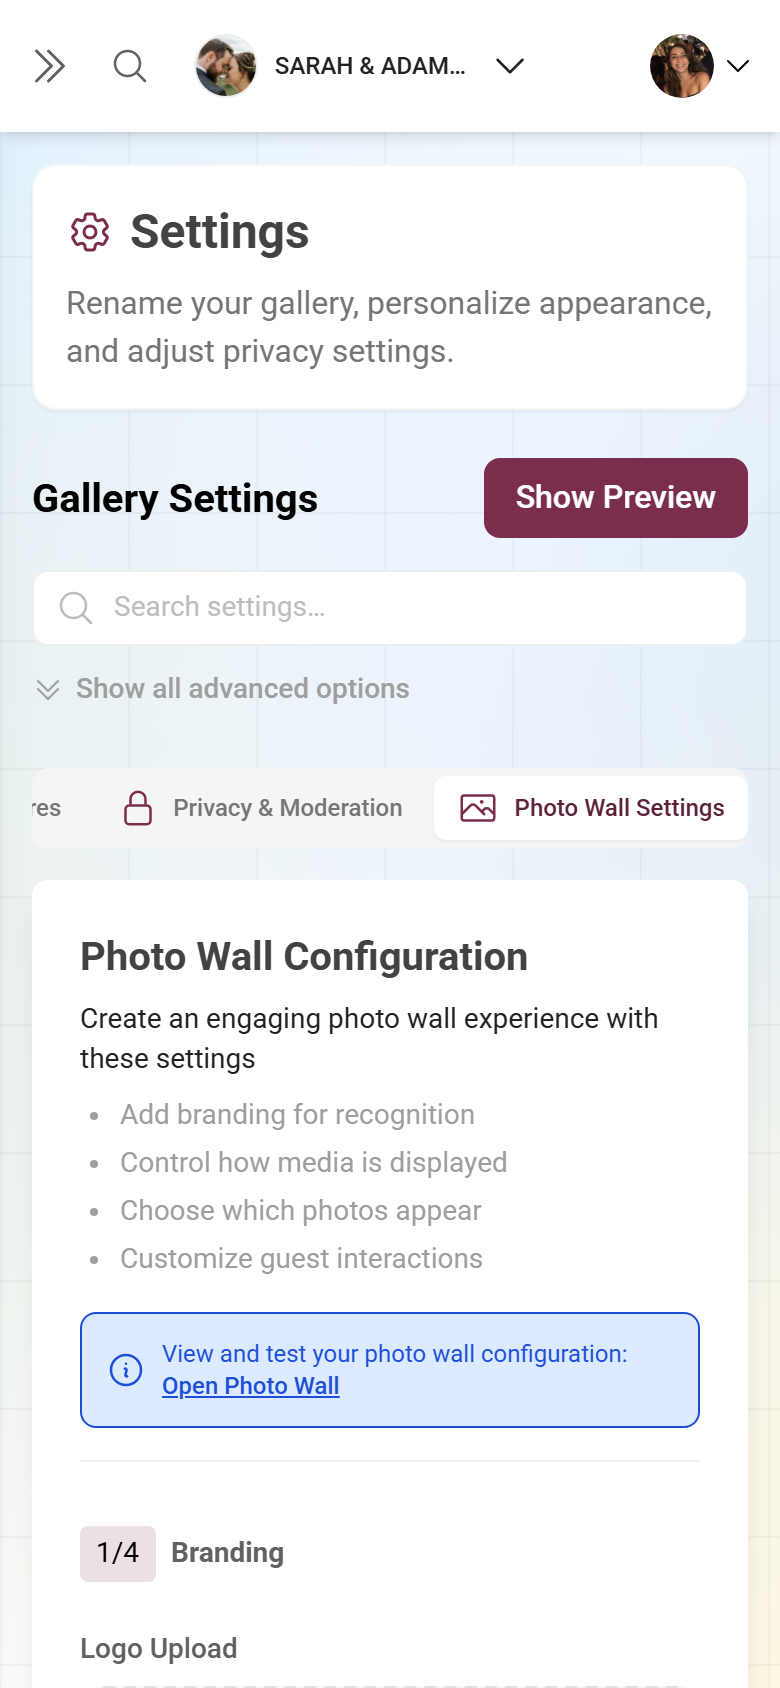
→ Setting up the live photo wall
6. Get the first uploads rolling
Section titled “6. Get the first uploads rolling”An empty gallery invites no one. Via the Gallery Overview (/admin/gallery) upload a few first photos yourself or ask close friends to start. Once the first pictures are visible, everyone else joins in too. For photo booths you can also use live upload, which pushes captures straight into the gallery.
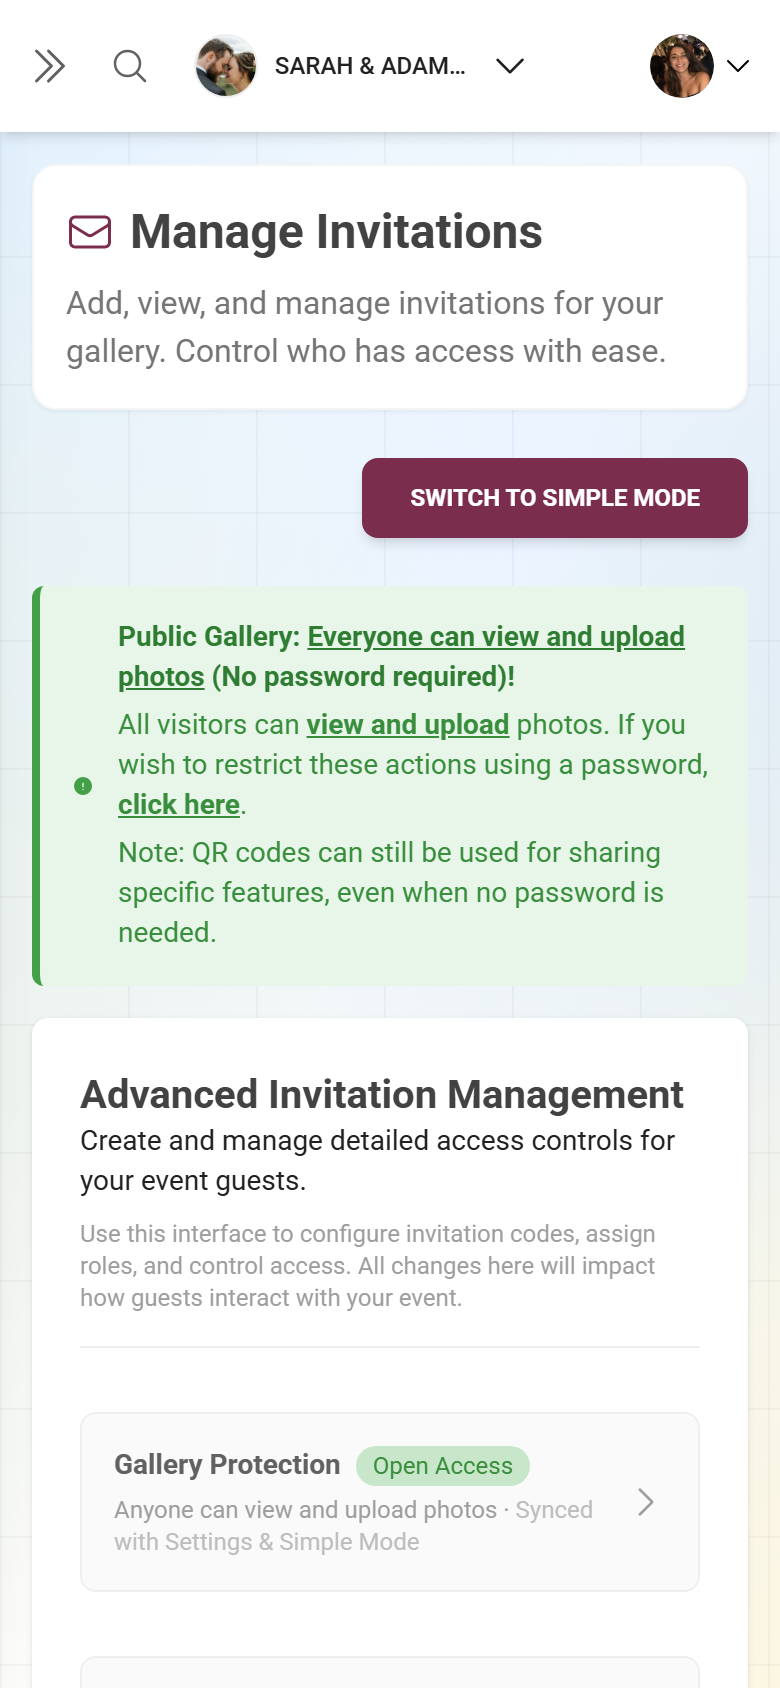
7. Share the load: co-hosts & moderators
Section titled “7. Share the load: co-hosts & moderators”For bigger events you don’t have to do it all alone. Give the moderator or admin role to people you trust who keep an eye on the gallery during the party. You manage roles via the sidebar Protection in the advanced mode of invitations.
8. Keep an eye on moderation
Section titled “8. Keep an eye on moderation”With an open gallery it’s worth checking moderation regularly:
-
Open the moderation view, especially when it’s busy.
-
Hide unsuitable photos – they go to the recycle bin and can be restored.
-
Check the reports that come in from your guests.
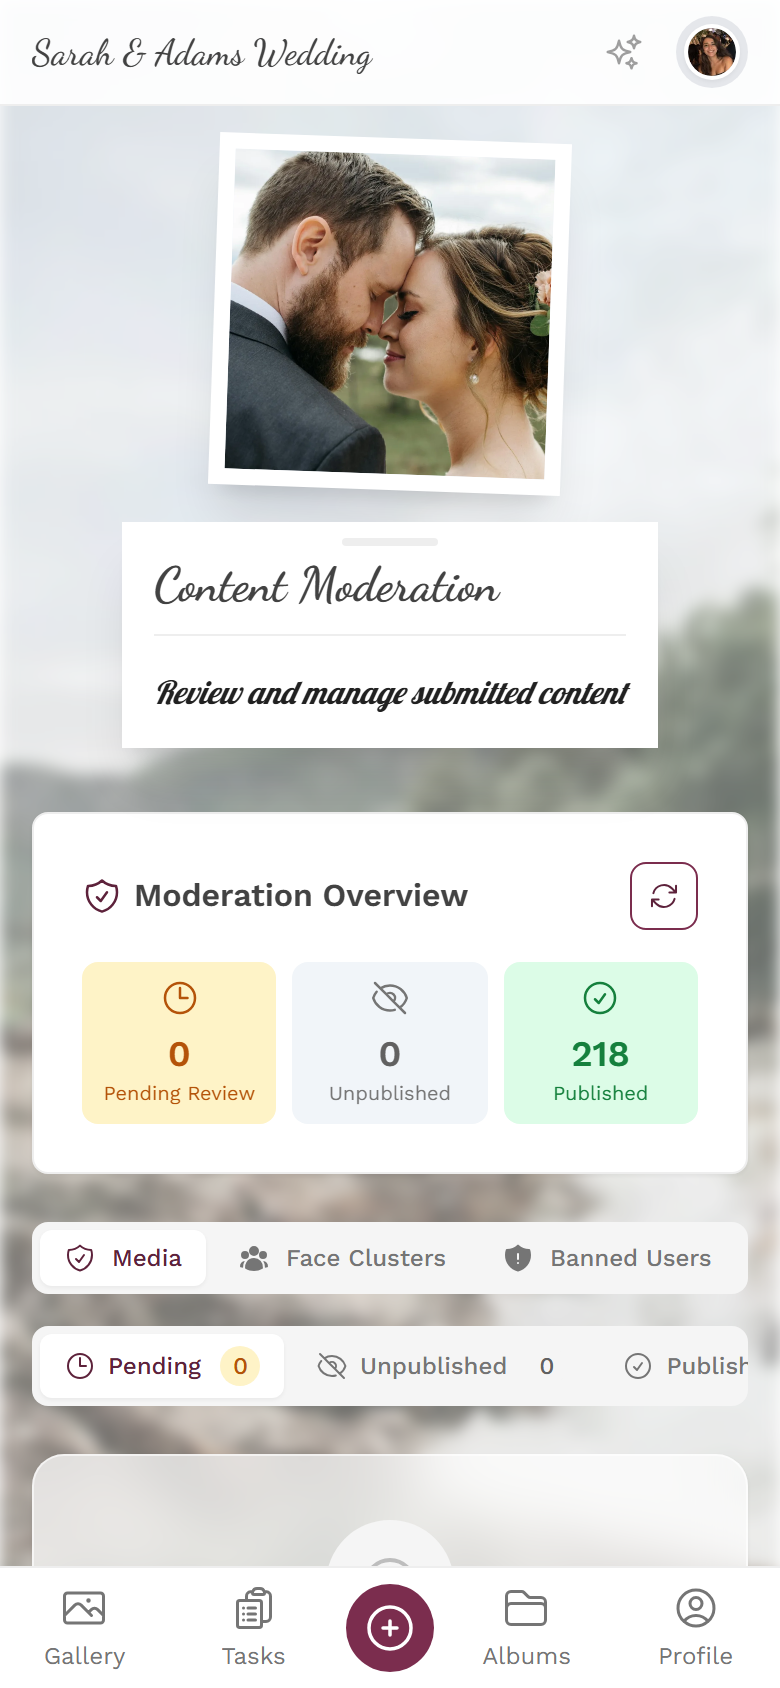
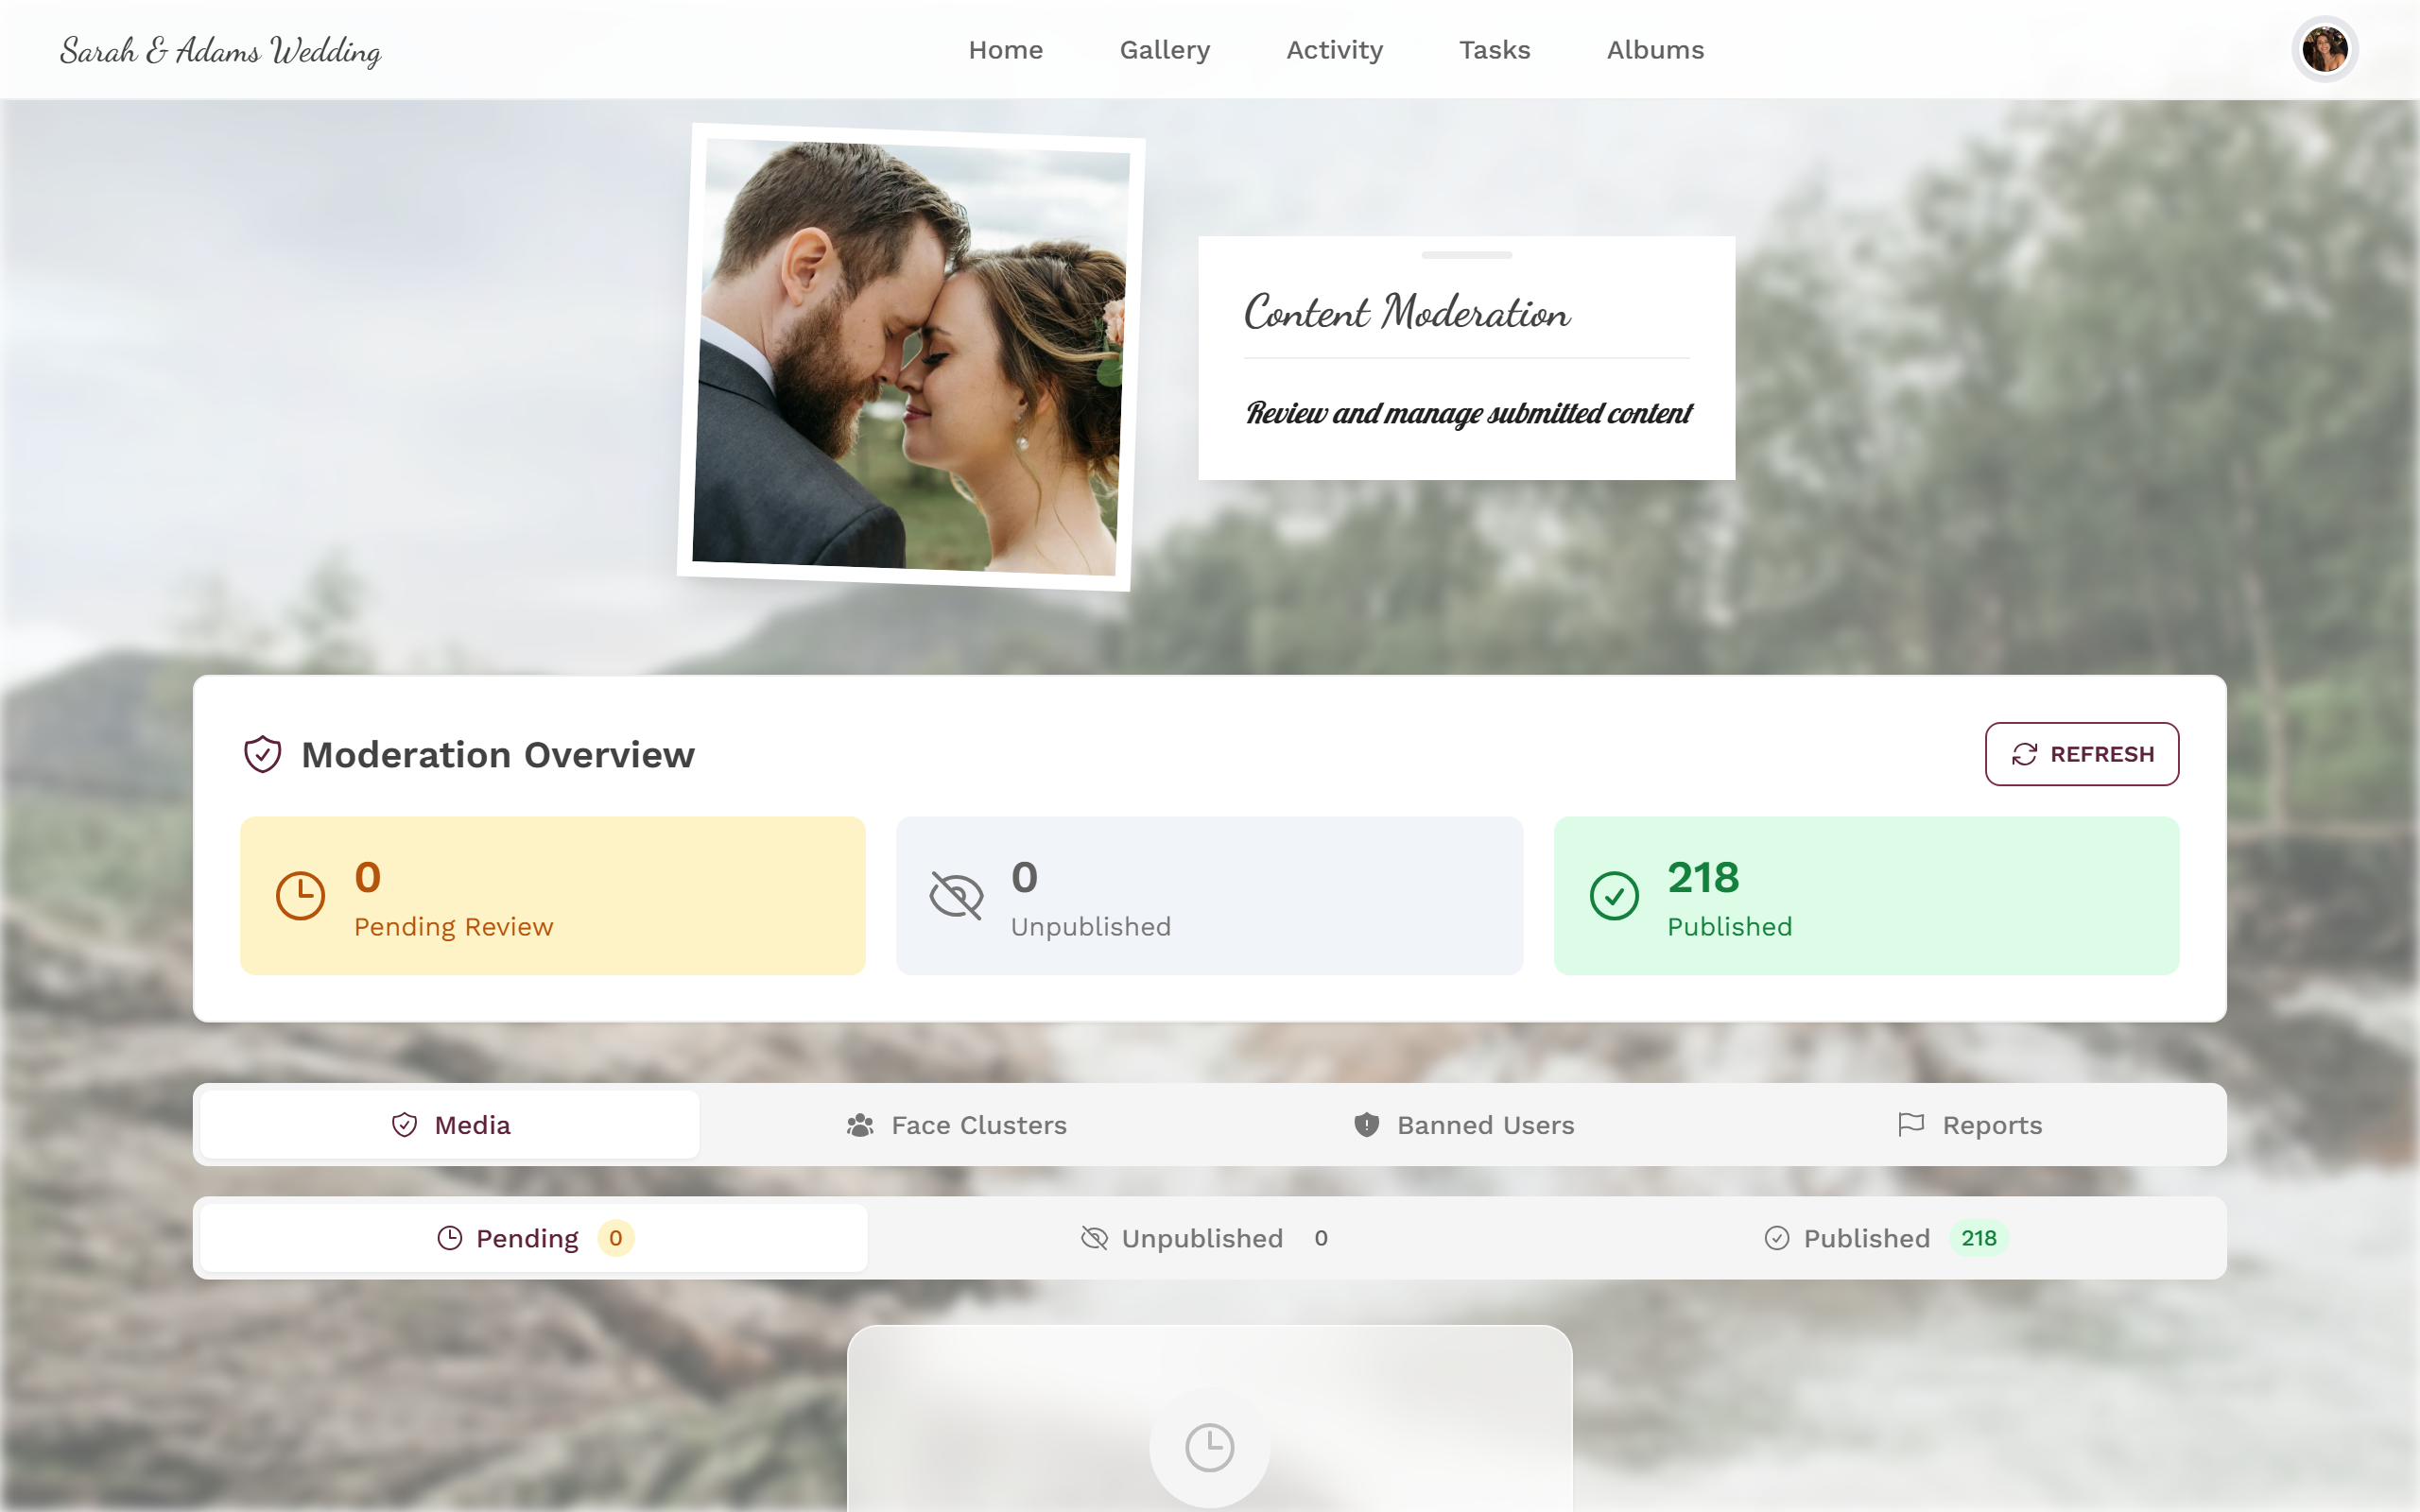
Anyone who repeatedly causes trouble can be restricted.
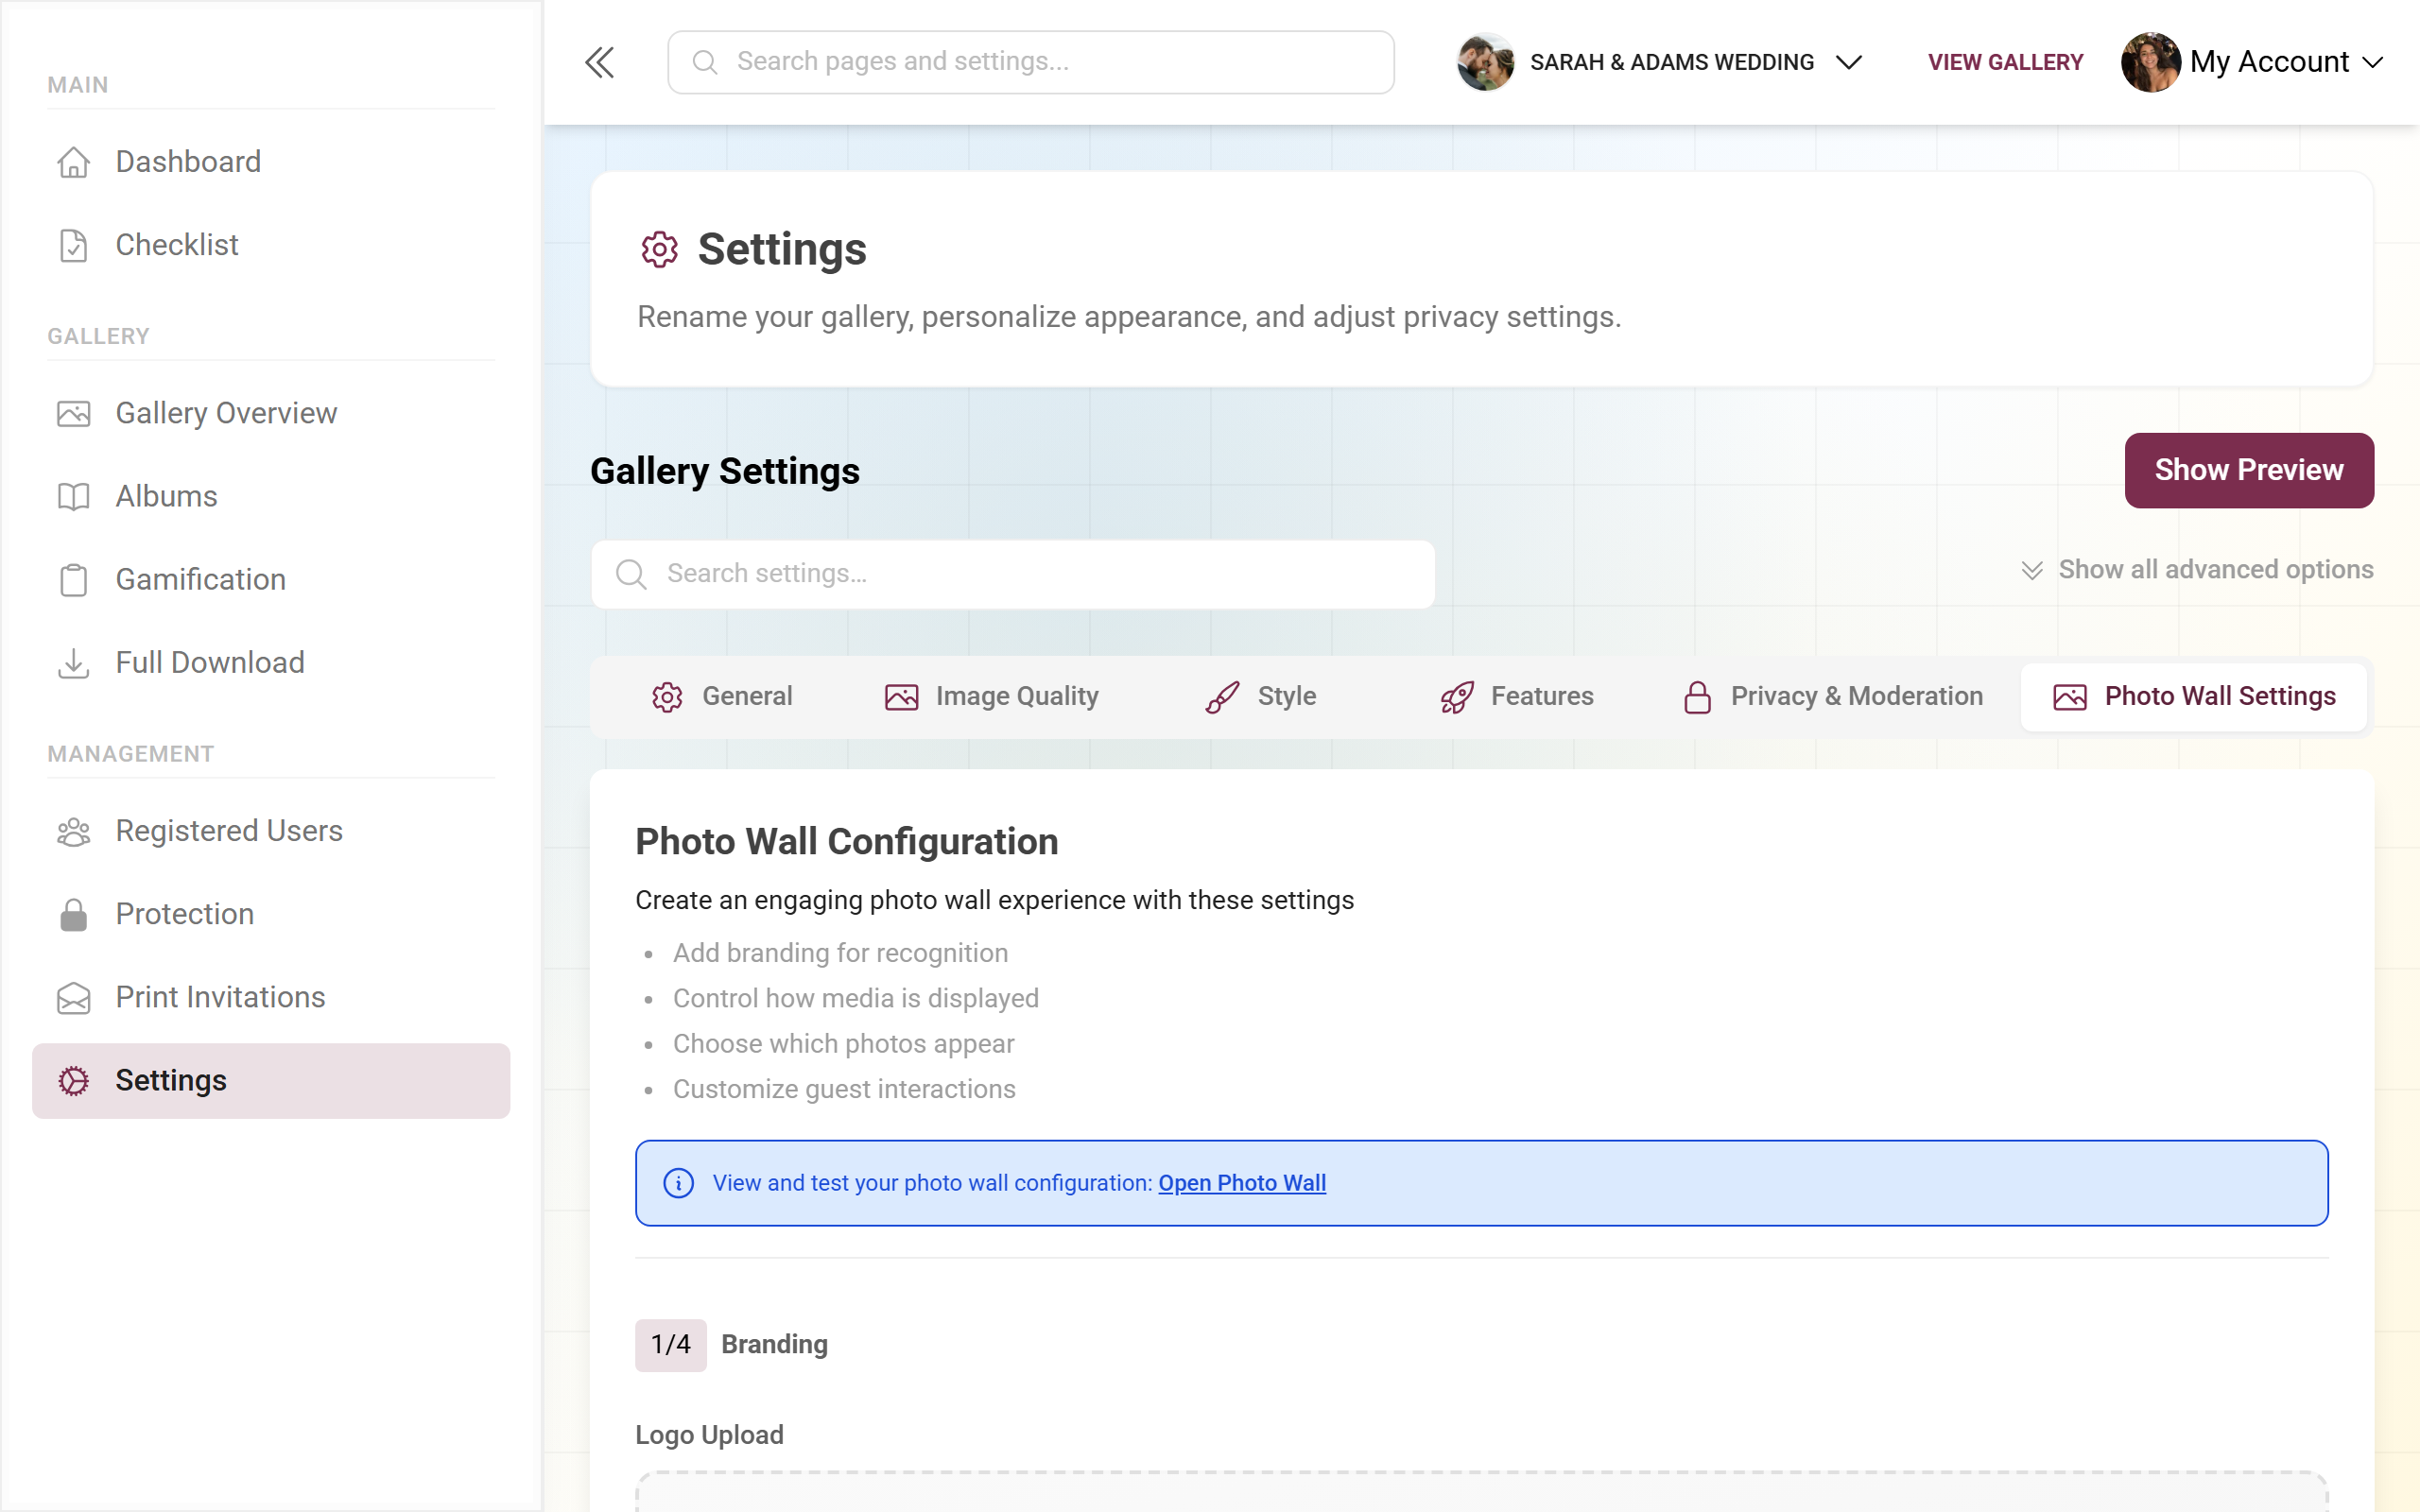
9. Set privacy & language to fit
Section titled “9. Set privacy & language to fit”For private celebrations an access code protects the gallery, and you can require approval (photos only appear after your review). Set this under Settings ▸ Privacy & Moderation – there you also decide whether only invited guests may join, which default role they get and whether the NSFW filter applies.

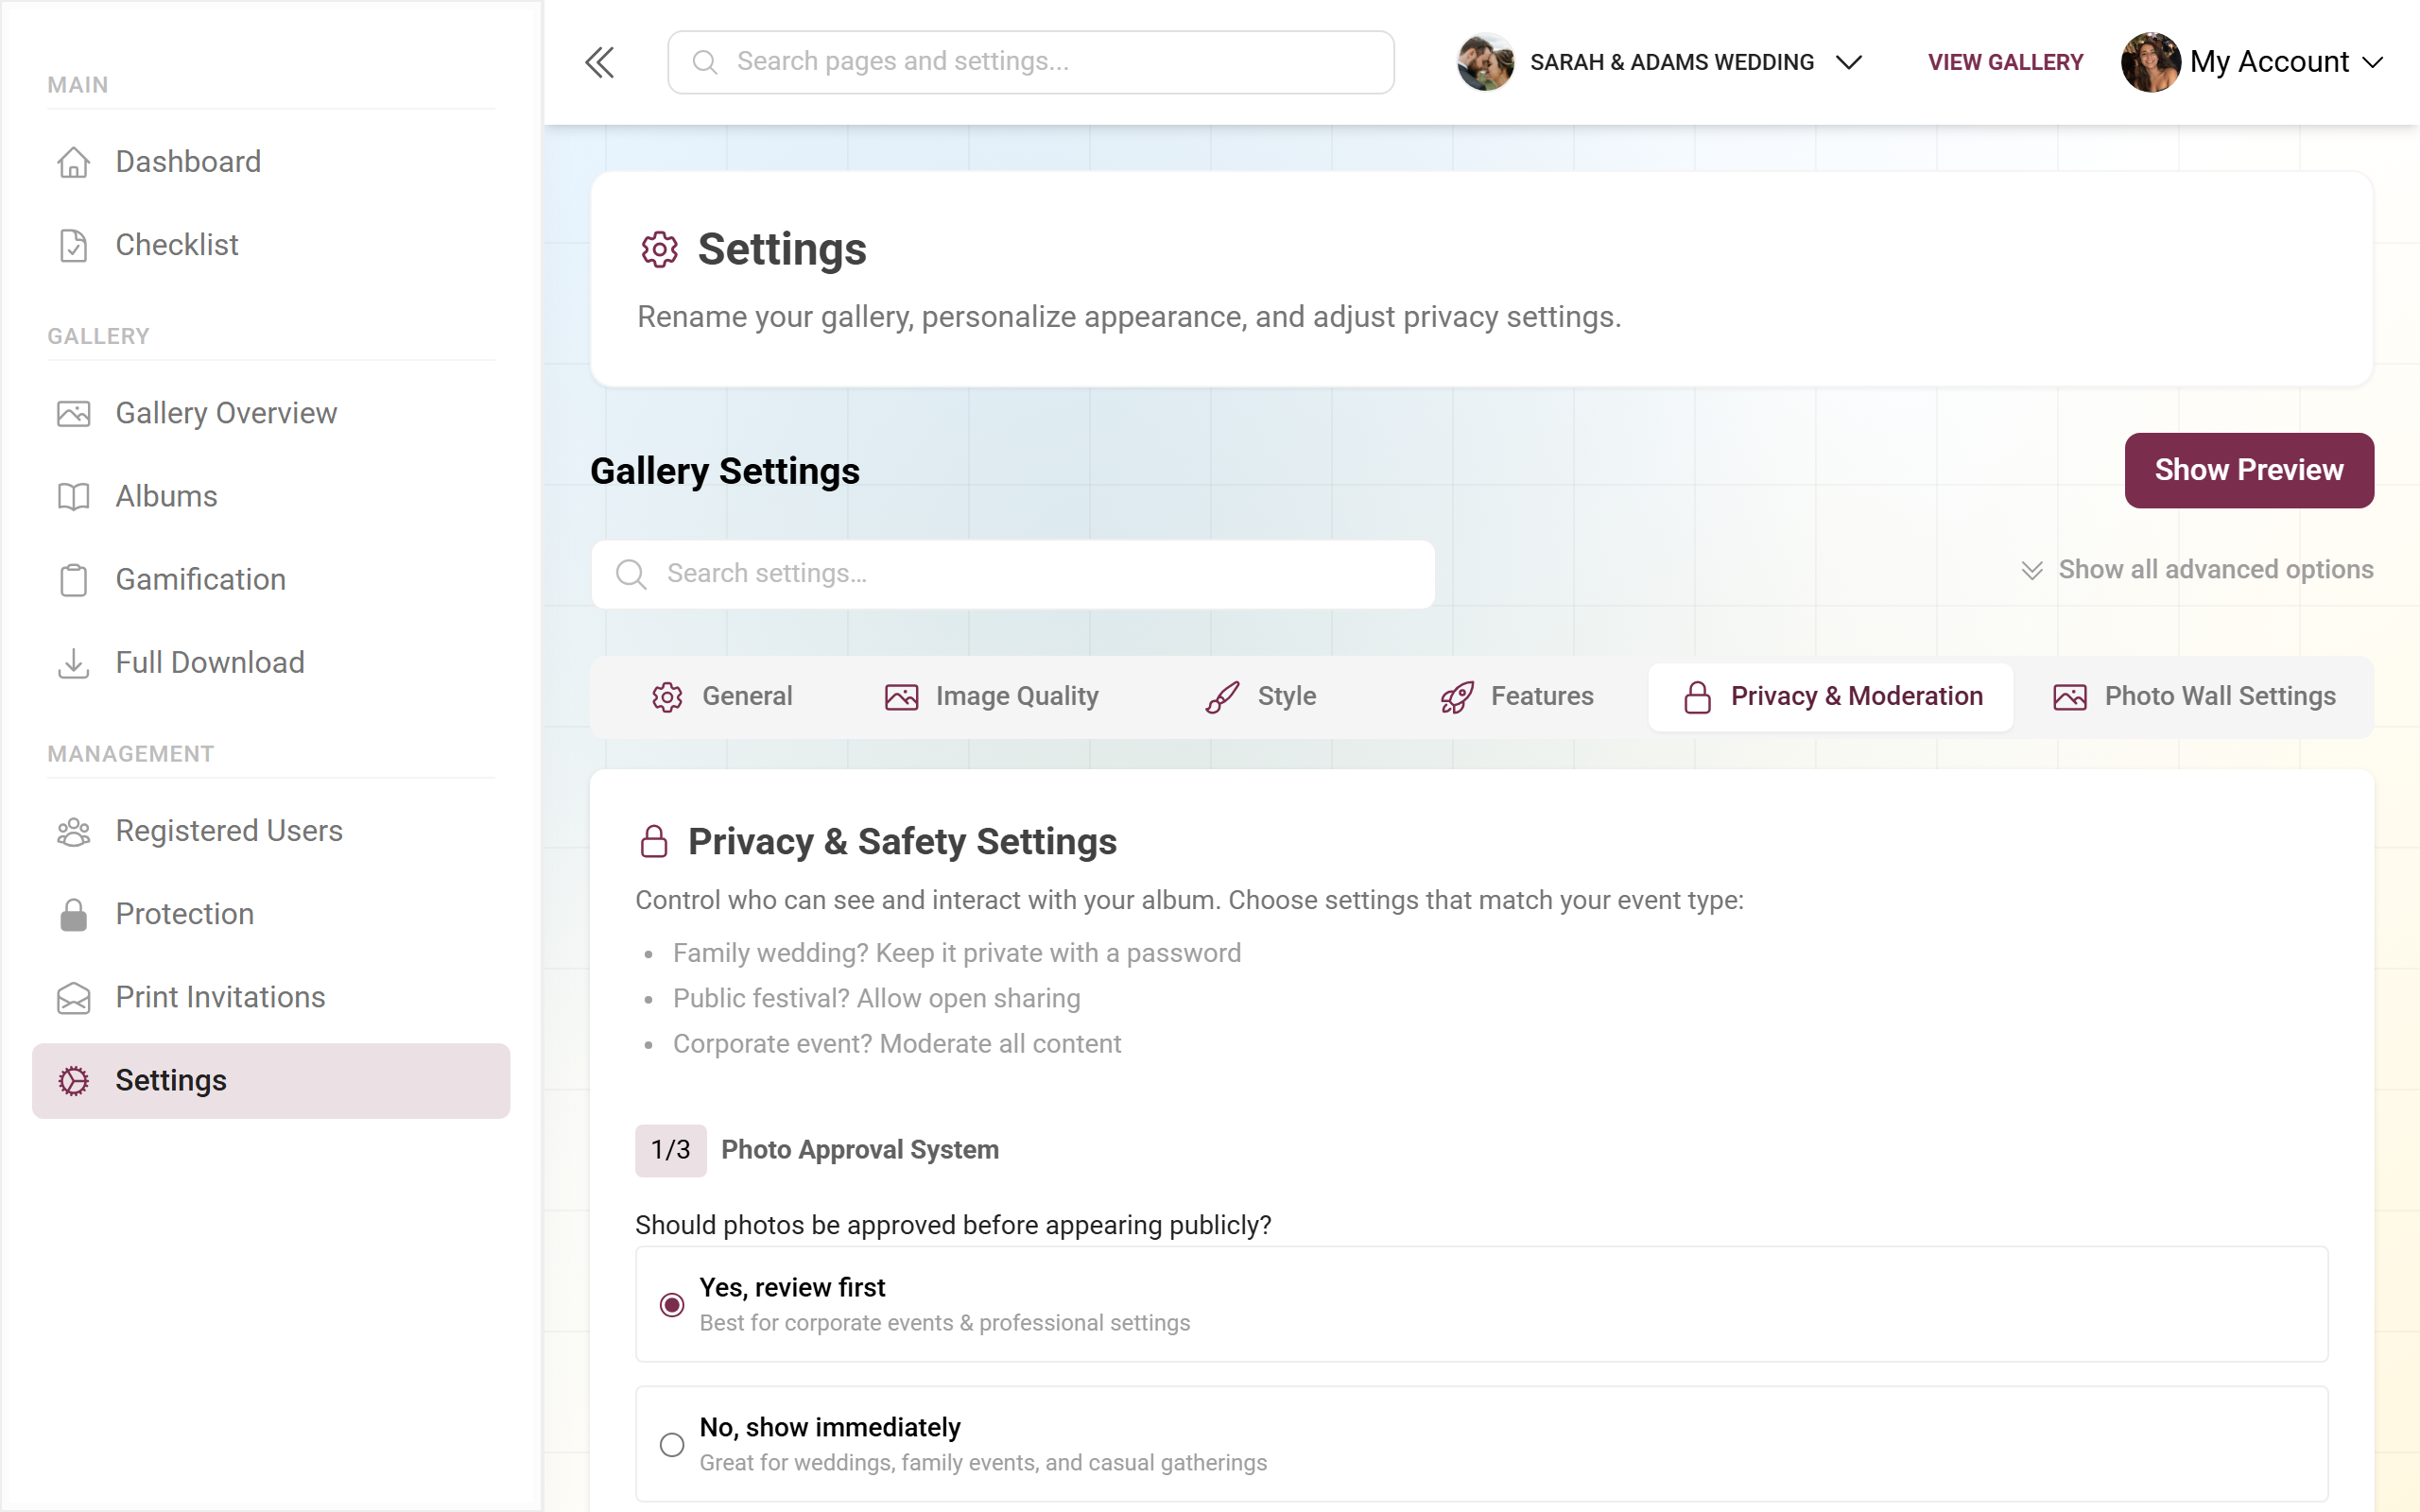
If guests from different countries join in, set up several languages under Settings ▸ General.
→ Privacy & moderation · General settings
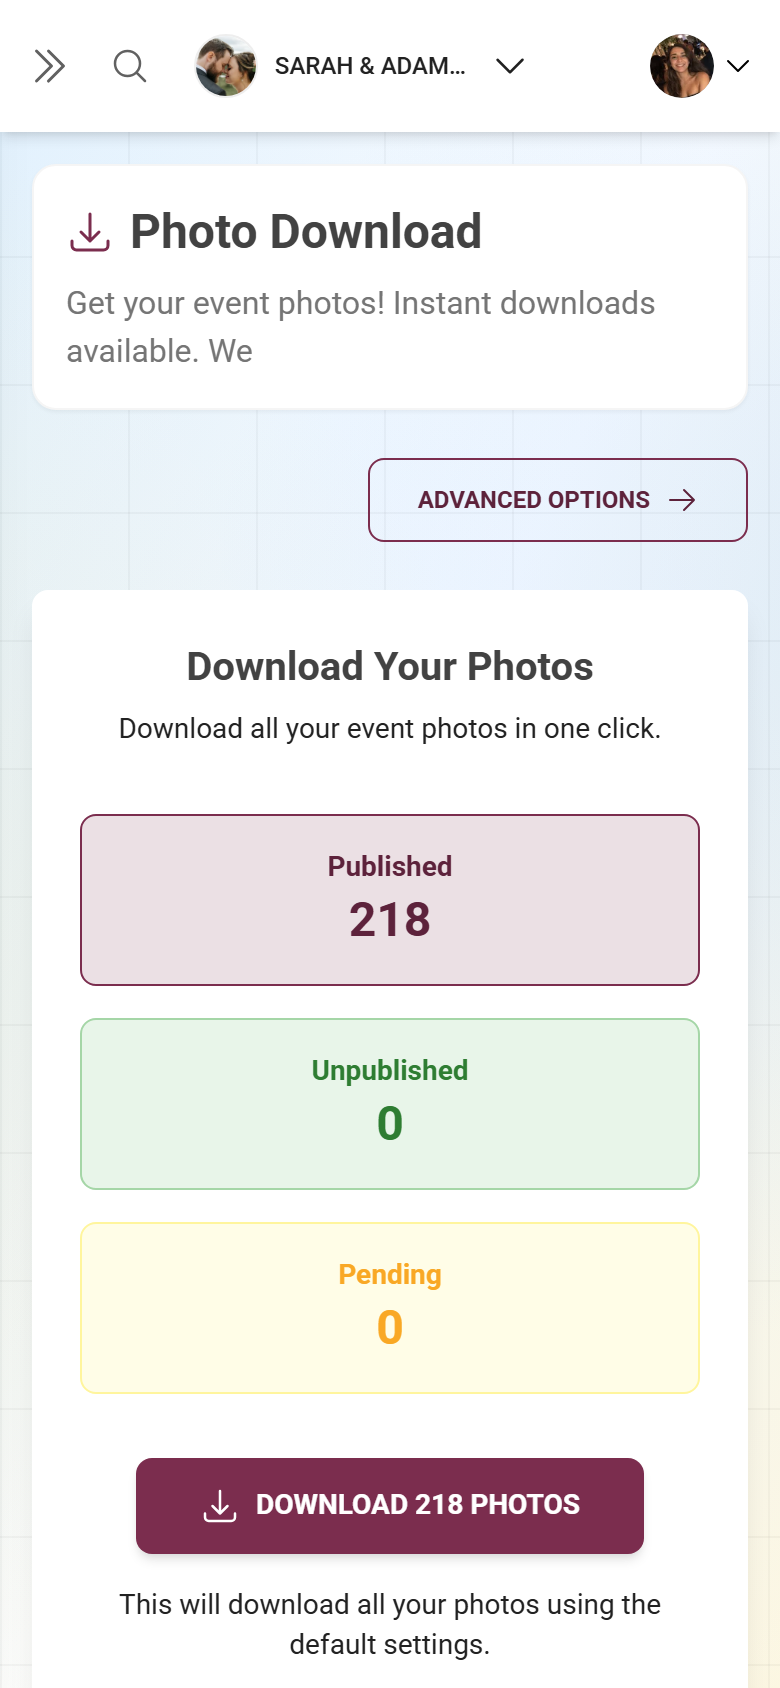
10. Back everything up at the end
Section titled “10. Back everything up at the end”Once the event is over, the memories are too precious to lose. Via the sidebar Full Download (/admin/download) you download the whole gallery as a ZIP – ideally well before the storage period ends.