Reporting & moderating content
To keep the gallery pleasant for everyone, you can report inappropriate photos. What happens next depends on your role – so this guide has three parts: for guests, for moderators, and for administrators/hosts.
As a guest: report a photo
Section titled “As a guest: report a photo”A report goes confidentially to the organizer, not to Photogala. The photo does not disappear right away – a moderator or the host reviews the report and decides what happens.
Step 1: Open the photo in fullscreen
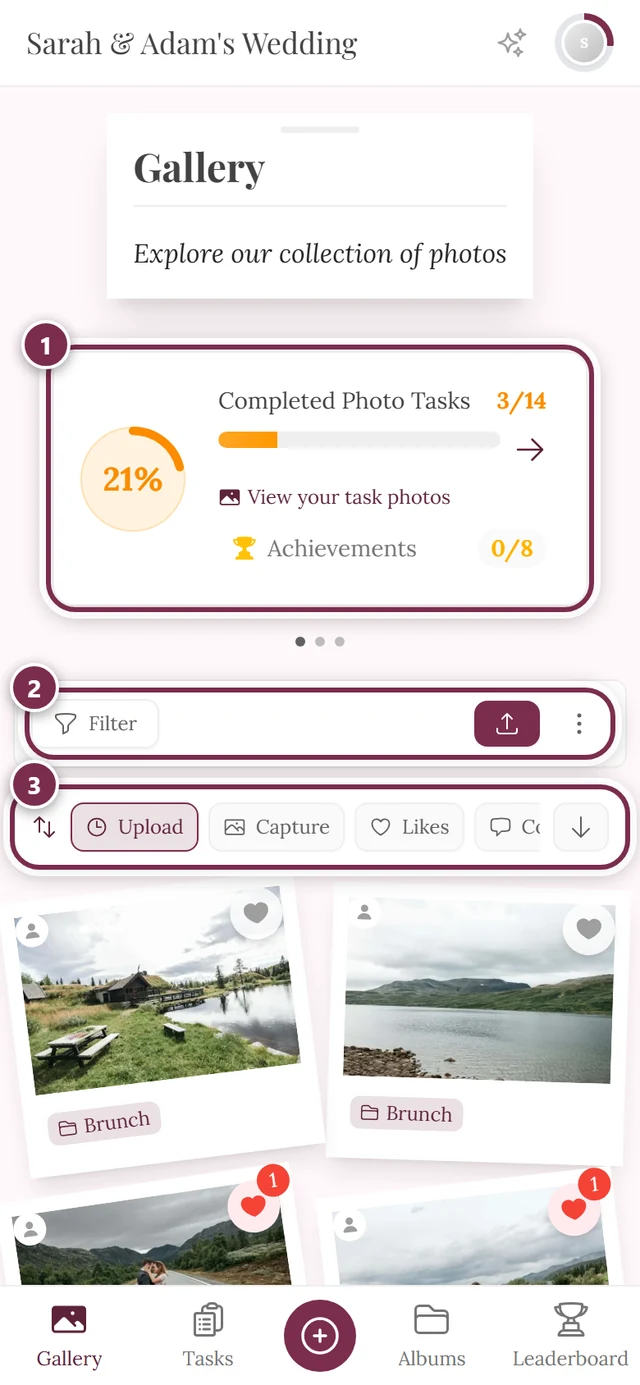
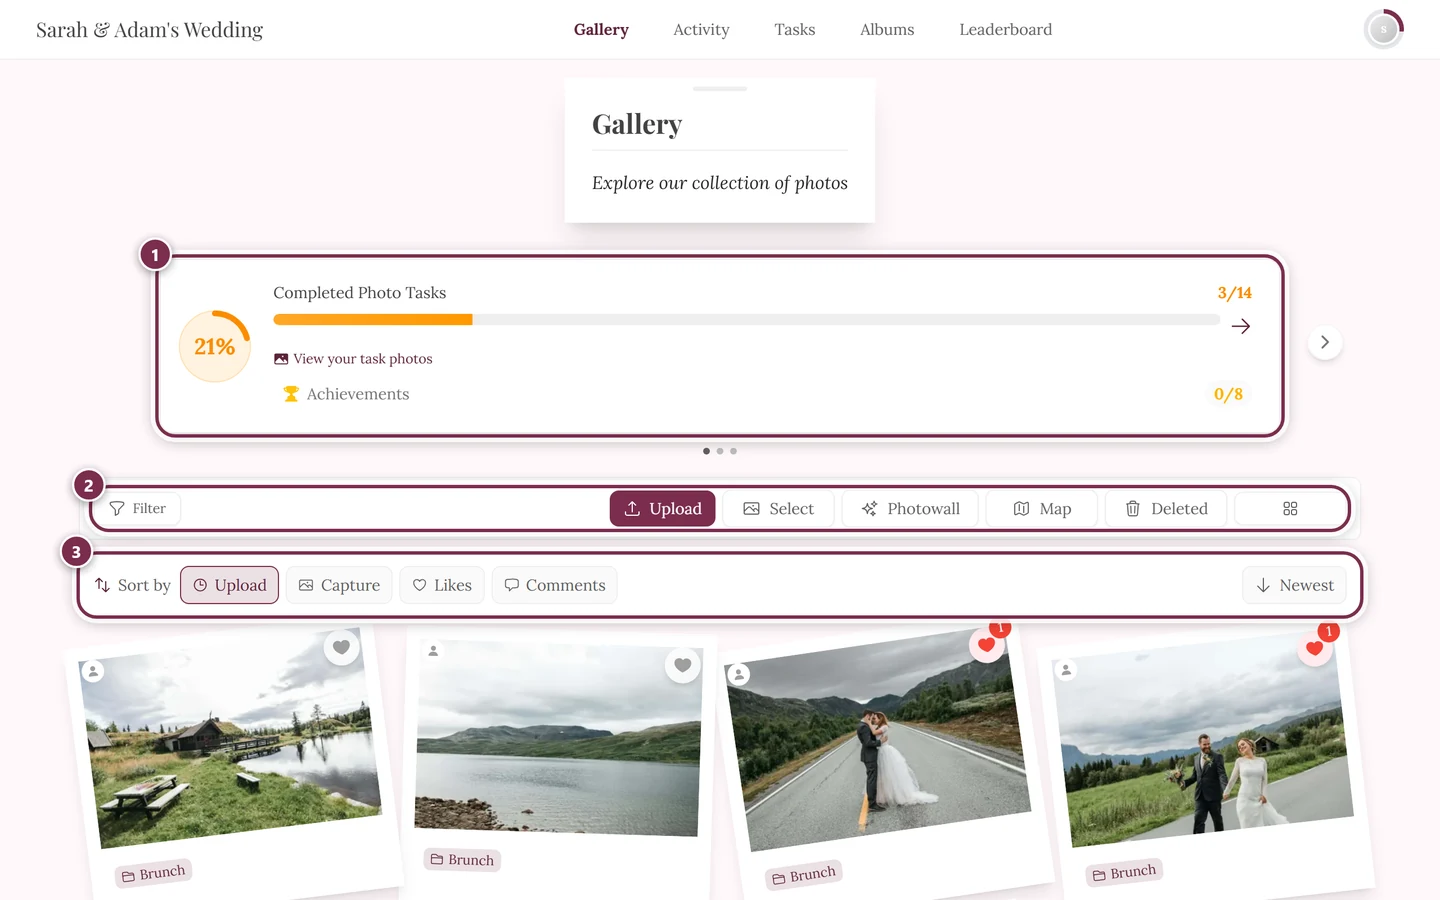
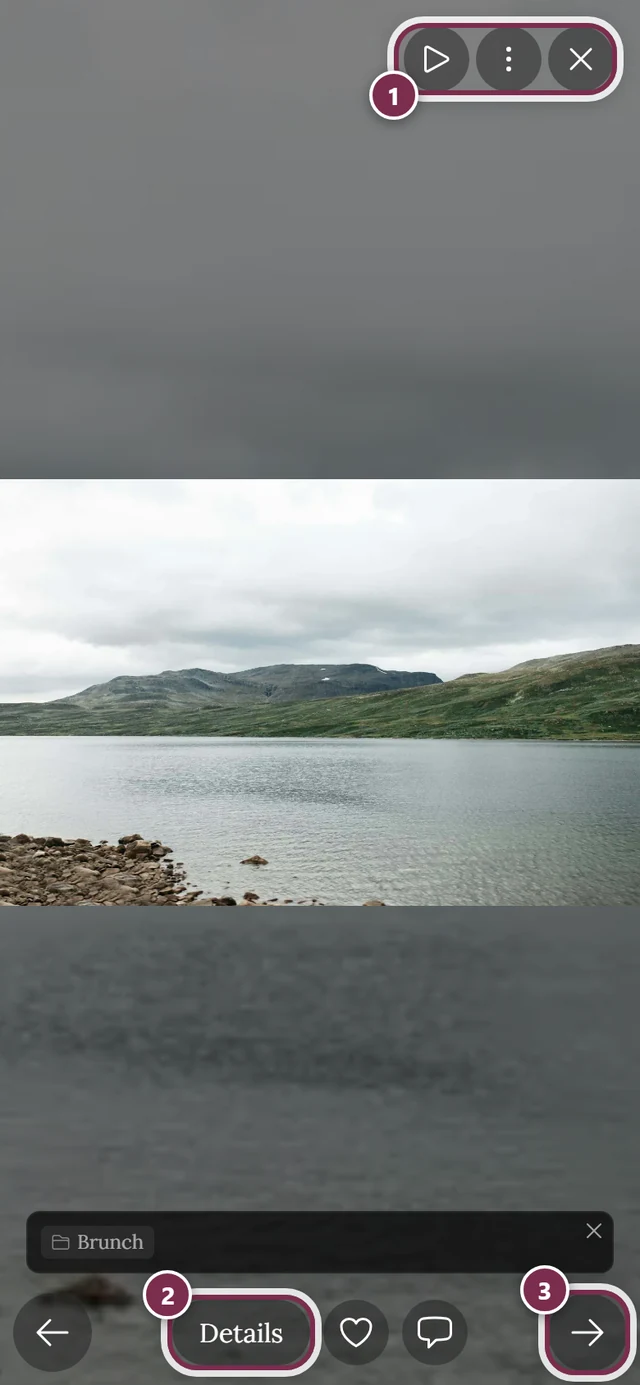
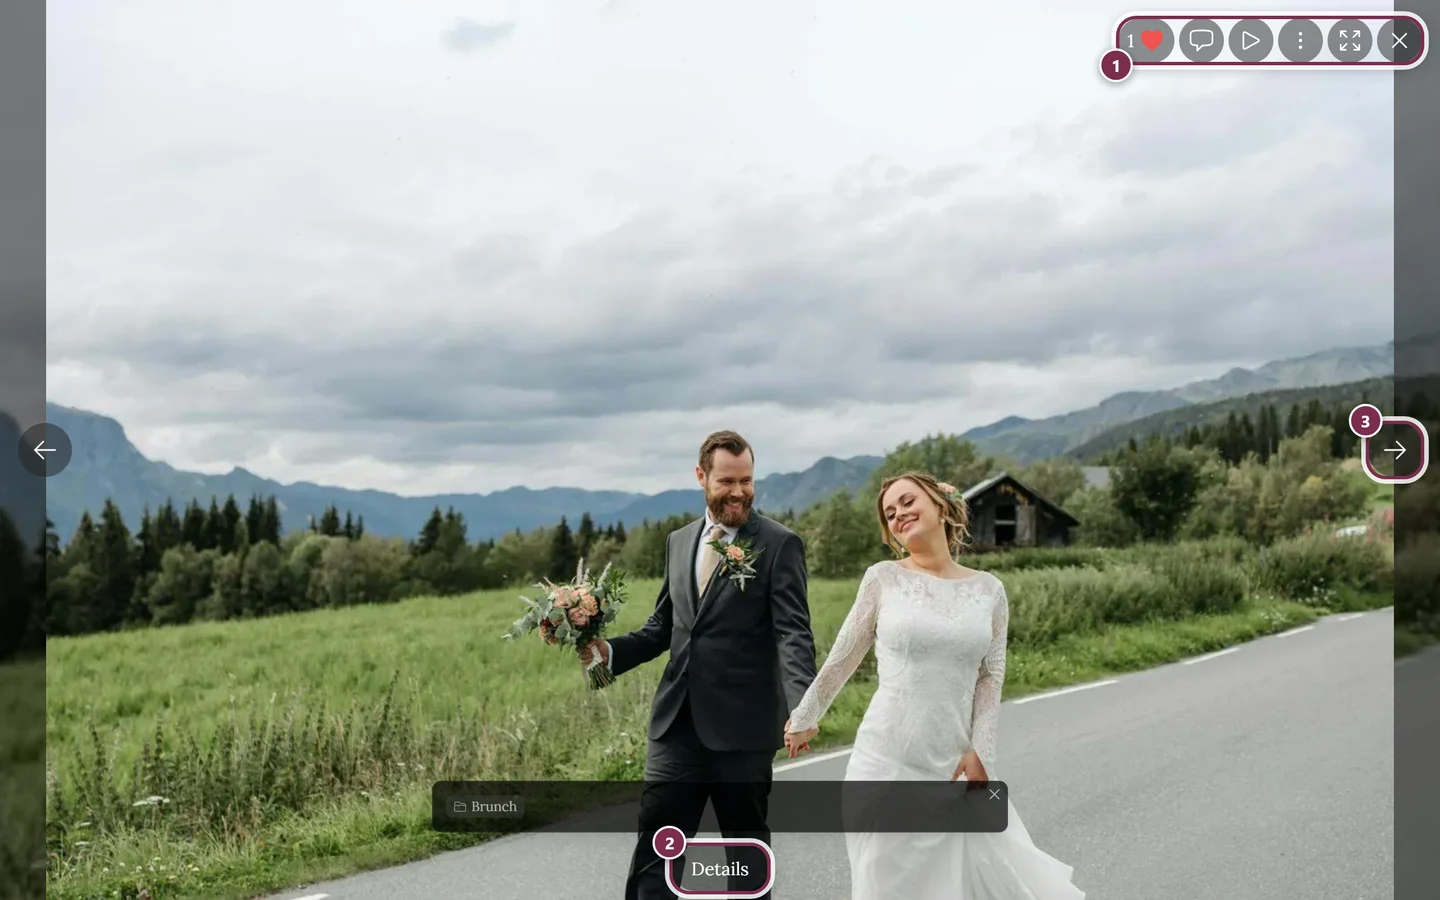
Section titled “Step 1: Open the photo in fullscreen”The Report action only exists in the fullscreen/slideshow view. In the gallery, tap or click the photo you want to report so it opens large.
Step 2 – Option A: via the ⋮ menu (all devices)
Section titled “Step 2 – Option A: via the ⋮ menu (all devices)”The ⋮ menu works the same on phone, tablet and computer and is the most reliable way.
-
In the fullscreen view, tap the ⋮ button in the top right (labeled Open menu).
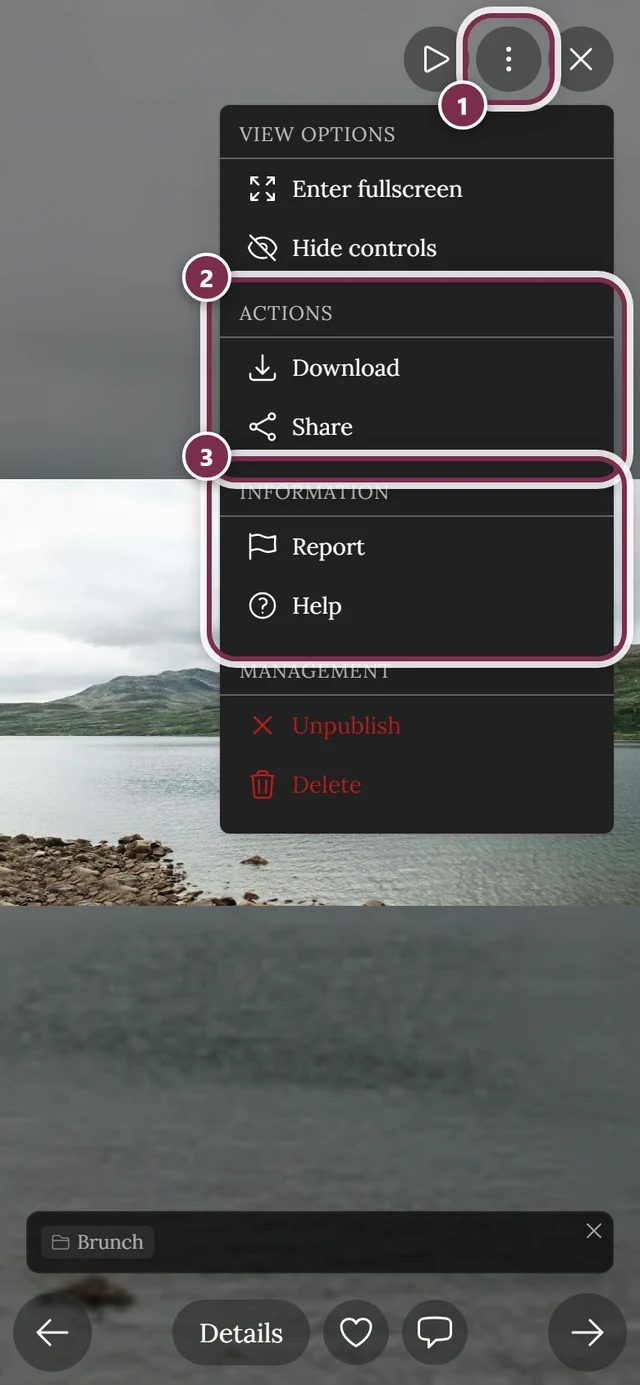
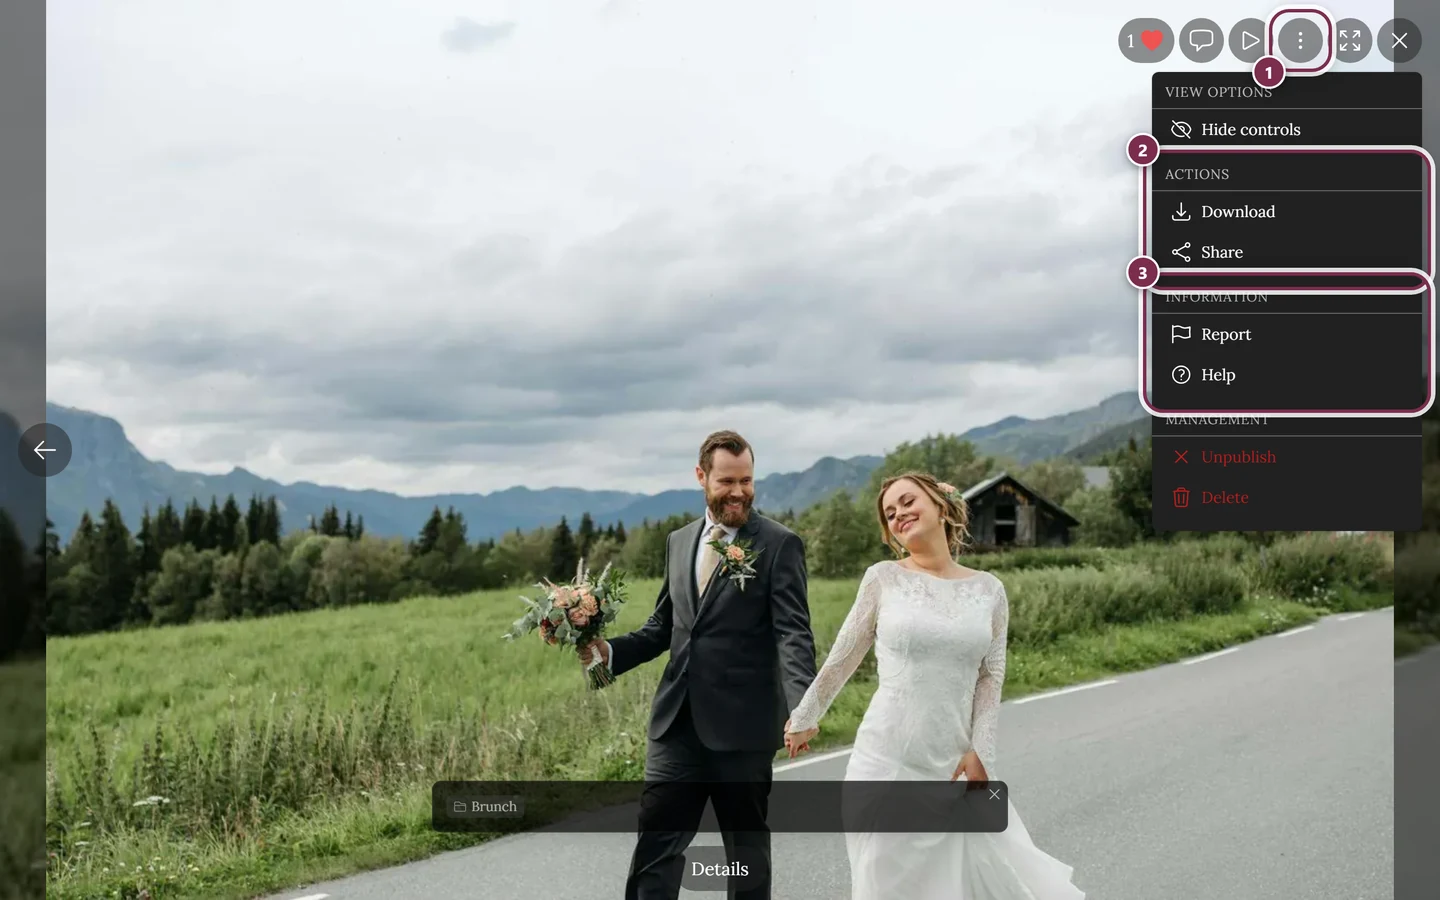
Under “Information”, the ⋮ menu lists Report with a flag icon. ① the ⋮ menu in the toolbar at the top right – to its left sit like, comments, play, full screen and close. ② Actions with Download and Share: this section only exists when downloading or sharing is allowed for the event – with both switched off it disappears entirely. ③ Information with Report and Help. Above them sits View Options with Hide controls (on a phone also Enter full screen). The Management section – Unpublish and Delete – only appears if you manage the event or uploaded the photo yourself; guests never see it. -
Under the Information heading, choose Report (flag icon). The Report content dialog opens.
Step 2 – Option B: right-click or long-press (fullscreen only)
Section titled “Step 2 – Option B: right-click or long-press (fullscreen only)”Alternatively, open the same context menu directly on the photo:
- On a computer: right-click the photo in the fullscreen view.
- On phone/tablet: long-press (hold your finger on the photo a little longer).
The context menu that appears contains the same actions, including Report.
Step 3: Choose a reason
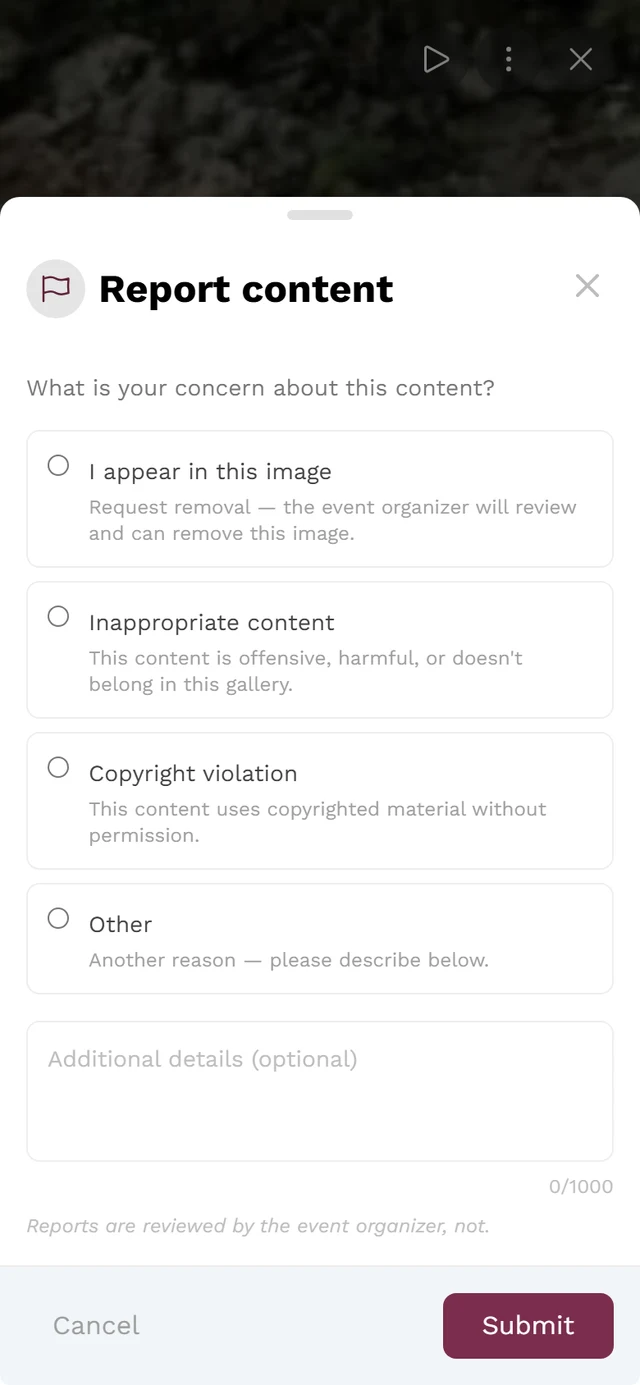
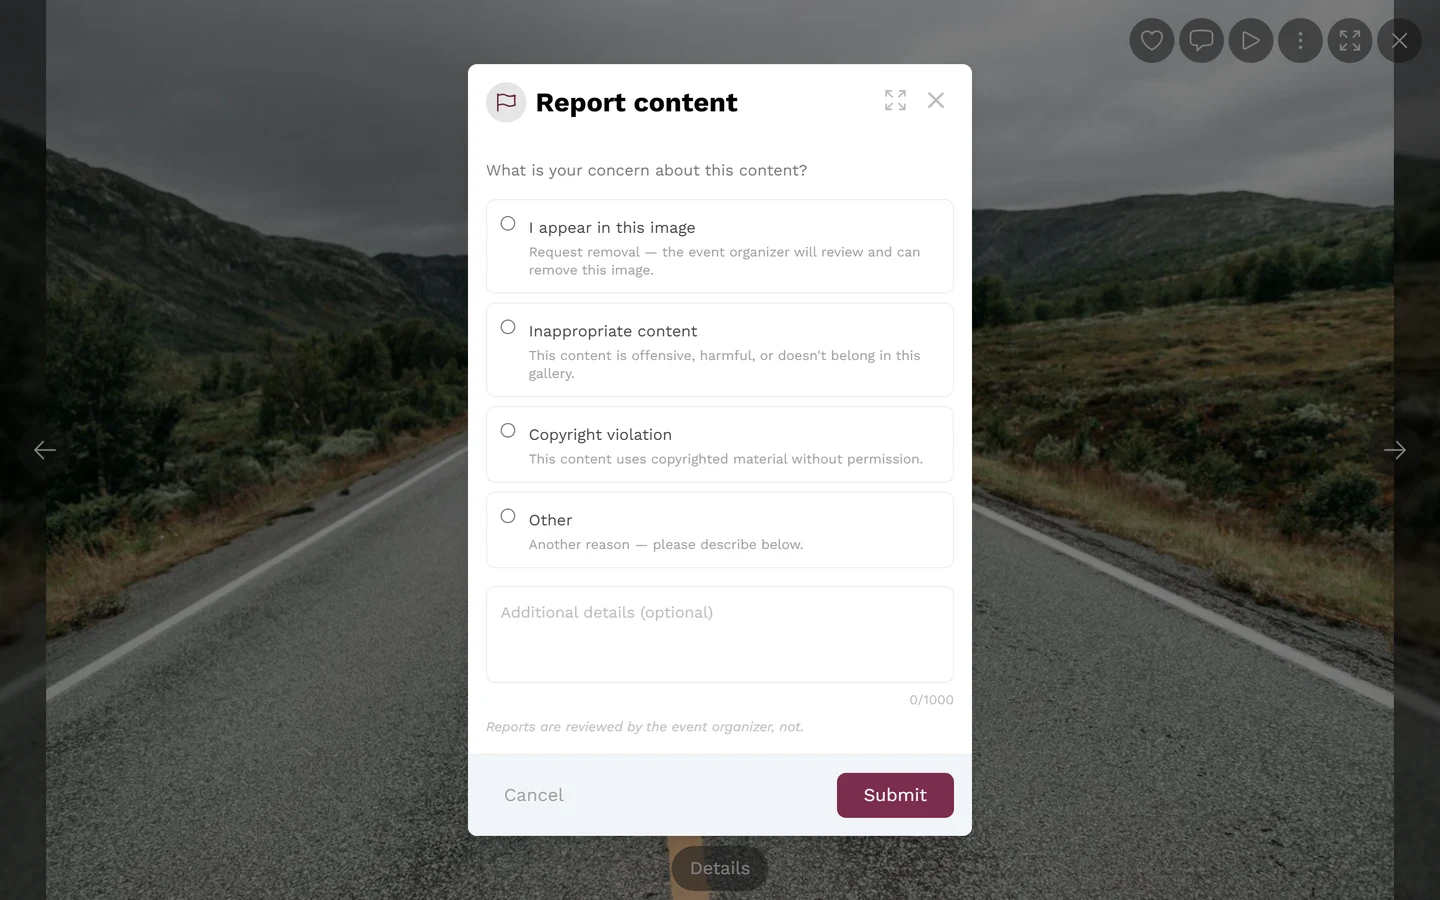
Section titled “Step 3: Choose a reason”In the Report content dialog you pick one of four reasons. Each reason has a short explanation right beneath it:
-
Choose the matching reason:
- I appear in this image – request removal; the organizer reviews and can remove this image.
- Inappropriate content – this content is offensive, harmful, or does not belong in this gallery.
- Copyright violation – this content uses copyrighted material without permission.
- Other – a different reason; please describe it in the text field below.
-
Optional: add a short note in the Add more details (optional) field to help the moderator.
-
Tap Submit.
Step 4: Confirmation
Section titled “Step 4: Confirmation”After submitting, a confirmation appears: Report submitted – “The event organizer will review your report.” That tells you the report went through. You can cancel any time via Cancel or the X in the dialog header.
For opening the fullscreen view, see also Viewing the gallery.
As a moderator: handle reports
Section titled “As a moderator: handle reports”If you have the moderator role, you review incoming reports in the Reports tab of moderation. There are two ways to get to that tab – the screen behind them is the same.
Route 1: via the profile menu (for moderators without admin access)
Section titled “Route 1: via the profile menu (for moderators without admin access)”-
Open the profile menu in the top right (your avatar).
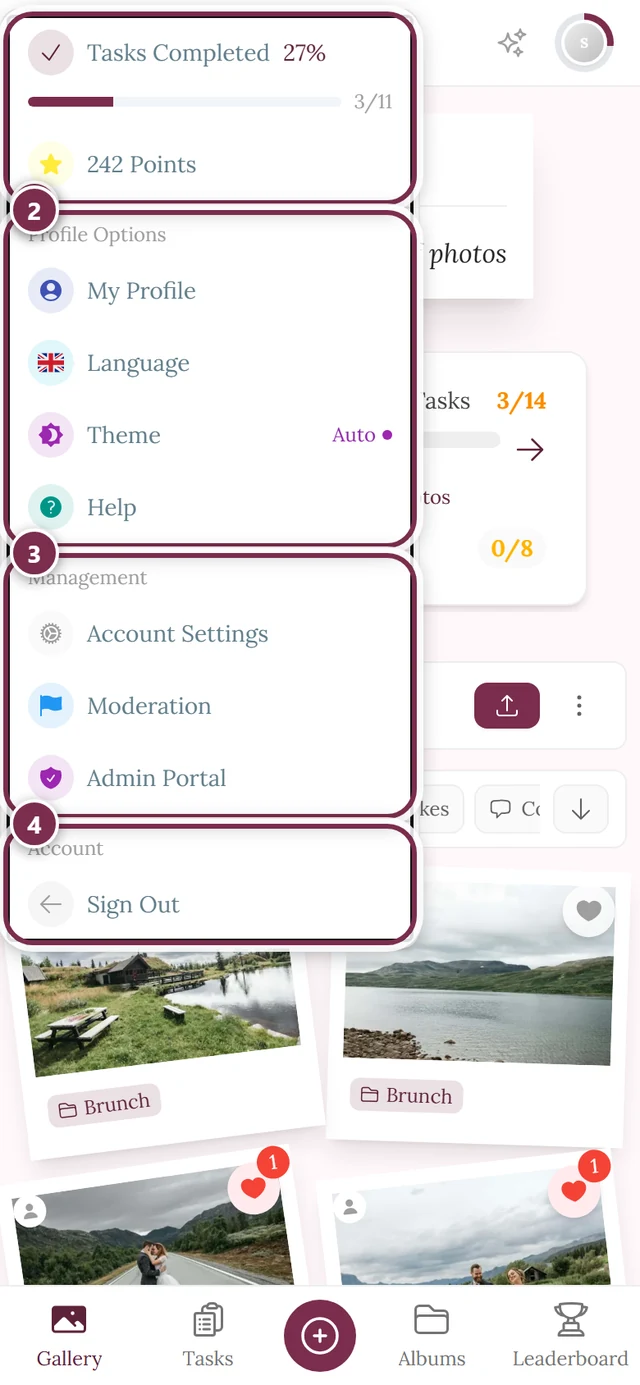
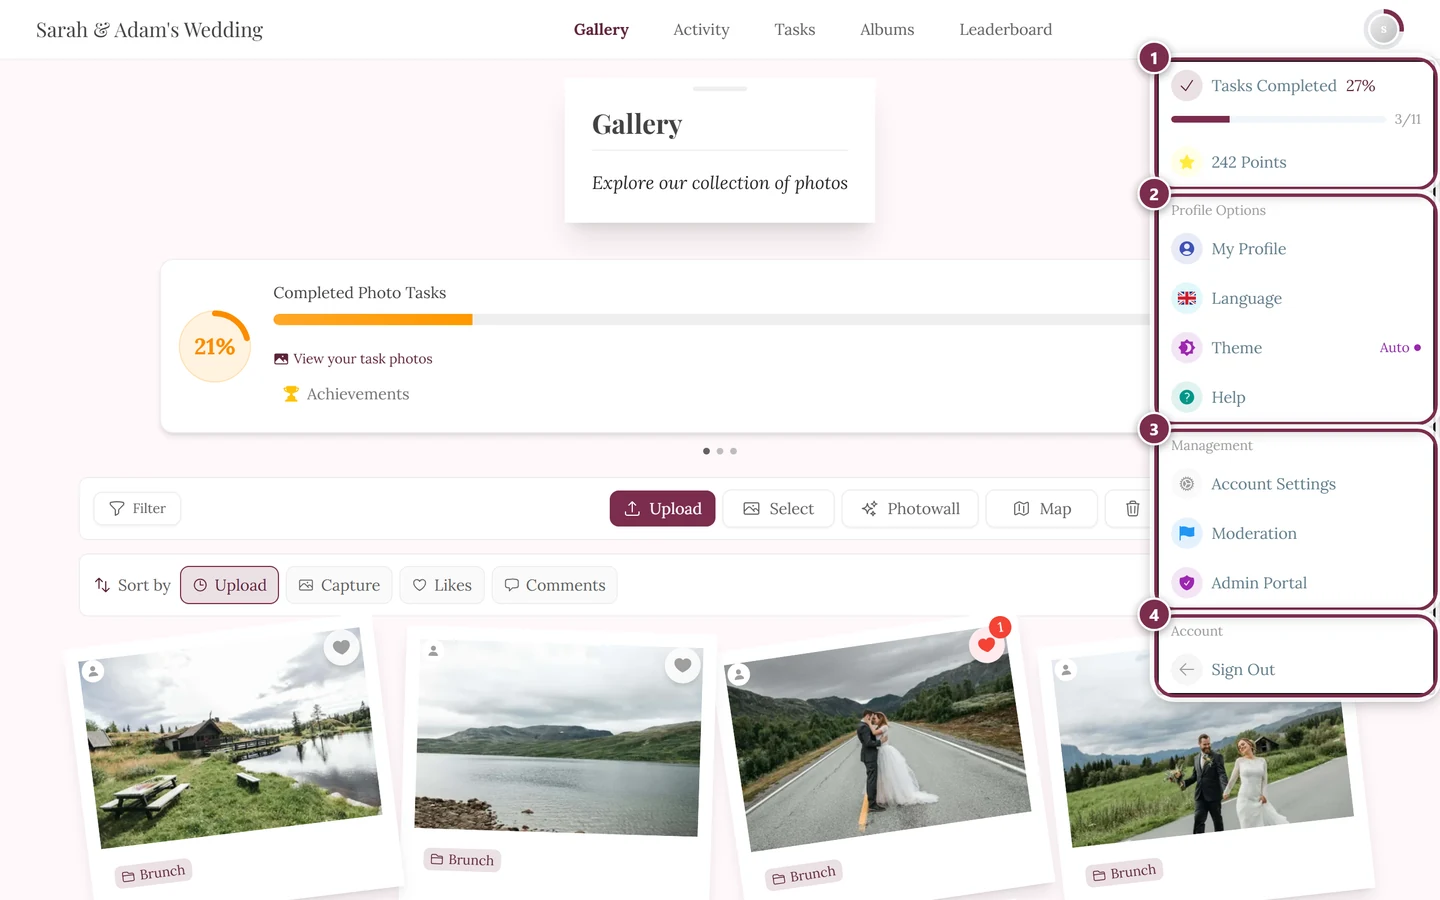
Under “Management”, the Moderation entry appears – only if you have the moderator role. ① your points and solved tasks, ② Profile options with My Profile, Language, Theme and Help, ③ Management with Account Settings, Moderation and Admin Portal – this section is missing until you hold a role for it, ④ Account with Sign out. -
Choose the Moderation entry (flag icon). With open reports, it shows a red badge with the count.
-
On the moderation page, open the Reports tab. This tab is always present (no feature switch) and also carries a counter badge of open reports.
Route 2: in the admin area (for hosts and admins)
Section titled “Route 2: in the admin area (for hosts and admins)”-
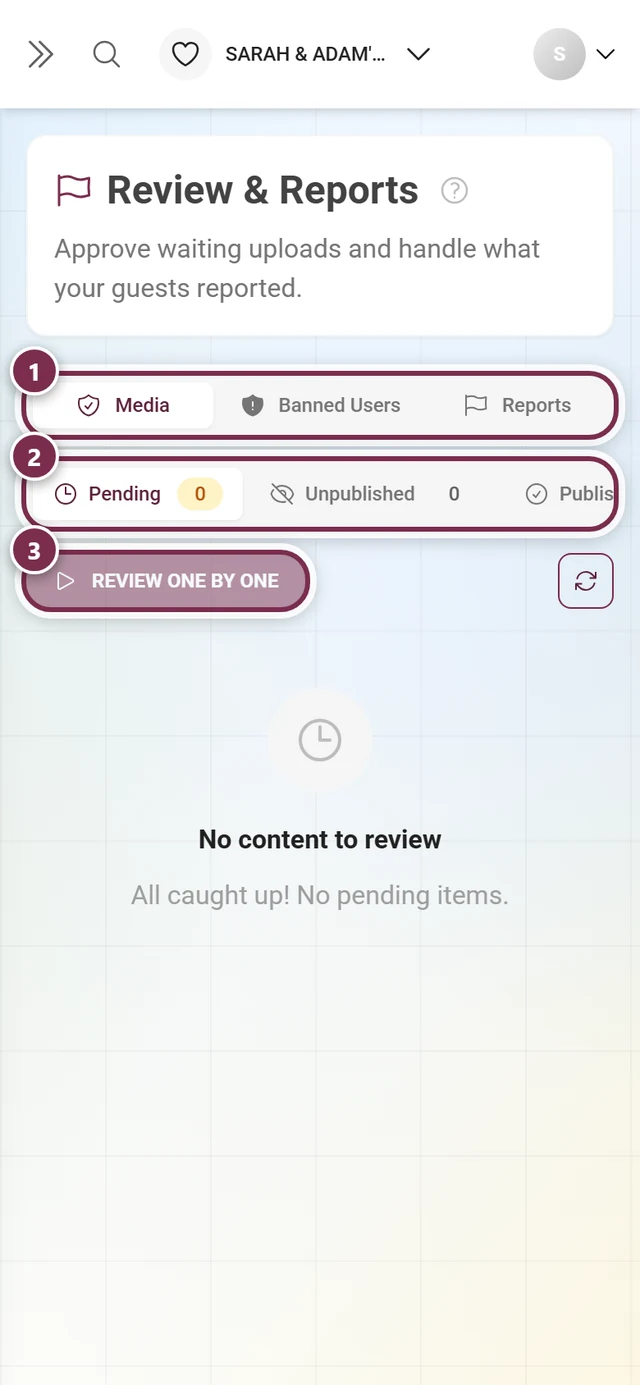
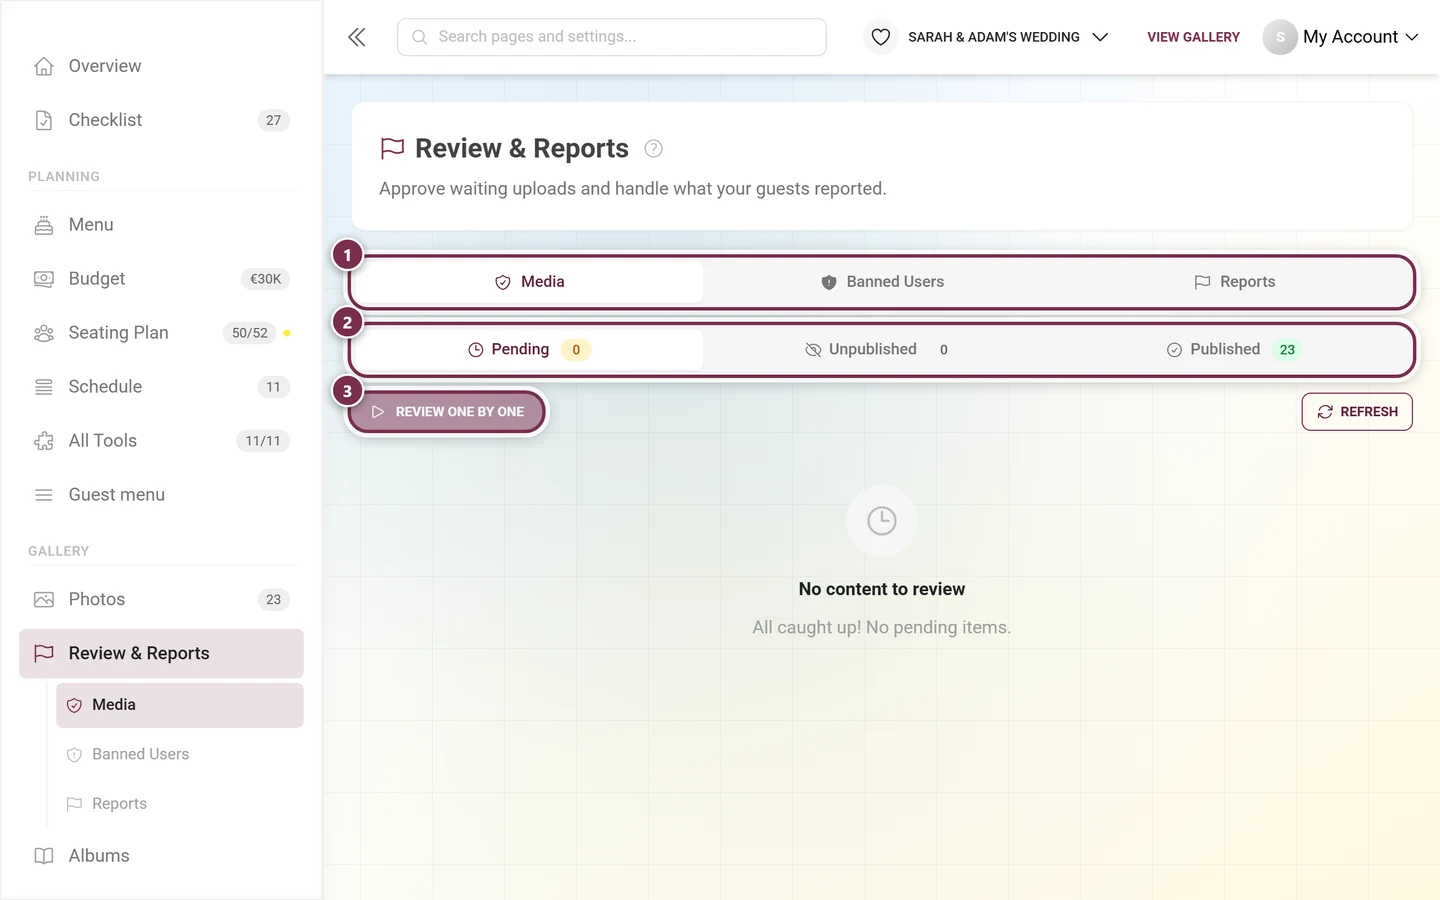
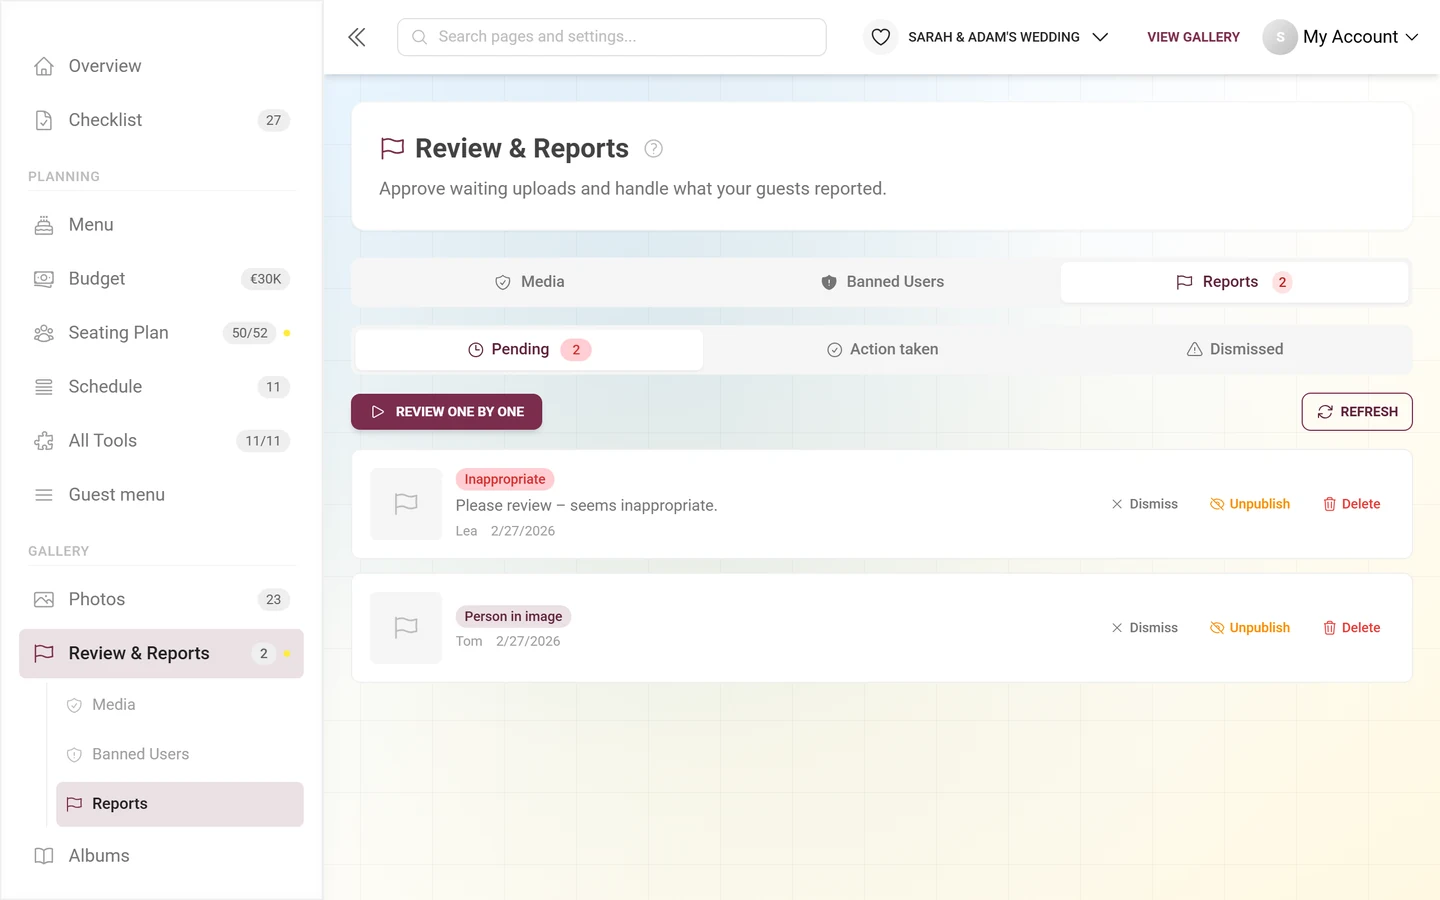
Open the admin area and click Review & Reports in the sidebar, under the Gallery group. The counter on the entry adds up waiting uploads and open reports.
-
Switch to the Reports tab – or click it directly as a sub-entry in the sidebar.
Filter reports by status
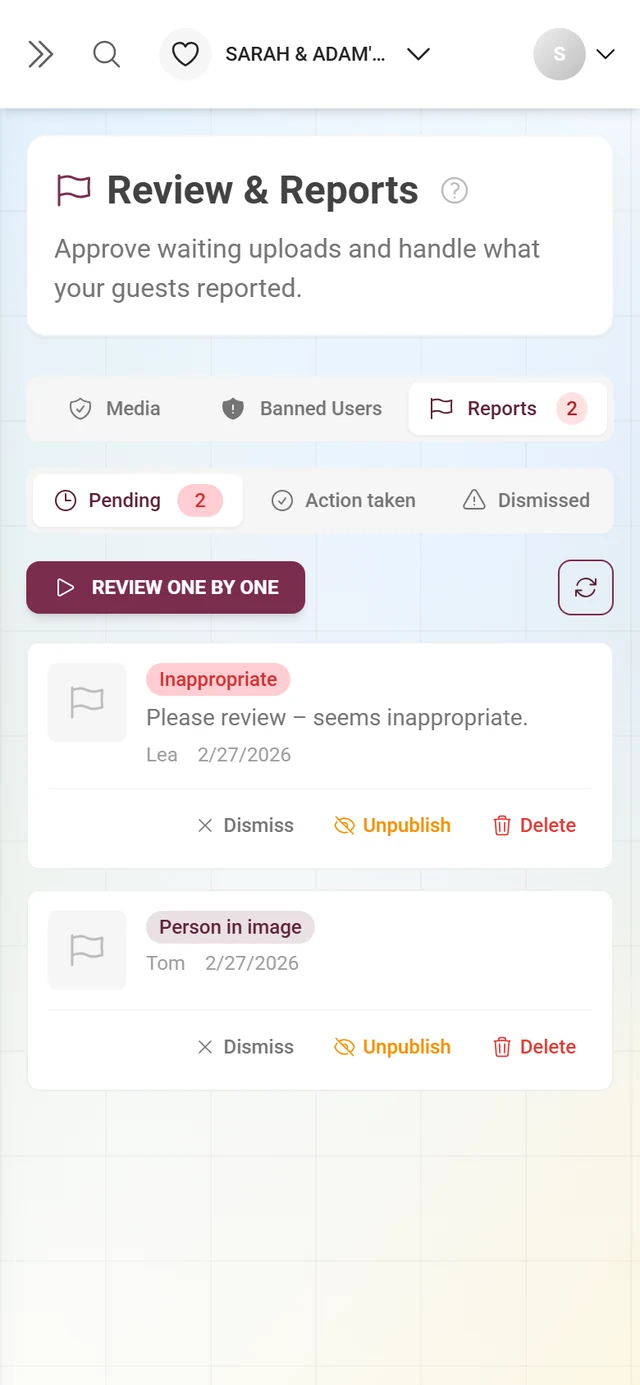
Section titled “Filter reports by status”Within the Reports tab you split reports into three segments:
- Pending (clock icon) – not yet handled, with a red counter badge.
- Action taken (checkmark icon) – already unpublished or deleted.
- Dismissed (warning icon) – marked as unfounded.
The active filter is stored in the address and survives a page reload.
What each report shows
Section titled “What each report shows”For each report you see a thumbnail, a colored reason badge, the reporter’s message, their nickname (or “Anonymous”), and the report date.
Clicking the thumbnail does not open the gallery’s fullscreen view – it opens the single review at exactly that report, a fullscreen mode you work through report by report.
Actions per report (only while “Pending”)
Section titled “Actions per report (only while “Pending”)”As long as a report is Pending, these actions are available – as buttons in the row and via right-click/long-press on the report row:
- Dismiss – the report is unfounded, the photo stays in the gallery.
- Unpublish – the photo is removed from the gallery (unpublished) but is kept and can be re-published.
- Delete – the photo goes to the recycle bin and can be restored from there.
Many reports at once
Section titled “Many reports at once”- Review one by one (above the list, only while the status is Pending) opens the fullscreen mode with a progress counter. Refresh sits next to it.
- A click selects a row, shift-click a whole range. The bar at the bottom then offers Dismiss, Unpublish and Delete for the entire selection.
- Keyboard: D dismiss, H hide, X delete, Z undo, Enter single review, Space select. In fullscreen the legend sits underneath: D dismiss · H hide · X delete · Z undo · ← → browse · Esc exit.
As an administrator/host: keep the overview
Section titled “As an administrator/host: keep the overview”As an administrator or host you additionally have full moderation at hand – inside the admin area, under Review & Reports. It shows up to four tabs – by exactly these rules:
- Reports – always available (see the moderator section above).
- Banned Users – always available. If someone repeatedly causes trouble, you can specifically restrict or ban them.
- Media – approve pending photos, with the sub-tabs Pending / Unpublished / Published. Appears only when approval is required or as long as pending or unpublished media exist. See Approving & moderating photos.
- Face Clusters – appears only when the plan includes AI face processing and face recognition is switched on for this event.
Whether approval is required at all is set under Moderation & safety.