Creating albums
Albums let you organize your event’s photos by moment or theme – for example “Ceremony”, “Party” or “Best photos”. Albums can be filled manually, or fill themselves as a smart album based on rules (e.g. all videos, or every photo of a specific person). This guide walks you as the host through the complete album manager. To see how guests browse albums later, see Browsing albums.
Reaching the album manager
Section titled “Reaching the album manager”-
Open your event’s Admin portal. Tap your profile menu at the top right and choose the Admin portal entry under Management. See Reaching the event admin for details.
-
In the left sidebar, open the Gallery category and click Albums. The page is titled Album Management and lives at the route
/admin/gallery/album-manager. You can also reach it from the dashboard or the global search.
Understanding the album list
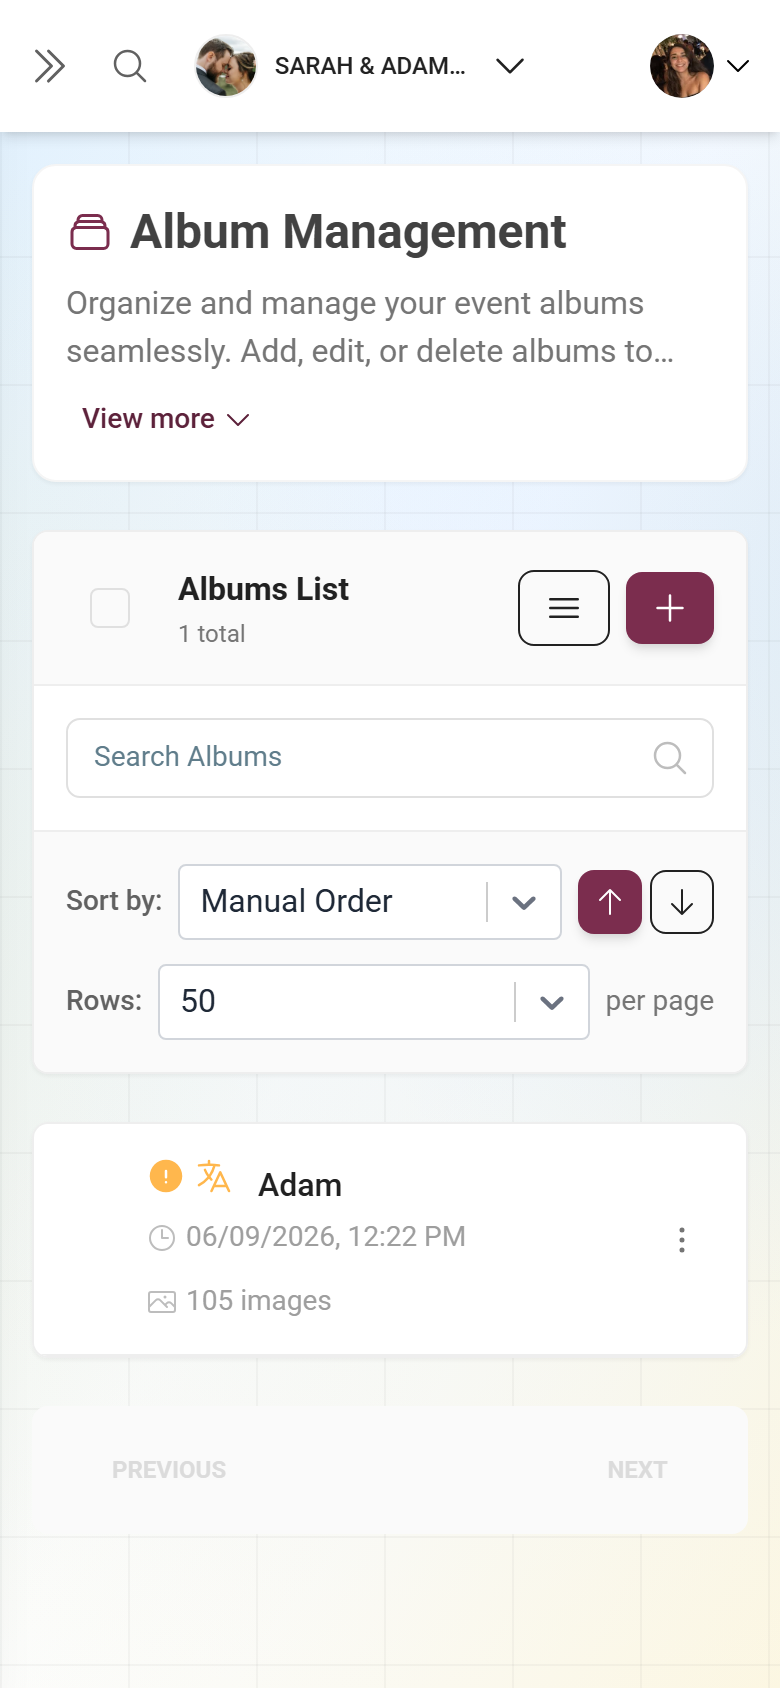
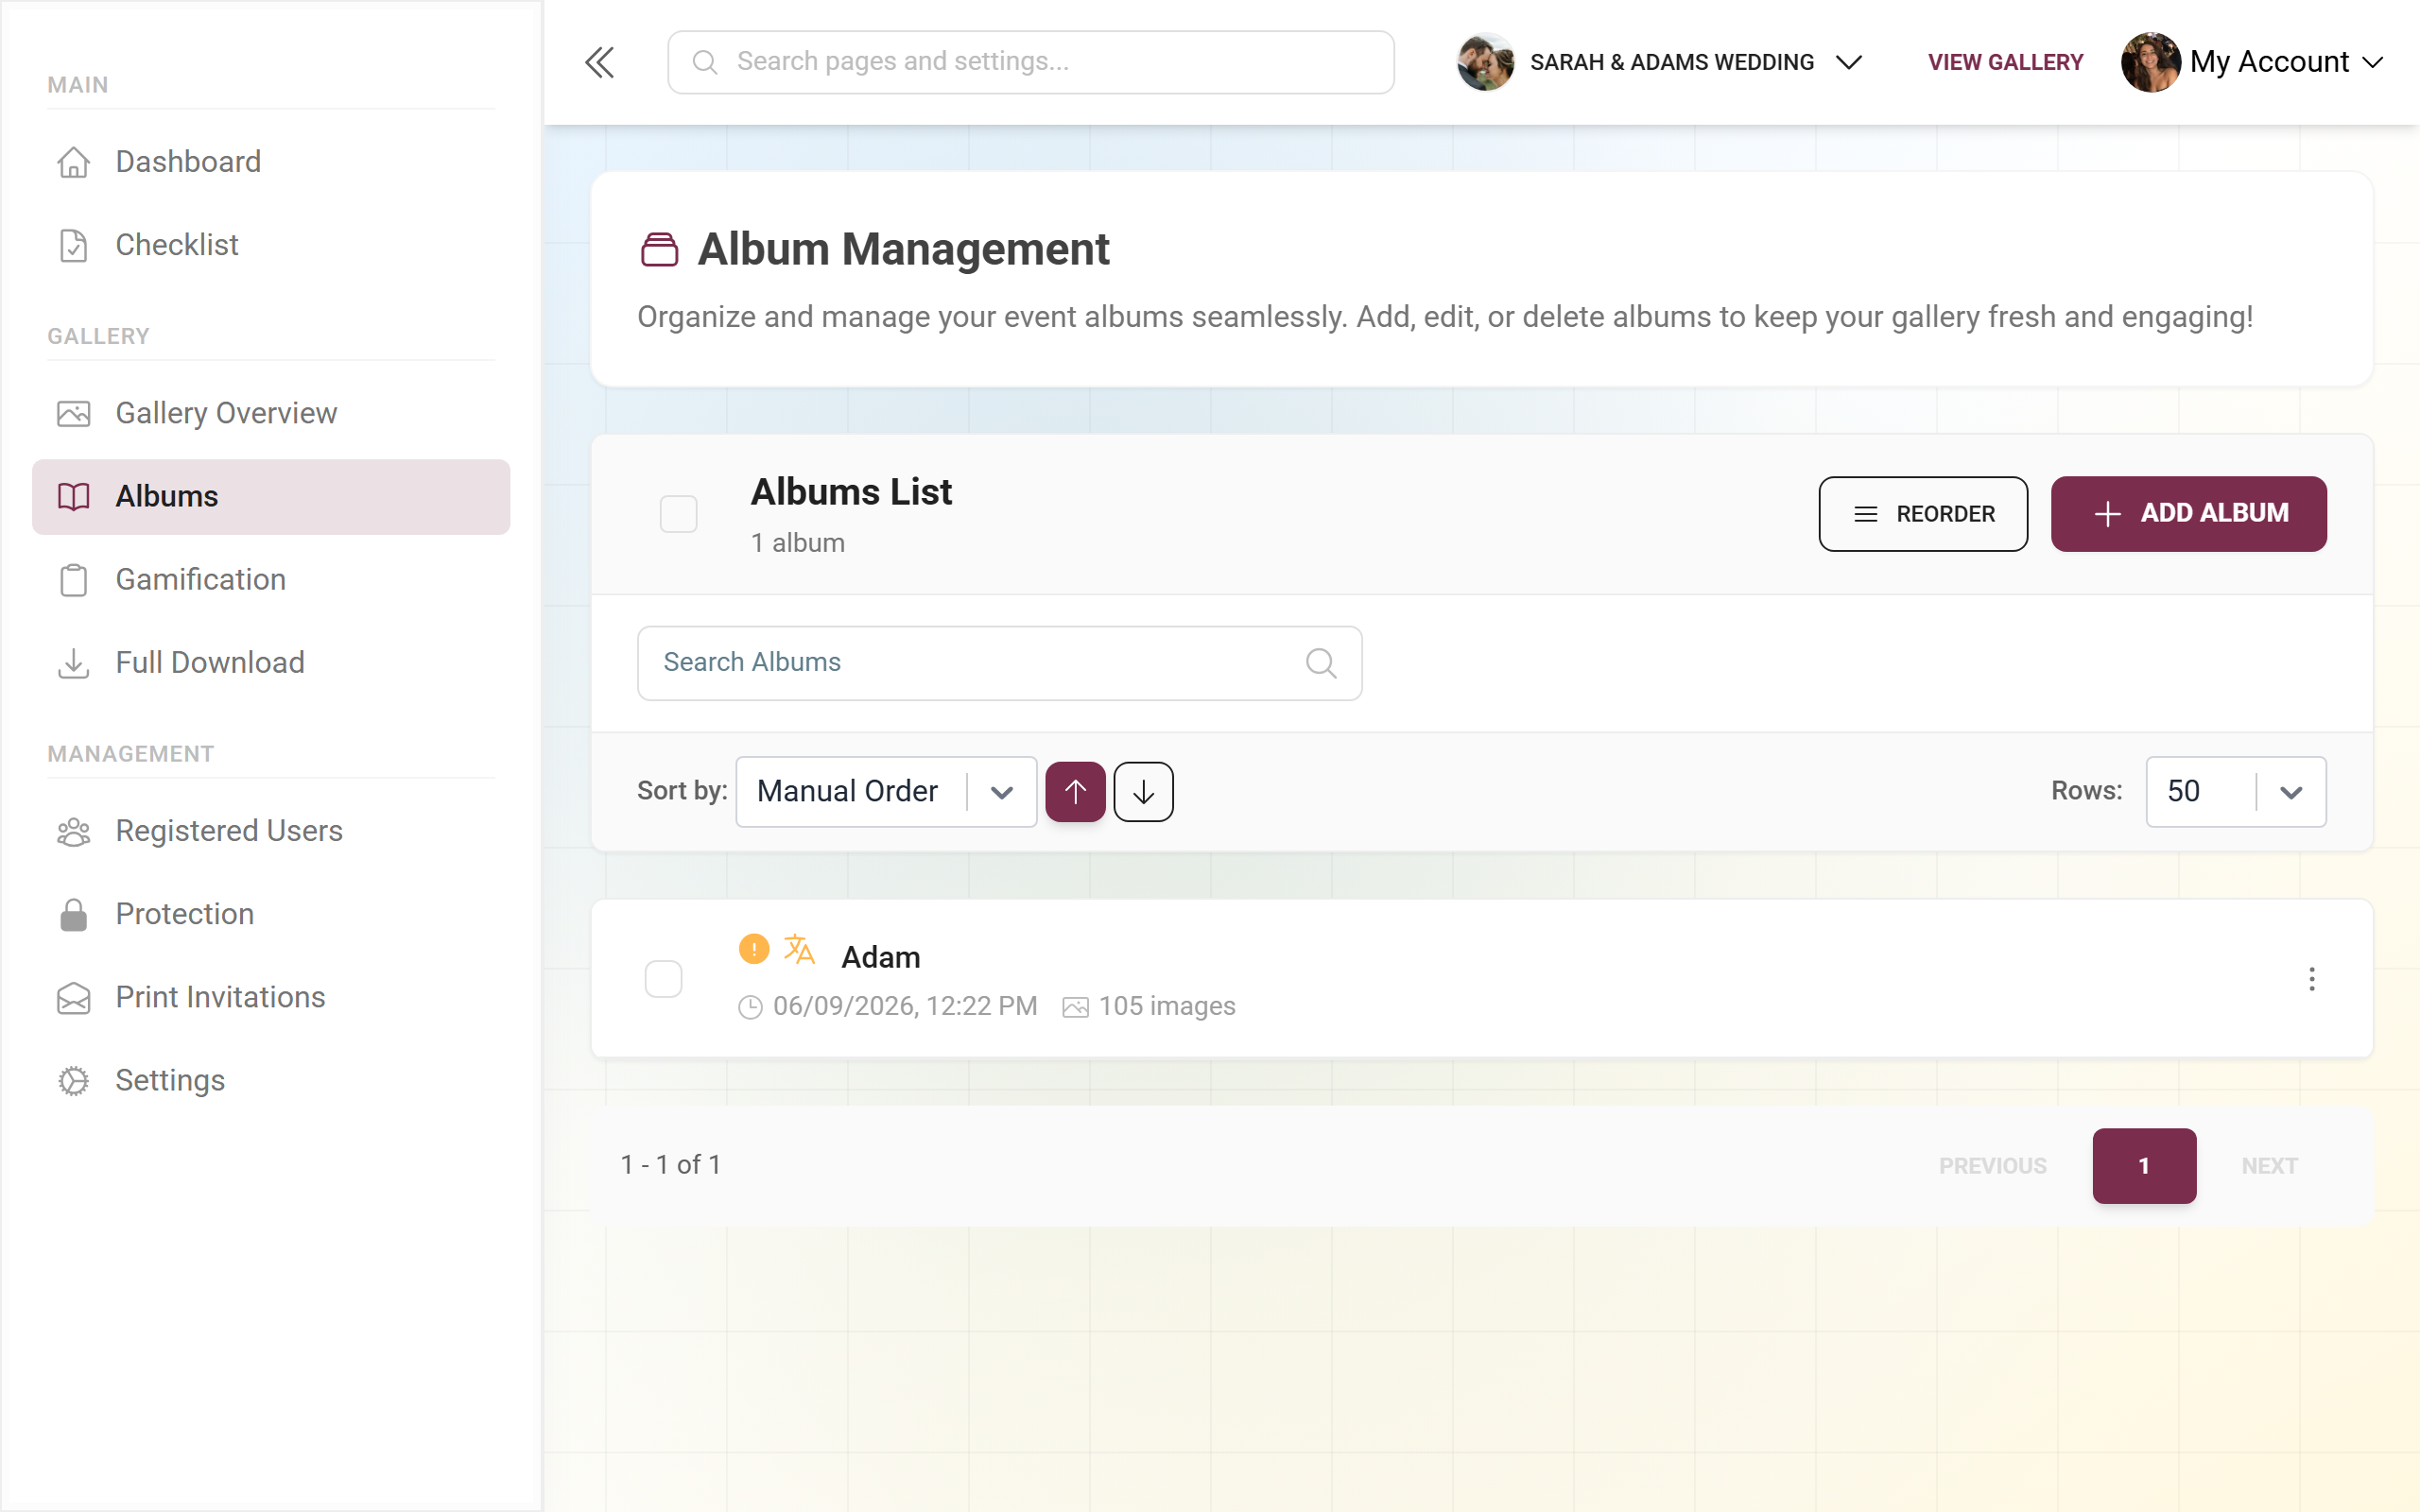
Section titled “Understanding the album list”The top area controls how the list is displayed – this does not affect how photos are sorted inside an album (you set that later in the dialog).
- Title & counter – the top reads Album Manager (just Albums on mobile) with the total “N albums”.
- Search – the Search albums… field filters the list live by title (with a short delay of about 300 ms).
- List sorting – the Sort by: dropdown orders the displayed list. Options: Manual Order (your manual arrangement), Title, Created At and Images Count. The arrow next to it toggles ascending and descending.
- Rows per page – Rows per page: sets how many albums appear per page (default 50).
- Reorder – this button appears only when “Sort by” is set to Manual Order (see “Reordering albums”).
- New Album – the button (just New on mobile) with the plus icon opens the create dialog.
Each album row shows a selection checkbox, a translation-status icon, the title, plus the creation date and “N images” (photo count). Clicking the row opens the edit dialog directly. The three-dot menu (or right-click) gives you:
- Select – mark the album for multi-selection.
- View Images – jumps to the filtered gallery showing only this album’s photos (route
/admin/gallery?albums=…). This is how you assign photos to a manual album. - Edit – opens the edit dialog.
- Delete – deletes the album after the prompt “Delete Album? / This action cannot be undone.” The photos themselves stay in the gallery; only the album assignment is removed.
As soon as you select at least one album, a selection bar appears at the bottom with “N album(s) selected” and a Delete Selected button. After the prompt “Are you sure? / This will permanently delete the selected albums.” all marked albums are deleted.
If there are no albums yet, the page shows No albums found / Get started by creating a new album with an Add Album button. If the search finds nothing, it shows No results for … instead.
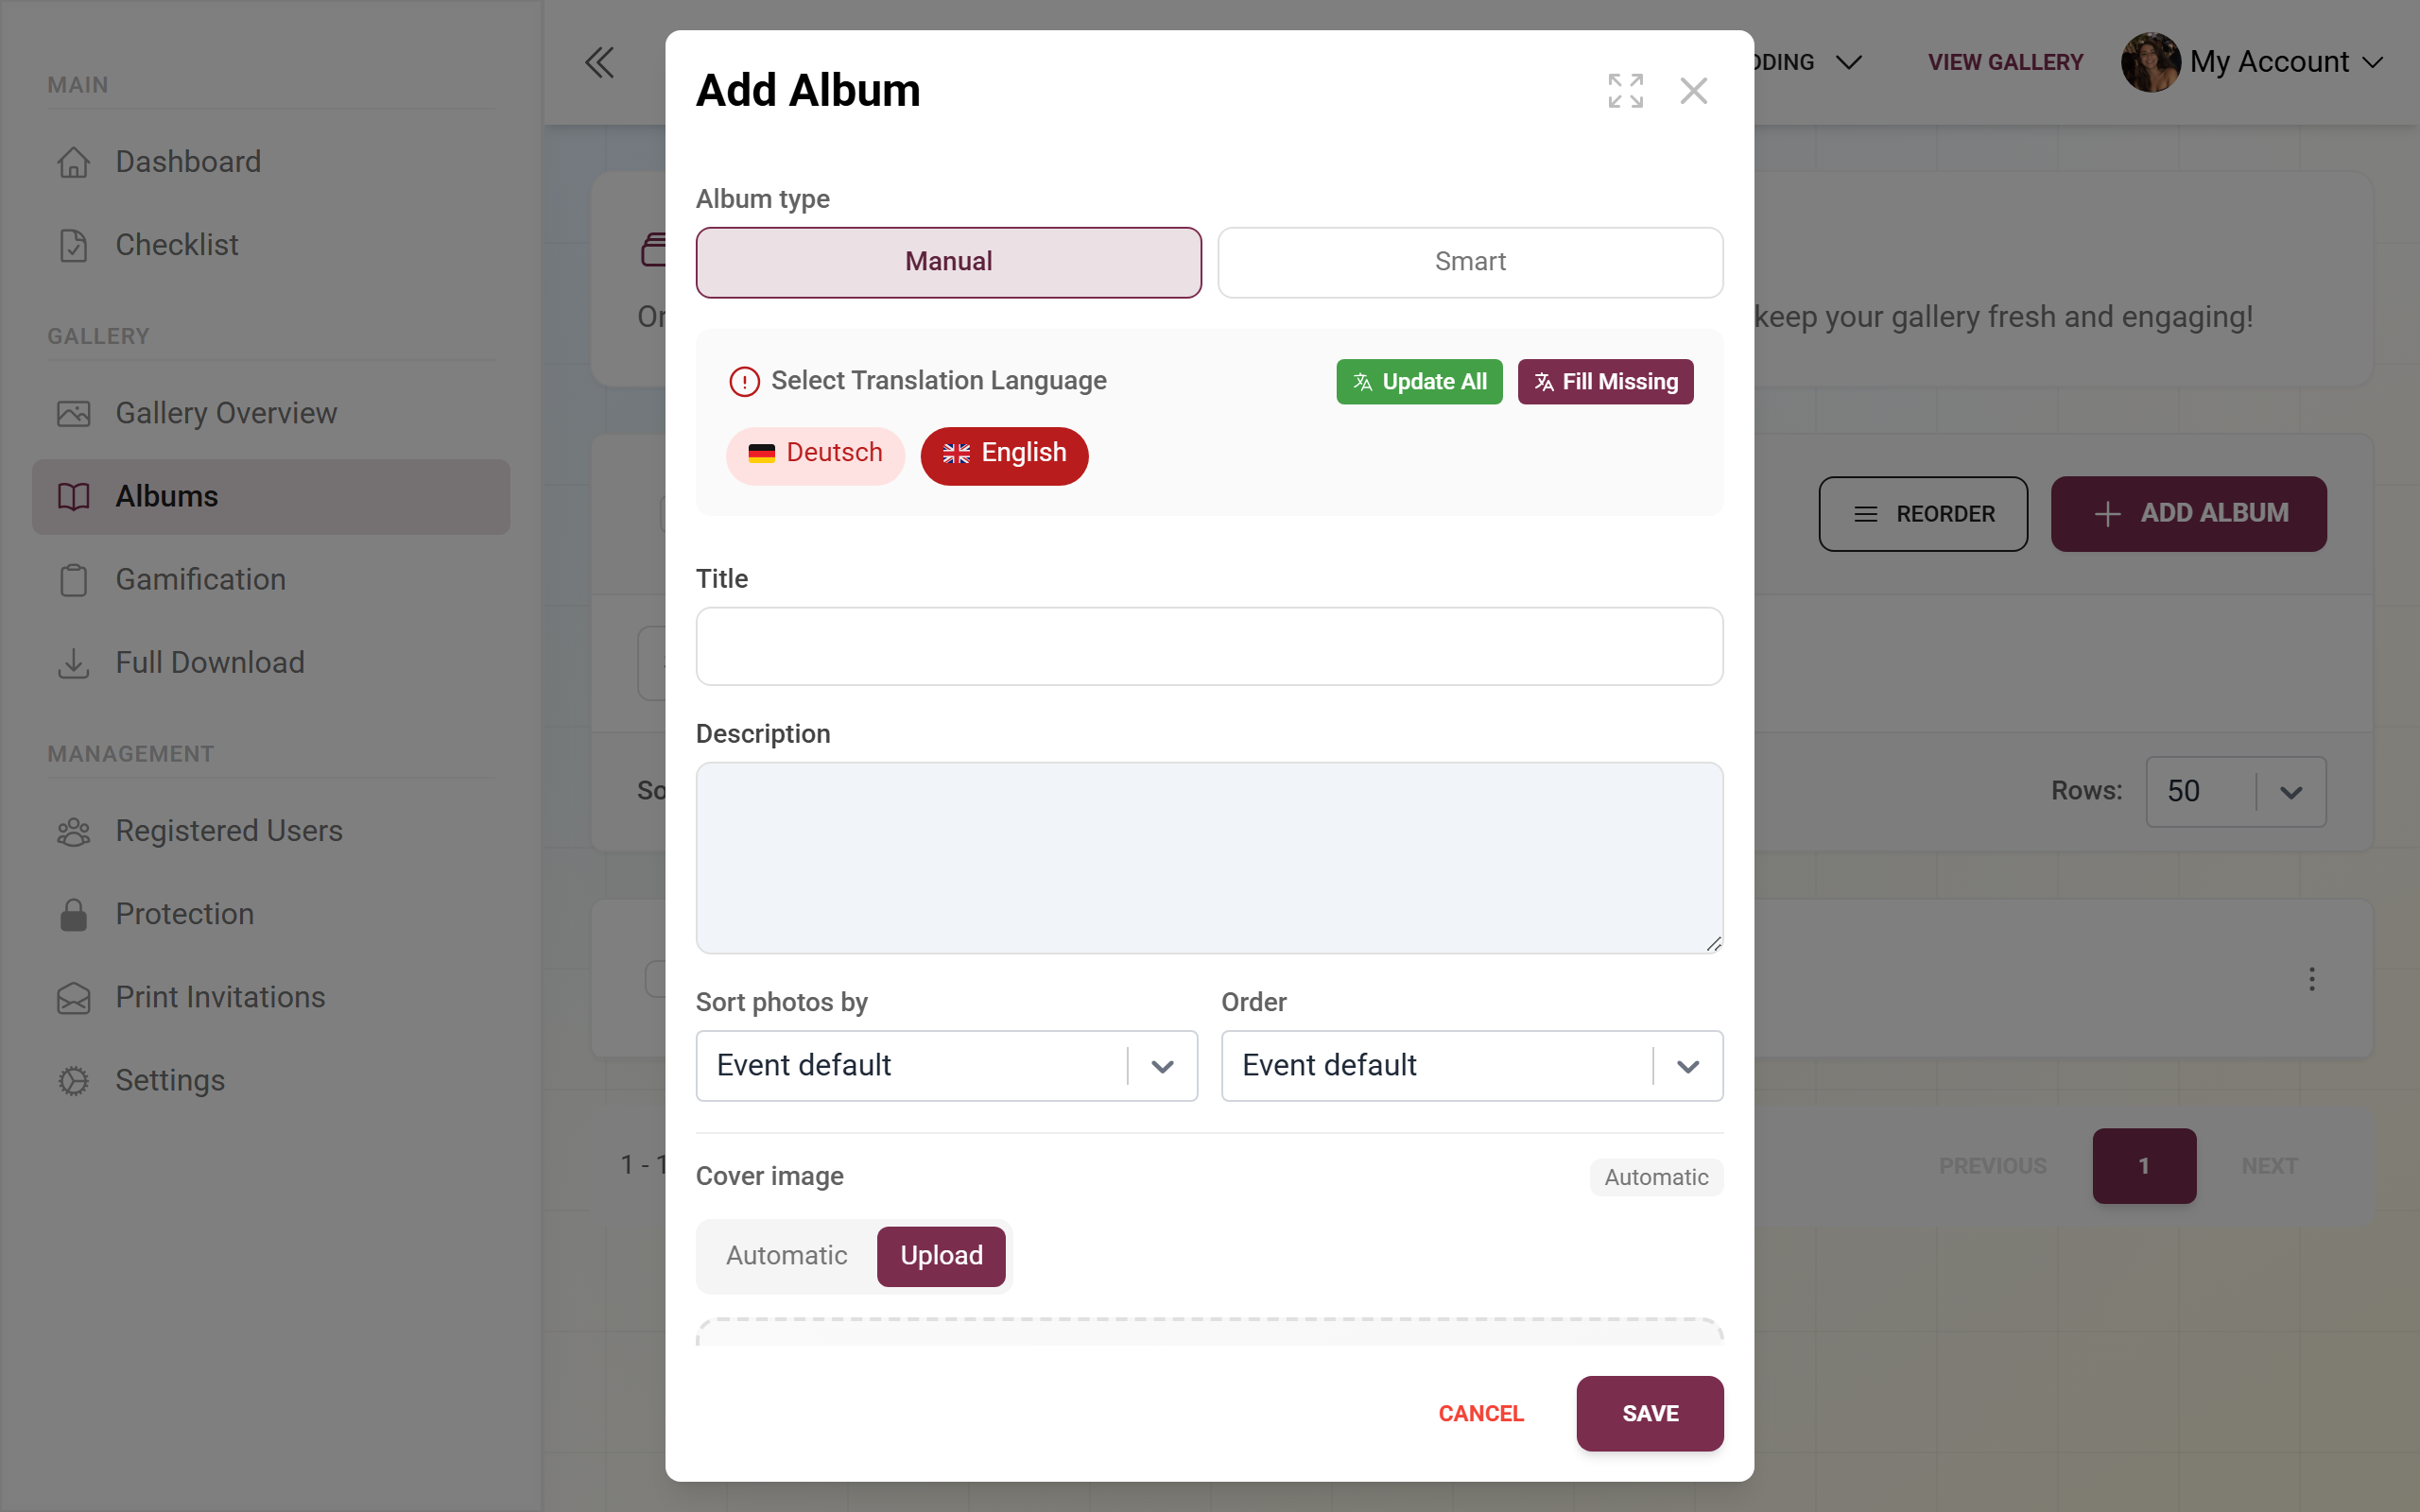
Creating an album: the dialog
Section titled “Creating an album: the dialog”Tap New Album. The Add Album dialog opens (when editing it reads Edit Album). The fields appear top to bottom in this order:
-
Album type – two buttons:
- Manual – a normal album you assign photos to manually.
- Smart – fills itself automatically by rules. If you lack the smart-album feature, this button carries a star icon as a premium hint.
-
Language selector / translation – at the top you pick the active event language. The title is required, the description optional. For multi-language events you maintain title and description per language separately.
-
Title (language code) – the required title for the active language.
-
Description (language code) – an optional description (a multi-line text field).
-
Auto-fill rules – appear only for the Smart type (see “Smart albums”).
-
Sort photos by / Order (photo sorting inside the album) – controls how guests see the photos within this album. “Sort photos by”: Event default, Upload date, Capture date, Likes or Comments. “Order”: Event default, Newest first or Oldest first. Don’t confuse this with the list sorting above – here it’s about the order of photos in the opened album. Event default inherits the event-wide setting.
-
Cover image – see “The cover”.
-
Tap Save at the bottom. While saving you’ll see “Saving…”, and during a cover upload “Uploading… N%”. Cancel discards the dialog.
The cover
Section titled “The cover”The Cover image area has three tabs. A status badge shows whether the cover is automatic, from the gallery, or uploaded.
- Automatic – the cover is picked automatically from the album’s photos (most likes, then newest). The simplest choice for new or empty albums.
- From gallery – available only for existing albums (new albums have no photos yet). Pick a single photo, or enable Collage and pick 2–4 photos in numbered order. If no photos are published yet, it shows “No published photos in this album yet.”.
- Upload – upload your own cover (square works best). After the upload, open the image adjustment via the gear menu: rotate, crop, replace, and set a focus point so the most important part of the image stays in the crop.
Best practice: For a consistent album look, upload square and place the focus point on faces or the main subject. For mixed collections, use the collage.
Smart albums: fill automatically
Section titled “Smart albums: fill automatically”When you choose Smart as the album type, the Auto-fill rules section appears. The album then continuously fills itself with every photo that matches your rules.
-
Tap Add rule and pick a field. The X icon removes a rule again.
-
From two rules onward, Match appears at the top with all (AND – every rule must match) or any (OR – one is enough).
-
Watch the live preview below: “Counting…” or ≈ N photos shows how many photos currently match. Check this before saving.
-
Tap Save.
The available rule fields:
- Media type – “image”, “video” or “motion_picture”.
- Minimum likes – a minimum number of likes (from 0).
- Uploaded by – one or more uploaders.
- Caption contains – text that appears in the caption.
- In album / Not in album – in or not in the selected album (the album itself is excluded).
- From task – photos from a specific task (see Managing tasks).
- Captured between / Uploaded between – a date range with From and To (each with date plus time; the time activates only once a date is set).
- Person – only with face recognition enabled (see below).
Best practice: Combine rules with AND to narrow the result – e.g. “Media type = image” AND “Minimum likes = 5” for a “Best photos” album. Use the ≈ preview as a sanity check.
Smart albums by person
Section titled “Smart albums by person”With face recognition enabled, the Person rule is available. The section is titled People in this album with a note that you can pick detected people or upload a reference photo – the album updates automatically.
- Path A – pick detected people: Tap the tiles of the detected faces to select them (checkmark). Show more people (N) loads additional tiles. If no people are detected yet, it shows “No people detected yet. Face recognition runs as photos are uploaded.”.
- Path B – upload a reference photo: In the Or upload reference photos section you upload a clear photo of one face (JPEG, PNG, WebP or HEIC/HEIF). This works only for an already-saved album – for a new album it reads “Save the album first, then upload reference photos here.”. Each reference shows its status: pending (processing), ready (green checkmark) or error (red). The X removes a reference again.
- A ≈ counter shows live how many photos match the selected people. “No matching photos yet…” means processing is still running.
More on face recognition: AI processing.
Reordering albums
Section titled “Reordering albums”The order in which guests see the albums is controlled by manual ordering:
-
Set Sort by at the top to Manual Order. Only then does the Reorder button appear.
-
Tap Reorder. A hint appears: “Drag and drop albums to reorder them. Click ‘Done’ when finished.”. Now drag the albums into the order you want. Alternatively, type the sort position directly as a number in a row.
-
Tap Done to save the order.
This order takes effect on the albums page when its sorting is set to “Manual Order (as arranged in Album Manager)” – you set that in the Style settings.
Premium & roles
Section titled “Premium & roles”Troubleshooting
Section titled “Troubleshooting”- No album feature: The Add dialog shows a premium hint. You can still edit existing albums.
- Smart chosen but no smart feature: Instead of the rule builder a premium hint appears and the Save button stays disabled. Switch to Manual or upgrade.
- “Person” missing from the field list: Face recognition is not active. See AI processing.
- Reference upload not possible (“Save first”): Save the album first, reopen it, then upload the reference.
- Preview shows ≈ 0 photos: The rules are too strict (too many combined with AND) or people aren’t detected yet. Wait for processing or loosen the rules.
- “Reorder” button missing: “Sort by” is not set to Manual Order. Switch it.
- Cover doesn’t change: The choice only takes effect after Save.
Best-practice tips
Section titled “Best-practice tips”- Prefer few, clearly named albums over many overlapping ones. For international guests, maintain titles in multiple languages.
- Smart albums are great for “Best photos” (minimum likes), “Videos” (media type) or “Per person” (bride/groom via reference photo).
- Leave the album-internal photo sorting on Event default in most cases and override it only deliberately.
- Set the album order via Manual Order and Reorder – this matches the albums-page sorting “Manual Order” in the style settings.
Related help
Section titled “Related help”- Guests: Browsing albums
- Admin: AI processing / face recognition
- Admin: Style settings
- Admin: Managing tasks