Live photo wall
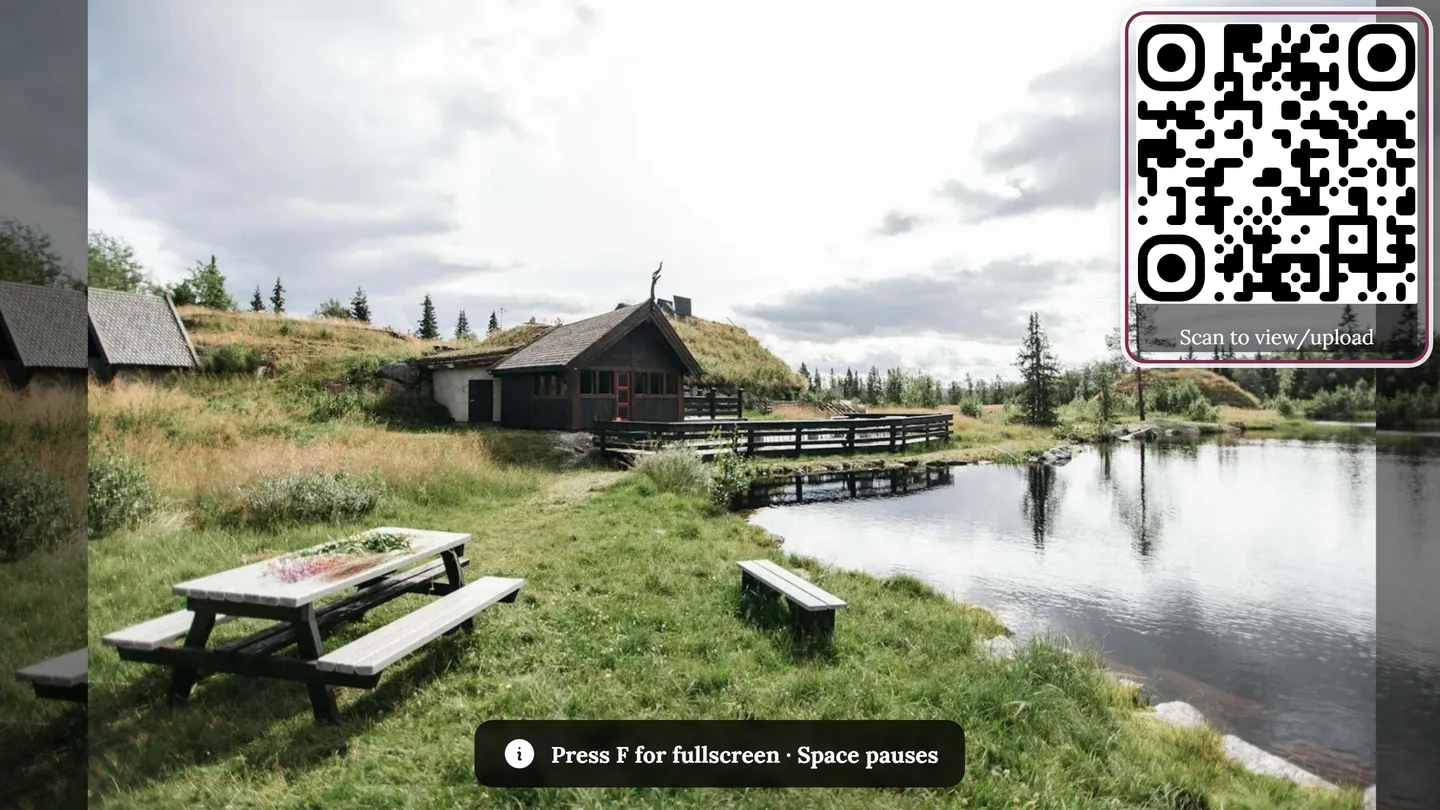
The live photo wall automatically shows an event’s newest photos on a big screen – ideal for a TV or projector next to the dance floor or at the entrance. New uploads appear in real time, and a QR code invites everyone to join in.
Who is this page for?
Section titled “Who is this page for?”- Guests watch the wall on the big screen and add new photos through the QR code / upload.
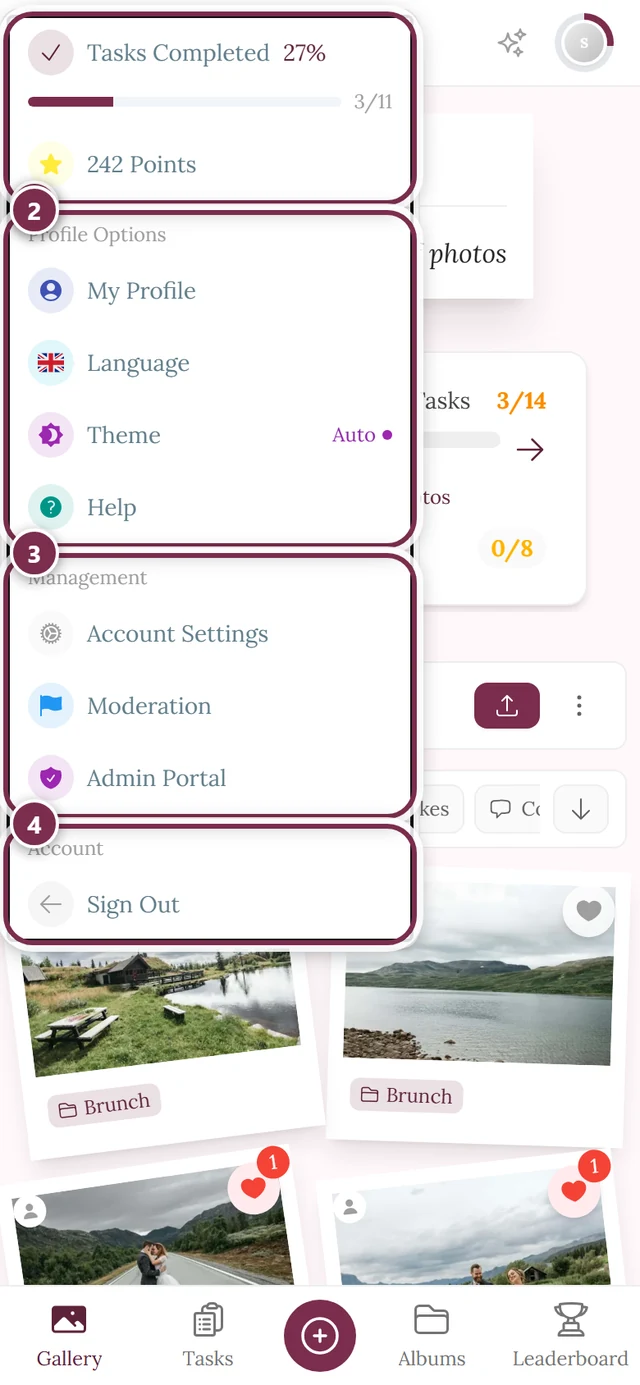
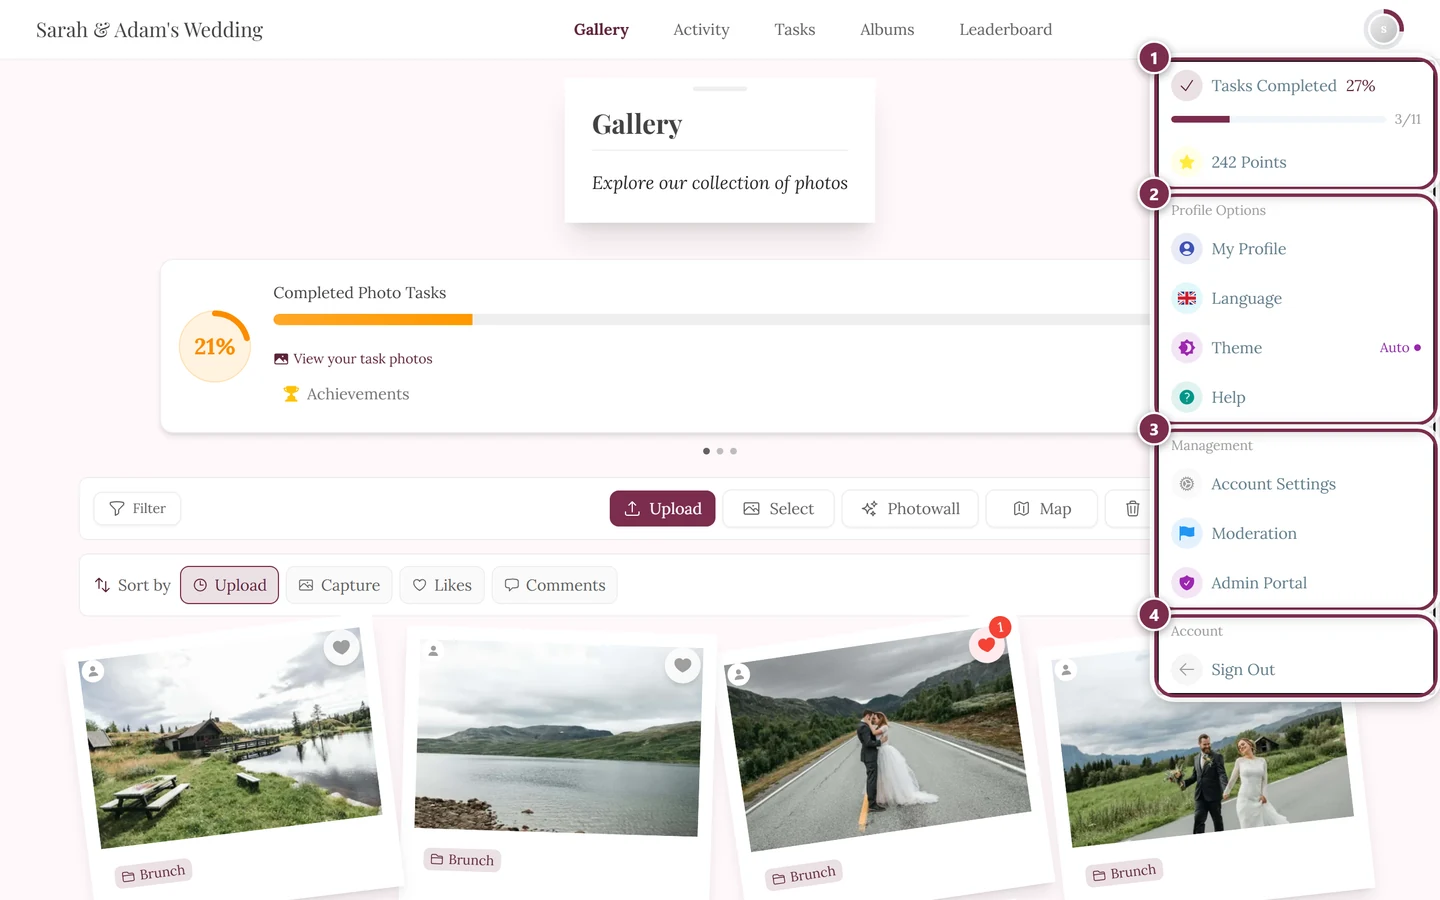
- Hosts and moderators start the wall, put it fullscreen on a TV or projector, and configure it in the settings. Moderation and admin areas are reached not on the photo wall itself, but through the profile menu at the top right of the gallery.
Is the photo wall available?
Section titled “Is the photo wall available?”For the Photowall button to appear in the gallery at all, two conditions must be met:
- Event plan: The photo wall must be included in the booked plan. If it isn’t, the
/photowallpage shows the notice Photo Wall Not Available instead of the wall. - Feature toggle: The host has to keep the feature enabled (on by default). Since the admin rework the Offer the photo wall switch lives in the Settings → Photo Wall Settings tab, right above the wall’s own options – no longer under “Features → Gallery Views”. Its description says what it does: “Shows the photo wall button in the gallery and makes the wall reachable through its link.”
Opening the photo wall – every way
Section titled “Opening the photo wall – every way”There are four ways to open the wall. Which one fits depends mostly on your device’s window width.
Way A – From the gallery bar (from 960 pixels wide)
Section titled “Way A – From the gallery bar (from 960 pixels wide)”The fastest way on a laptop or computer connected to a TV or projector.
-
Open the event’s gallery.
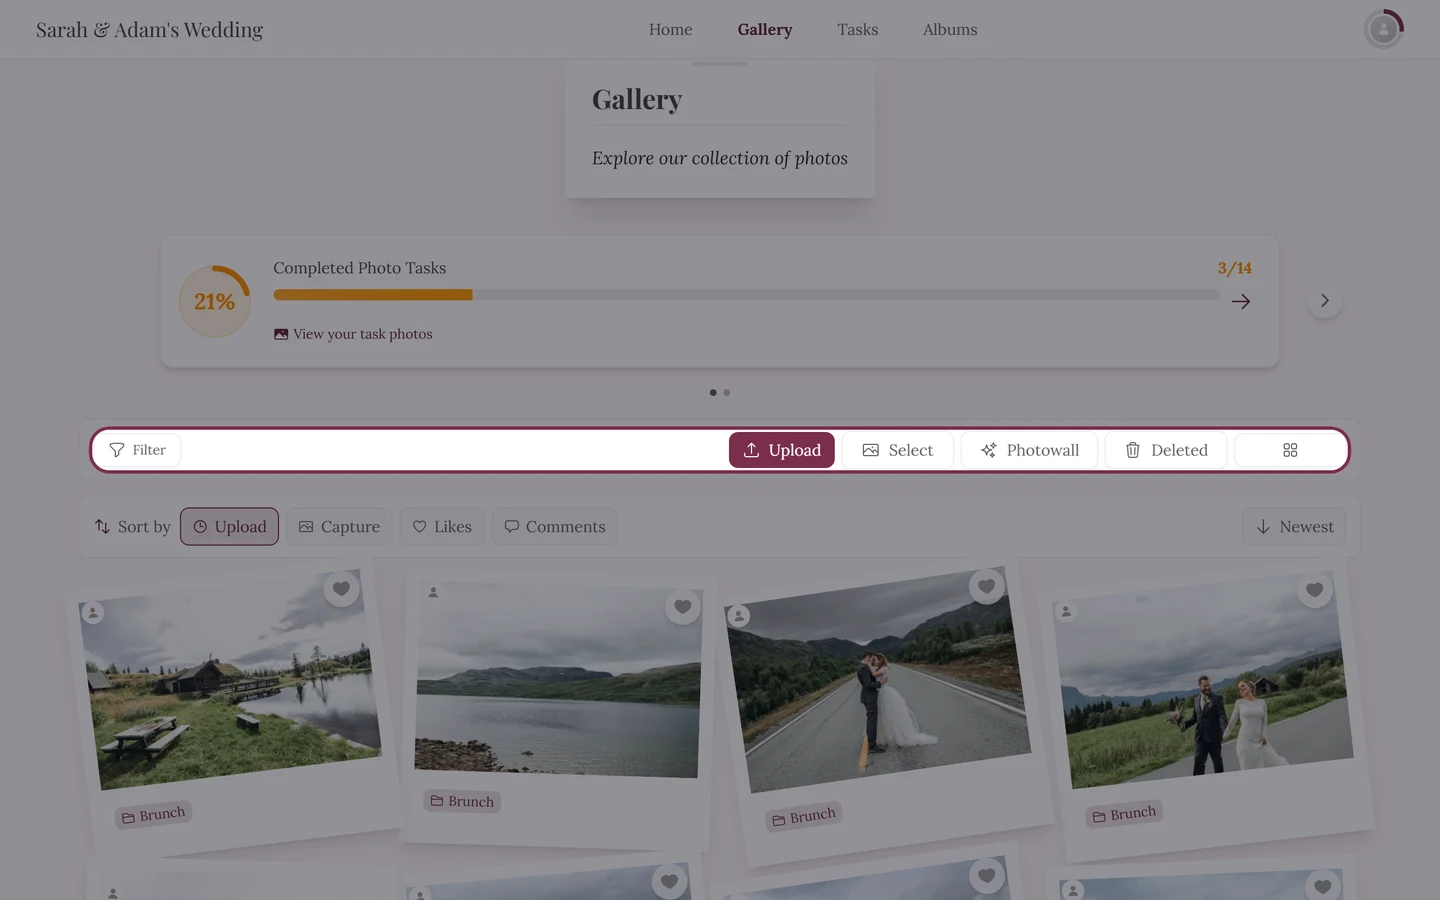
The gallery toolbar on a computer – this is where the Photowall button lives as its own button. -
In the top toolbar, click Photowall (sparkles icon).
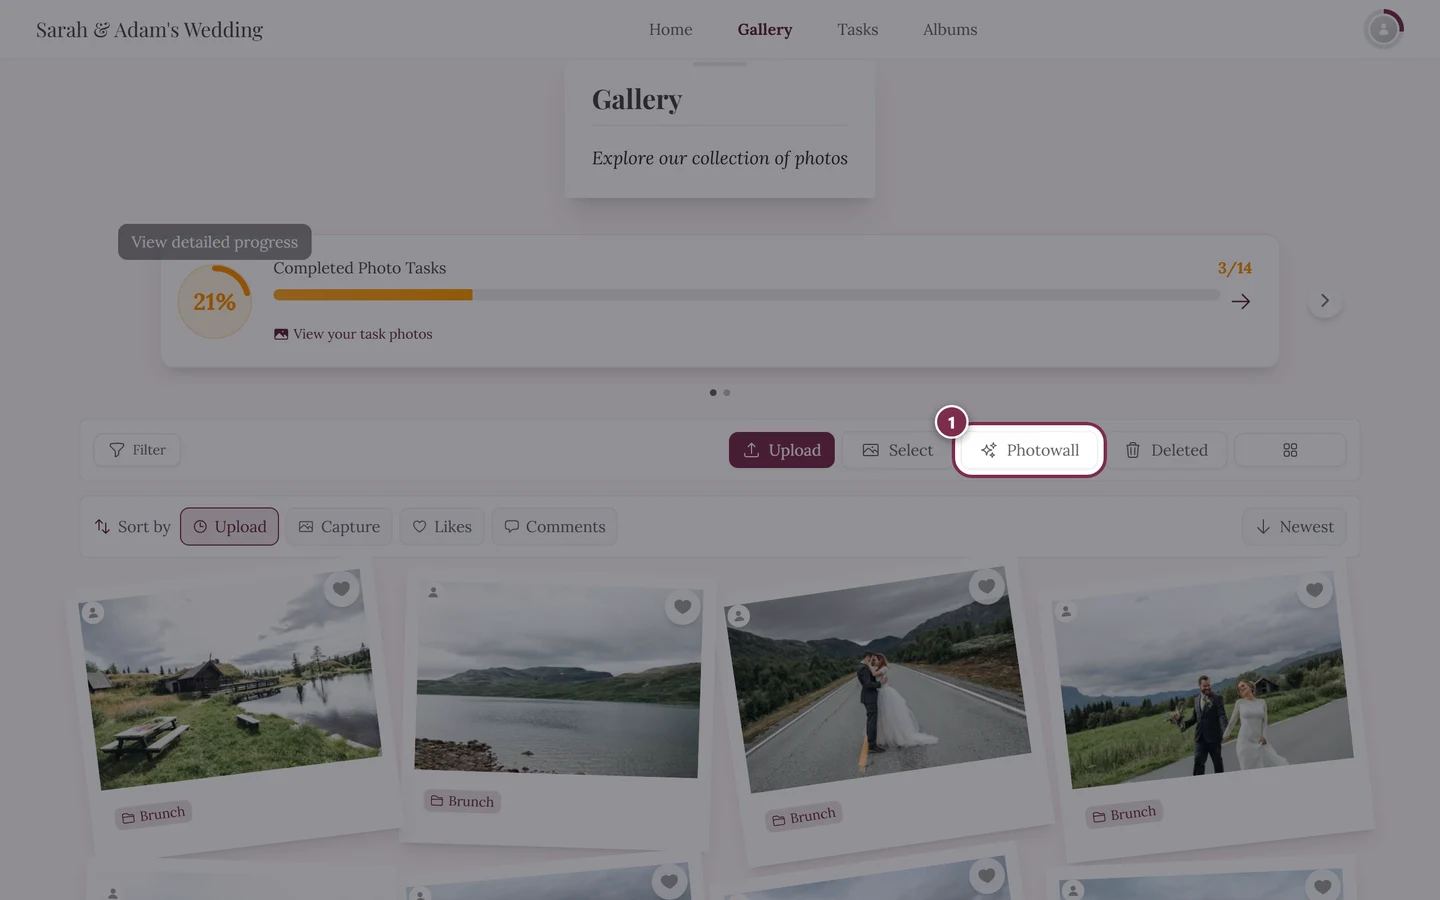
The Photowall button in the gallery bar opens the live wall. -
The wall opens at the
/photowalladdress and immediately starts showing photos.
Way B – From the ⋮ menu (below 960 pixels wide)
Section titled “Way B – From the ⋮ menu (below 960 pixels wide)”With a narrower window there is no dedicated photo wall button in the bar – it lives in the ⋮ more menu of the gallery. That applies to a phone just as much as to a landscape tablet or a half-width browser window.
-
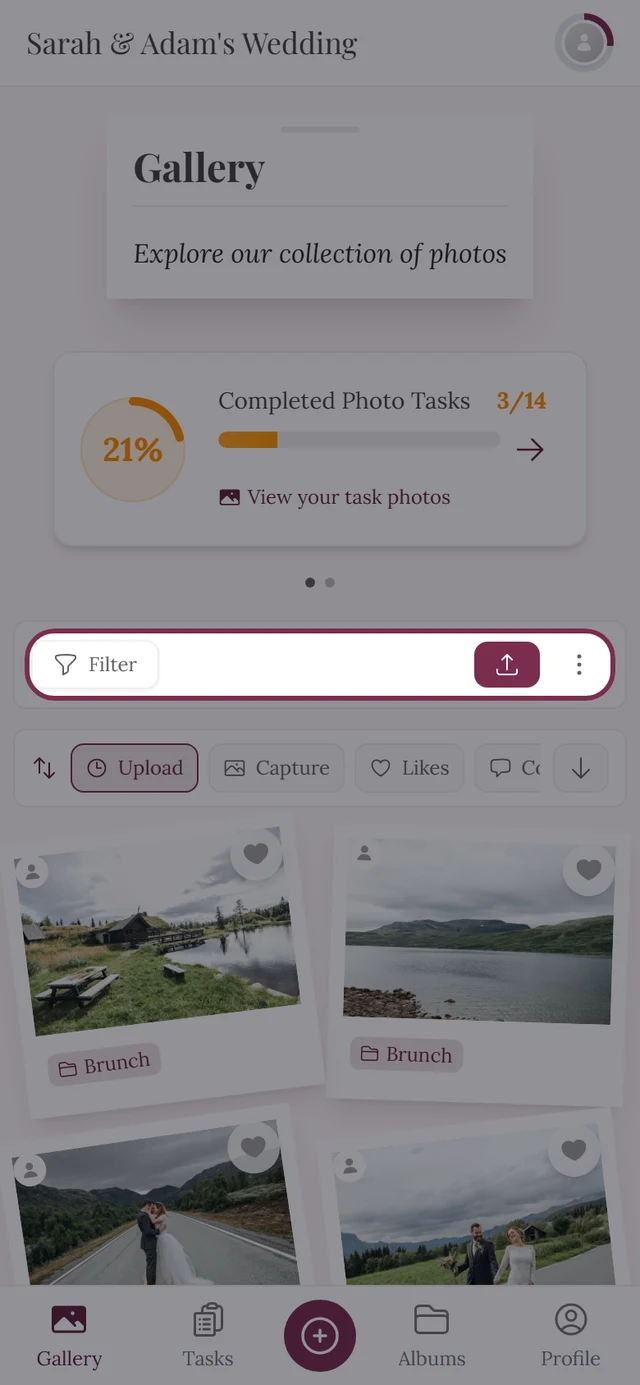
Open the gallery. In the toolbar – the row with Filter and Upload – tap the ⋮ icon (three dots) on the far right.
-
Choose the Photowall entry (sparkles icon) from the menu. It sits directly below Select Photos; depending on the width, Map follows underneath.
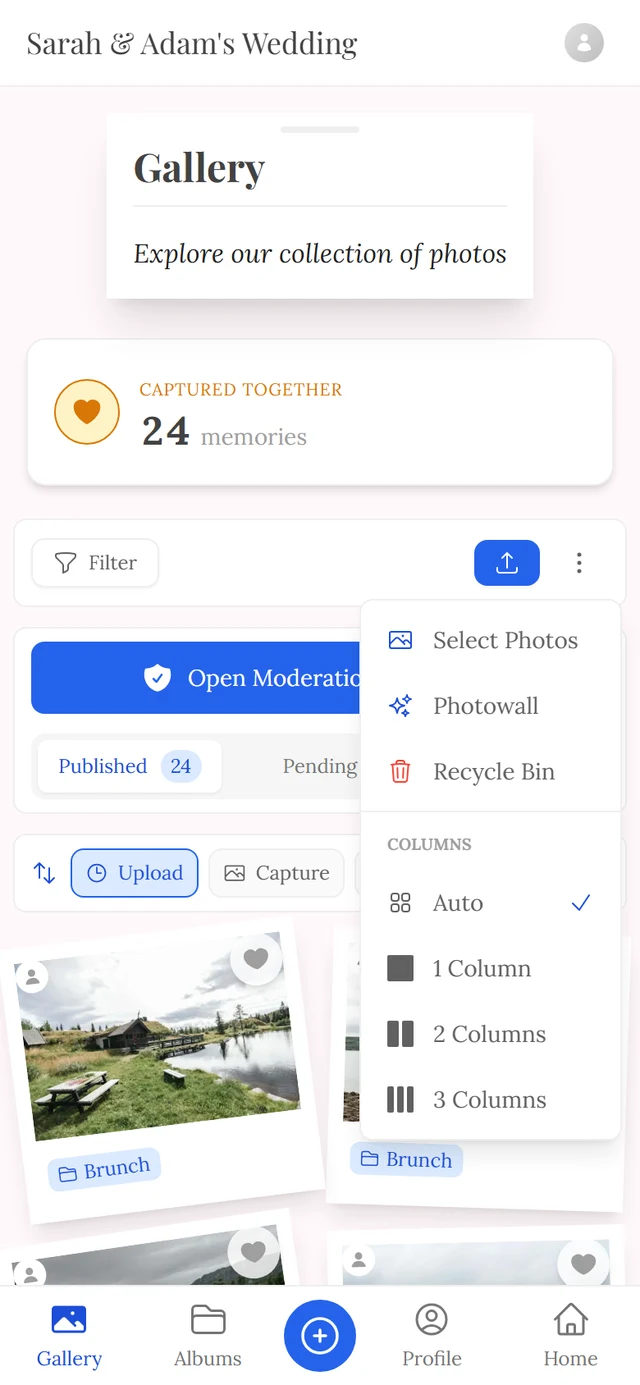
On a phone you open the wall from the gallery bar's ⋮ menu. -
The wall opens. On a phone it’s mainly for watching – for the big moment use a device connected to a TV or projector.
Way C – From a fullscreen photo
Section titled “Way C – From a fullscreen photo”If you’re already viewing a photo large, you can switch straight to the wall from there.
-
Open a photo in the fullscreen view (tap/click it).
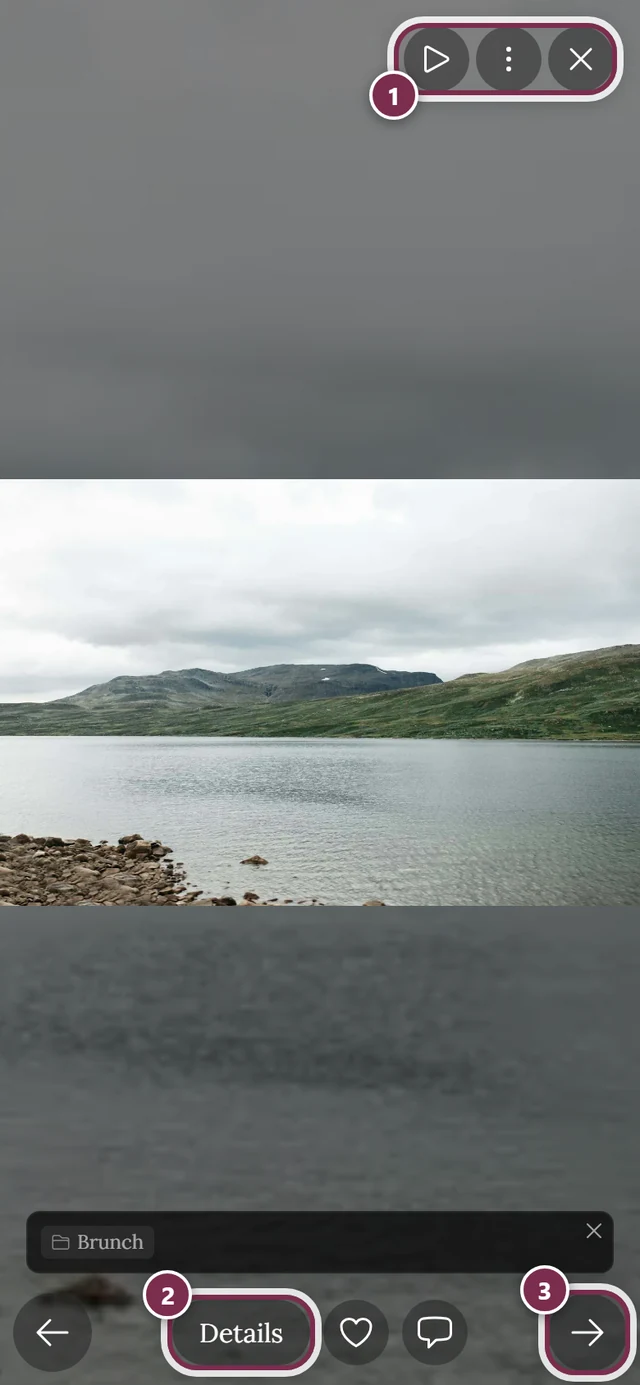
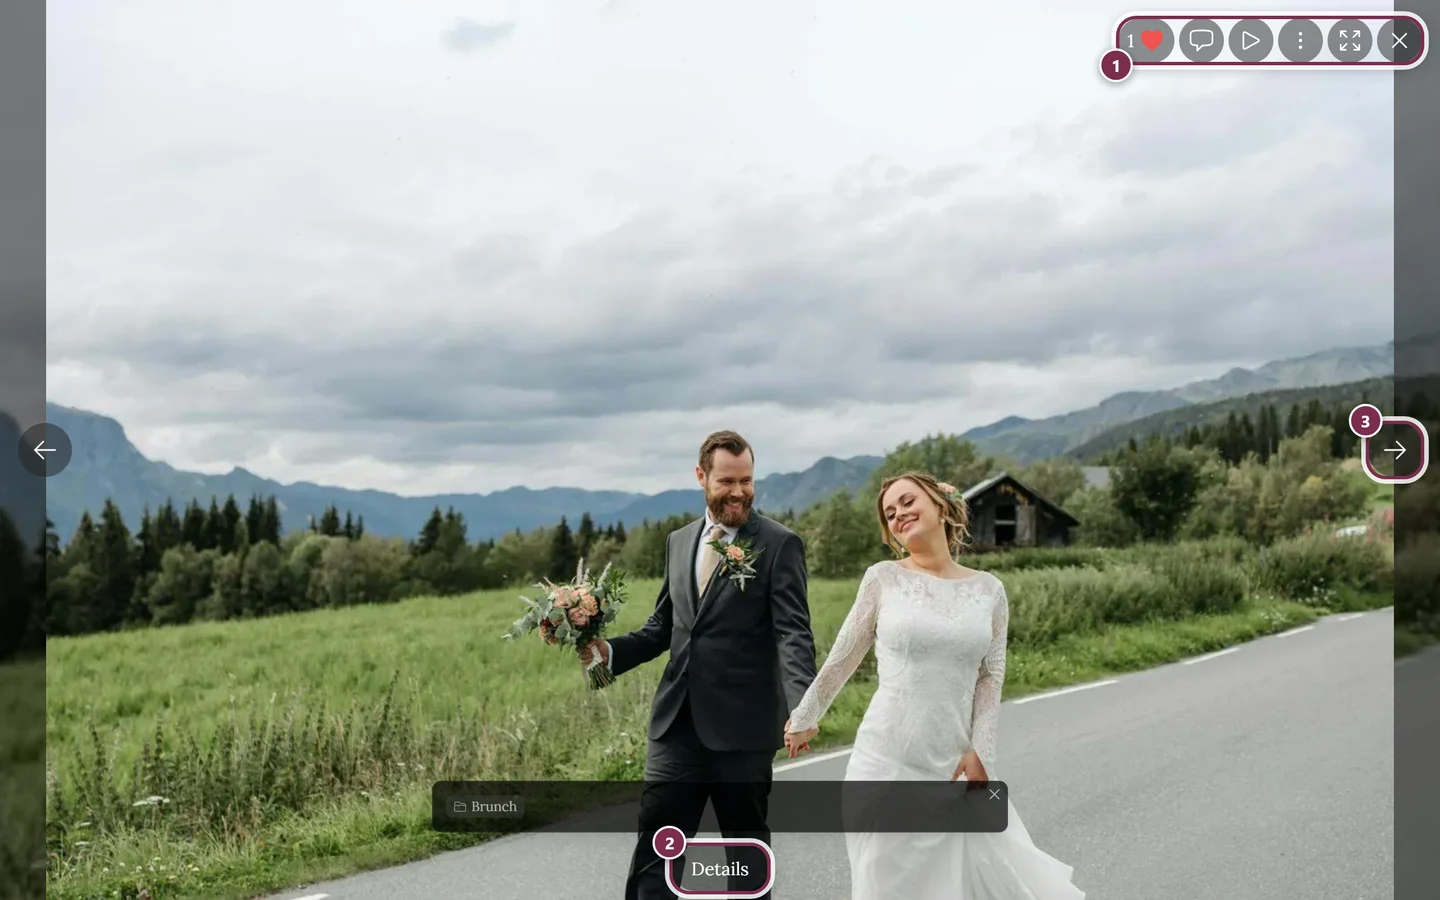
The fullscreen view has the play button for slideshow and photo wall. ① the icon bar in the top right – on a computer with Like, Comments, Slideshow, the three-dot menu, Fullscreen and Close, on a phone only Slideshow, the menu and Close, ② Details reveals title, album and capture data, ③ the arrow to the next photo – on a phone you can swipe instead. Like and Comments sit next to Details at the bottom on a phone. -
Tap the play button (circle). Instead of starting right away, a small menu opens with Start Slideshow and Live Photo Wall.
-
Choose Live Photo Wall – the photo wall opens.
Way D – Direct address (for kiosk devices)
Section titled “Way D – Direct address (for kiosk devices)”The wall lives at a fixed /photowall address for your event. For a TV or kiosk device that should permanently show the wall, add a bookmark to this address – then the device starts straight into the wall, with no toolbar and no width thresholds involved.
Operating the wall
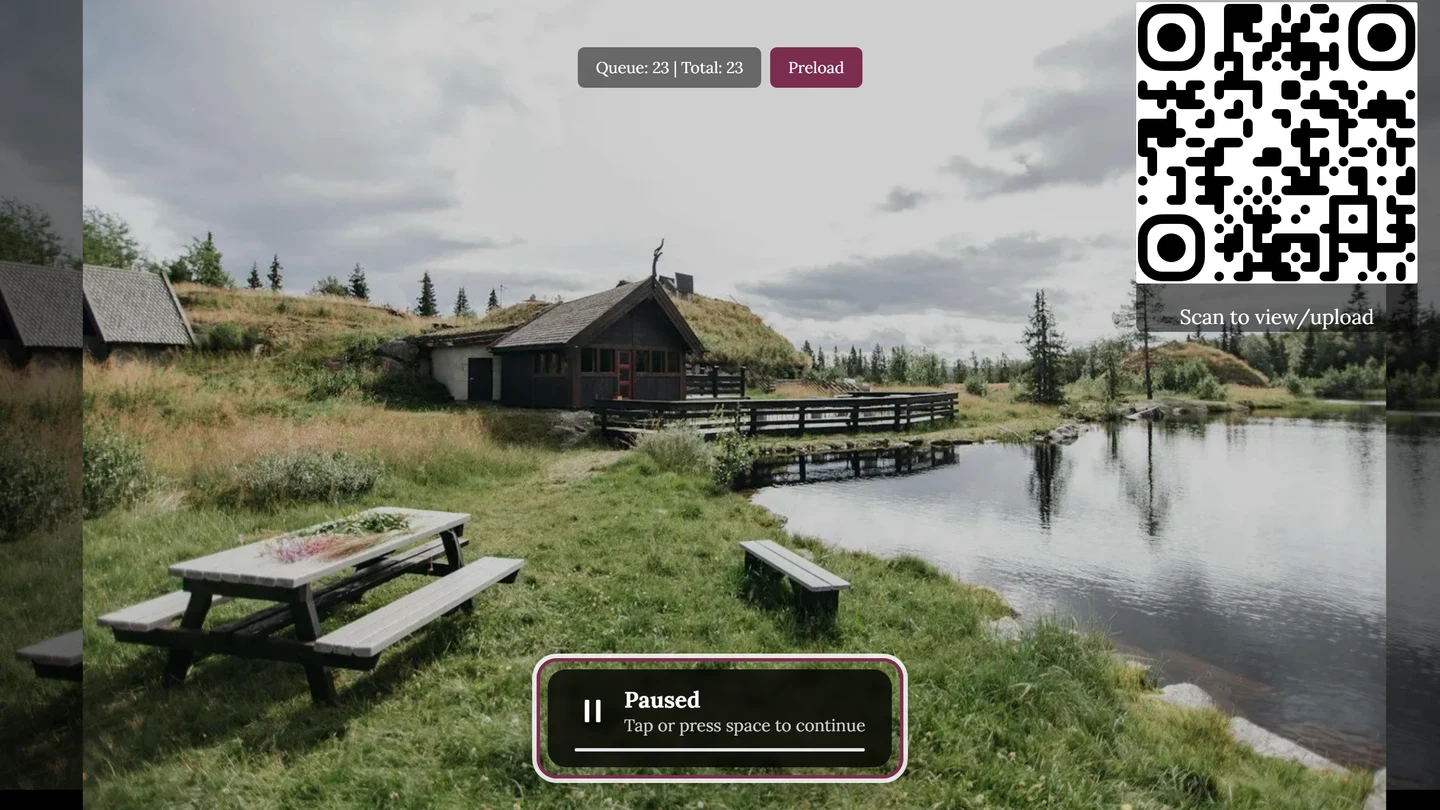
Section titled “Operating the wall”The wall deliberately has no button bar – it is a display, not an app. You operate it with the keyboard or with swipe gestures:
| Input | Effect |
|---|---|
| F | Fullscreen on/off |
| Space or K | Pause and resume |
| → ↓ Page Down or swipe left | Next photo |
| ← ↑ Page Up or swipe right | Previous photo |
| M | Video sound on/off |
| Tap/click the wall | Pause and resume |
A presentation remote works without any extra software: it sends Page Up/Page Down, and those count as the arrow keys.
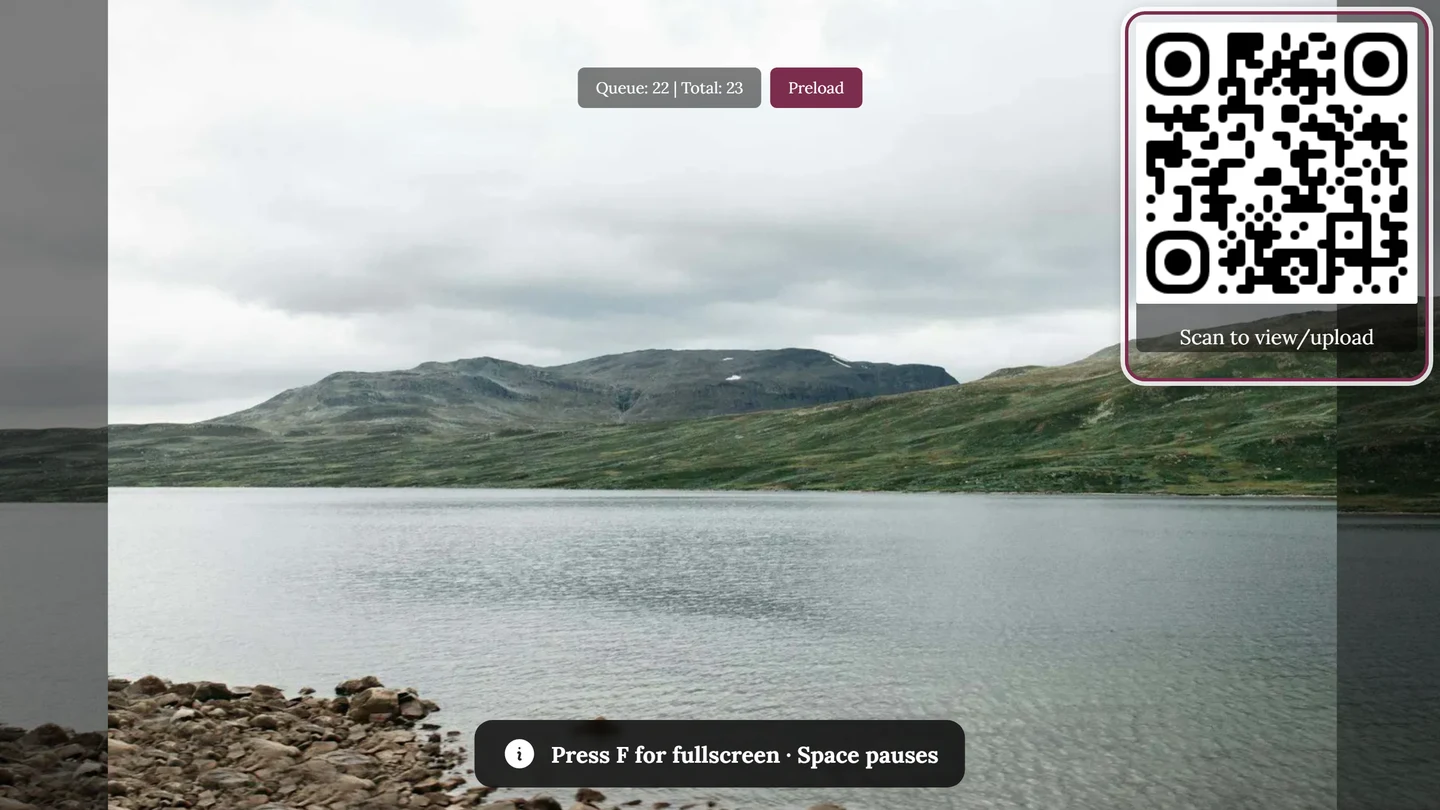
For the first few seconds the wall shows a hint at the bottom center – Press F for fullscreen · Space pauses – and then fades it out, so nothing stays in the picture permanently. On touch devices without a keyboard that hint is skipped.
Going fullscreen
Section titled “Going fullscreen”To make the wall fill the whole screen (without browser bars), you switch it to fullscreen.
-
On a computer, laptop or TV stick with a keyboard: press F. The wall immediately uses the entire screen; F or Esc gets you back out.
-
On touch devices (tablet, touch kiosk) there is no keyboard. There a small round fullscreen button appears at the top center. It fades out after about ten seconds so it doesn’t sit in the picture permanently – reloading the page brings it back.
-
In fullscreen the wall is completely uncluttered: logo, QR code, photo info and celebrations stay, everything else disappears.
Running it on a TV or projector
Section titled “Running it on a TV or projector”A few practical points so the wall lasts the whole evening:
- Turn off the screen lock and power saving. Photogala does not keep the screen awake – that is the device’s job. If your TV, laptop or tablet sleeps after a few minutes, the wall is gone. Disable the auto-off beforehand.
- Keep the photo wall tab in the foreground. If you switch to another tab or program on the display device, the wall no longer runs visibly. If you want to work alongside it, use a second device.
- Go fullscreen before the guests arrive and watch the wall for a moment – you’ll see straight away whether the framing and text size work on the big screen.
- Bookmark
/photowallon kiosk devices (Way D). If the device restarts, one tap puts you back into the wall. - Don’t mount it too narrow. On very narrow screens the wall hides the QR code – and then guests lose their way in.
- Reload after a long outage. The wall catches up on brief connection drops by itself. If it stalls after a longer failure, reload the page once; it starts straight back into the wall.
What happens live on the wall
Section titled “What happens live on the wall”Almost everything on the wall is a setting the host chooses. That explains why you see something at one event but not at another. Guests can’t change these options themselves.
New photos in real time
Section titled “New photos in real time”New uploads appear automatically – no reload needed. If the connection drops briefly, the wall reloads on its own after reconnecting.
Two display modes
Section titled “Two display modes”The display mode decides between two basic forms:
- Slideshow — one photo at a time, with a gentle cross-fade. Images show for about 5 seconds by default, videos longer accordingly. Optionally a slow pan and zoom plays over them (Ken Burns effect).
- Collage — grid of photos, several at once. As the collage style you can pick Uniform grid, Polaroid, Vintage, Featured (highlight) or Justified rows.
How a photo fits the frame is set by Photo fit: Default (adapts to the photo’s aspect ratio), Fill frame (fills the area, crops the edges), Whole photo (with dark bars) or Whole photo, blurred fill (edges softly blurred).
QR code to join in
Section titled “QR code to join in”If the QR code is enabled, it appears at the top right with the text Scan to view/upload. On very narrow screens it is hidden. Through the code guests go straight to the gallery to view and upload – see Uploading photos.
Highlights and celebrations
Section titled “Highlights and celebrations”These overlays are individual toggles and off by default – the host decides whether they run:
- Like celebration: a heart effect at the bottom right when a photo gets a like – with the guest’s name, or “Someone liked a photo”.
- Achievement unlocked: a banner in the same zone at the bottom right with the name of the award.
- Milestones: a big effect in the center of the picture with the number reached, for about five seconds. The thresholds are 10, 25, 50, 100, 250, 500, 1000, 2500, 5000 and 10,000 photos.
All three carry the accent color the host set for the wall.
Photo info and captions
Section titled “Photo info and captions”Depending on the settings, a small info pill can appear at the bottom of the photo with the uploader’s name (camera icon) and/or the like count (heart). A caption can also be shown – either the photo description or the related photo task (optionally with an example image). More on tasks under Photo tasks.
Which photos run at all (curation)
Section titled “Which photos run at all (curation)”The host can narrow down which photos are shown – this explains why you sometimes don’t see all pictures:
- only photos from certain albums or certain photo tasks (one match is enough – album or task),
- only one media type: photos only, videos only or motion photos only,
- only task photos or, the other way round, only free photos (Task relation),
- only popular photos (from a minimum number of likes) – or the other way round only the quiet ones, with at most that many likes,
- only photos from the last few minutes (Recent photos only), with an optional fallback to older ones if nothing new is there,
- only photos with certain people on them, only group shots or only portraits, or only the photos of one particular guest,
- jump to new photos so fresh uploads are shown right away,
- and the playback order: newest first, oldest first or shuffled – counted either by upload time or by capture time.
Empty state and loading state
Section titled “Empty state and loading state”- No photos yet: The wall shows No Photos Yet and invites the first picture with “Be the first to share your photos for the event!” – including the prompt Scan to upload your photos when the QR code is enabled.
- Loading: briefly a placeholder appears reading Loading slideshow… or Loading collage…. That’s normal and only takes a moment.
- Error: On a connection or loading error the page shows a generic error notice. Reload the page and check your internet connection.
Troubleshooting
Section titled “Troubleshooting”- No Photowall button in the bar → either the window is narrower than 960 pixels (then it sits in the ⋮ menu), the plan doesn’t include the photo wall, or the host has switched Offer the photo wall (Settings → Photo Wall Settings) off.
- Map is its own button but Photowall isn’t → normal between 720 and 960 pixels. Use the ⋮ menu.
- The wall goes black mid-evening → the display device went to sleep. Turn off the screen lock.
- No QR code visible → either disabled by the host or the screen is too narrow.
- Only a few photos are running → curation is active (album, popular, or recent photos only).
Related help
Section titled “Related help”- Slideshow & fullscreen – the play button that also starts the wall.
- Uploading photos – how new pictures reach the wall via QR code.
- Photo tasks – the tasks that can appear as a caption.
- Like & comment – likes that are shown as a celebration.
- Set up the photo wall – for hosts: on/off plus every option of the wall.