Digital invitation
The Digital Invitation is a page of its own for your guests: names, date, countdown, venue, dress code, accommodation, gifts – and the replies along with it. You share it as a link or QR code, and your guests need neither an account nor a sign-in.
What makes the digital invitation special
Section titled “What makes the digital invitation special”The tool sits in the Planning & organization section – right next to the guest list, the seating plan and RSVP, and first in that section. It behaves differently from the other tools, though:
- The guest address is short and shareable: it ends in /invite. That is exactly the address that belongs on the save-the-date card.
- It has no widget and by default does not appear in the guest menu on the event home page. The tile therefore carries the note Direct link only. You can add it deliberately, though – the switch for that sits in the QR code tab (see below).
- It runs as a standalone page – no gallery navigation, no app footer. Only Imprint and Privacy sit at the bottom.
- It works without a sign-in. Anyone who only looks at the invitation never becomes a guest account and shows up in no participant statistic.
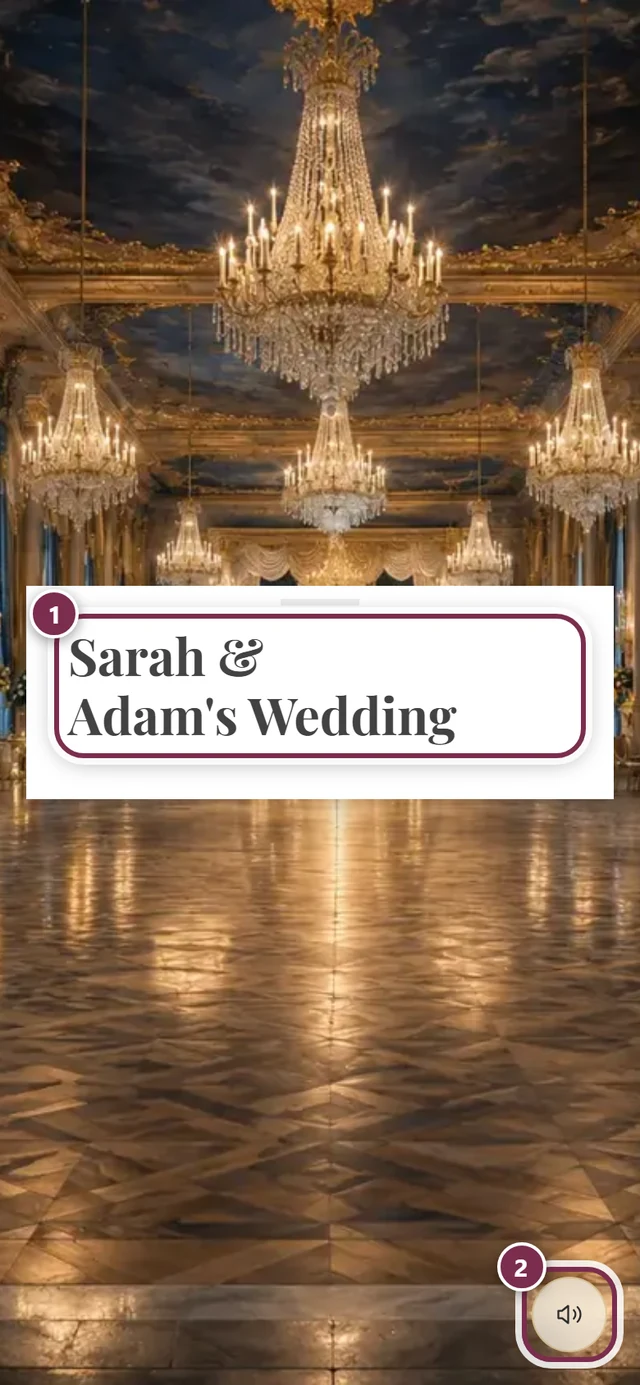
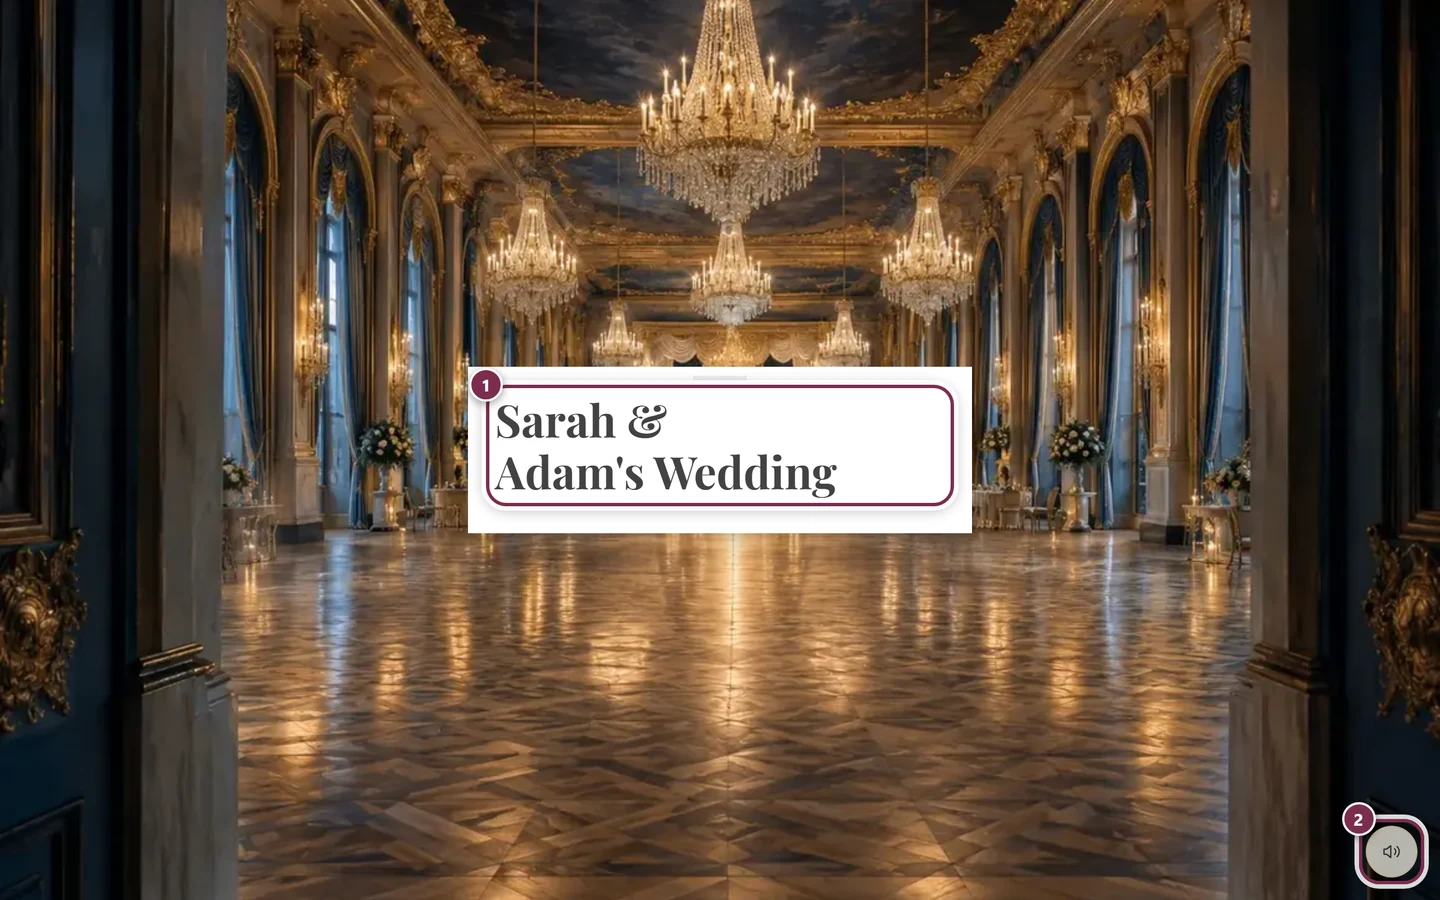
Setting it up and publishing
Section titled “Setting it up and publishing”-
Open the invitation: in the sidebar under Planning, either its own entry – which exists as soon as it is active and recently used – or All Tools and there the Digital Invitation tile.
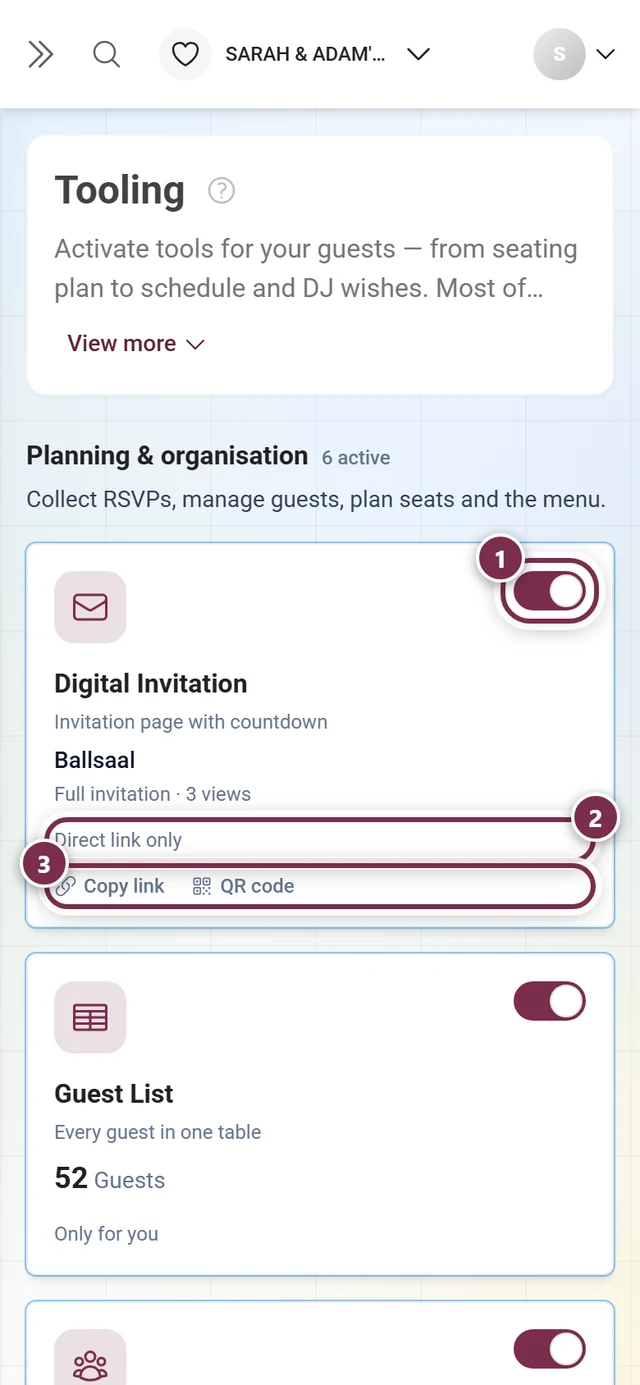
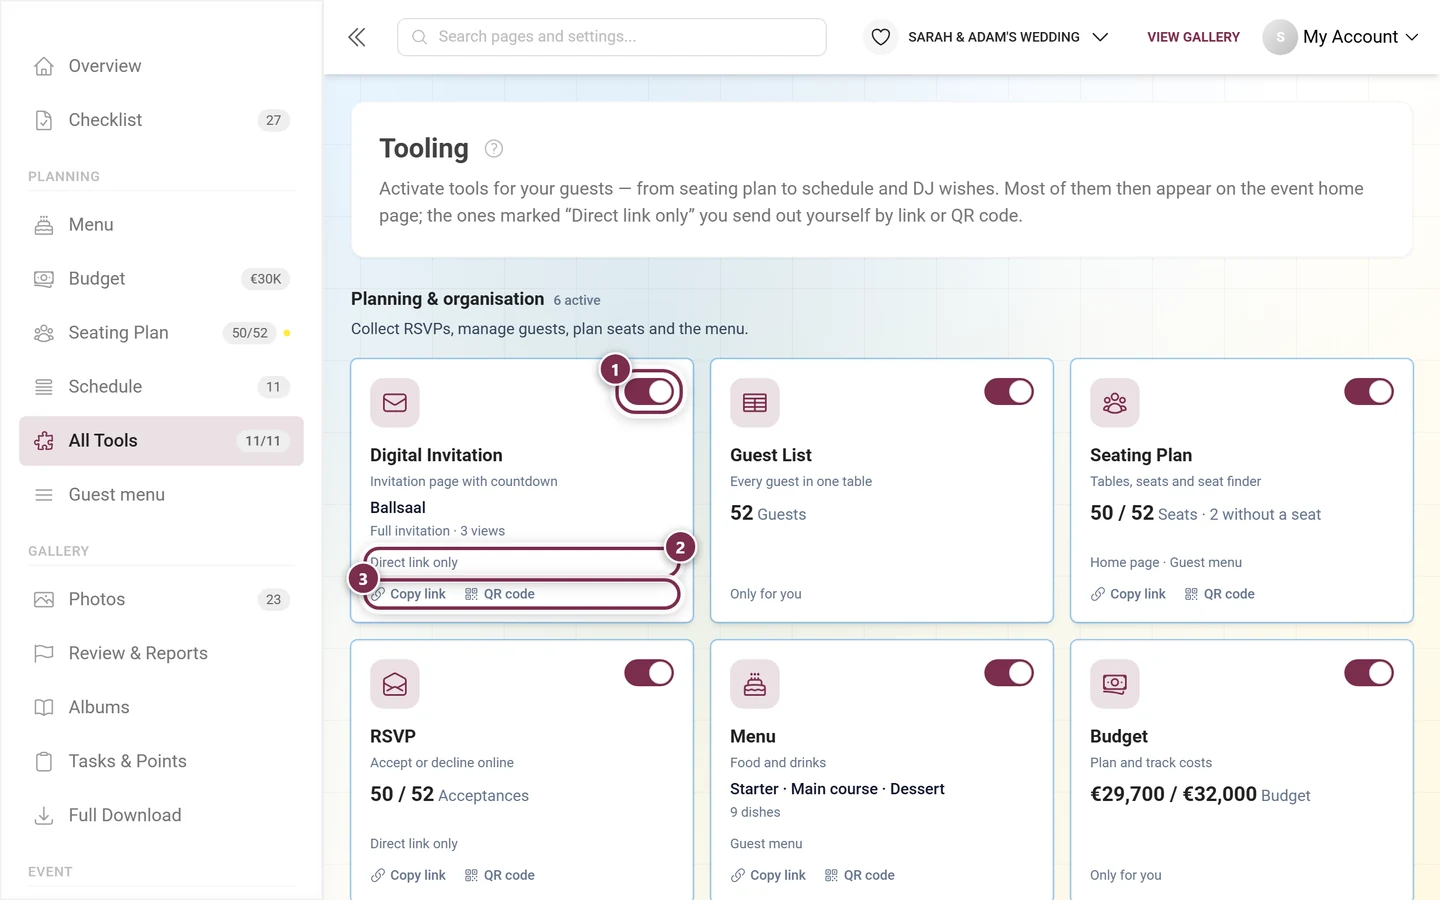
All tools at a glance – the tiles are grouped by section. The invitation sits under “Planning & organization”. ① The switch in the top right turns the tool on or off right away – there is no save button. If a tool is not part of your plan, an Upgrade chip sits there instead and a click takes you to the plan overview. ② The line below says where guests meet the tool: Home page (a card on the event home page), Guest menu (an entry in the menu), Direct link only (reachable via link or QR code only), Only for you (a pure admin tool) and, if you set an end, Until ‹date›. ③ Copy link puts the guest address on your clipboard, QR code opens the tab with the printable code. That row only exists for tools that are switched on and have a guest page of their own. Clicking the tile itself opens the editor. -
Design your invitation in the Content tab. That works while the tool is still off – a note at the top says you can prepare the content in peace.
-
Switch on Enable tool at the top – or click Publish in the Not published yet box inside the editor. Both do the same thing.
-
Pick up the link or QR code in the QR code tab and send it out.
The editor has three tabs – Content, Display and QR code. Only Visibility is missing: the invitation gets no time window, because it is only ever reached up to the event day anyway.
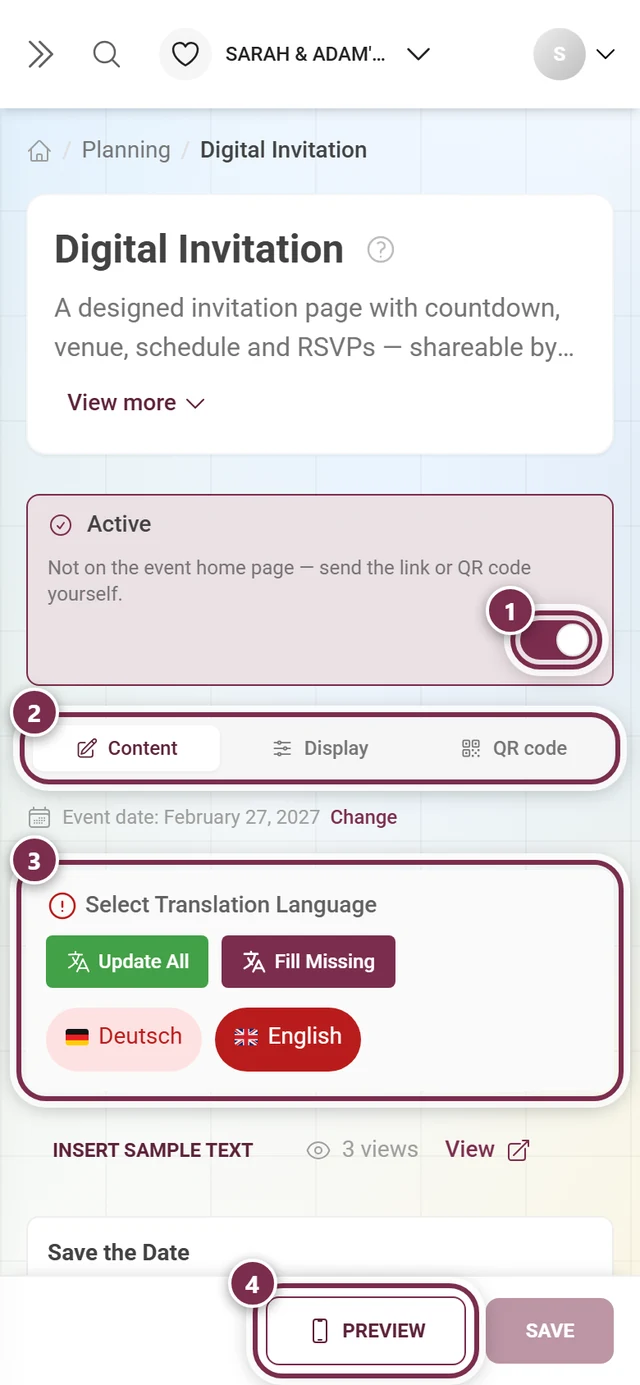
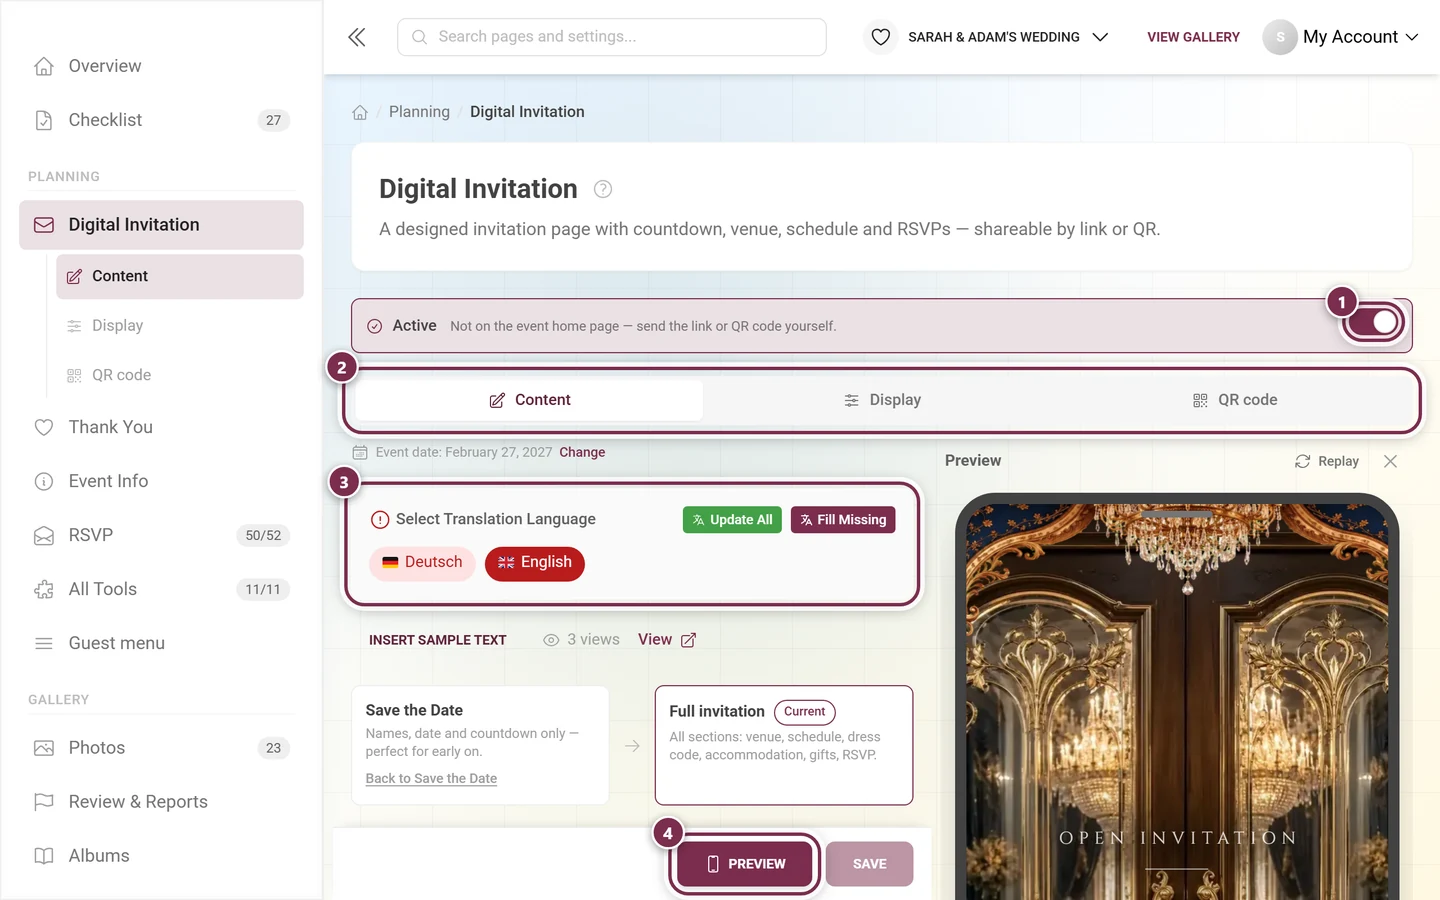
Once the invitation is switched on, the large card at the top gives way to a slim strip with a check mark, the word Active, the line “Not on the event home page — send the link or QR code yourself.” and the switch on the right.
Saving happens in the bar at the bottom: Unsaved changes appears on the left, Preview and Save sit on the right. If the invitation is already published and has been opened at least once, Saving is visible to guests immediately appears next to it – so a saved half-finished state is out there right away.
Scope: save the date or full invitation
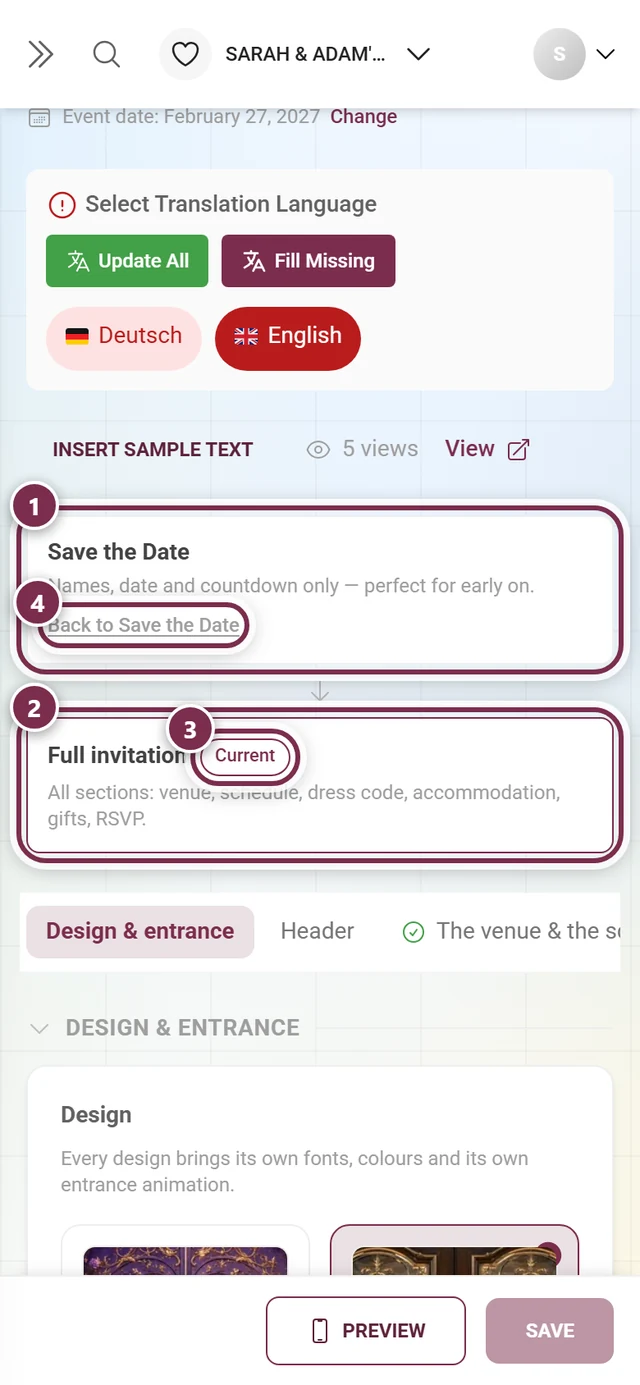
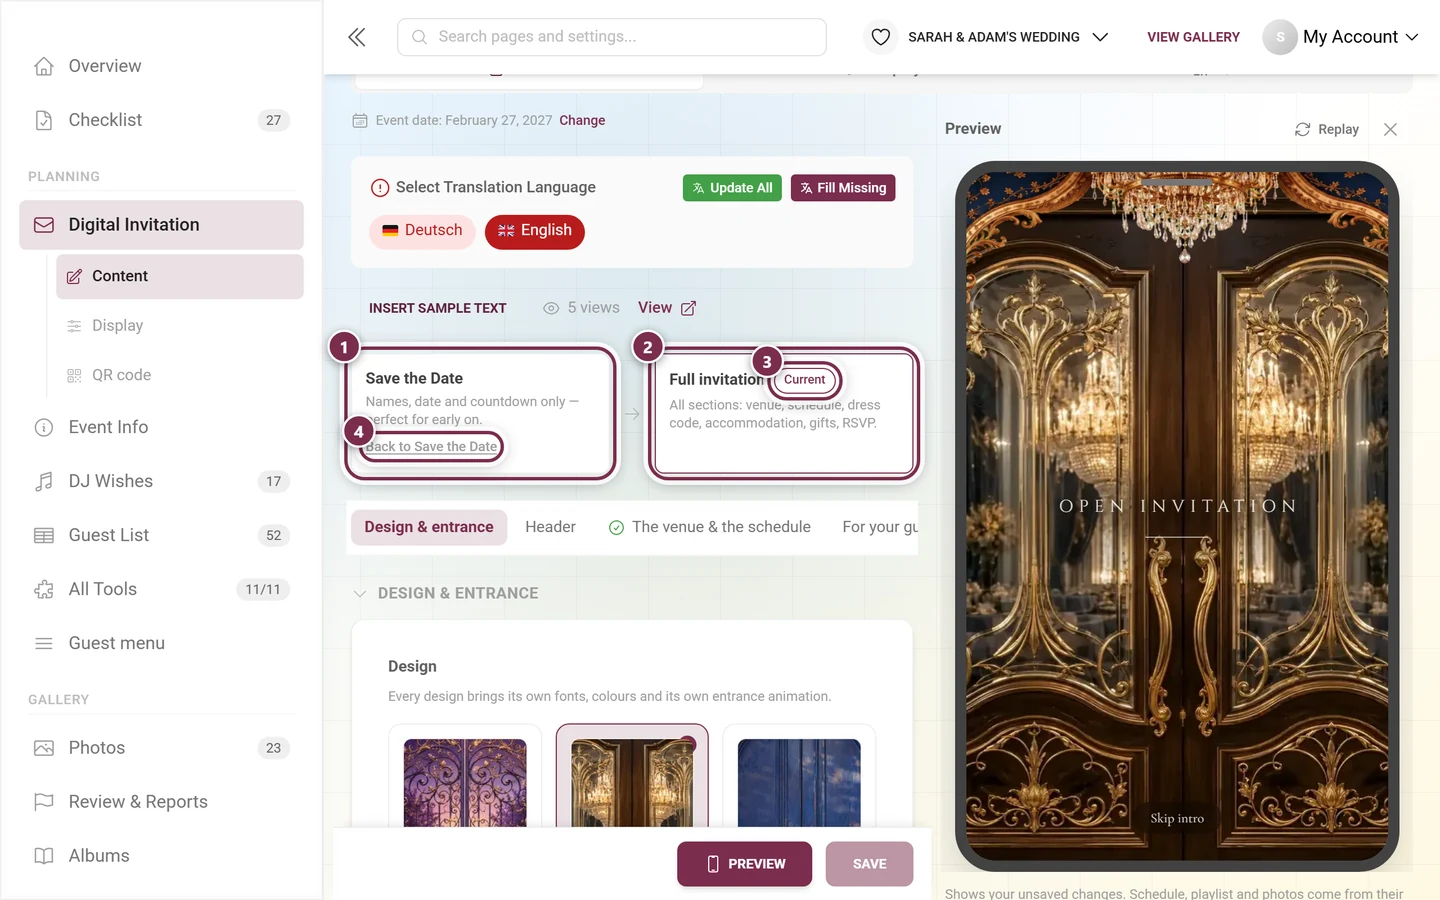
Section titled “Scope: save the date or full invitation”Right at the top of the editor sit two equal cards side by side, stacked on a phone – there is no heading above them, and the active one carries the Current chip. They decide how much the invitation already shows:
- Save the Date – names, date, countdown and, if you like, the calendar entry only. Ideal while the venue is not settled. Free on every plan.
- Full invitation – all sections: venue, schedule, dress code, accommodation, gifts, RSVP. The Expand now button switches over.
You can switch at any time, and the link stays the same. Whoever already holds the save-the-date card lands on the finished invitation months later, automatically.
Design
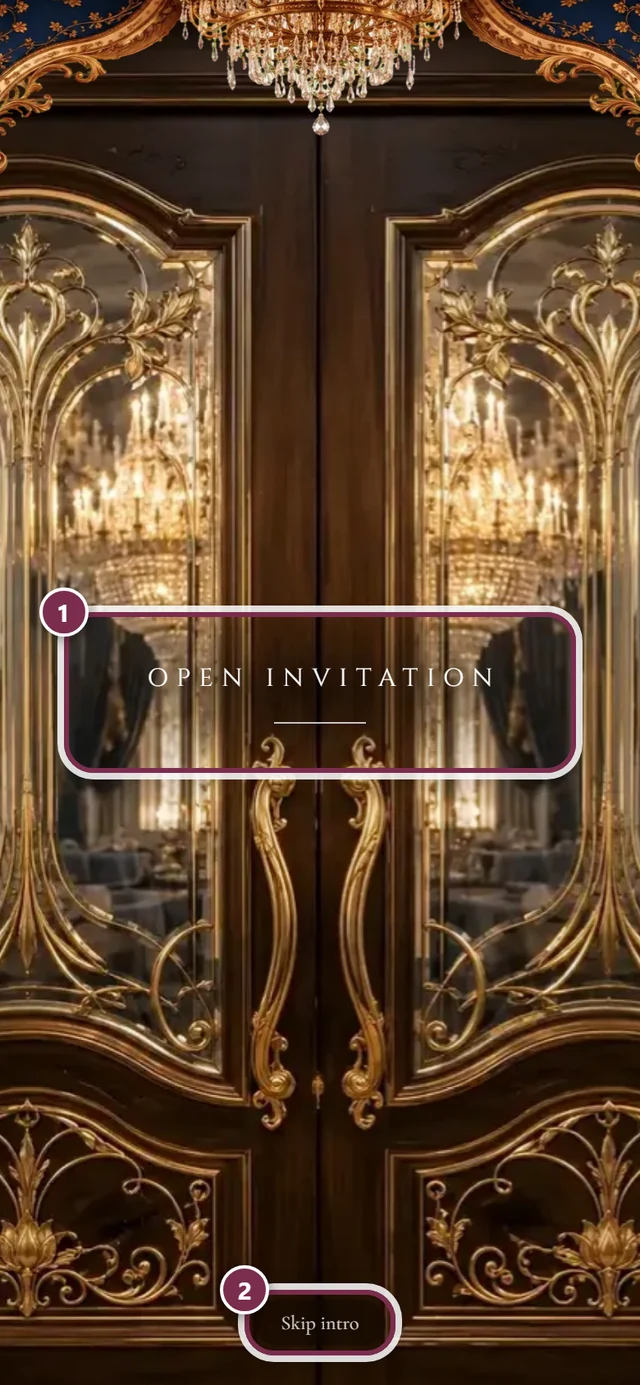
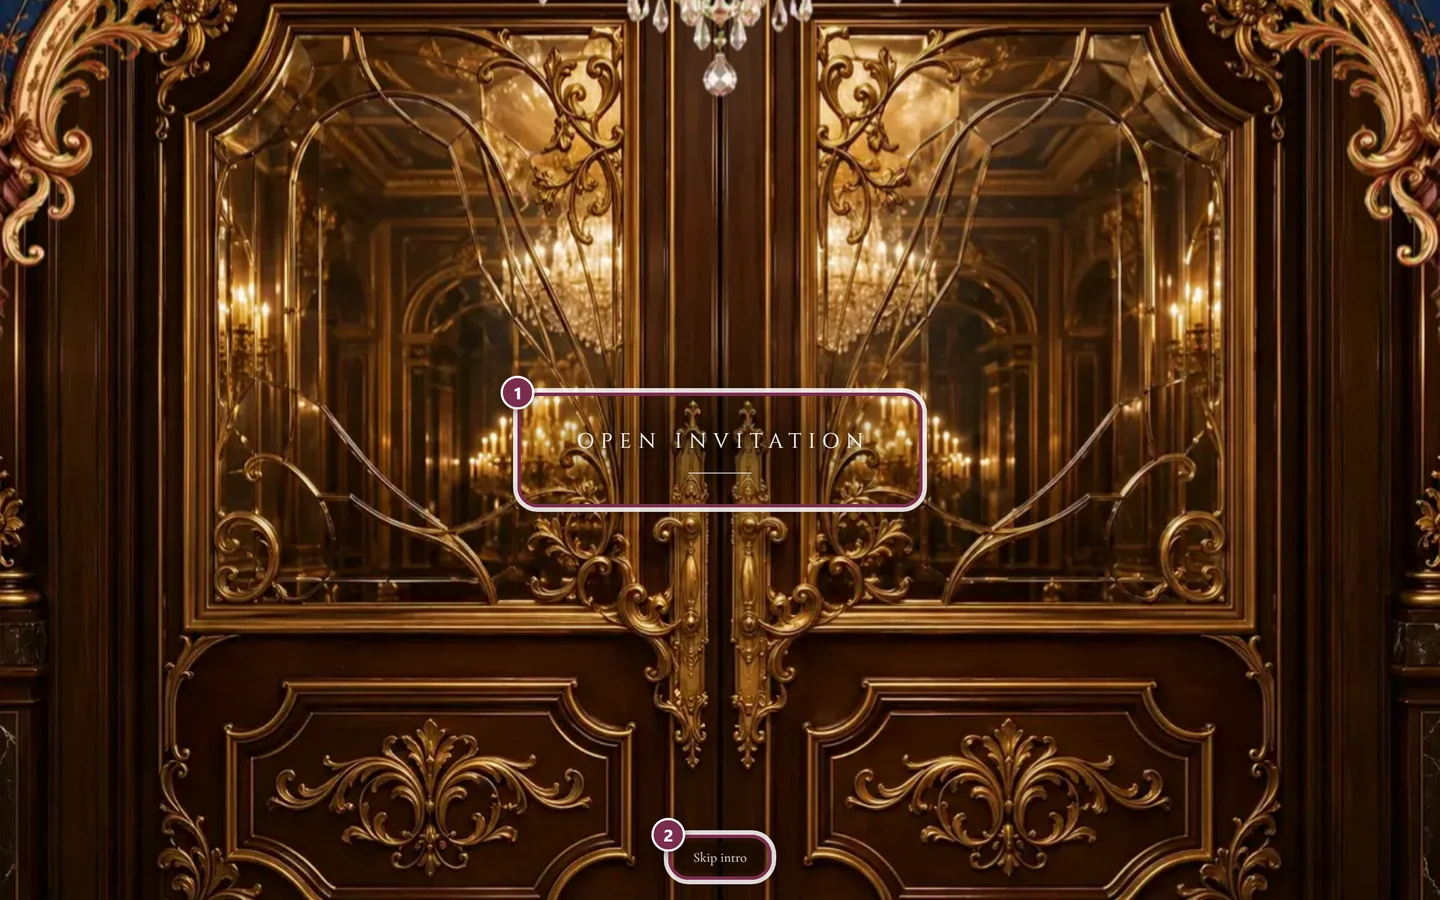
Section titled “Design”Under Design you pick the look. There are 27 designs – enchanted gardens, ballrooms, cinemas, city skylines, winter scenes and more. Each brings its own fonts, its own color palette, its own entrance animation and its own piece of music. The tiles show the real entrance artwork with the three base colors underneath.
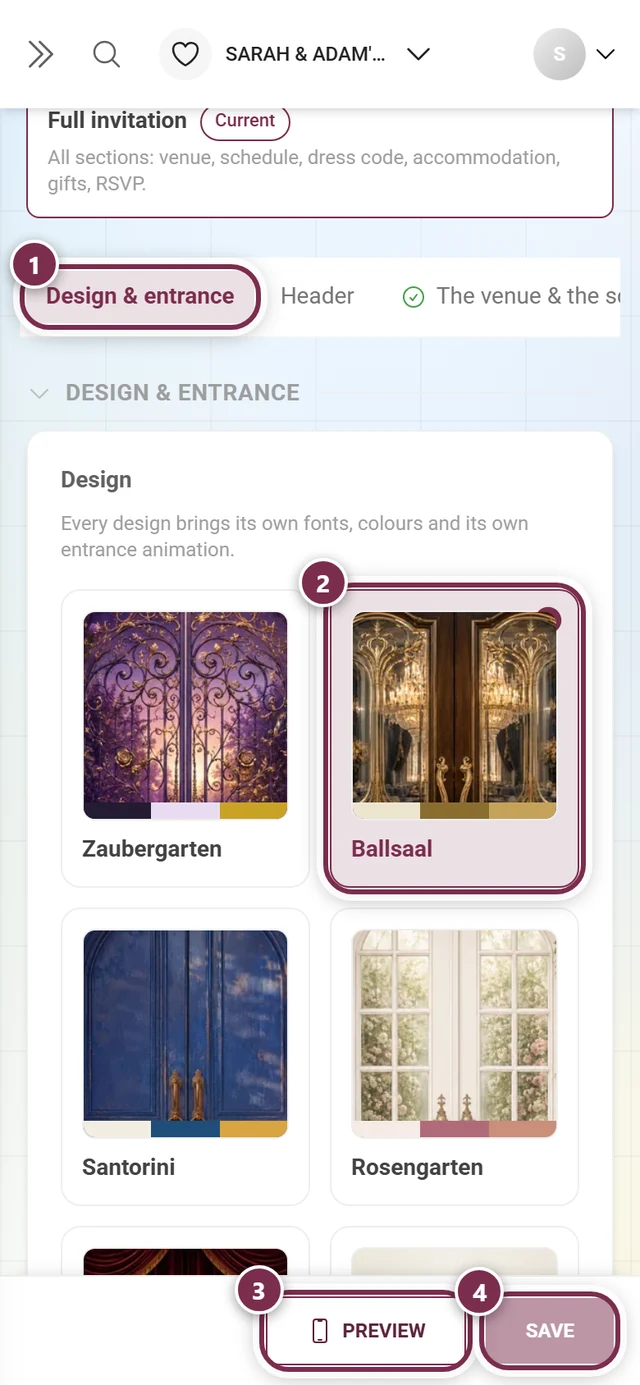
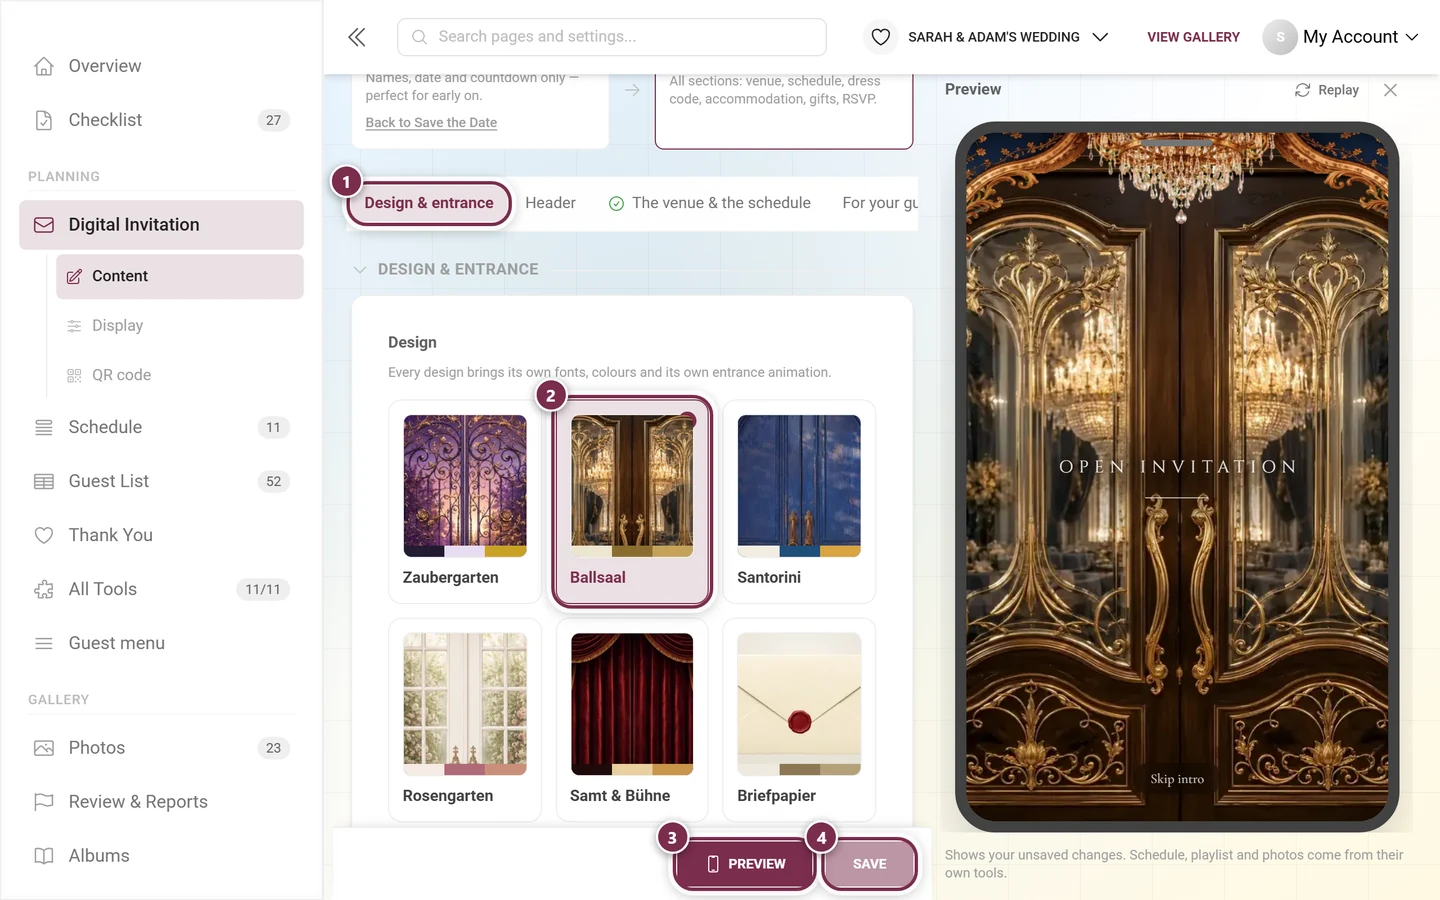
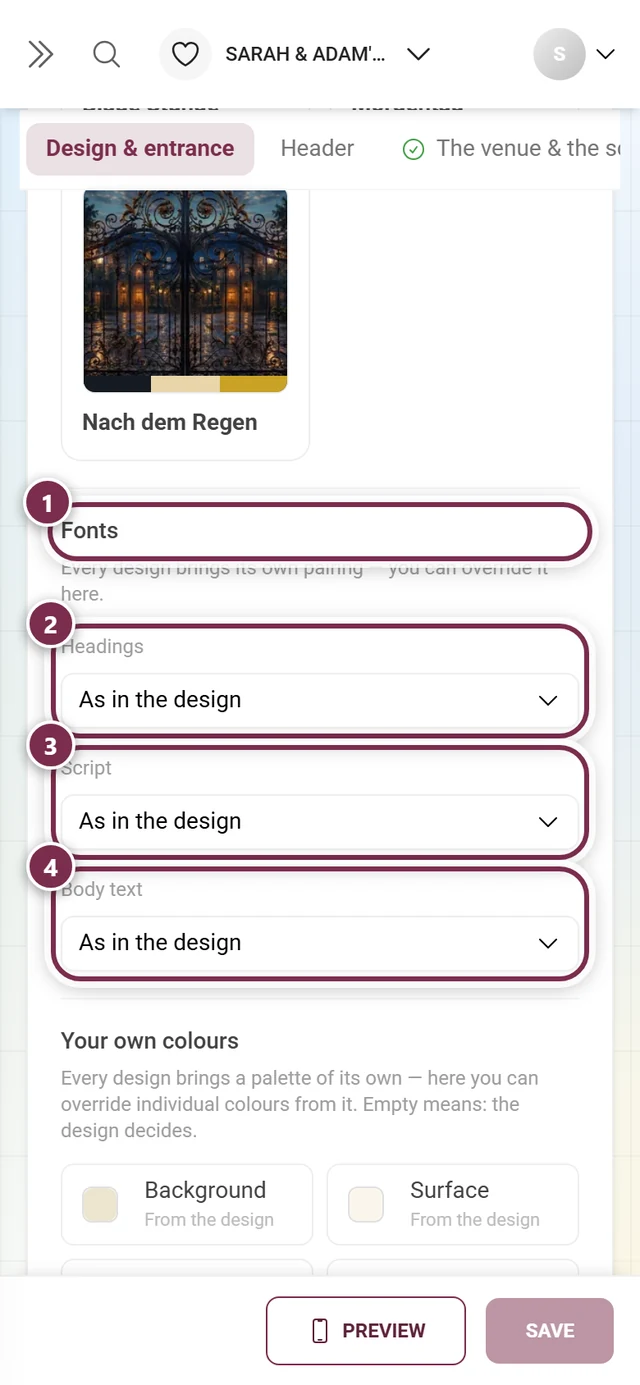
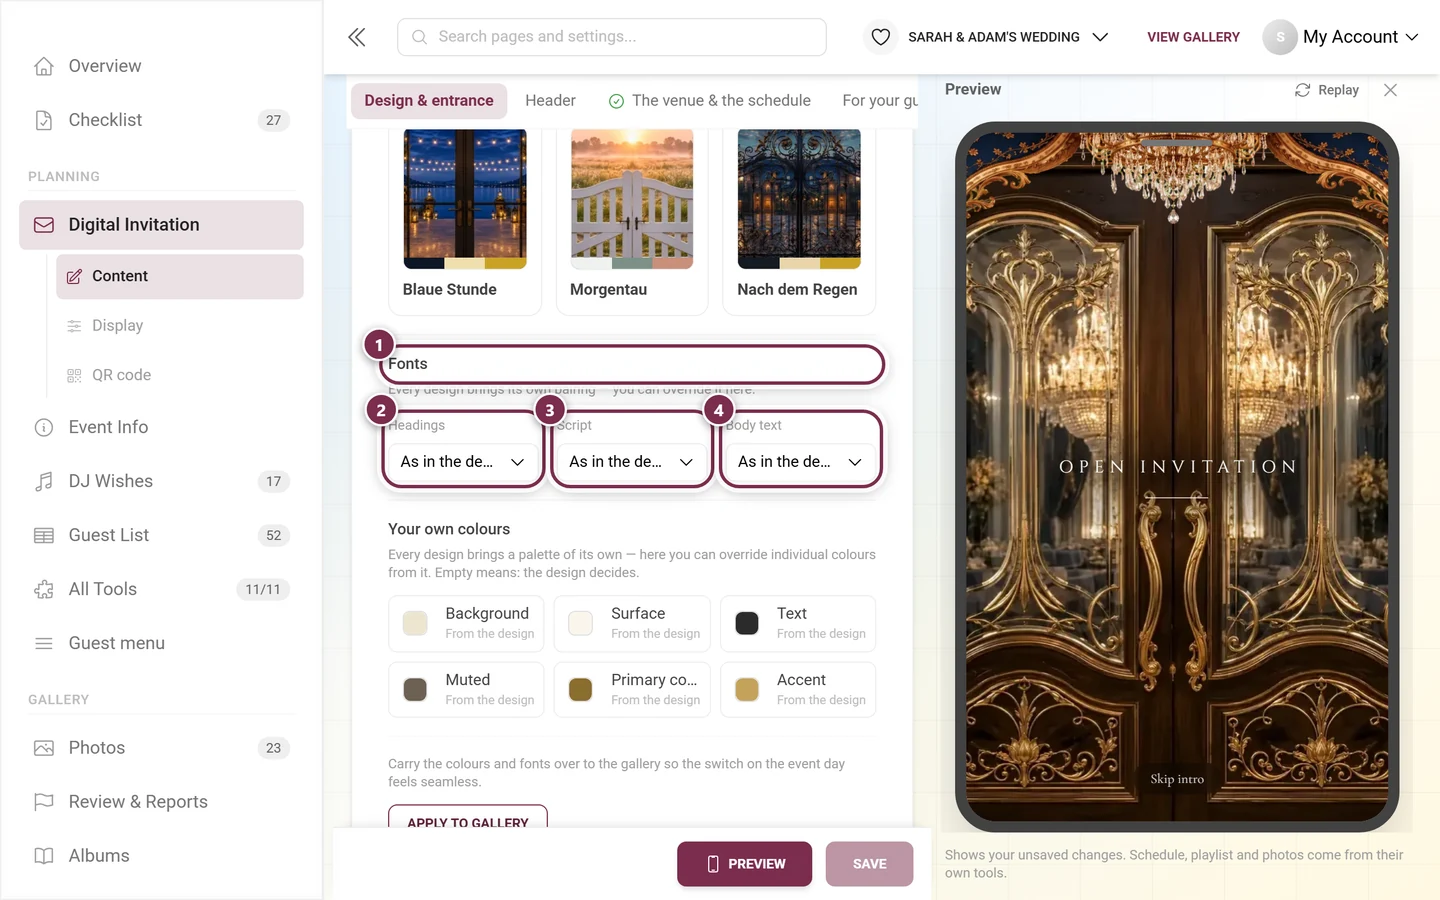
Every design brings a finished pairing. Under Fonts you can override it in three roles:
- Headings
- Script
- Text, date & countdown
The fonts apply to this invitation only, independently of the gallery – even if the header is set to Like the gallery. The text font also applies to the date and countdown in the header.
Each role sits on As in the design until you choose something yourself. As soon as at least one role is set, the line “You are overriding 1 of 3 fonts of this design.” appears above the choices, with Use the fonts of the design next to it – one click resets all three roles at once. Only a small, built-in selection is offered, deliberately – so that opening the invitation never fetches a font from a third-party server.
Your own colors
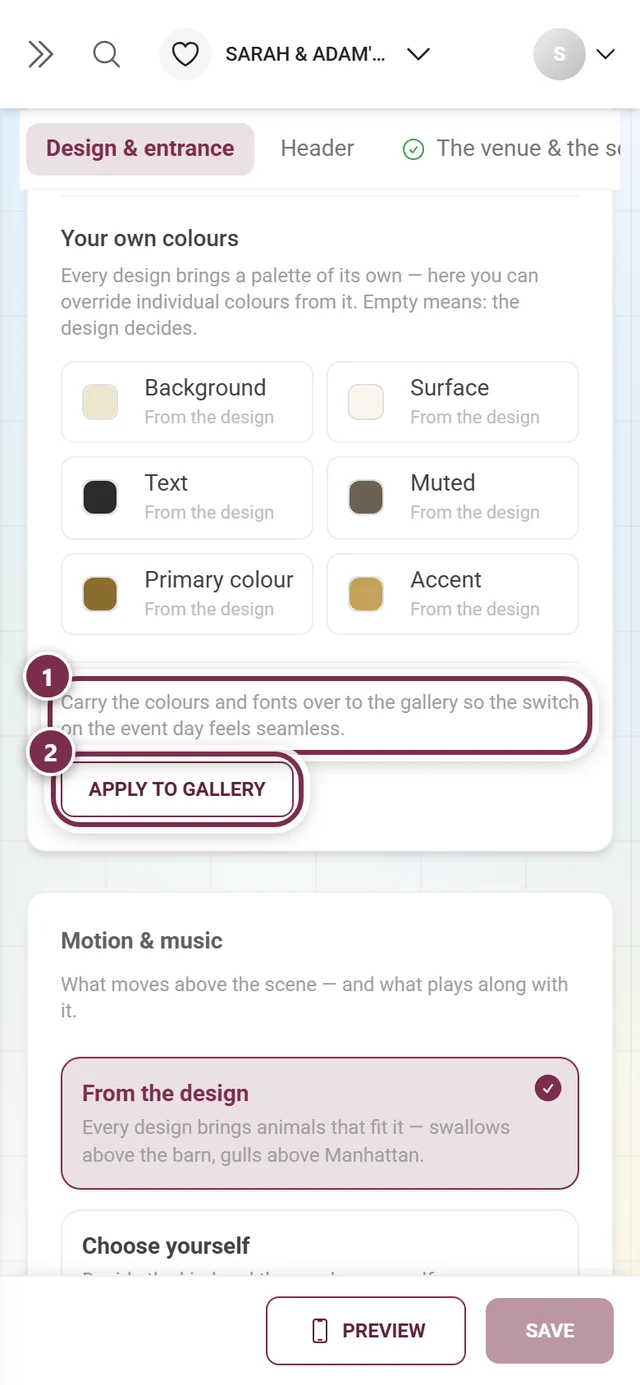
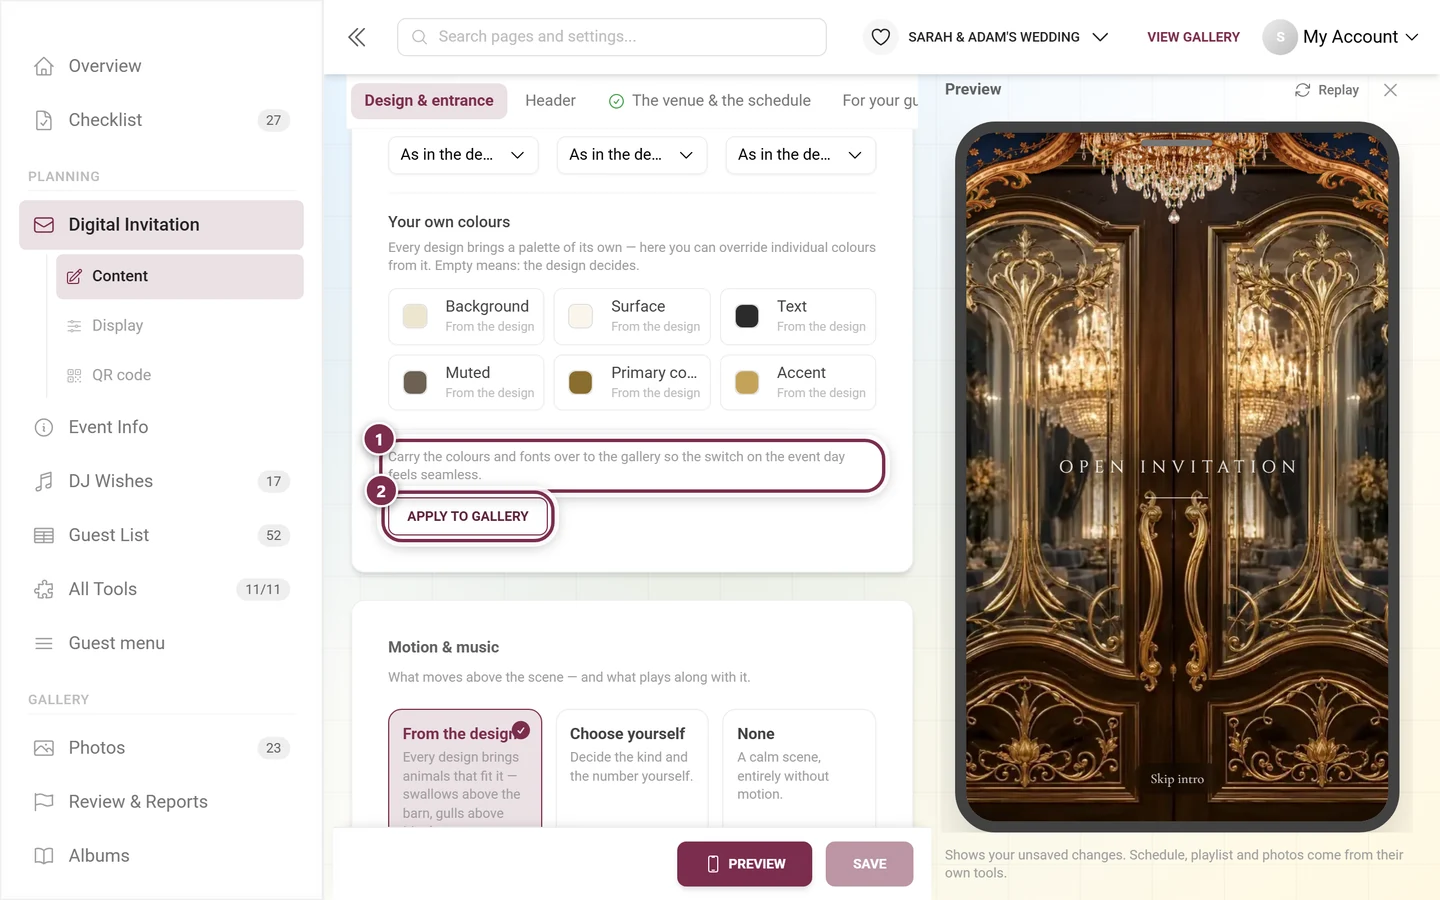
Section titled “Your own colors”Directly under the fonts sits Your own colors: “Every design brings a palette of its own — here you can override individual colors from it. Empty means: the design decides.” Six roles lie side by side in a grid – two per row on a phone, three on a large screen:
- Background – the ground the whole invitation sits on.
- Surface – the cards of the sections. Translucent in the designs; a solid color looks flatter.
- Text – headings and body text.
- Muted – the quiet lines: date, notes, captions.
- Primary color – buttons and links.
- Accent – rules, ornaments and, unless you pick one yourself, the pattern.
Each role sits on From the design until you set a color yourself. Only that one is overridden then – all the others keep following the design, even if you switch it later. As soon as at least one is set, “You are overriding 1 of 6 colors of this design.” appears above them, with Use the colors of the design next to it, which resets all six at once.
Apply to gallery
Section titled “Apply to gallery”The Apply to gallery button copies the design’s colors and fonts into your gallery settings. That keeps the event day from feeling like a break: whoever has been looking at the invitation for months lands in a gallery that looks the same. The button sits right at the end of the design block, under Your own colors. Two safeguards hang off it. First, the button is disabled while you have unsaved changes; next to it you then read “Save your changes first — otherwise the gallery gets a design the invitation does not even show yet.” Second, the dialog Apply the design to the gallery? asks first and lists every overwritten value one by one – primary color, accent color, background color and the fonts, each as “before → after”. The old values can only be brought back in the gallery settings; the gallery’s grid and photos stay untouched.
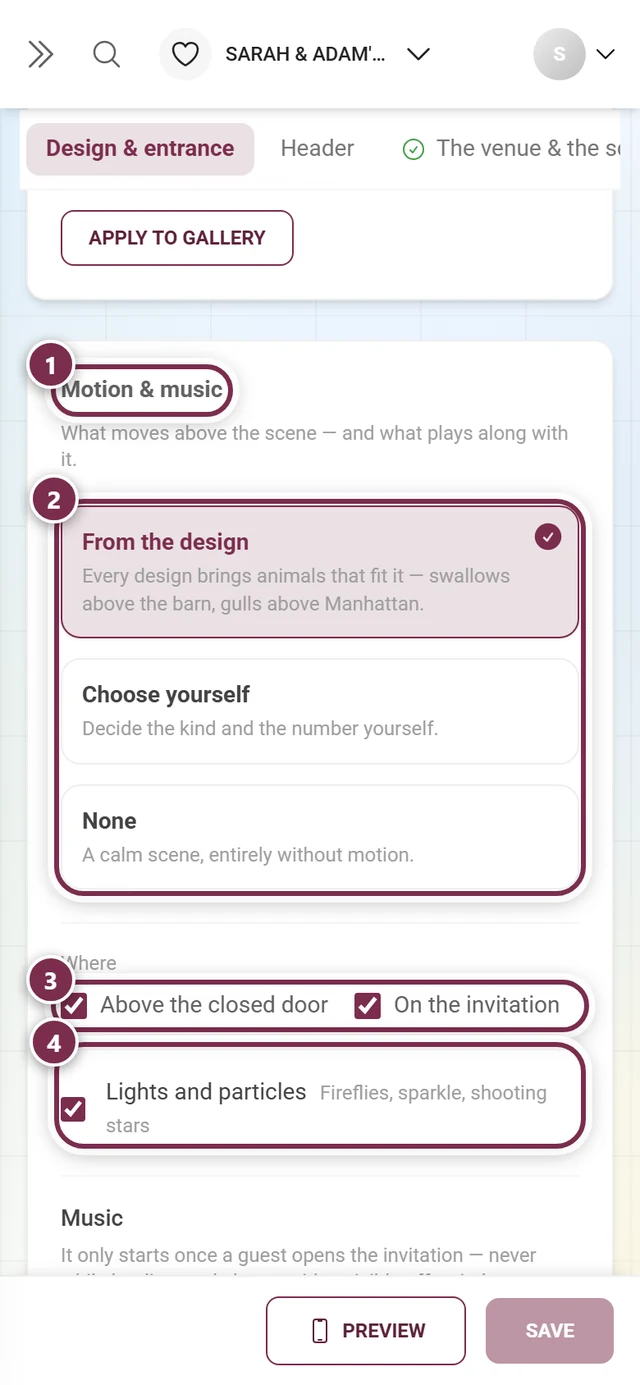
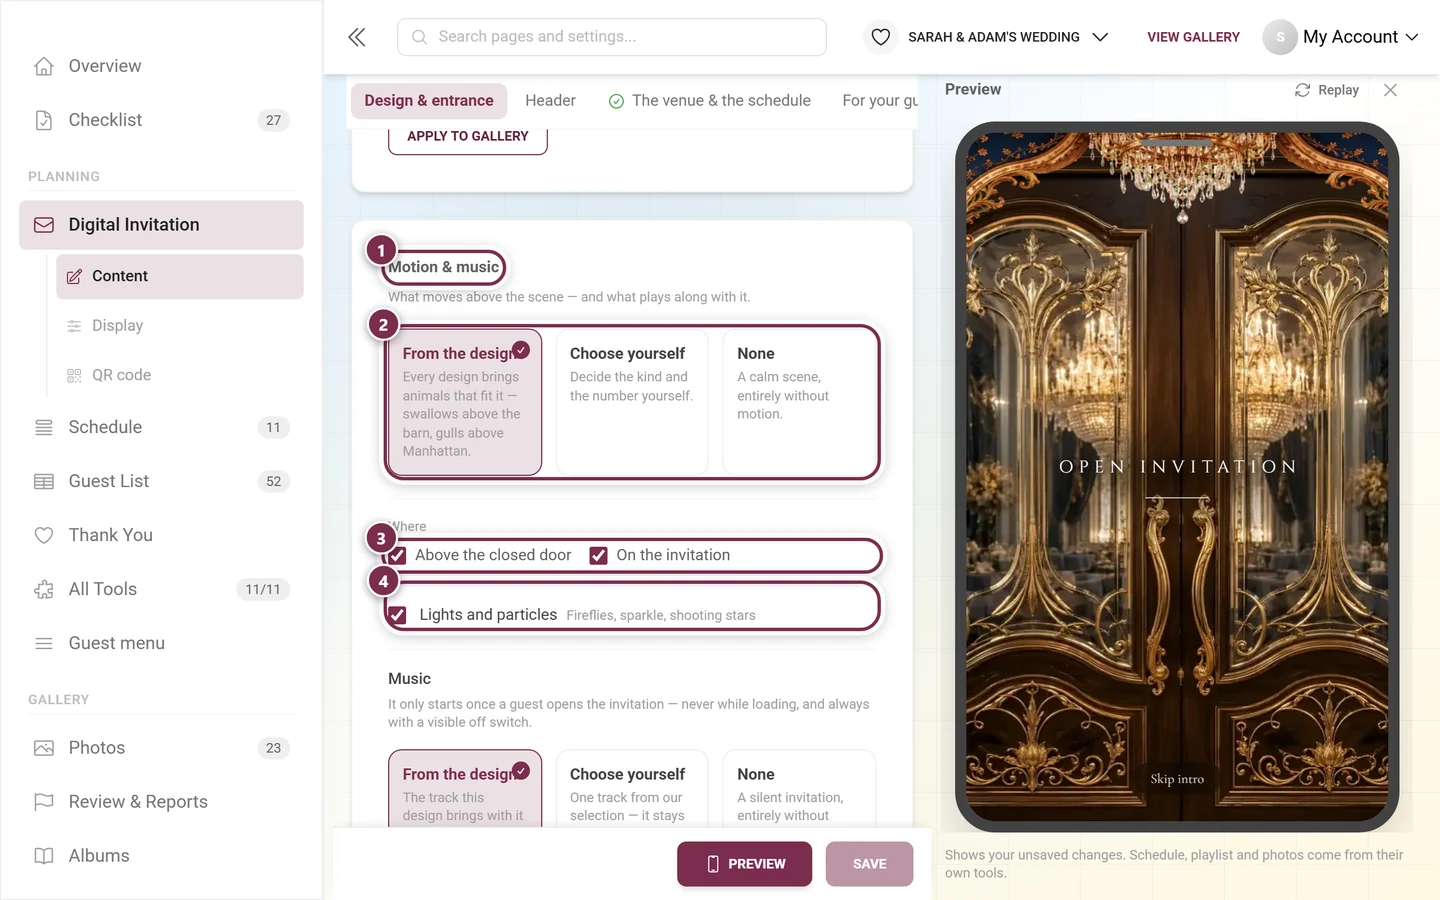
Motion and music
Section titled “Motion and music”This part of the editor decides what moves over the scene and what plays along with it.
- Motion: either whatever the design brings, or your own selection (birds, butterflies, creatures around the entrance, an aeroplane – each with a count and an appearance), or nothing at all. You can also switch off lights and particles and choose whether the motion runs at the entrance only, on the invitation only, or in both places.
- Music: the design’s own track, a track you pick yourself, your own file (Upload your music) or none. With your own file you upload your track under Upload your music – MP3, WAV, M4A, AAC, OGG or FLAC, up to 50 MB and 10 minutes. It is converted to MP3 automatically; afterwards you can listen to it right away or delete it again with Remove music. You can only save this choice once the track has finished uploading. A slider sets the volume; even at 100 % it stays background music.
The music never starts when the page loads – only once the guest opens the invitation – and can be switched off at any time from a visible control.
Paper & finish
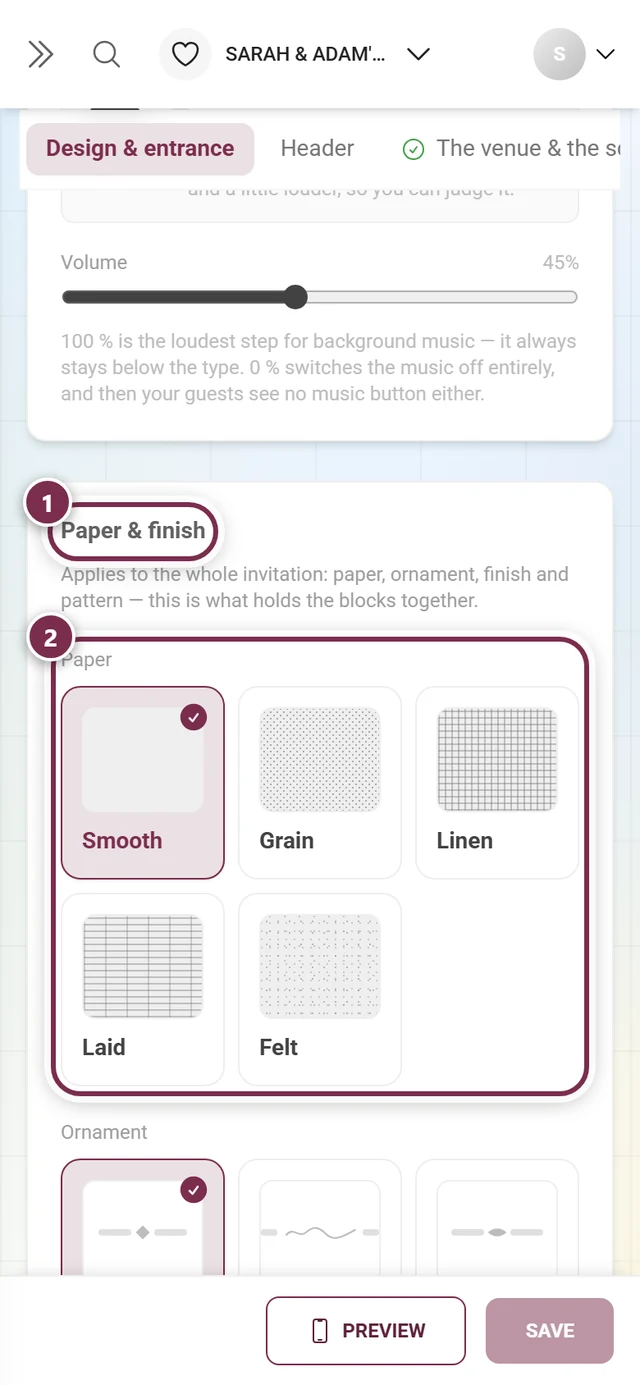
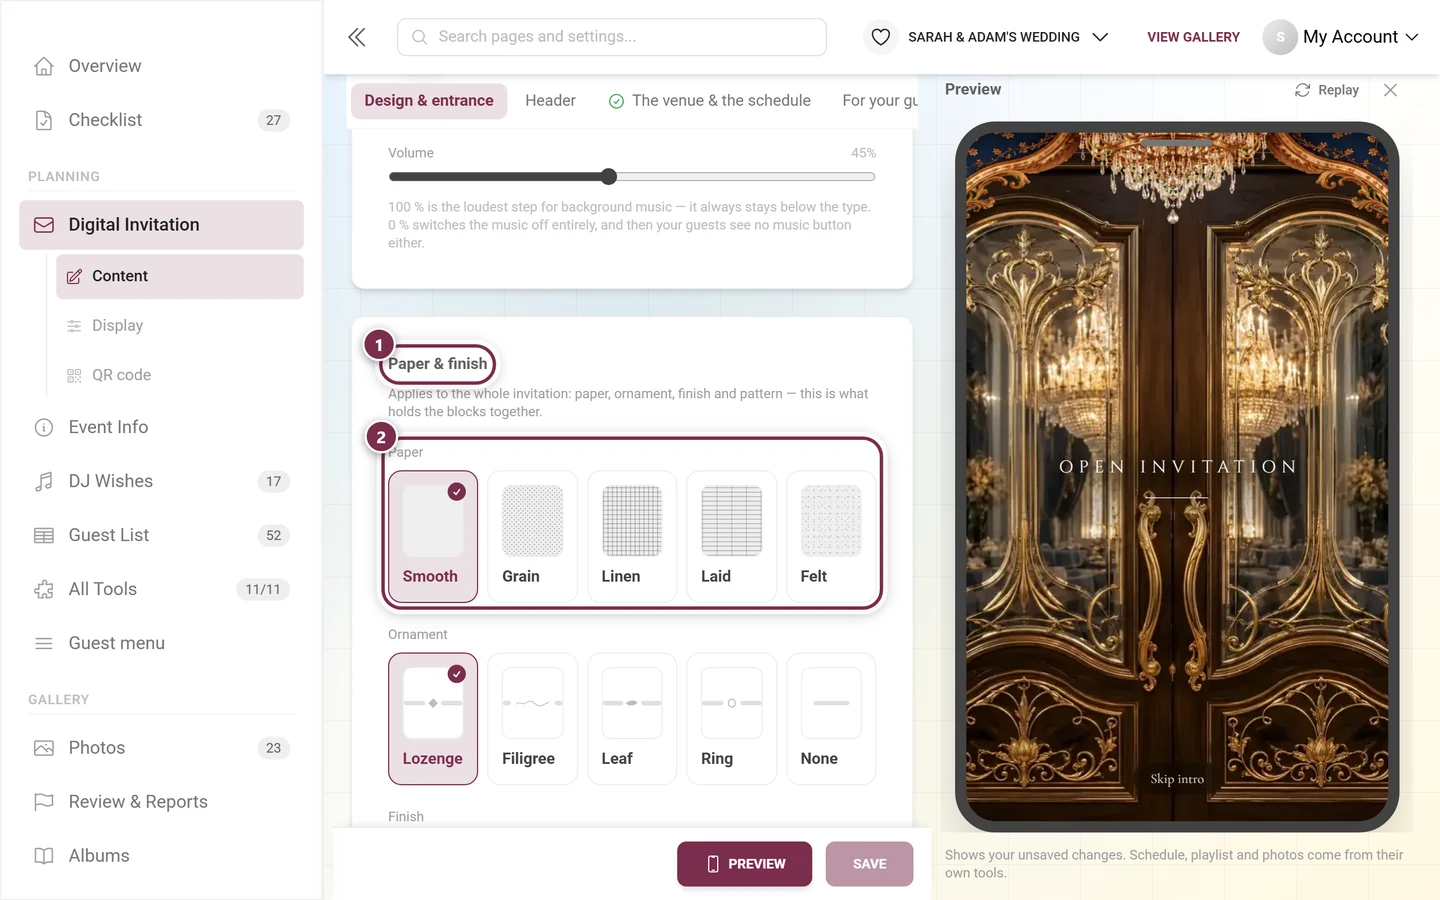
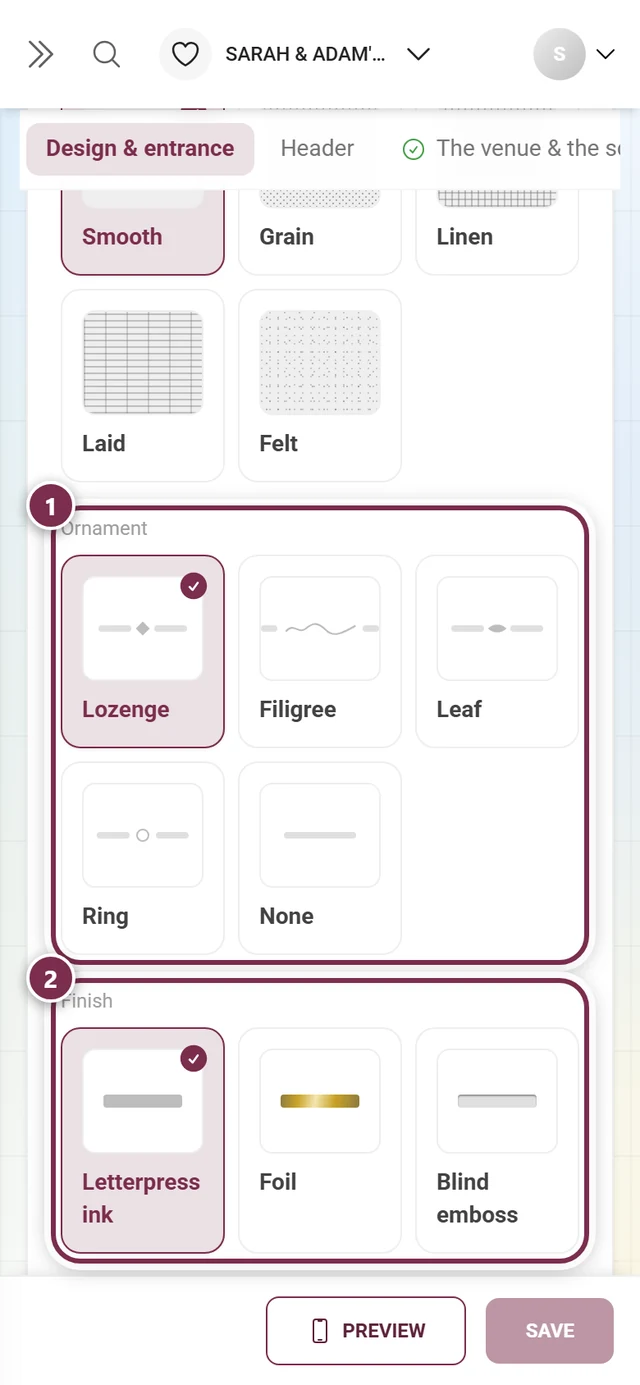
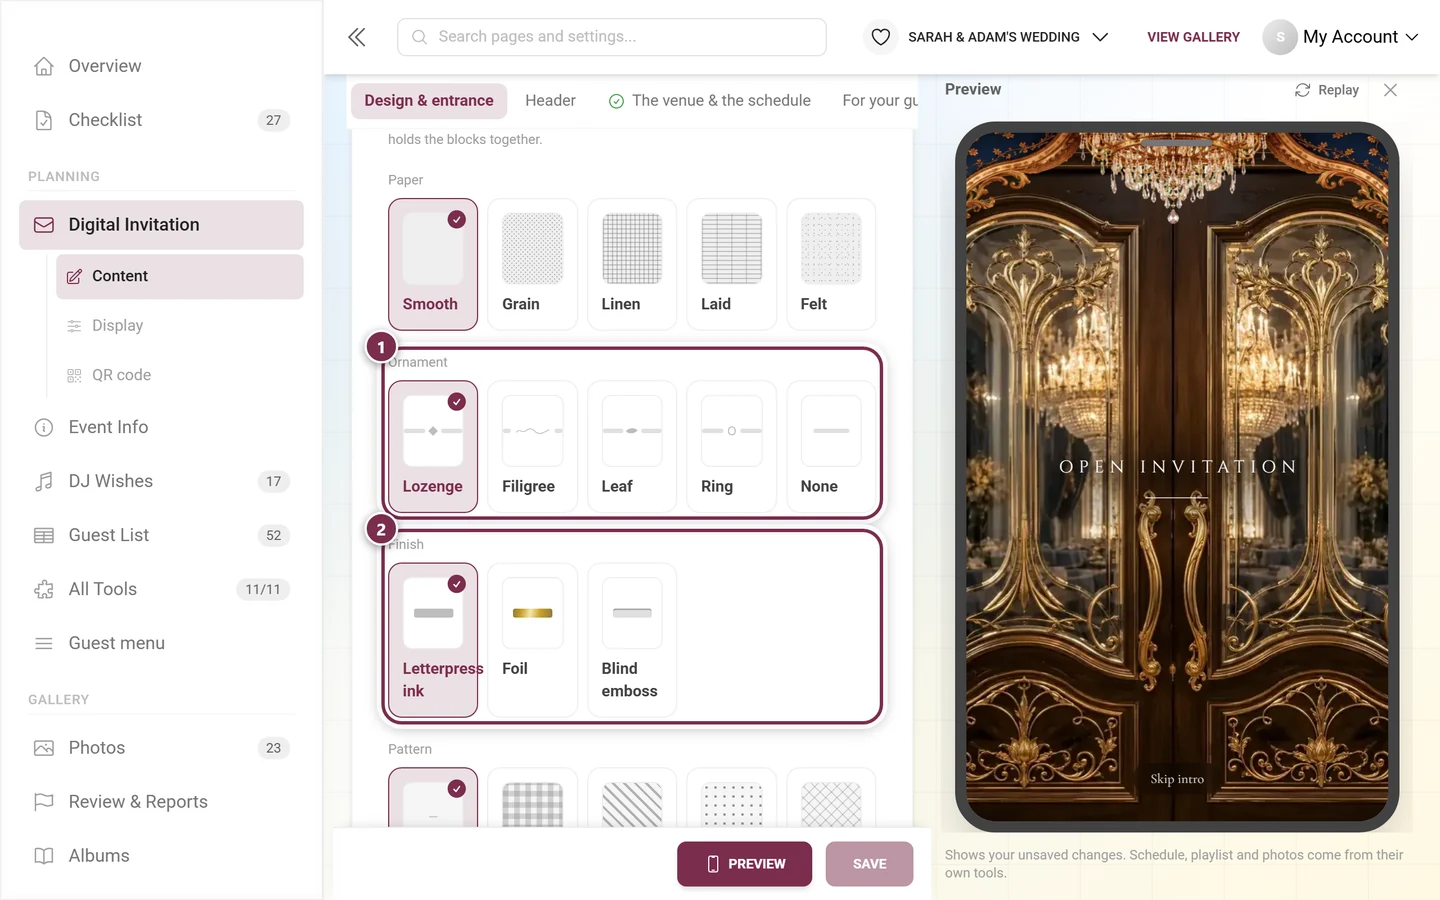
Section titled “Paper & finish”These settings apply to the whole invitation and are what hold the blocks together. In the editor the four axes come in this order:
- Paper – the texture of the stock: Smooth, Grain, Linen, Laid or Felt. All five deliberately stay at the very edge of visible – a paper you can read as a pattern stops reading as paper.
- Ornament – the mark in the middle of the section rules: Lozenge, Filigree, Leaf, Ring or None.
- Finish – how the type looks printed: Letterpress ink, Foil or Blind emboss.
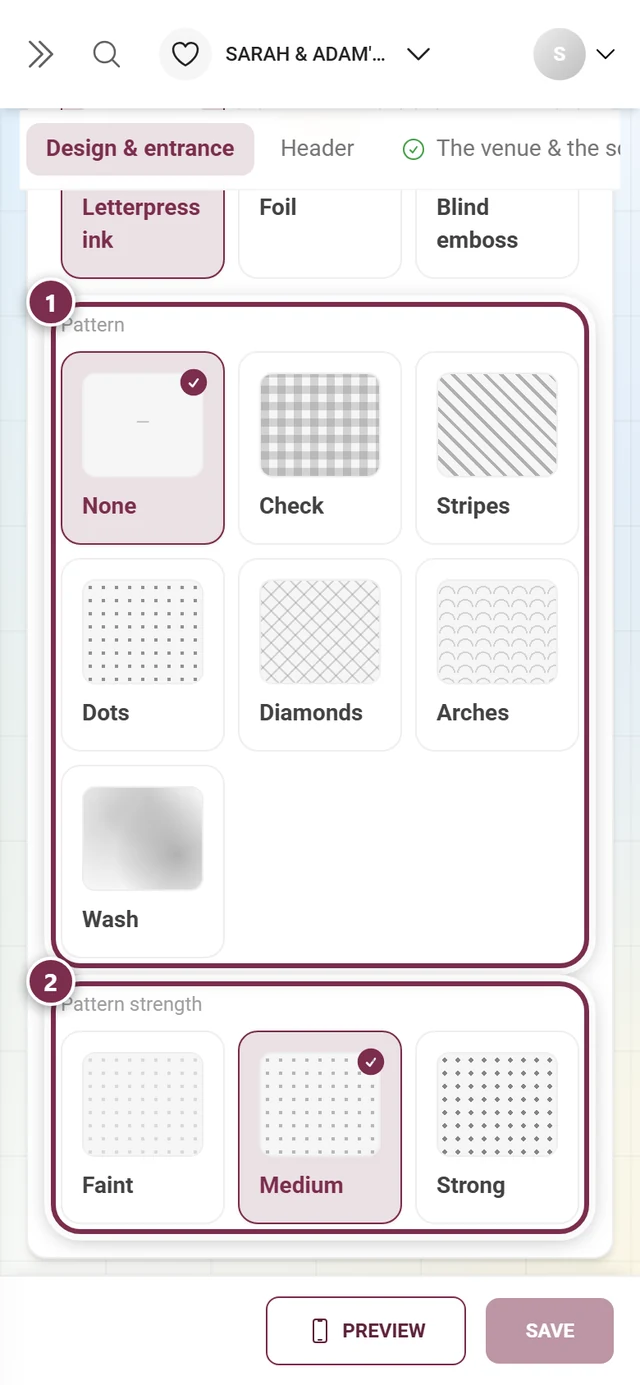
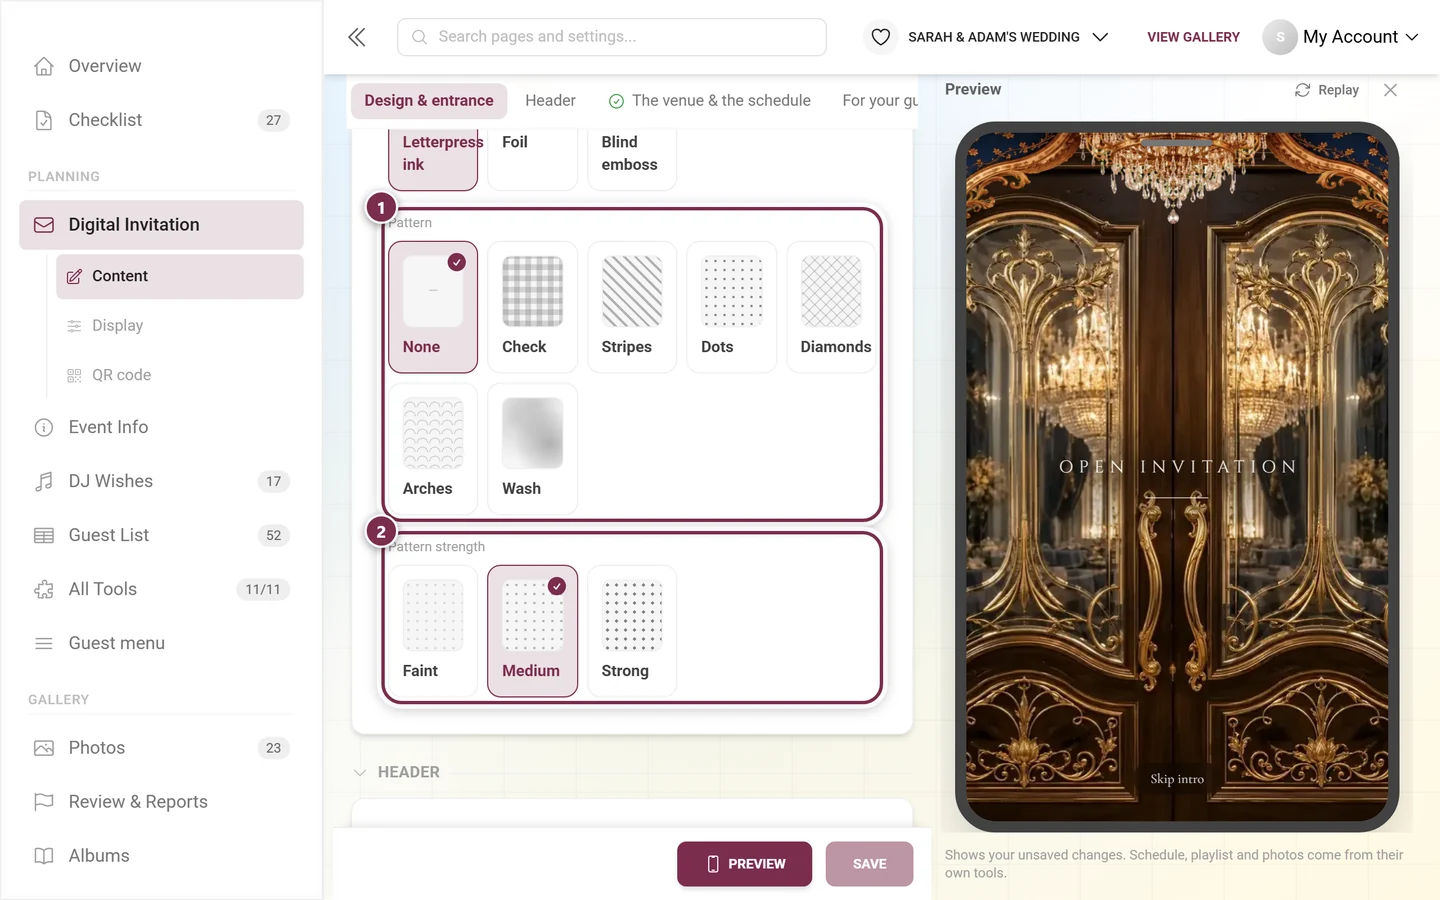
- Pattern – the fourth axis, and the only one meant to be seen: None, Check, Vertical lines, Stripes, Dots, Diamonds, Arches or Wash. You also set the Pattern strength – Faint, Medium or Strong – and, if you want, your own Pattern colors; without a color of its own the pattern prints in the colors of your design and follows along when you change them. The color slots only appear once a pattern is picked at all.
Header
Section titled “Header”The header is the first thing guests see after the entrance animation.
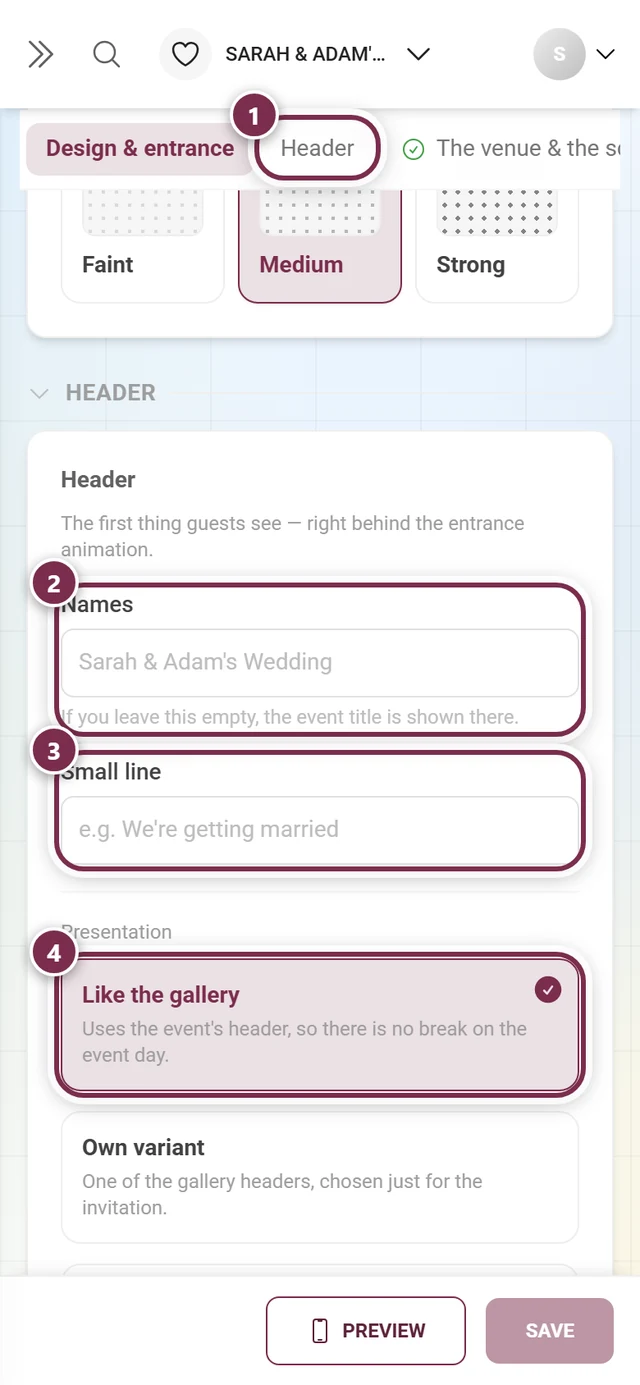
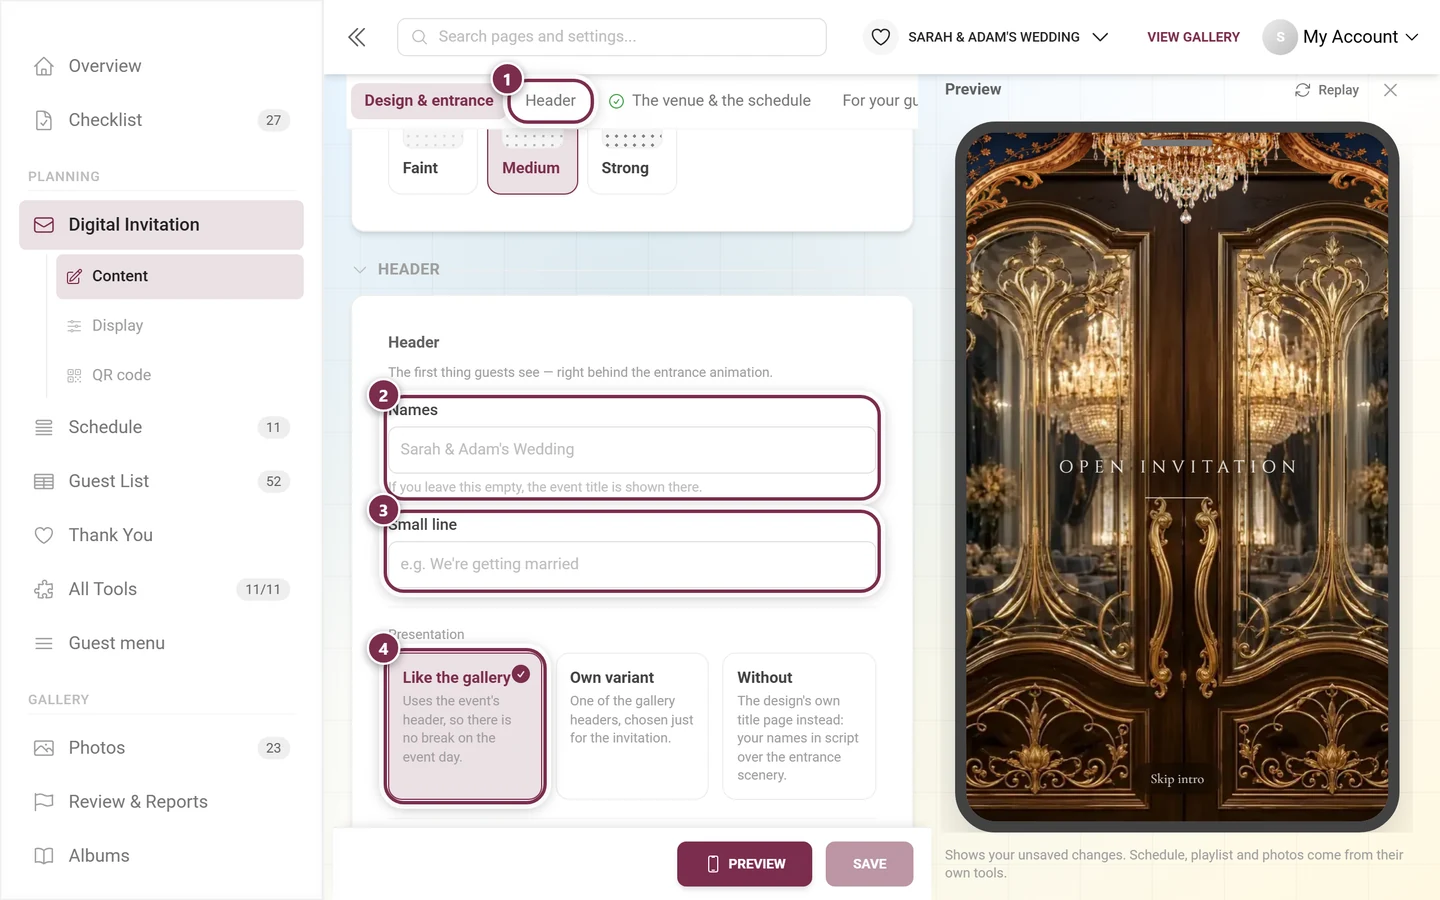
Under Presentation you choose from a row of cards that you scroll through sideways:
- Like the gallery – uses the event’s header so there is no break on the event day.
- Without – the design’s own title page instead: your names in script over the entrance scenery. Only here do you additionally set the Text alignment (Left, Center, Right), the Text position (Top, Middle, Bottom) and the Logo size.
- Modern Compact, Modern, Polaroid, Minimalist, Elegant, Gradient or Cover – one of the gallery headers, chosen just for the invitation. One click on the card is enough.
With Show logo you show or hide the logo in the header. Under Invitation logo you can upload a logo of its own – without one, the gallery logo is used.
Under Image you decide where the cover picture comes from:
- From the gallery – the event’s cover image. Change it there and it changes here too.
- From the design – the artwork of the chosen design.
- Own image – for the invitation only; the gallery’s cover image stays untouched. Landscape is recommended, at least 1600 px wide, with a calm middle.
Image treatment
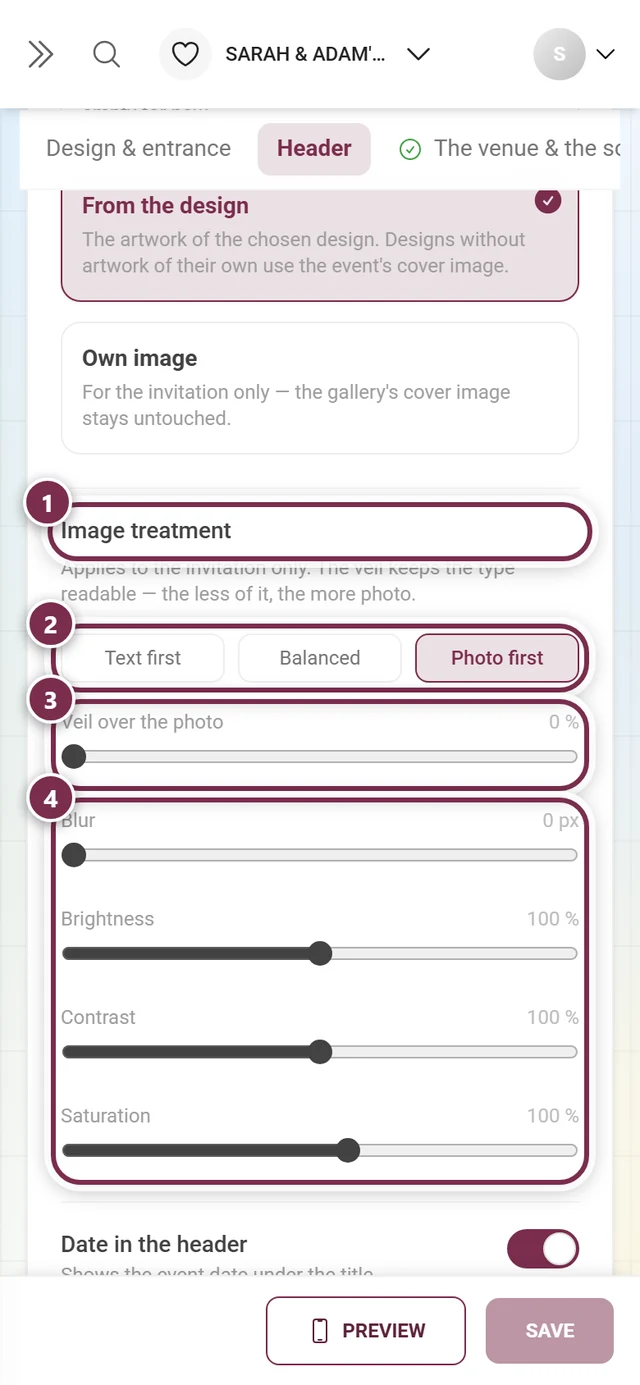
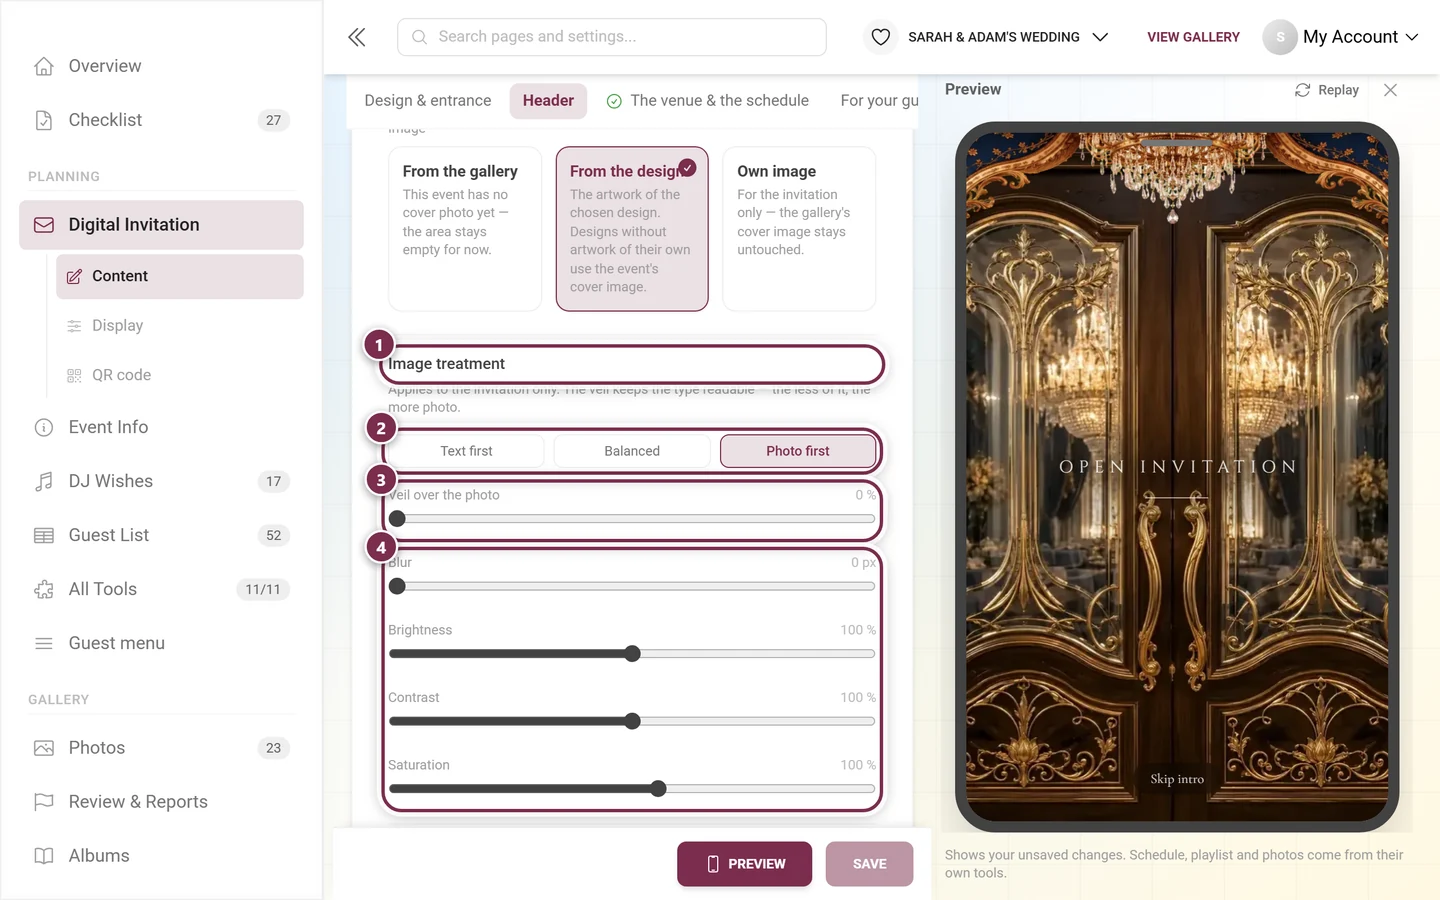
Section titled “Image treatment”As soon as there is a picture, an Image treatment block appears below it with three presets: Text first, Balanced and Photo first. If the chosen source currently delivers no picture – From the gallery, say, while the event has no cover image – the whole block stays away.
The sliders fine-tune it; they apply to the invitation only, the gallery keeps its own values:
- Veil over the photo – 0 to 80 %. It keeps the type readable: the less veil, the more photo.
- Blur – 0 to 20 px.
- Brightness and Contrast – 40 to 160 % each.
- Saturation – 0 to 180 %; at 0 % the picture turns black and white.
Which preset applies without you doing anything hangs on the presentation: Like the gallery and the gallery headers start on Photo first, Without starts on Balanced. And every preset sets only the sliders it needs – never all five:
- Text first sets Veil 42 %, Blur 3 px and Brightness 90 %. Contrast and saturation stay open.
- Photo first sets Veil 0 % and Blur 0 px. The other three stay open.
- Balanced sets Veil 50 %. The other four stay open.
From the gallery: ‹value› therefore only shows under a slider that neither you set yourself nor the applying preset occupies: that one keeps following the event, and changing the value there changes it here too. Under Photo first that is true of brightness, contrast and saturation only, because veil and blur are already fixed; under Balanced that is true of all of them except the veil. Only a value you set yourself gets a reset next to it that hands it back.
Text sizes and readability
Section titled “Text sizes and readability”This block applies to the header of this invitation only. You choose the typefaces themselves under Design → Fonts.
- Sizes in pixels for Title / names (32–120), Subtitle (10–64), Date (10–48), Countdown (10–48) and Scroll hint (10–32). An empty field is set to Automatic and uses the default of the respective header; custom sizes adapt to smaller screens.
- Contrast surface behind the text – a surface behind the type, on by default.
- Outline (0–2 px), Shadow and Glow (each 0–100 %) set the type further apart from the picture.
Restore default appearance resets every value in the block.
Names, date and countdown
Section titled “Names, date and countdown”On top of that come the two text fields Names (e.g. “Sarah & Adam”) and Small line (e.g. “We’re getting married”), plus two switches: Date in the header and Countdown over the photo. The countdown in the header shows days, hours and minutes in every presentation; after the date it stays at 00 and shows “The event has started”. Directly below sits the separate Countdown section, which counts down to the event date.
For your calendar
Section titled “For your calendar”Directly below the header you can switch on the Save the date card: a section of its own with a fully configurable calendar entry, placed between the header and the venue & program by default. The section is also available in the Save the Date. Guests see a card with the Add to calendar button; it offers Google Calendar and Apple, Outlook & others (.ics).
The editor has two parts:
- Visible card – Card title (empty: your names or the event title), Card text and the switch Show event date on the card (default: on).
- Calendar entry (Google / ICS) – these details only end up in the calendar and don’t change the visible card. Here you set the Event title, Description and Location / address. With Use information from other sections for the calendar entry, empty fields take over the title, tagline, venues and the visible program; your own entries take precedence.
Date and reminder:
- All day is preselected. Without a date of your own, the event date applies; for all-day entries the End date is the last included day.
- If you switch All day off, Start time, End time and Event time zone appear. Start and end apply in this time zone, regardless of where your guests are.
- Reminder in the calendar file – No additional reminder, At the start or 5, 15, 30, 60 or 1440 minutes before. Google Calendar uses its own reminder settings.
If the entry is invalid – for instance because the end lies before the start – the error shows right at the field, and saving reports “Please correct the calendar entry first.”
The sections
Section titled “The sections”You maintain these sections inside the invitation itself. Each has its own switch – switched off, the content stays saved but guests cannot see it.
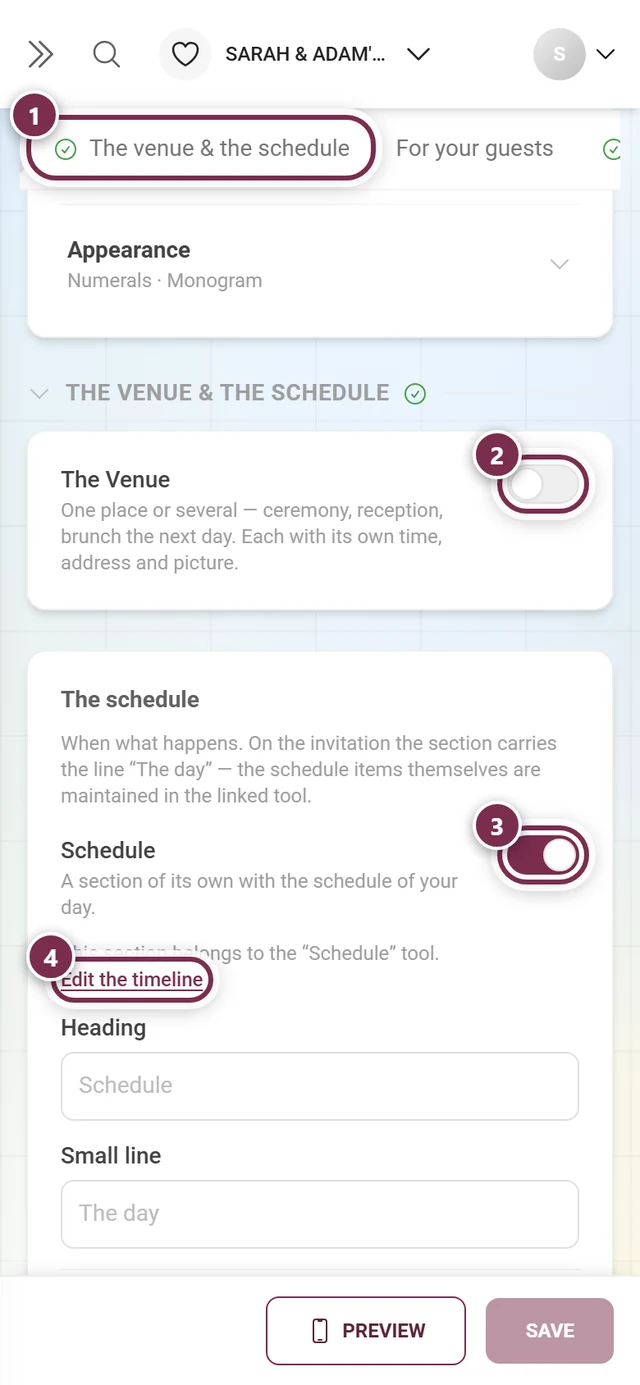
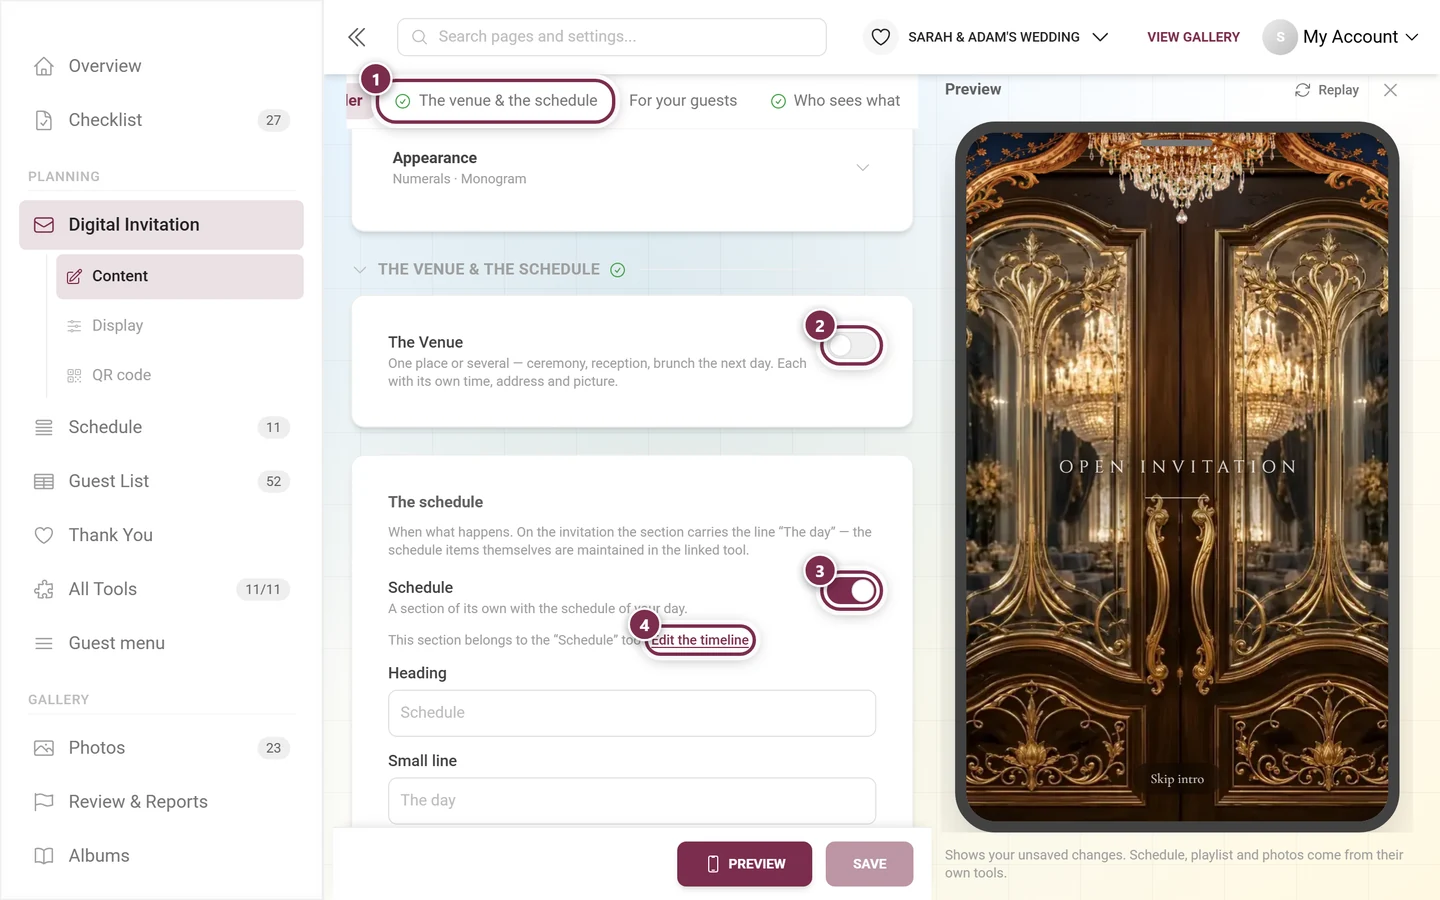
The venue – this holds every place of the day, not just one: Add a place creates the first, Add another place each further one – ceremony, drinks, party. Every place has an Occasion (e.g. Ceremony), a Time (e.g. “from 5 pm”), Name, Address, Map link, its own Venue picture (landscape, at least 1200 px wide – it also unlocks the Full bleed and Arch shapes for this section), its own Note for this place (parking, directions, accessibility) and a shown switch. Below all of them sits one more Note that applies to every place – it is printed under the last one. Where the map link comes from is set in the Appearance block under Map link: Google Maps and OpenStreetMap build it automatically from name and address, Own link uses the Map link field instead. Guests then see an Open in Maps button.
Dress code – a Heading, a Description and up to four columns (ladies and gentlemen, for instance), each with its own column heading, its own text and its own Colors as swatches next to the text.
Accommodation – an Intro (a room-block keyword, for example) and up to ten places to stay with Name, Website, Address, Map link, Note and Price hint. Leave the map link empty and directions are derived from the address.
Gifts – a Text with formatting (you can bold the IBAN, for instance) and up to ten links with Label and Link.
Your own sections – up to ten freely named blocks for anything the fixed sections do not cover: a shuttle bus, childcare, a word for guests travelling from further away. Each has a Heading, a Text and a Show switch; Move up and Move down sort them. On the invitation they appear after the gifts.
Sections from other tools
Section titled “Sections from other tools”These sections have no content of their own – they show what lives in another tool, and here they are only switches:
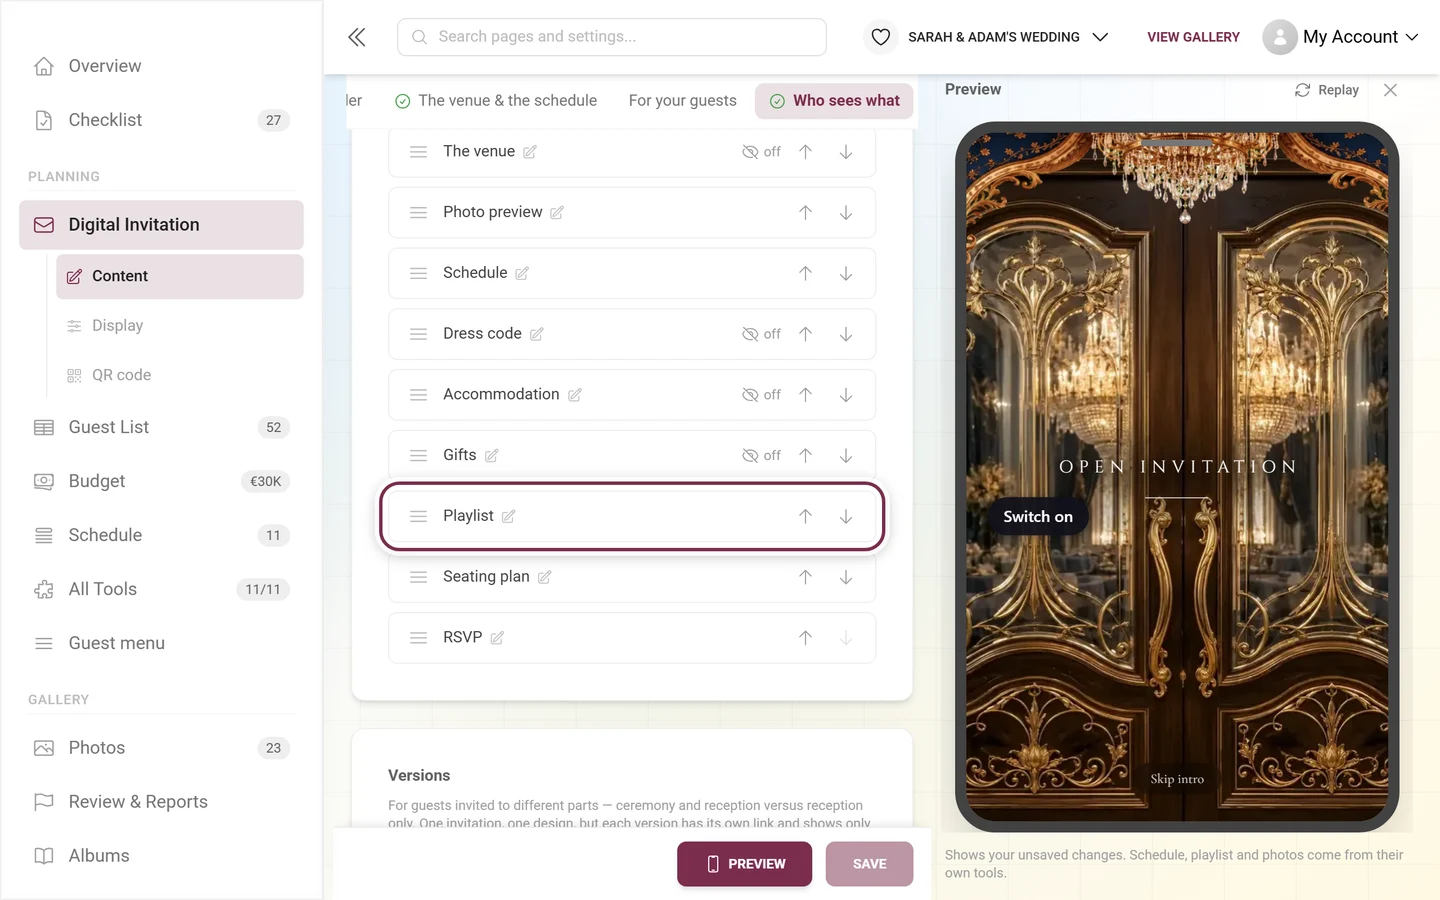
- Photo preview – the latest photos from your gallery. Only from selected albums narrows the selection; without one the section shows the whole gallery.
- Schedule – the schedule from the schedule tool; Edit the schedule takes you straight there.
- Playlist – the top songs plus button from the DJ requests; Edit the song requests opens the tool.
- Seating plan – the plan right on the invitation, see seating plan; Edit the seating plan opens the tool.
- RSVP – the reply button from the RSVP tool, shown on the invitation as “Are you coming?”; Edit the RSVP tool opens it.
Section order
Section titled “Section order”Under Order you sort the order the sections appear in on the page. There are three ways:
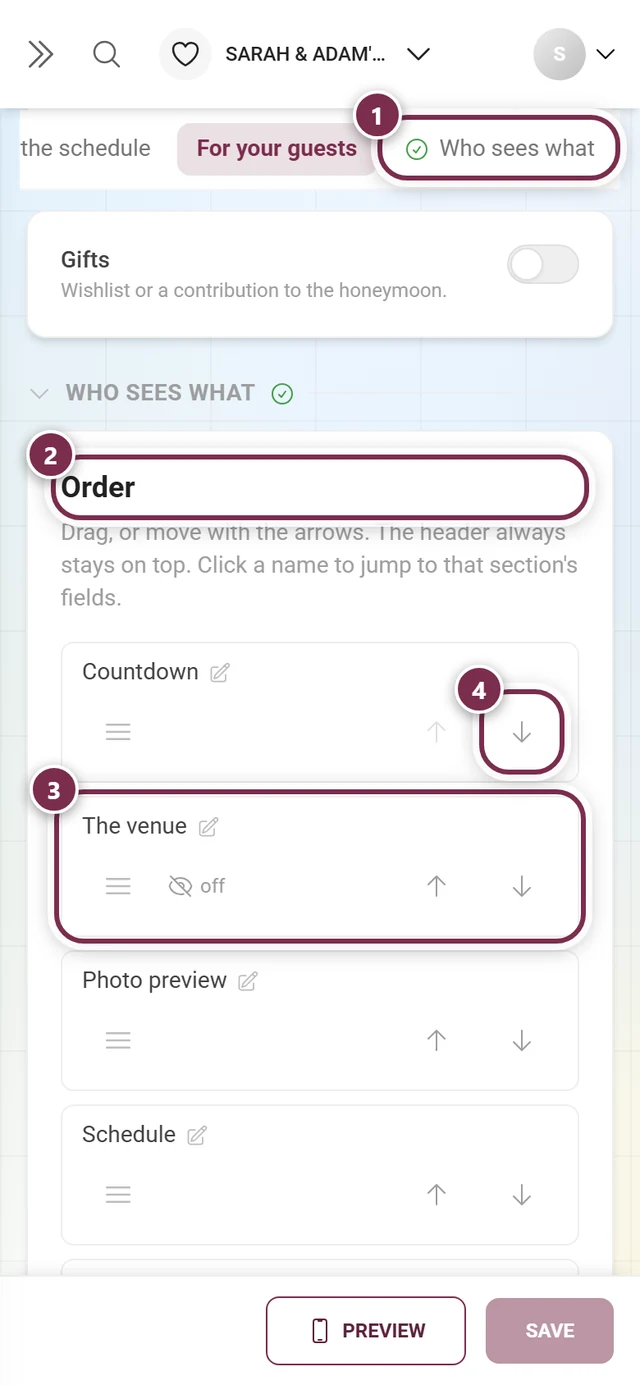
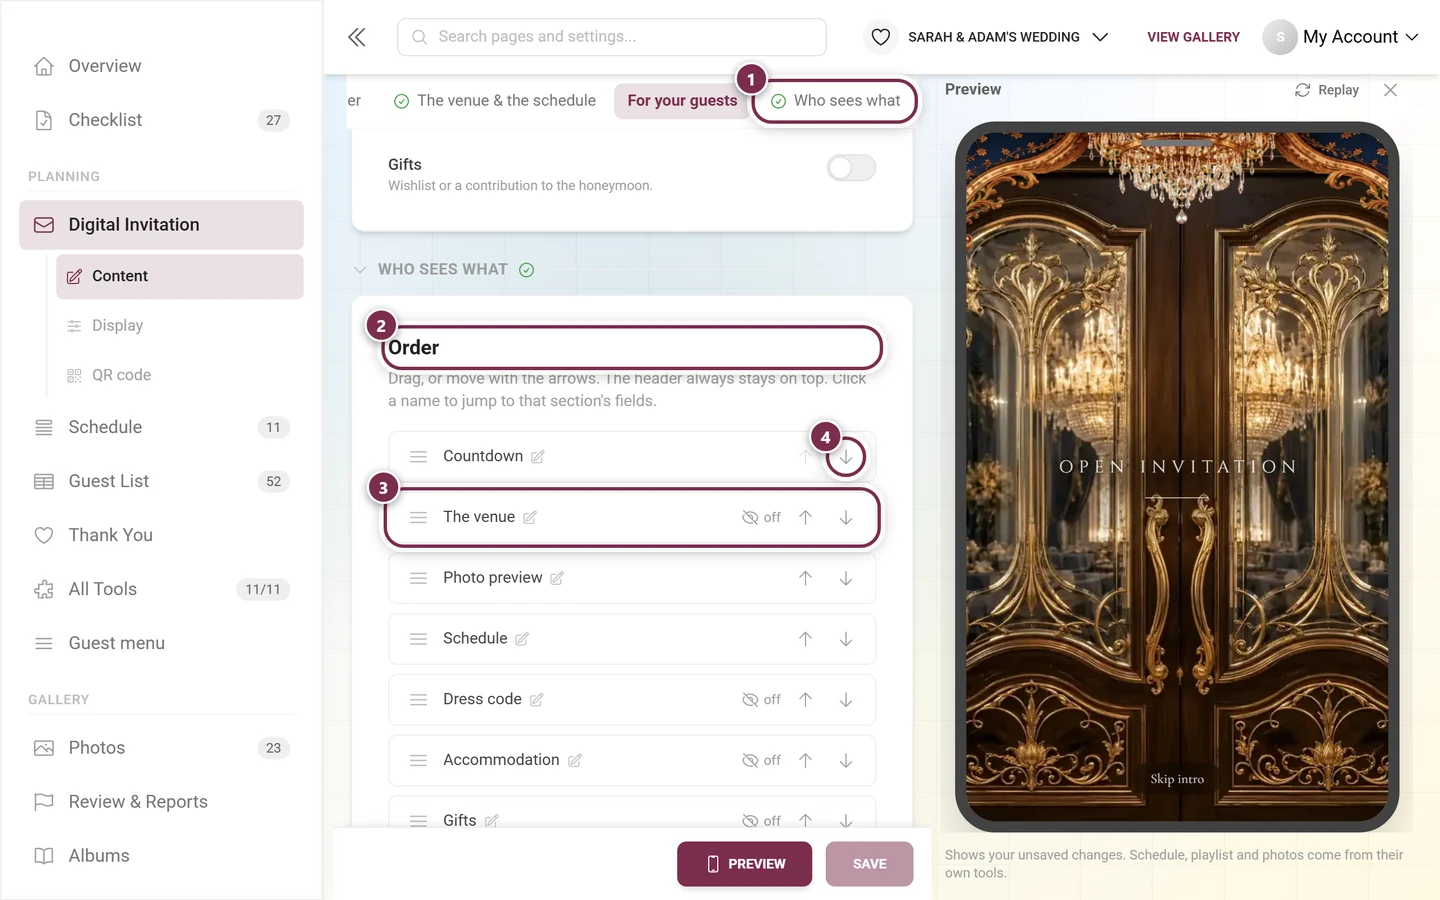
- Drag the handle on the left – the fastest route on a computer.
- The Move up and Move down arrows – the better route on a phone.
- Keyboard: focus the handle, pick the row up with the space bar, move it with the arrow keys.
The header always stays on top and cannot be moved. Sections that are switched off remain in the list (with a crossed-out eye) so you can set their position before you switch them on. Restore the default order resets everything – after a confirmation (“Reset the order?”) in which your own sections move back behind Gifts. Clicking the name of a row, by the way, jumps straight to that section’s fields.
Versions: one link per circle of guests
Section titled “Versions: one link per circle of guests”Some guests are invited to everything, others only to the evening. That is what the Versions card right below the running order is for: one event, one design, but each version has its own link and shows only the sections you assign to it. Until you create one, it reads “There is one version right now — every guest sees the same thing.”
- Add a version creates one. You only give it a Version name (e.g. “Evening only”); the token in the link is issued by Photogala and never changes with it – so a link you already sent stays valid even if you rename the version later.
- Every version shows its link with the
?v=…addition and a Copy link next to it. At the top sits the link Without an addition — shows everything. - Assigning does not happen here but at the section itself: the version chips sit right next to Show there. A section with no assignment appears in every version – including the plain link.
- Below each version you see its Assigned sections. If that list is empty, the version shows everything you have not reserved for another one.
- The header is never version-specific; it appears in every version.
- In the preview you pick which one you are looking at under Version – Plain link shows the complete invitation.
- Delete version asks first: the link with that addition then leads to the complete invitation, and sections assigned only to that version are shown to all guests afterwards. The dialog lists them for you beforehand.
Not to be confused with the two cards at the very top: they decide whether the invitation appears as a save the date or in full – and it applies to every version alike.
Building blocks: shape and heading style
Section titled “Building blocks: shape and heading style”Every section has a collapsible Appearance block; inside it you pick its own Shape and its own Heading style – that is what turns the same content into your page. The line next to Appearance always shows the current choice, e.g. “Card · Classic”. Only what fits the content is offered per section.
Shapes include Card, Engraved, Rows, Timeline, Full bleed, Plain, Numerals, Mosaic, Grid, Strip, Scratch card, Arch, Deckled paper, Folded card, Wax seal, Ticket, Corners, Arches and Film strip.
A few with a special effect:
- Scratch card (on the countdown) – guests scratch the date free with a finger.
- Folded card (on the dress code) – two halves with a crease between them, ideal for two columns.
- Ticket (on the schedule) – the time in the stub, like an admission ticket.
- Wax seal – a wax medallion with your initials, derived from the Names field.
- Timeline – dots along a line, for schedules with times.
Heading styles are Classic, Monogram, Arch, Ribbon, Minimal, Editorial, Stamp – and, in some sections, None.
Sample text and preview
Section titled “Sample text and preview”Insert sample text at the top right fills every text field that is still empty with fully written examples – in the language currently selected. Text you have already written stays untouched. It is the fastest route to a page that already looks finished and that you only have to rewrite.
Preview in the bottom bar shows the invitation in a phone frame: as a column beside the form on a computer, full screen on a phone. The preview also shows changes you have not saved yet. Schedule, playlist and photos still come from their own tools. Replay plays the entrance animation again.
Sharing: link, QR code and a personal greeting
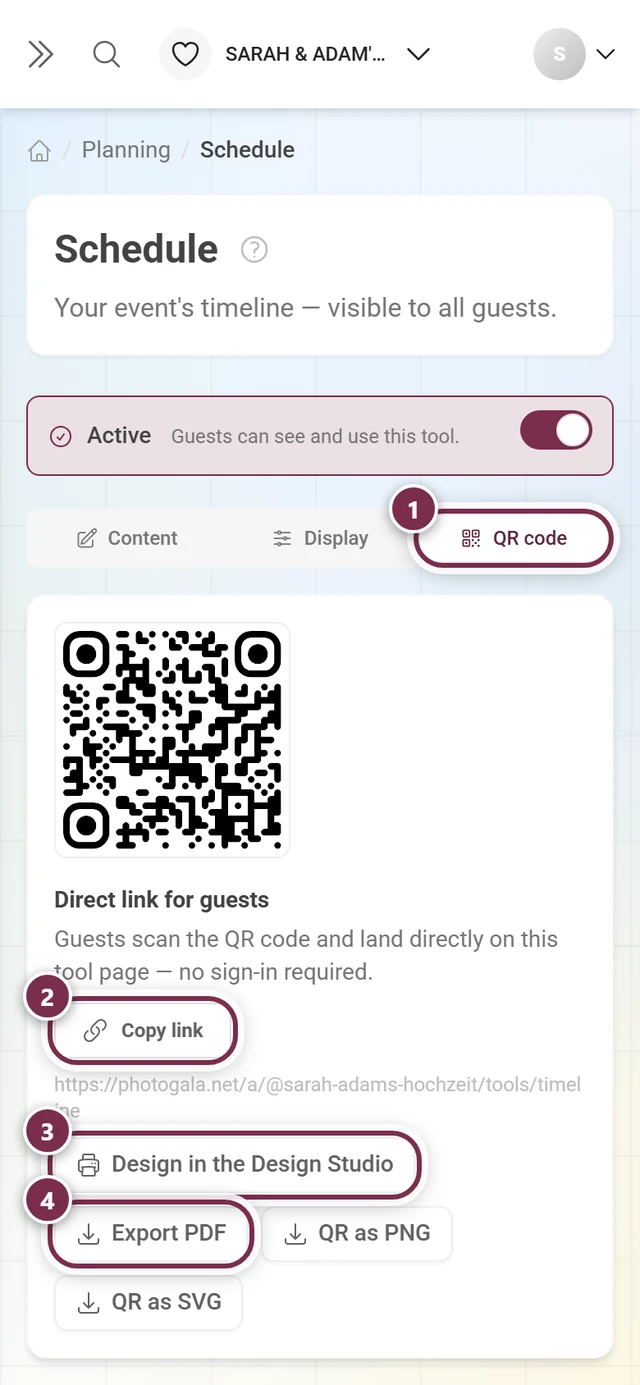
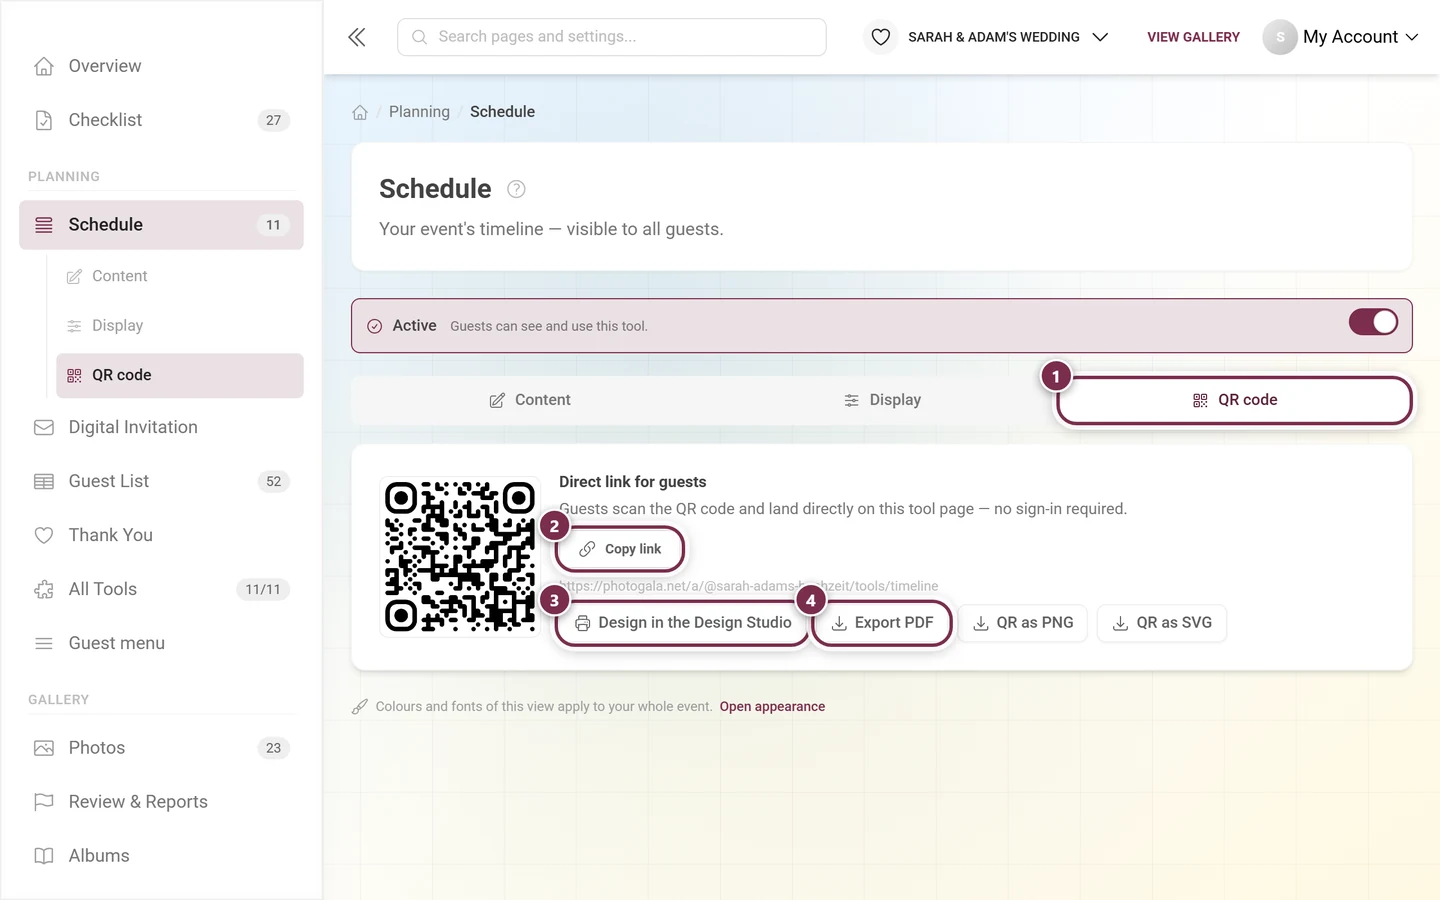
Section titled “Sharing: link, QR code and a personal greeting”In the QR code tab, everything you need to send it out sits under Direct link for guests: Copy link, Export PDF or Design in the Design Studio for a matching card. Above that, under Link preview and share text, you decide which preview image and which text appear when the link is shared on WhatsApp, Telegram or Facebook – details under Tools.
The Display tab
Section titled “The Display tab”Everything that makes the invitation visible inside the event sits in the Display tab – not in the QR tab. Three switches, all three off by default – plus a sub-option that only shows up once the third one is on:
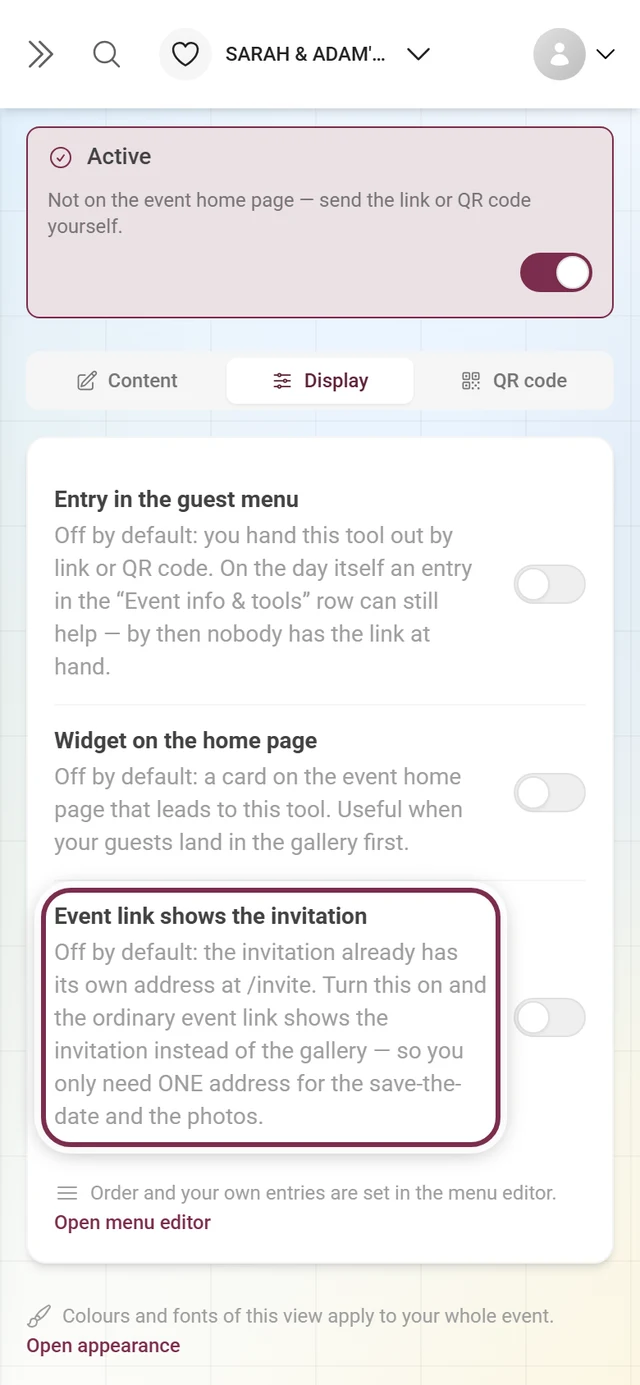
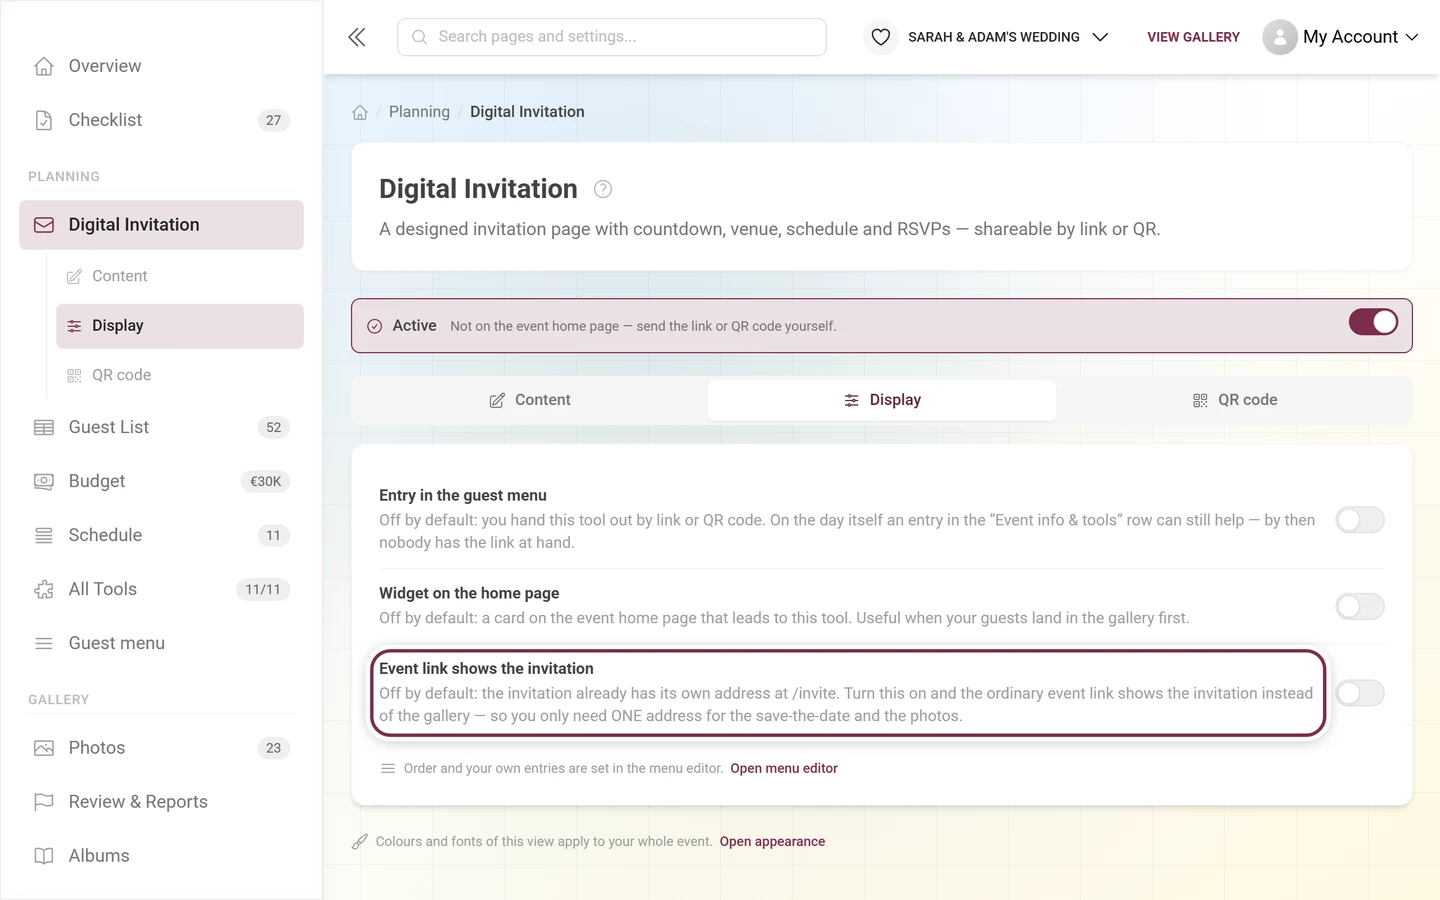
- Entry in the guest menu – puts the invitation into the Event info & tools rail on the event home page. “Off by default: you hand this tool out by link or QR code. On the day itself an entry … can still help — by then nobody has the link at hand.” Order and your own entries are set in the guest menu; the link to it sits right below the switches.
- Widget on the home page – a card on the event home page that leads to the invitation.
- Event link shows the invitation – the switch the next section is about.
- Only until the event day – its sub-option; it appears indented as soon as the switch above is on, and is on by default.
The RSVP tool does not have these switches.
A personal greeting
Section titled “A personal greeting”Append the ?n= parameter with a name to the invitation link and the entrance animation greets exactly that person – “For the Berger family”, for instance. The name is only displayed and stored nowhere; it must not be too long or it gets shortened.
Personalized guest links
Section titled “Personalized guest links”A separate link per guest – with the reply assigned unambiguously – is not created here but in the RSVP tool. There the personalized links are exported as CSV or Excel, ready to use for a mail merge.
As soon as somebody has opened the invitation, the number of views appears at the top of the editor. It is counted on the server and repeat visits by the same person are folded together – nothing about the visitors is stored. The invitation page itself deliberately ships no trackers, which is why it needs no cookie banner either.
One link that follows the event
Section titled “One link that follows the event”You do not have to hand out two addresses – if that is what you want. Turn on Event link shows the invitation in the Display tab and the bare event address shows the invitation instead of the gallery. That switch is off by default: the invitation then stays the thing you hand out at /invite, and the event link leads into the gallery as usual.
With it on, the sub-option Only until the event day (default: on) decides the rest:
- On – up to the day before, the address shows the invitation; from midnight on the event day it shows the gallery. The clock of the device doing the clicking decides.
- Off – the event link keeps showing the invitation, even after the party.
- No event date means there is no day to hand over on, and the editor says so on the spot: “This event has no date set yet — until it does, the link keeps showing the invitation.”
Worth knowing:
- The switch only takes effect while the invitation is active. With the tool off, nothing happens.
- It treats everybody the same – you and your event admins included. The notice on your dashboard says exactly that. To get to the gallery yourself, use
?view=homeor the direct gallery link. - As the host you see two buttons on the invitation itself, top right: Edit takes you back to the editor, Normal site past the switch to the event home page. Guests never see that bar – it only appears when the server recognizes you as a manager of the event.
- Only the bare event address is redirected. Anything with a path after it (gallery, a tool, a single photo) is left alone.
- Appending
?view=hometo the event address forces the home page. That also gets a guest past the switch when you want to show them the way. - Everything attached to the link (personal greeting, embedded password) is carried across the redirect.
Troubleshooting
Section titled “Troubleshooting”Guests see “This invitation is currently unavailable.” The tool is not active yet. Switch on Enable tool at the top or click Publish in the editor.
A section is missing from the invitation Four possible causes: Save the Date is still the active card at the top (then only names, date, countdown and possibly the calendar entry appear), the section’s switch is off, it is a section from another tool that is not active yet – or your plan does not cover the full invitation, so guests keep seeing the save-the-date version.
The countdown shows nothing No event date is set. The note at the top of the editor takes you straight to the setting.
A shape cannot be selected It does not fit the content – Full bleed without a venue picture, say, or Film strip with too few photos. Upload the missing content and the shape becomes available.
The preview looks different from the real page The preview shows your unsaved state. Save, and the two match again.
Guests land in the gallery instead of the invitation The event day has started – from then on, the same link deliberately leads to the gallery.
Related pages
Section titled “Related pages”- For guests: The digital invitation – what your guests see.
- For hosts: RSVP · Seating plan · Schedule · Design Studio · Tooling – Overview