Approving & moderating photos
Content Moderation is your command center for everything that goes public in the gallery: reviewing new uploads (approve or hide), running bulk actions, handling reported content, banning guests and – with AI enabled – organizing detected person clusters. This guide is for hosts, admins and moderators.
When photos land in moderation at all
Section titled “When photos land in moderation at all”Two paths put a photo in the queue:
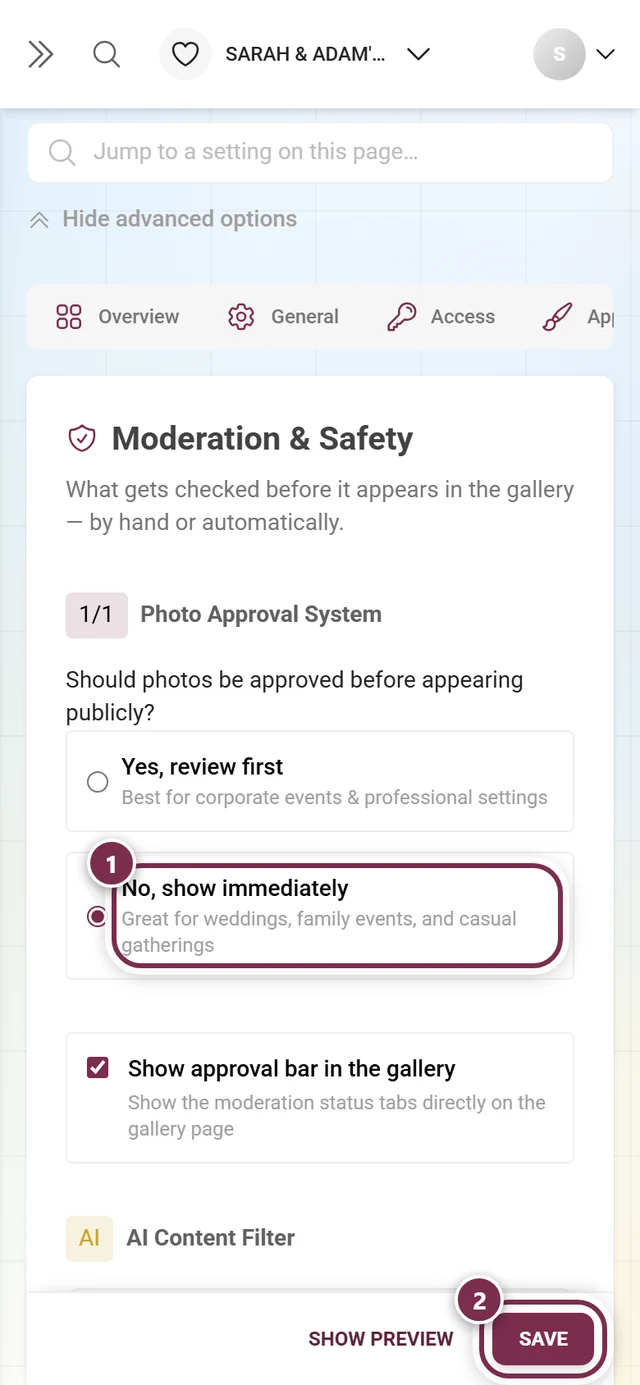
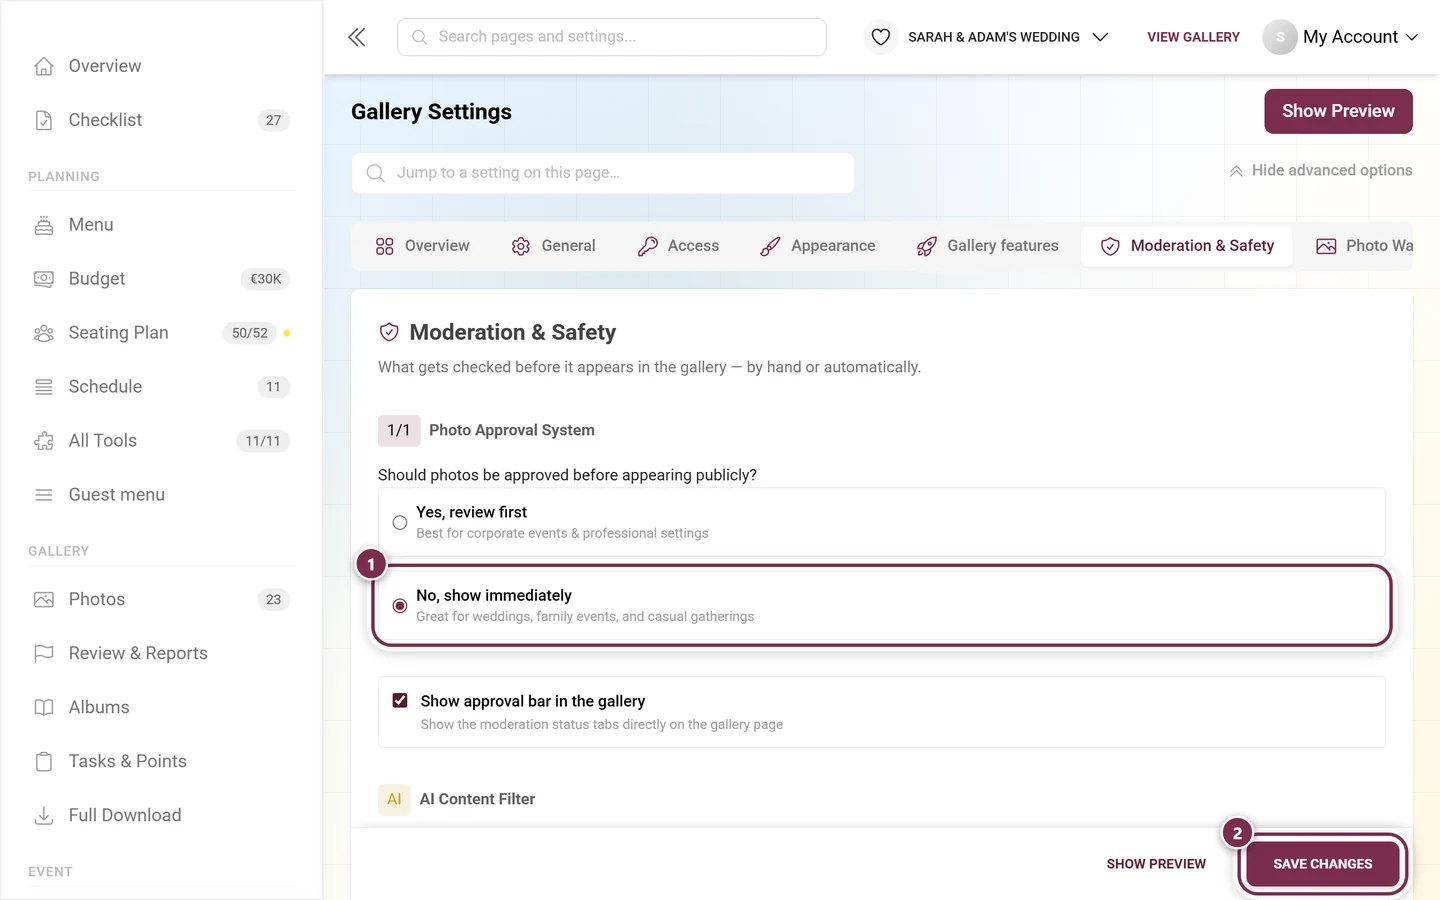
- Approval is required: With content moderation switched on, every new upload first arrives as pending in moderation and only becomes public after you approve it. You’ll find this switch under Moderation & safety.
- Orphaned content: Even without required approval, the Media tab appears as soon as there are pending or unpublished photos – for example because the AI content filter (NSFW) automatically unpublished an upload, or you hid something earlier.
If approval is off and there is no such orphaned content, the Media tab simply isn’t there – that’s normal. The page then opens on Reports instead.
How to reach moderation
Section titled “How to reach moderation”As a host or admin: in the admin area
Section titled “As a host or admin: in the admin area”-
Open your event’s admin area (profile menu top right → Admin Portal).
-
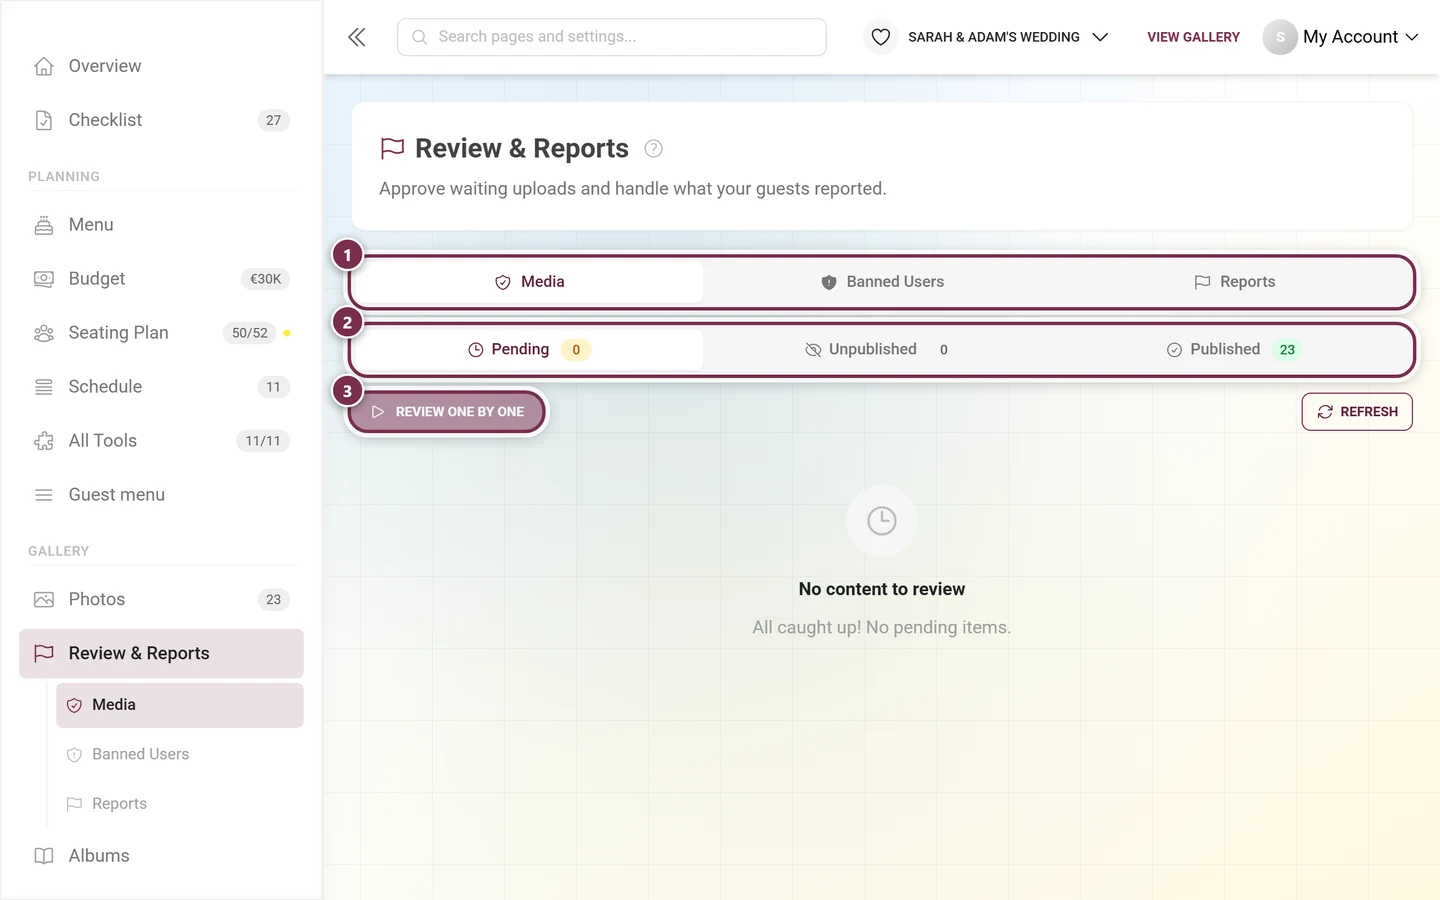
In the sidebar, under the Gallery group, click Review & Reports. A red counter on the entry shows what is still waiting for a decision: waiting uploads plus open reports. Already published or unpublished photos deliberately don’t count – otherwise the number would never go down.
-
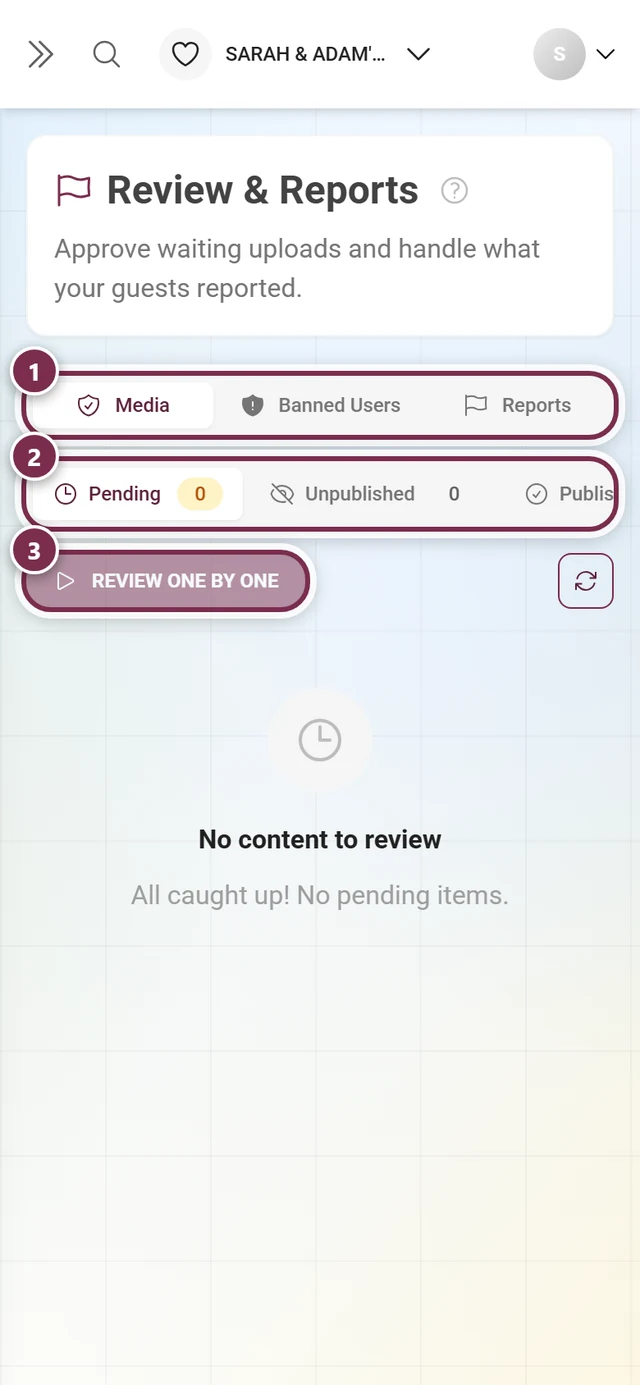
The page is called Review & Reports, subtitle “Approve waiting uploads and handle what your guests reported.”. Its four sections – Media, Face Clusters, Banned Users, Reports – also appear as sub-entries in the sidebar, so you can jump straight to one.
As a moderator: through the profile menu
Section titled “As a moderator: through the profile menu”Moderators without admin access move around in the same gallery as the guests. For them the route goes through the profile menu – and that route always works.
-
Tap your profile picture or avatar in the top right. The profile menu opens.
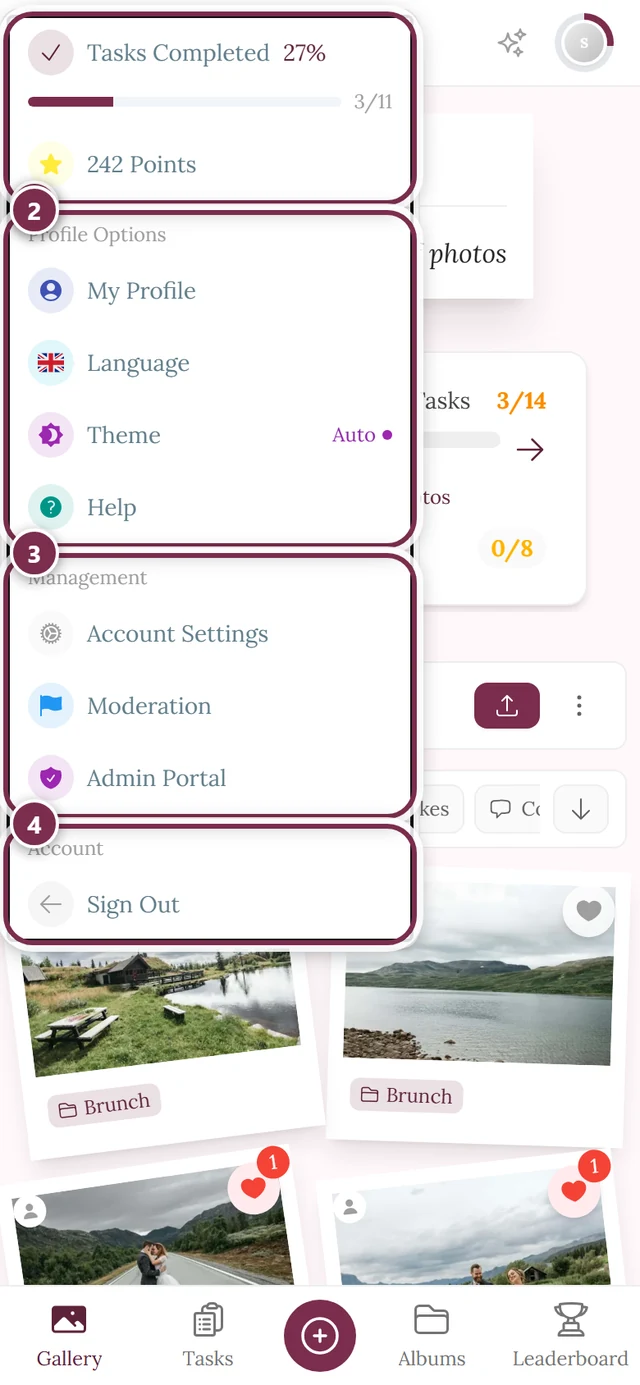
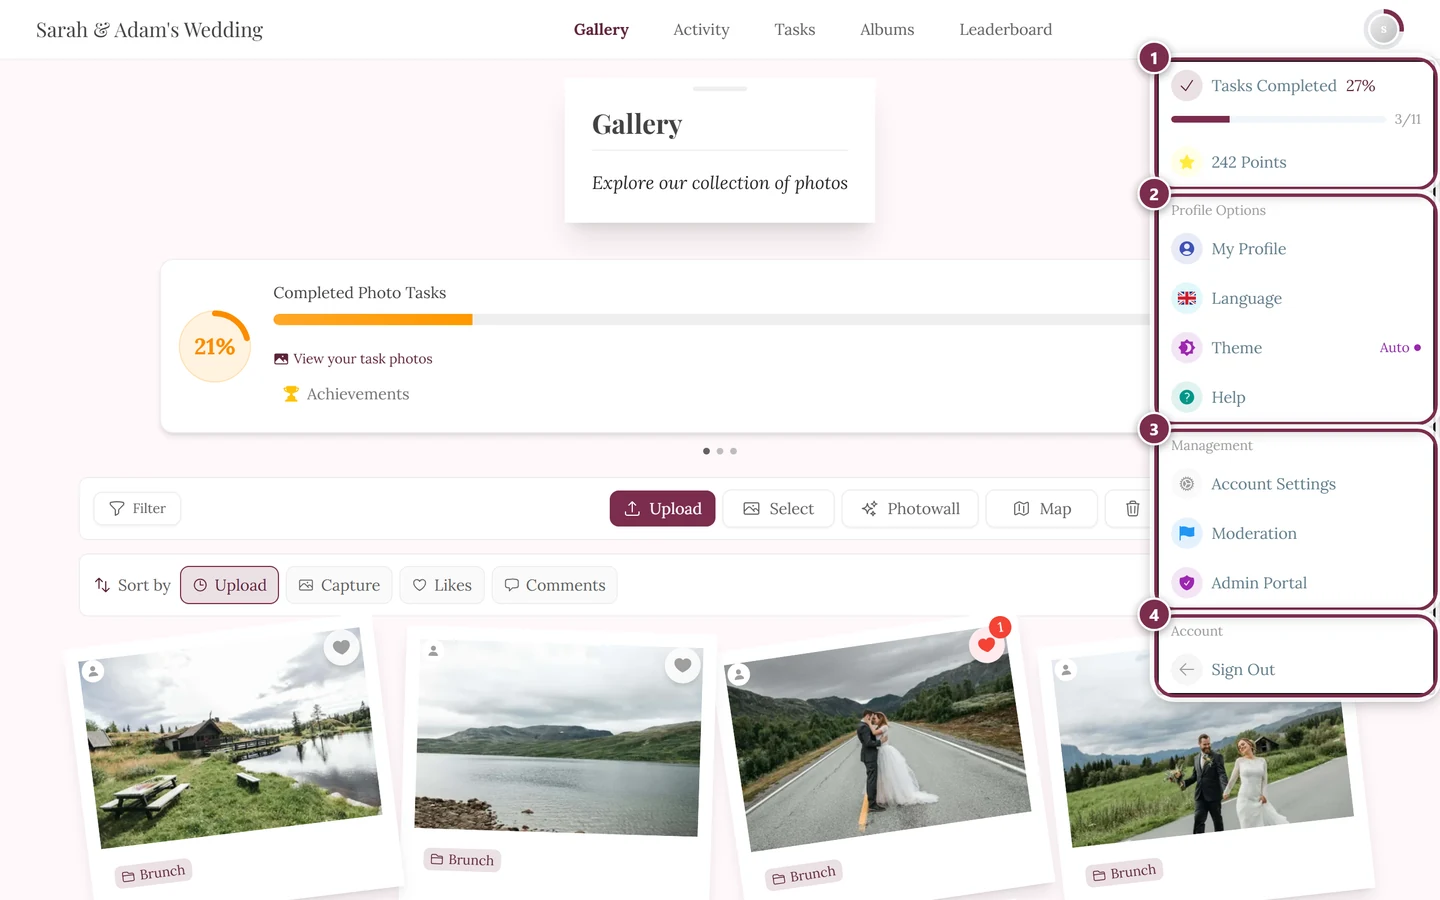
You reach moderation through the profile menu in the top right. ① your points and solved tasks, ② Profile options with My Profile, Language, Theme and Help, ③ Management with Account Settings, Moderation and Admin Portal – this section is missing until you hold a role for it, ④ Account with Sign out. -
Under Management, choose the Moderation entry (flag icon). You only see this entry with the moderator role or higher. A red counter on the entry shows the combined number of open reports and pending media.
-
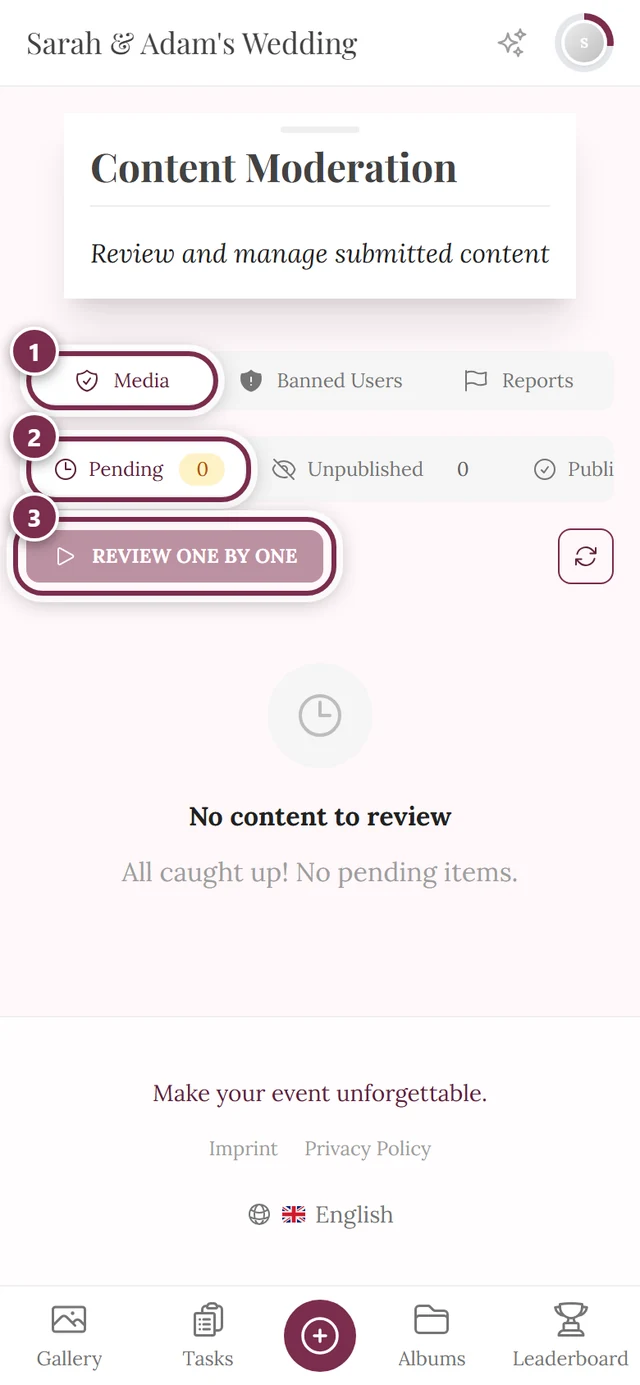
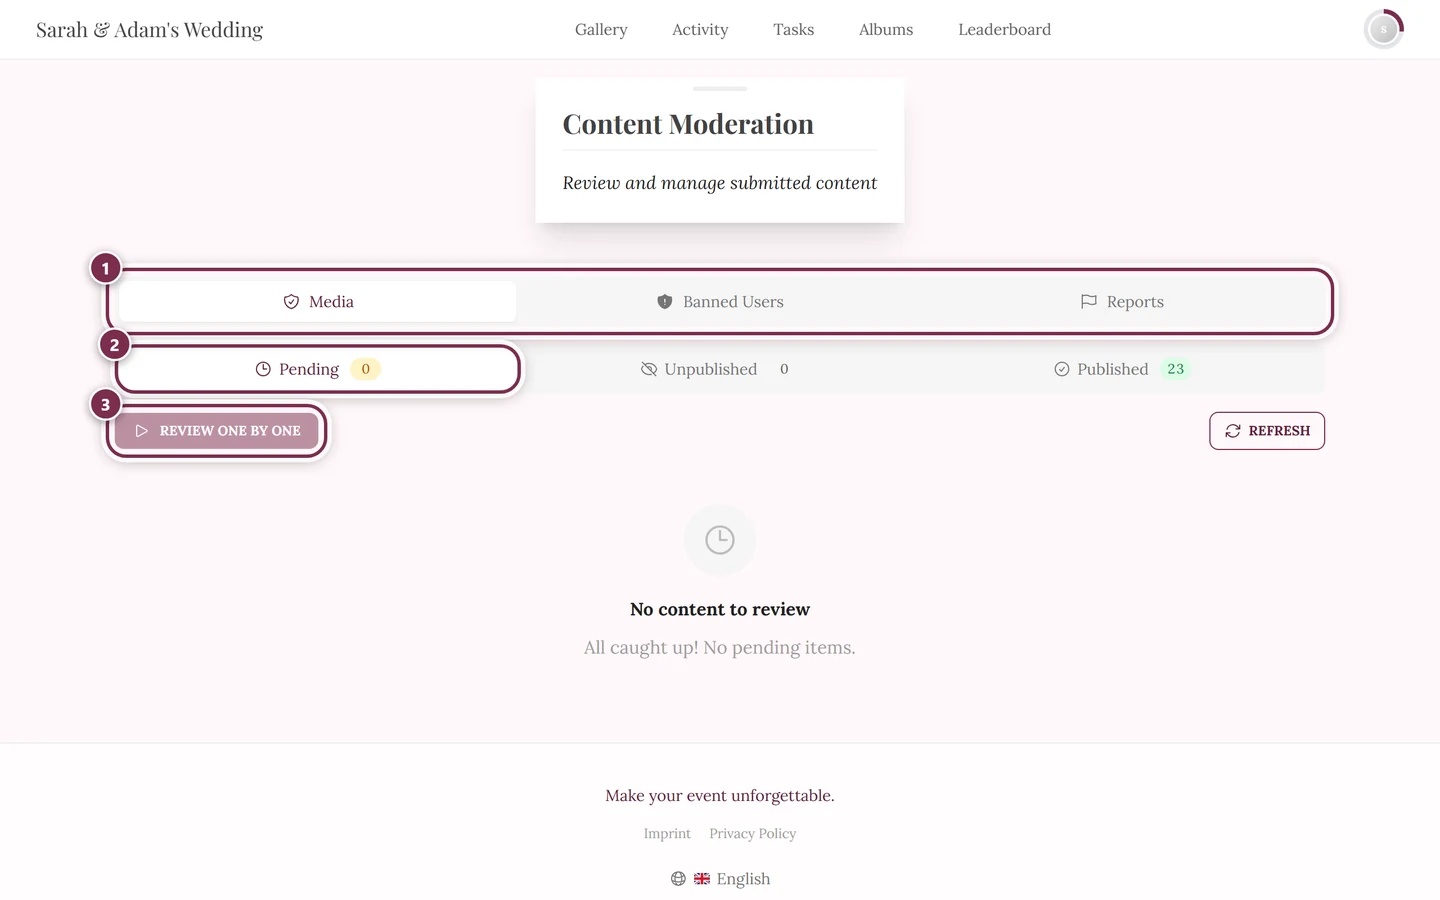
You land on the Content Moderation page with the subtitle “Review and manage submitted content”.
What sits at the top of the page
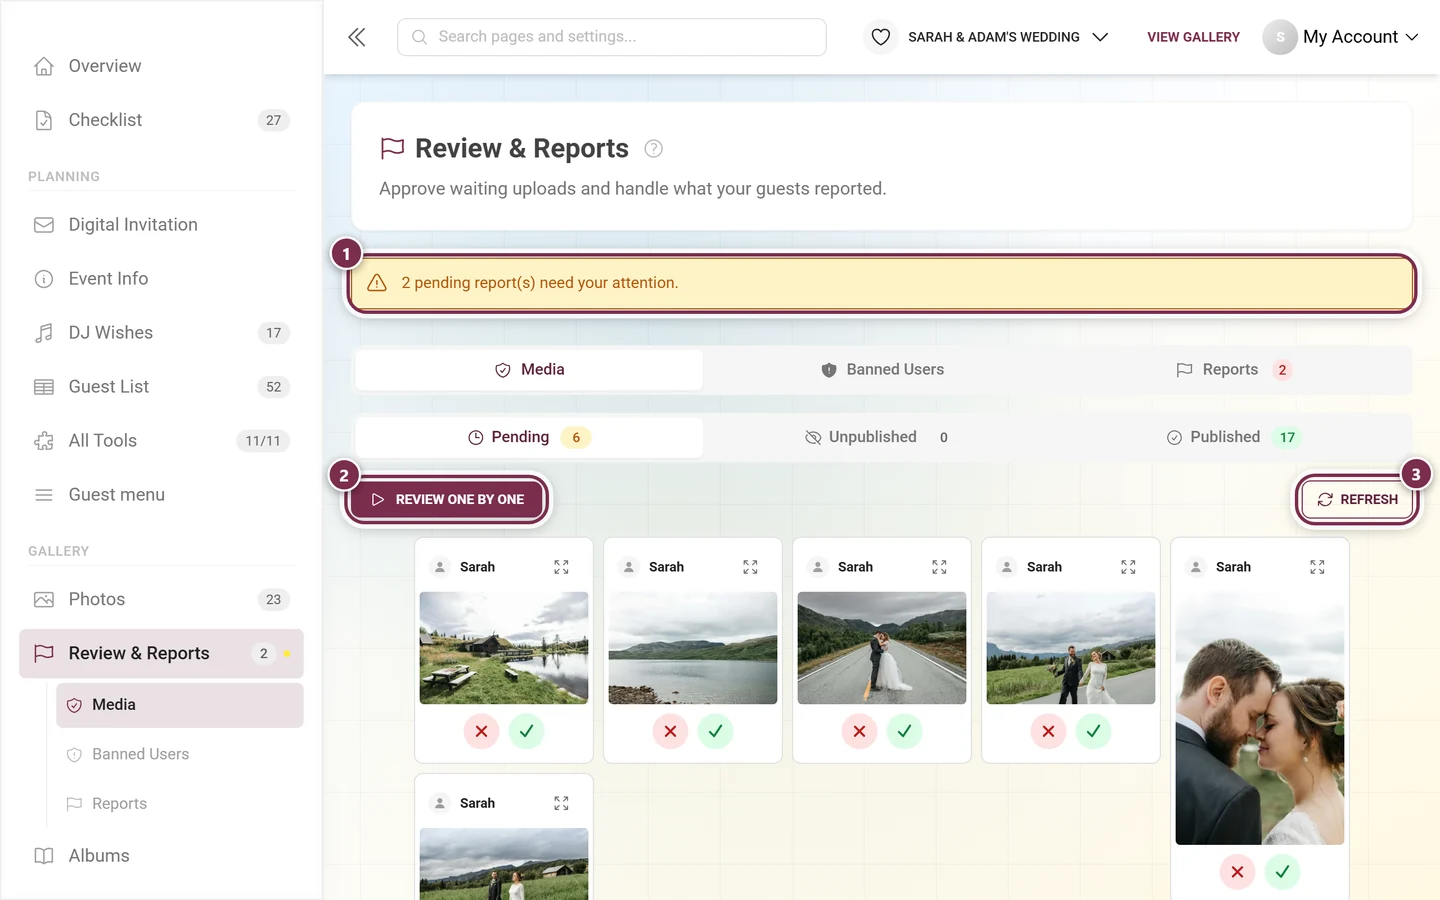
Section titled “What sits at the top of the page”There is no longer a Moderation Overview card with three big counters. The numbers now sit where you need them:
- As a badge on every status tab inside Media: Pending (yellow), Unpublished (gray), Published (green).
- As a red counter on the Reports tab, as long as reports are open.
- If a yellow warning banner sits at the very top (“N pending report(s) need your attention.”), there are open reports – one click jumps straight to the Reports tab.
A page-wide Refresh button is gone too. It now sits in the toolbar of the section you are in: in Media next to Review one by one, in Reports only while the status is Pending.
The tabs at a glance
Section titled “The tabs at a glance”Depending on feature and role you see up to four tabs:
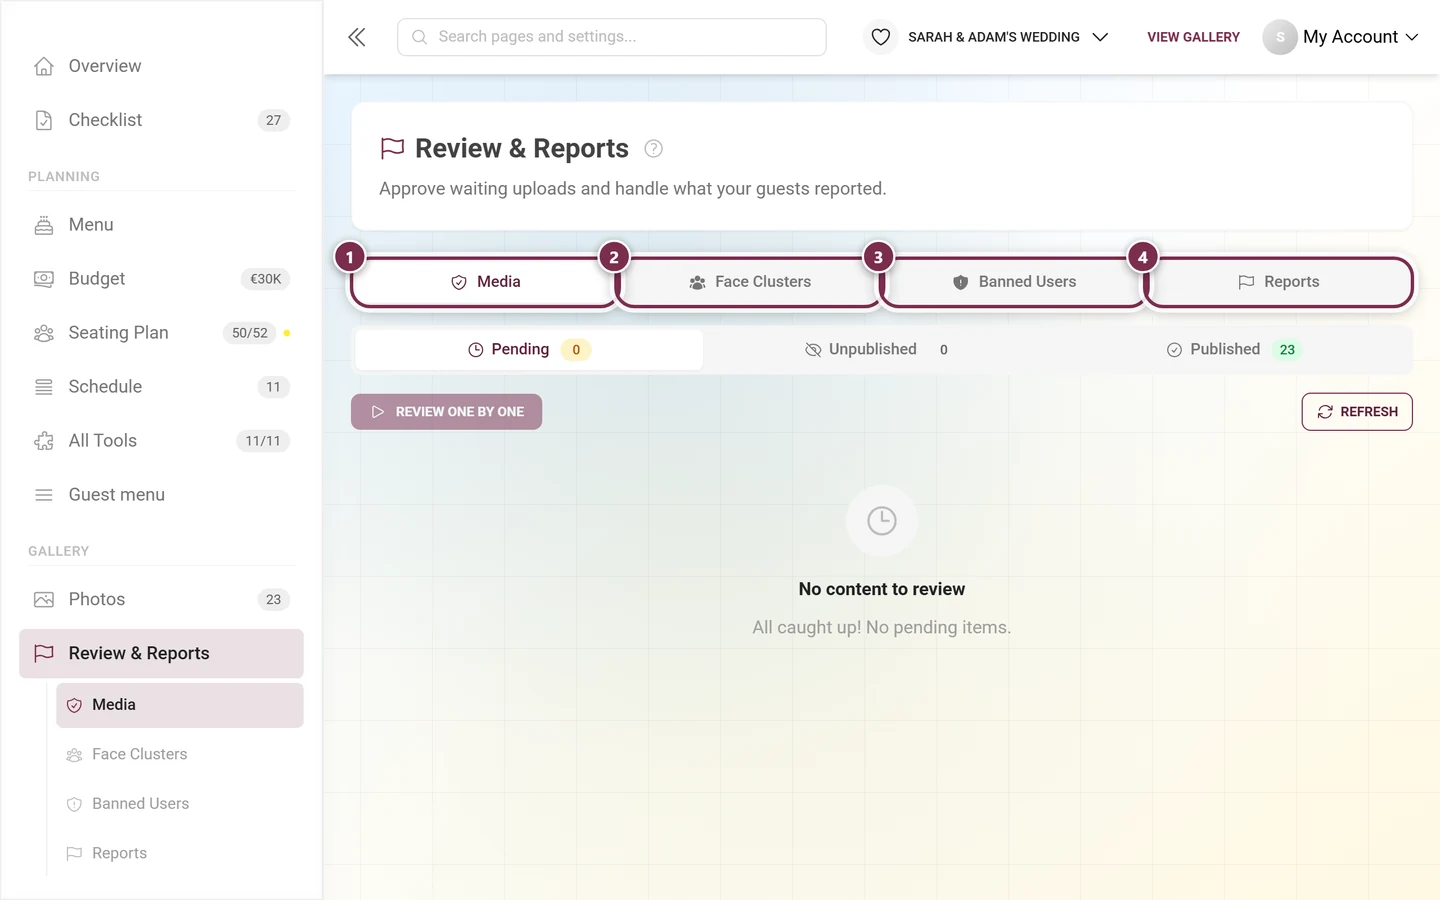
- Media: review new photos. Visible when approval is required or orphaned content exists.
- Face Clusters: organize detected people. Only when your plan includes AI face processing and face recognition is switched on for the event.
- Banned Users: manage restricted guests. Always present.
- Reports: handle content flagged by guests. Always present; a red counter shows open reports.
The “Media” tab – approve or hide photos
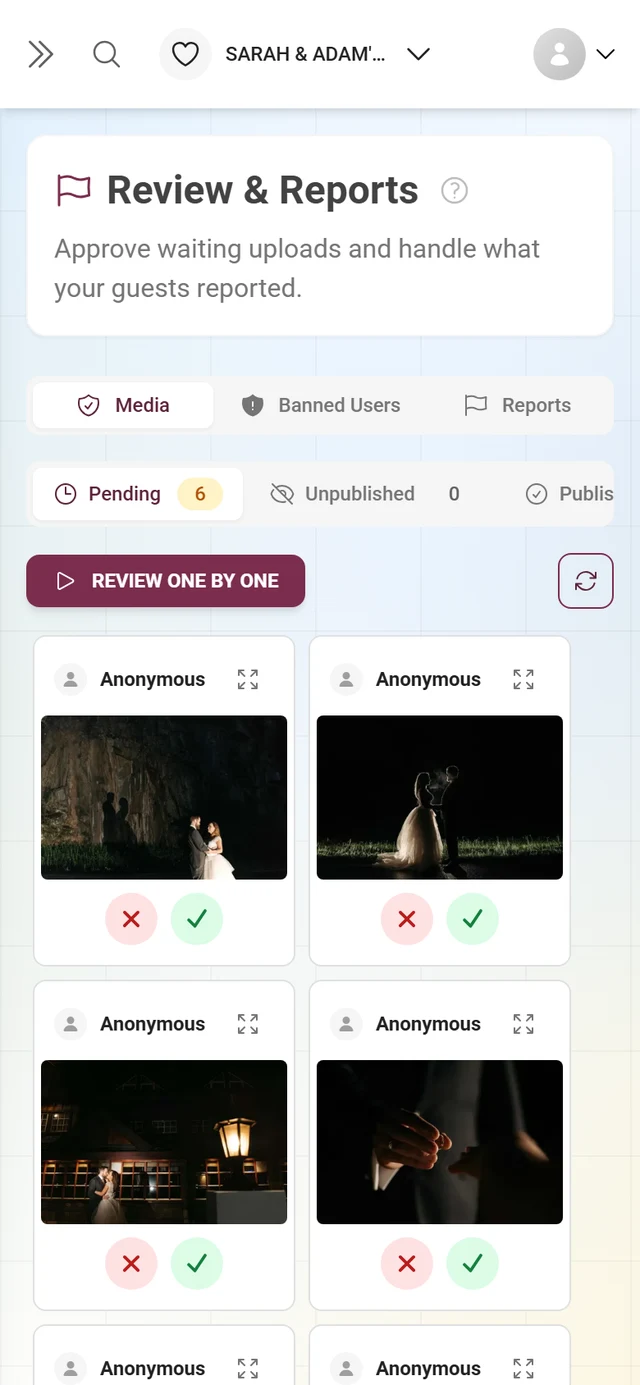
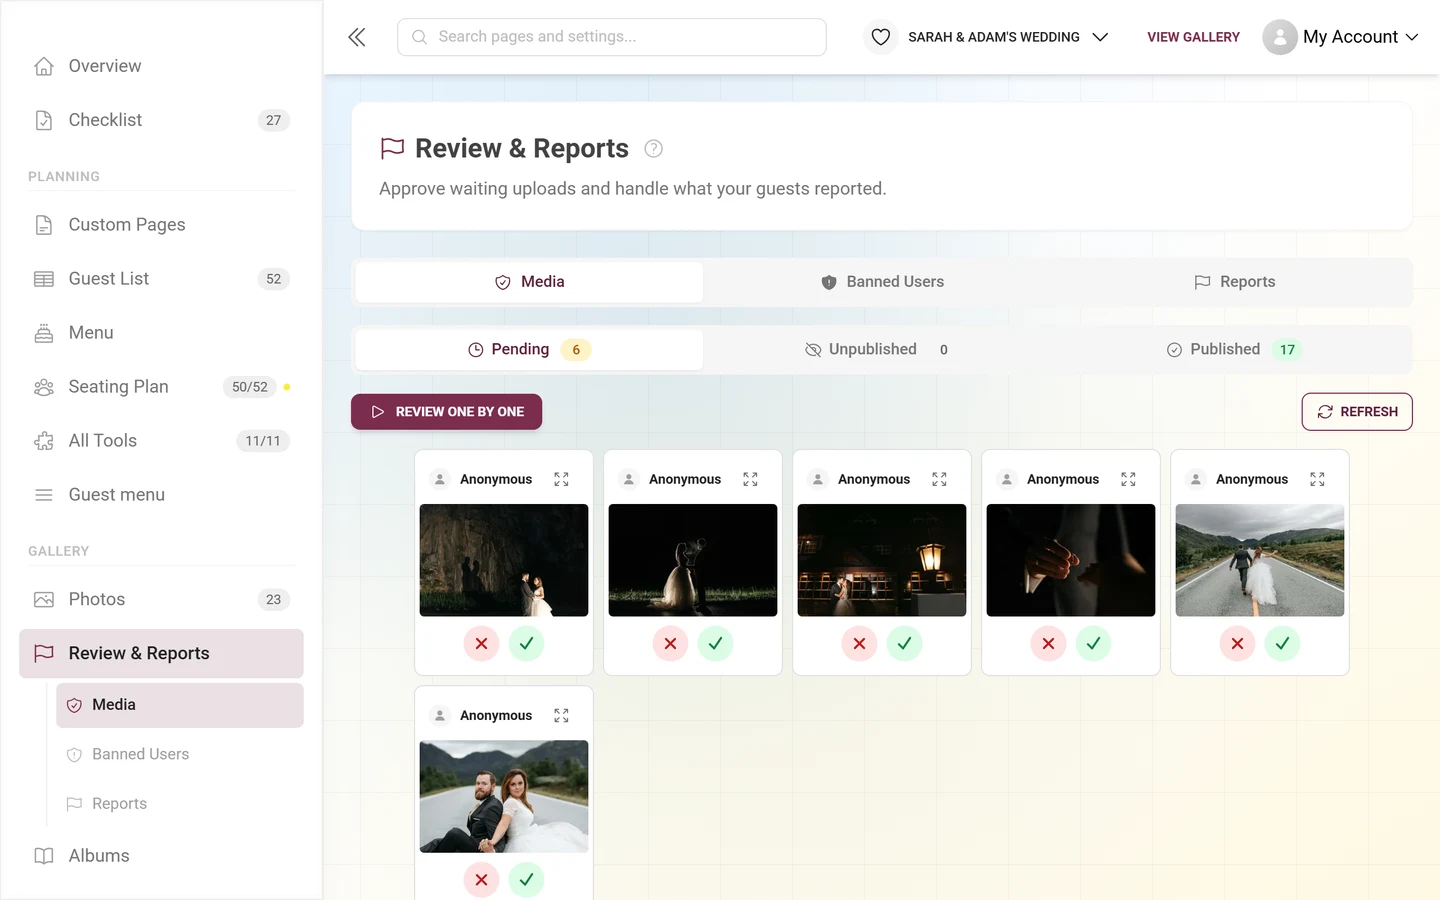
Section titled “The “Media” tab – approve or hide photos”This is the core. Inside Media there’s a second tab bar by status: Pending (clock, yellow counter), Unpublished (crossed-out eye, gray counter) and Published (checkmark, green counter).
How a decision plays out
Section titled “How a decision plays out”The rule is: nothing moves under your hands. Your decision is recorded locally and instantly, the card stays exactly where it is and turns into its own receipt. The requests leave in batches behind you.
- The decided card is dimmed and labeled: Approved (green) or Denied (gray).
- As long as the decision hasn’t been sent yet, Undo sits next to it. While it is being sent a small spinner turns.
- Once it is through, the card offers the opposite action – Hide instead or Approve instead. There is no way back to pending, so the button is named for what it actually does.
- If something failed, the card gets a red ring and a Retry button.
There are no confirmation toasts for this anymore. Instead a floating bar at the bottom keeps the tally for your session: “N approved”, “N hidden”, “Saving N…”, on trouble “N failed – retry”, plus the buttons Undo last and Clear decided. Only Clear decided tidies the list – that is the single moment the grid is allowed to re-flow.
Reviewing a single photo
Section titled “Reviewing a single photo”Each card shows the uploader name (or Anonymous), the upload time and possibly a purple Live badge – then the photo came from a photo booth or camera via live upload, not from an app guest. Clicking the image or Expand opens the fullscreen single review; clicking the card around it selects it.
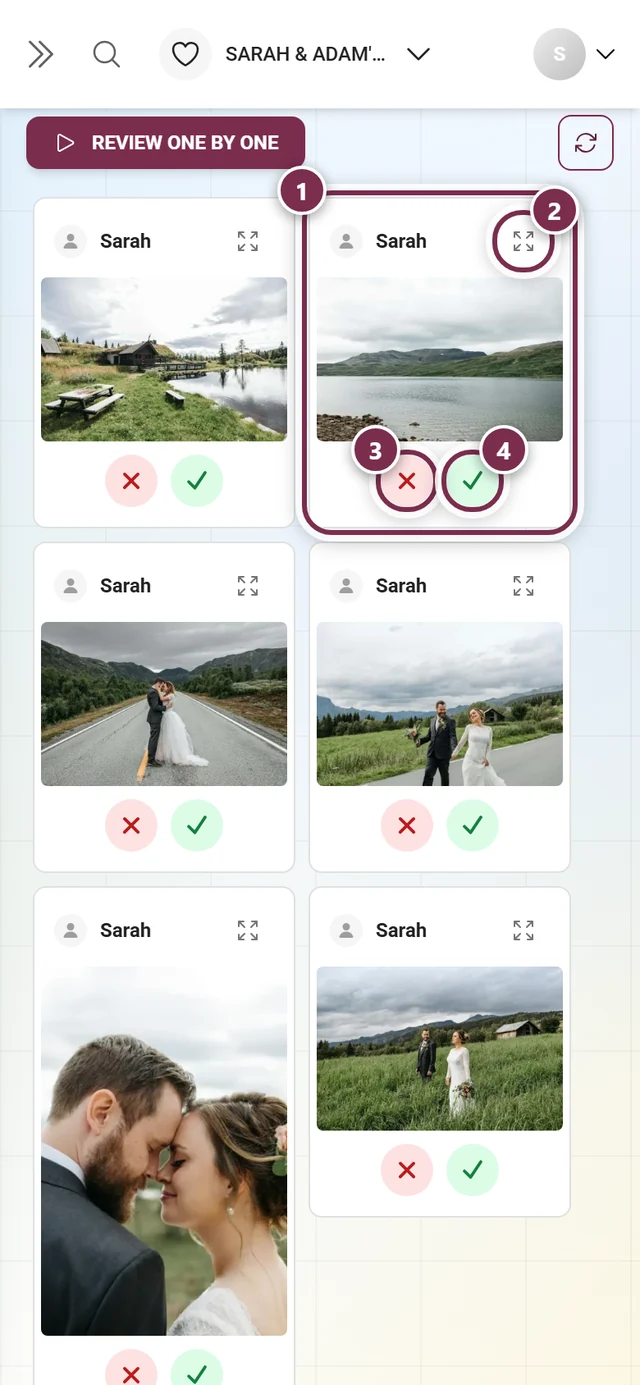
Which buttons you get depends on the status tab:
| Status tab | Buttons on the card |
|---|---|
| Pending | Deny (red X) · Approve (green checkmark) |
| Published | Hide (crossed-out eye) |
| Unpublished | Publish (green checkmark) |
Deny deletes nothing: the photo moves to Unpublished, becomes invisible to guests and can be published again at any time.
“Review one by one” – the fast pass
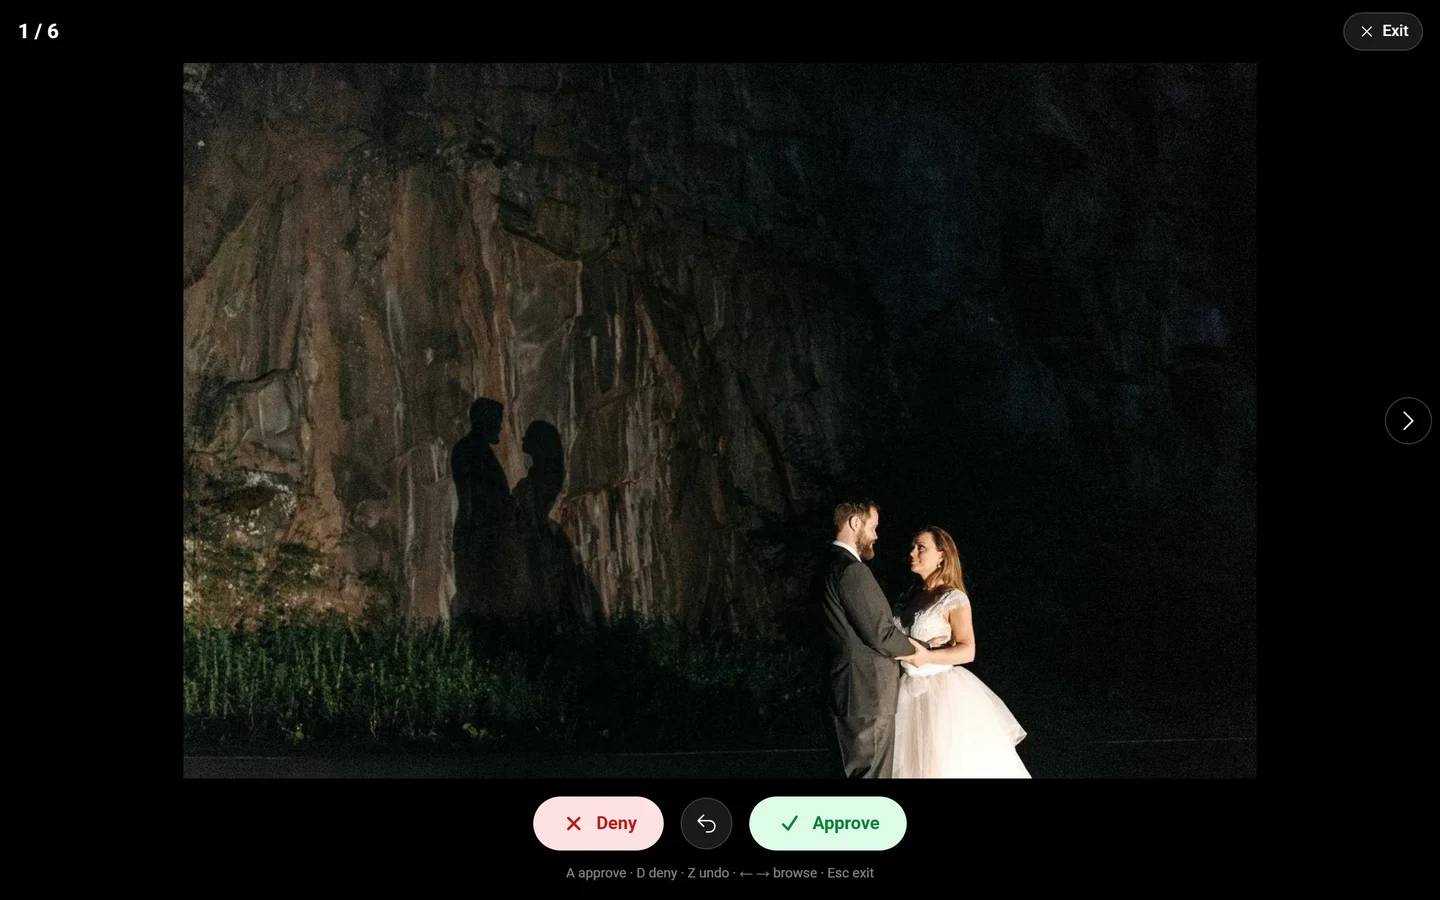
Section titled ““Review one by one” – the fast pass”For longer queues there’s a second working mode. Above the list sits the Review one by one button (play icon).
-
Click Review one by one. A fullscreen mode opens with exactly one photo.
-
Top left shows the progress n / N and, once you get going, “N decided”. Exit sits on the right.
-
At the bottom you decide with Deny / Undo / Approve; the arrows left and right step through. The next image is preloaded in the background.
-
On a computer the keyboard legend sits underneath: A approve · D deny · Z undo · ← → browse · Esc exit.
Several photos at once (bulk actions)
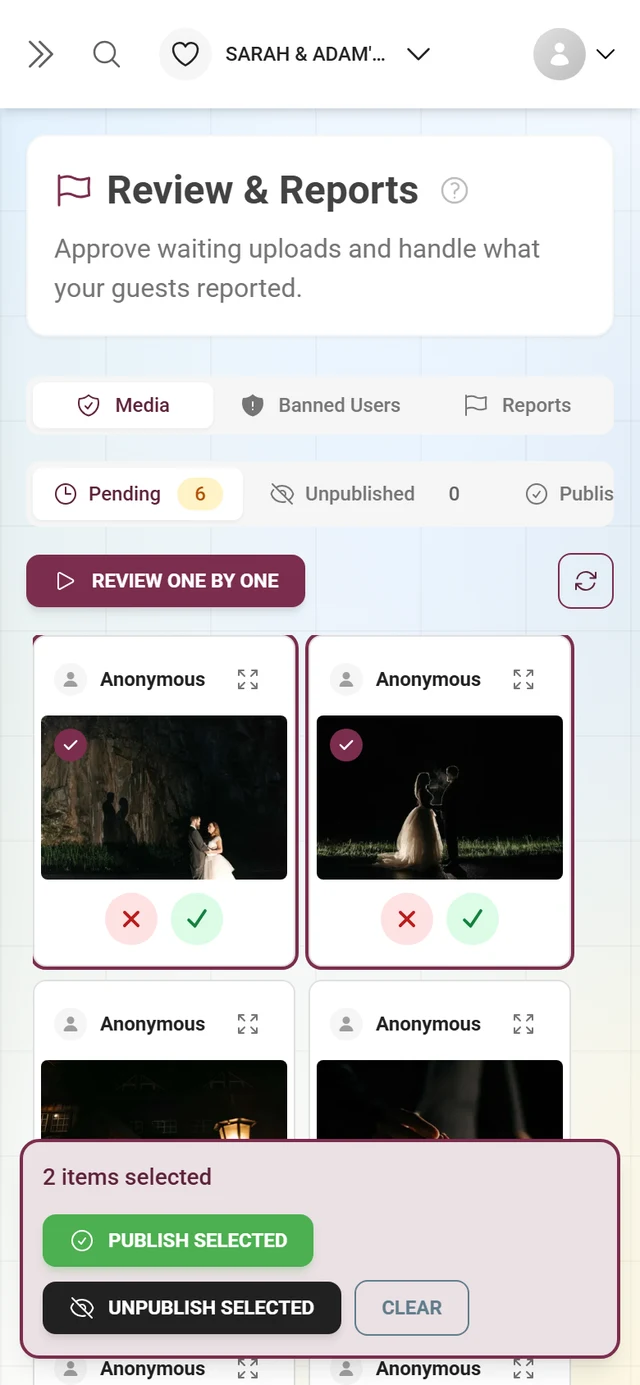
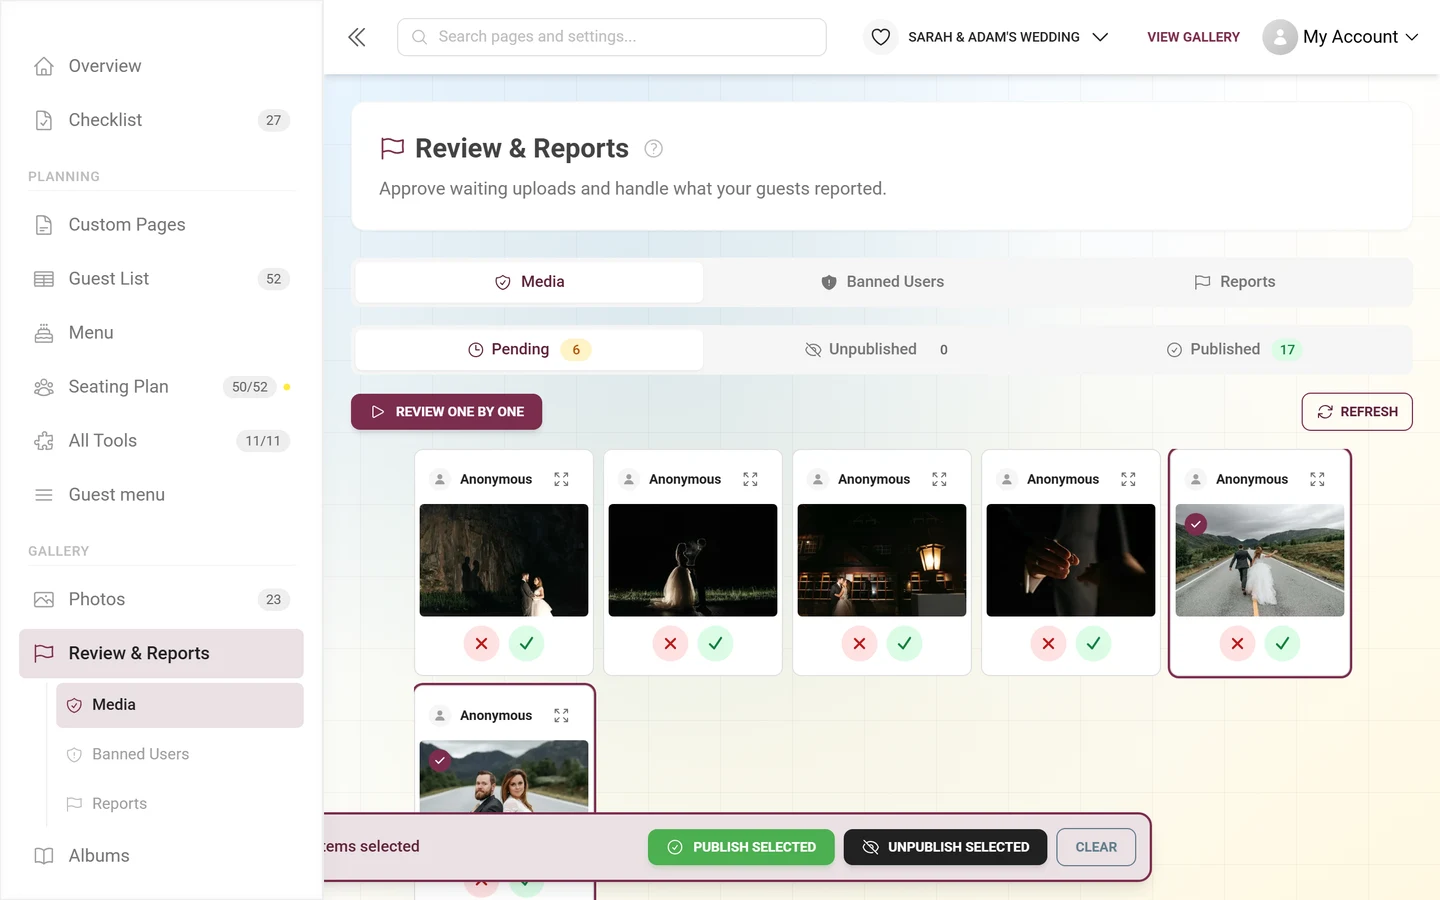
Section titled “Several photos at once (bulk actions)”Click cards to select them (selection ring + checkmark overlay). As soon as at least one card is selected, that same floating bar at the bottom switches to “N items selected”:
- Publish Selected – in every tab except Published.
- Unpublish Selected – in every tab except Unpublished, so under Pending as well.
- Clear (the X on the right of the bar) – clears the selection.
State model & empty states
Section titled “State model & empty states”A photo goes through: pending → published (approve) or pending → unpublished (deny). Unpublished photos are not deleted – they stay in the Unpublished tab and can be published again anytime. Permanent deletion only happens via reports or the recycle bin.
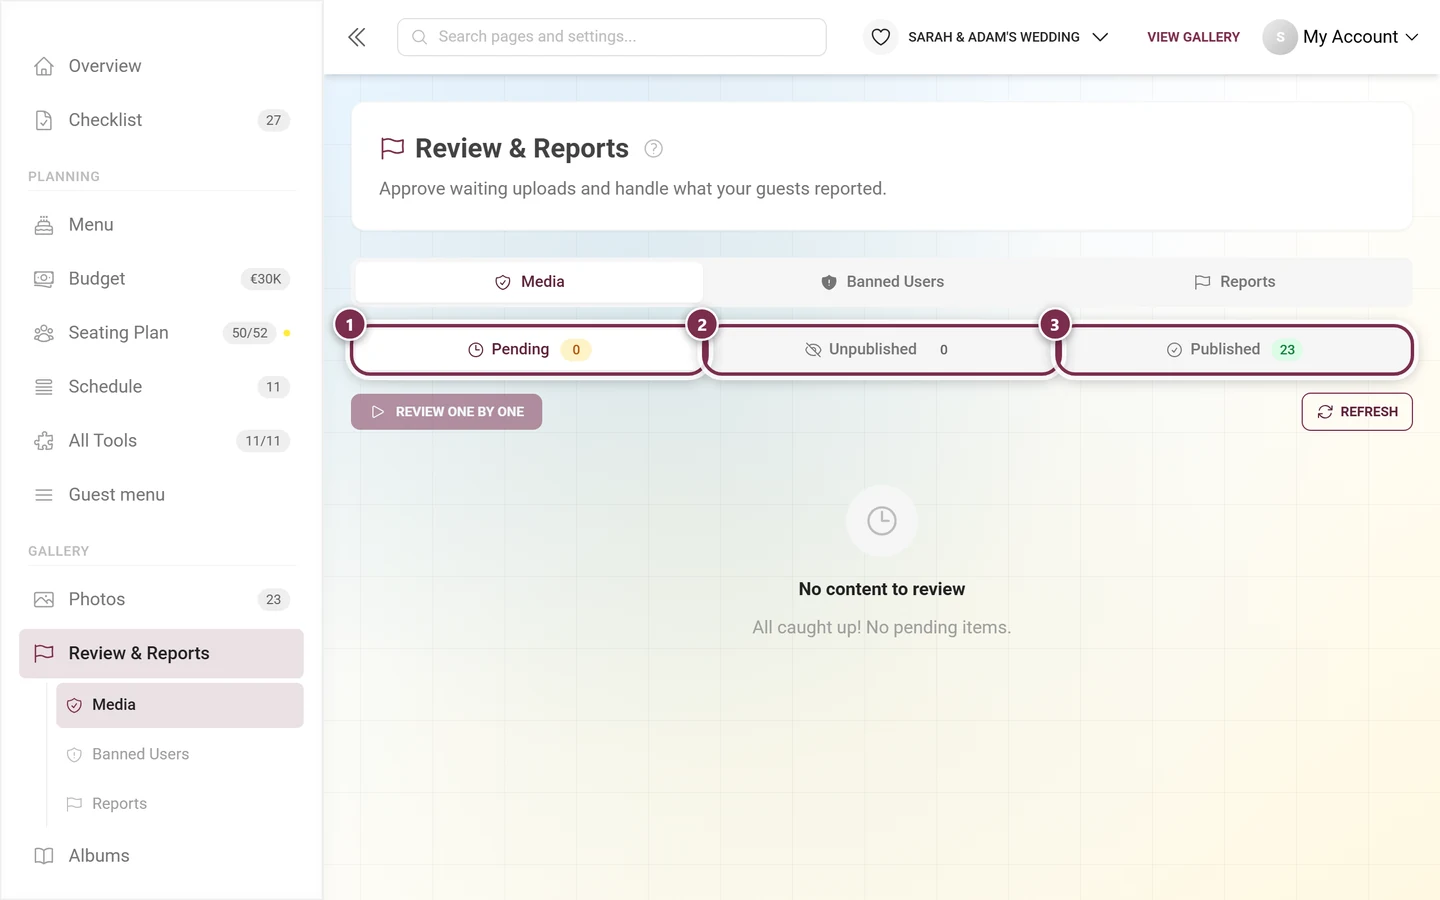
Once everything is handled, each tab reports “All caught up! No pending items.”, “No unpublished content.” or “No published content yet.”. The list loads more photos as you scroll (“Loading more…”).
The “Reports” tab
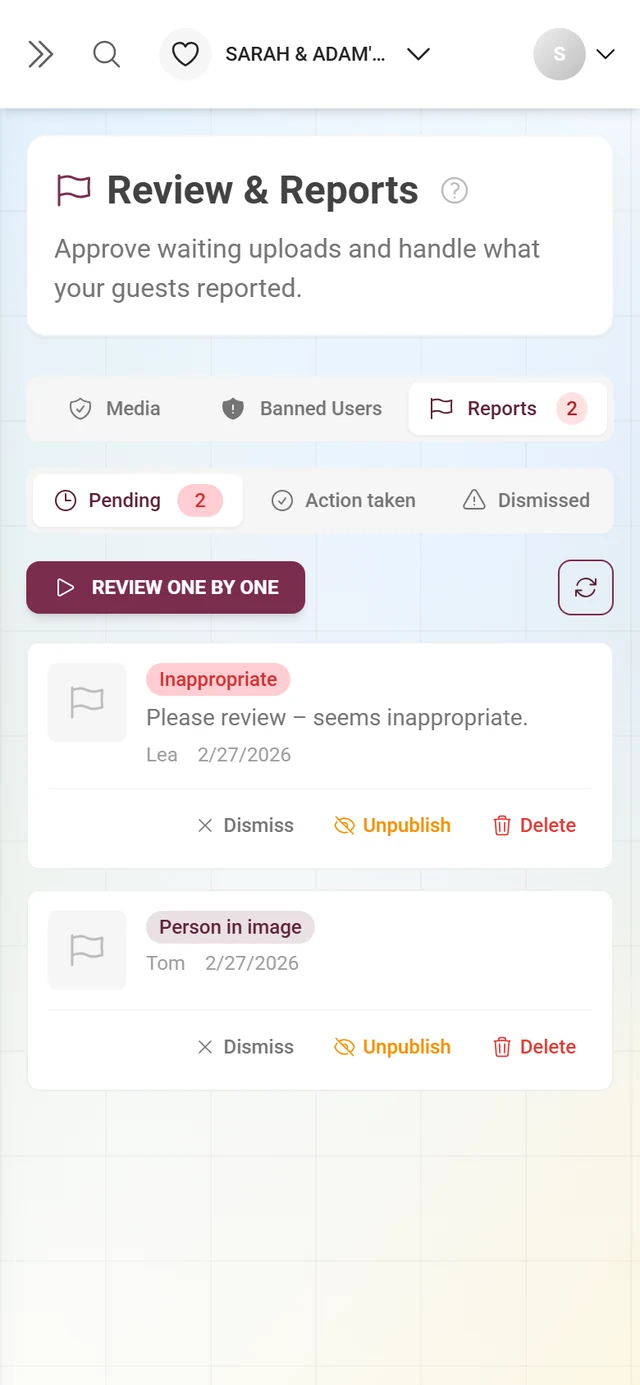
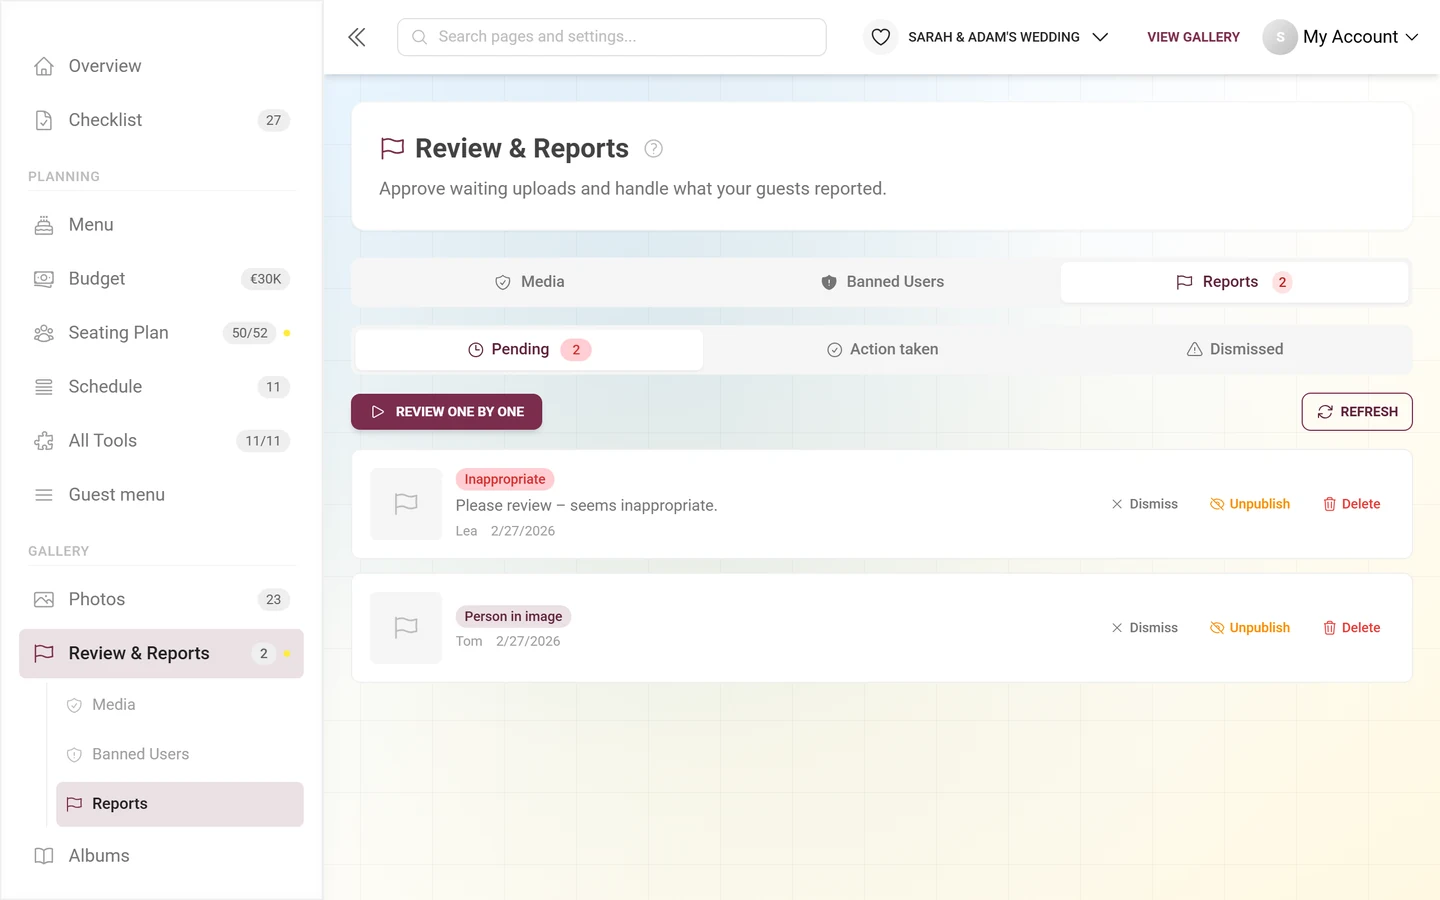
Section titled “The “Reports” tab”This tab is always present. Here too there are inner status tabs with counters: Pending (clock, red counter), Action taken (checkmark) and Dismissed (warning triangle). The status is stored as ?reportStatus= in the address.
Each report shows a thumbnail, a reason badge – Person in image, Inappropriate, Copyright or Other –, an optional message from the reporter, plus the reporter name (or Anonymous) and date. Clicking the thumbnail opens the single review at exactly that report.
The three actions
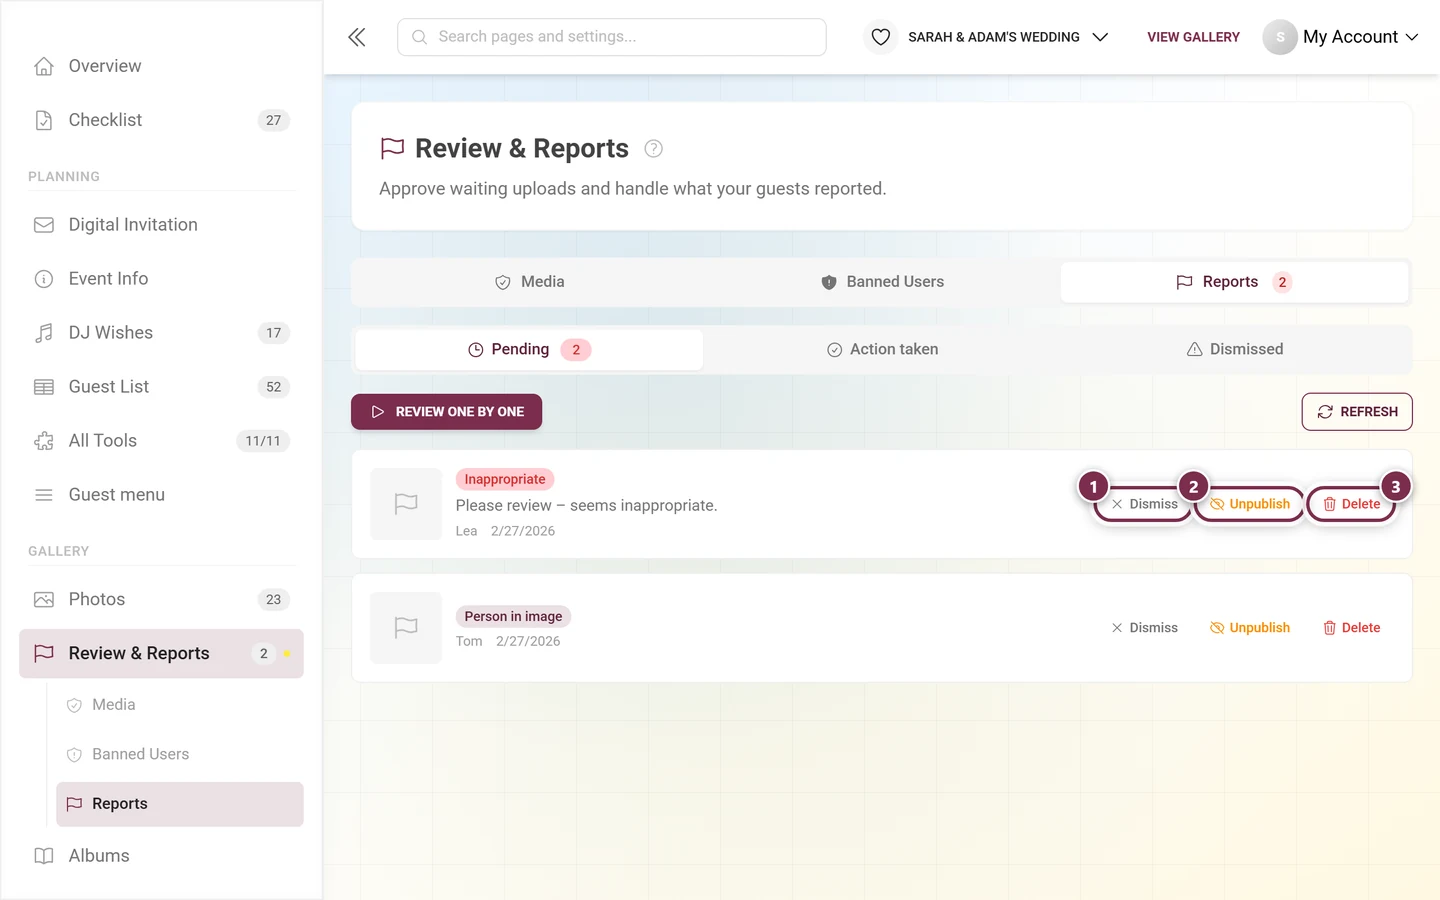
Section titled “The three actions”For open reports you have three options – as buttons in the row and, via right-click or long-press, as a context menu:
-
Dismiss – dismiss the report, the photo stays online. For mistaken or trivial reports.
-
Unpublish – takes the photo out of the gallery without deleting it. This button only appears with content moderation active.
-
Delete – the photo moves to the recycle bin and can be restored from there.
The same session flow as media
Section titled “The same session flow as media”Reports are worked through just like photos:
- Above the list (only while the status is Pending) sit Review one by one and Refresh.
- A decided row stays in place and shows Dismissed, Hidden or Deleted – with Undo while that is still possible. Moderator toasts are gone.
- At the bottom, the floating bar adds up “N dismissed”, “N hidden”, “N deleted” and offers Undo last and Clear decided.
- A click selects a row, shift-click a range; the bar then offers Dismiss, Unpublish and Delete for the whole selection.
- Keyboard: D dismiss, H hide, X delete, Z undo, Enter single review, Space select. In fullscreen the legend reads D dismiss · H hide · X delete · Z undo · ← → browse · Esc exit.
If nothing is open, “No reports to review” appears.
The “Banned Users” tab
Section titled “The “Banned Users” tab”Here you manage restricted guests. At the top you’ll find the heading Banned Users and a search field (“Search users…”). Five filter tabs, each with a red count, narrow the list: All, Uploads, Comments, Nickname and Profile Picture. The counts come from the same query as the list, so switching filters costs no extra loading.
Each user card shows the avatar, name (or Anonymous User), the active ban badges – Upload Ban, Comment Ban, Nickname Ban, Profile Picture Ban – and, if set, the stored reason per category.
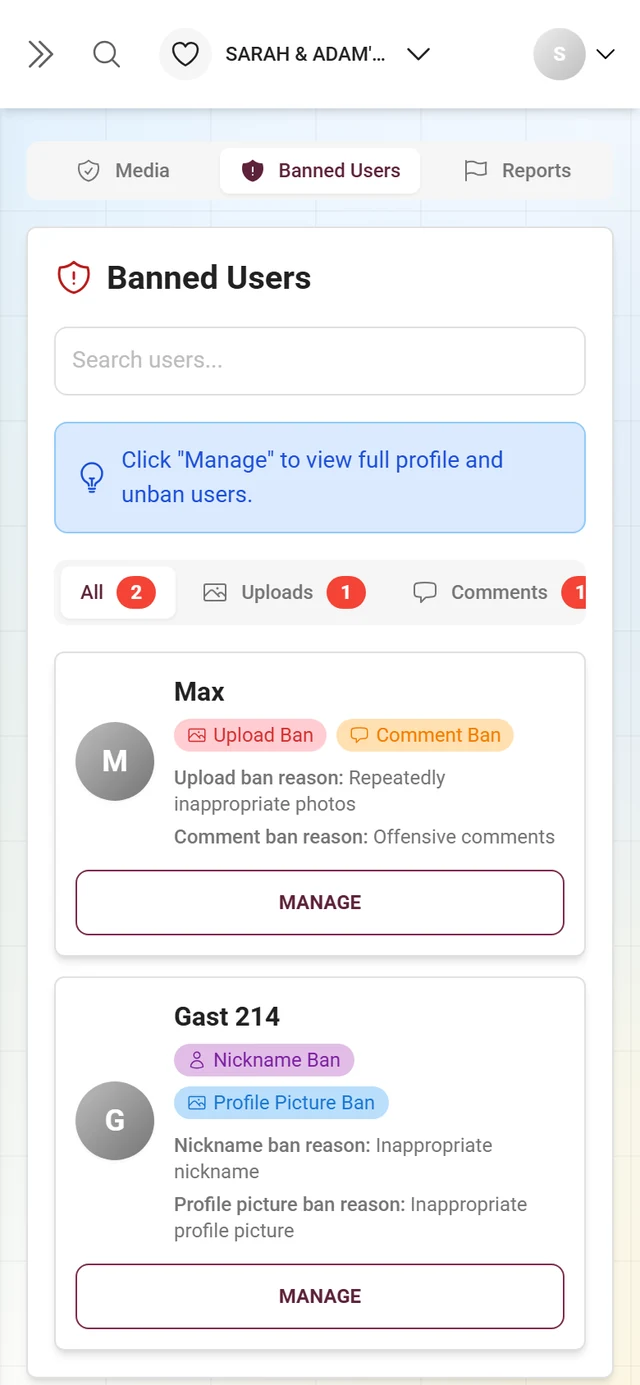
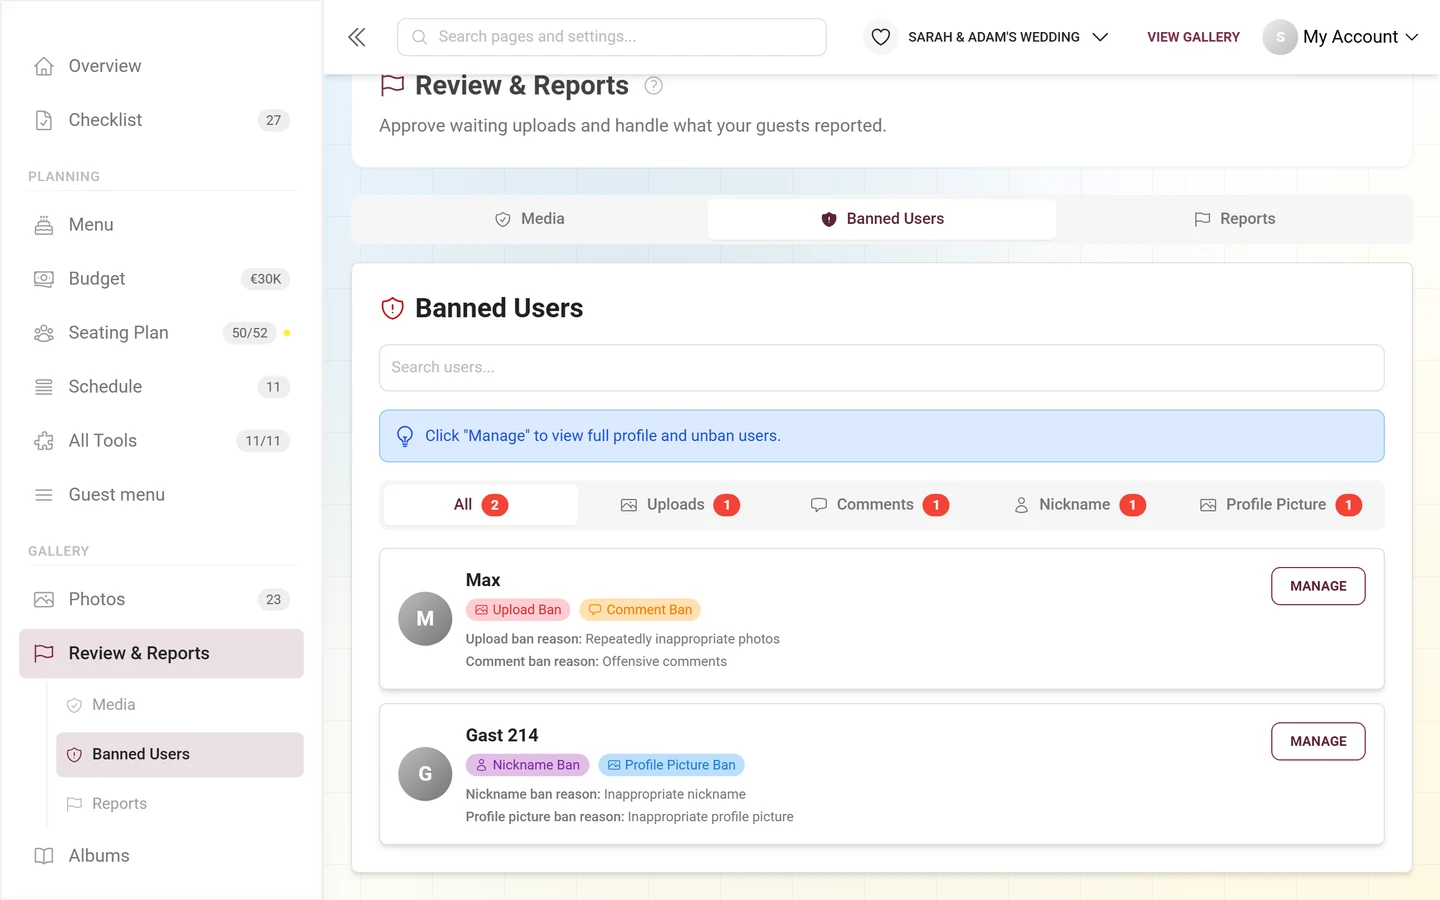
If no one is banned, it reads No banned users with the addition “All users are currently in good standing”.
The “Face Clusters” tab
Section titled “The “Face Clusters” tab”This tab only appears when your plan includes AI face processing and face recognition is switched on for the event. It shows the automatically detected person clusters as a grid – there you name people, merge duplicate clusters, split wrongly grouped ones, hide irrelevant ones and set preview images.
Managing the clusters is covered step by step in its own guide, Managing face clusters. Background: AI processing.
The moderation panel in the gallery
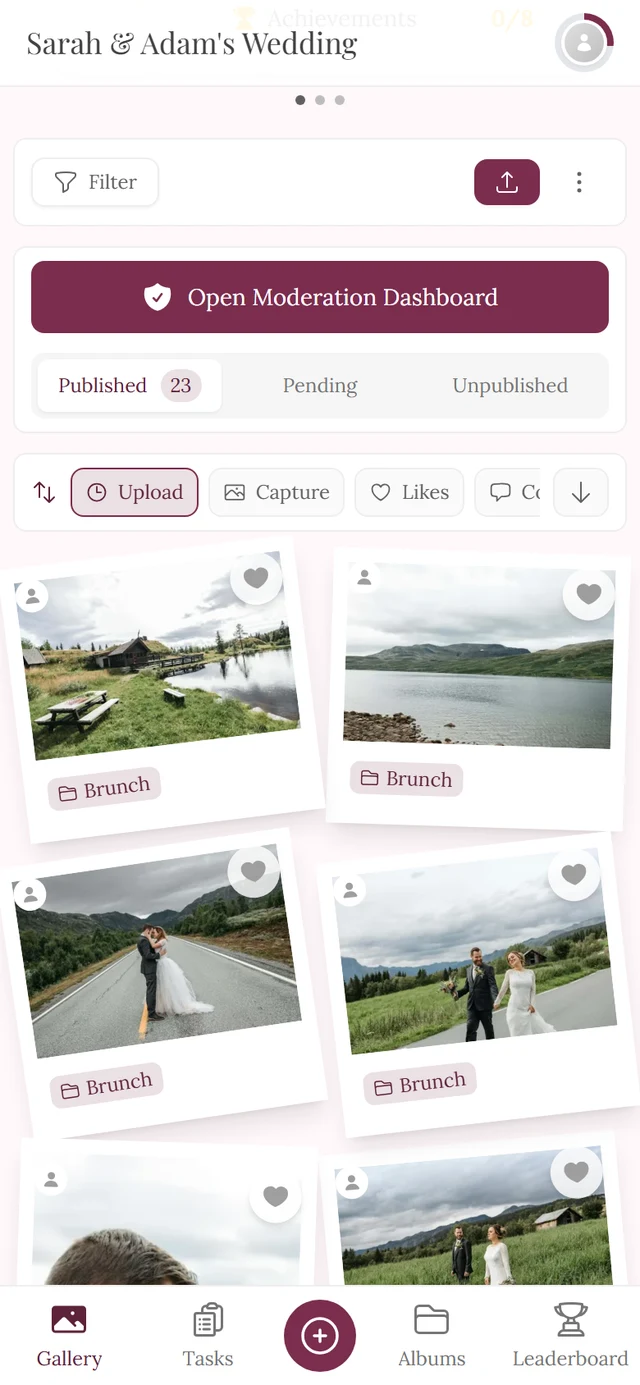
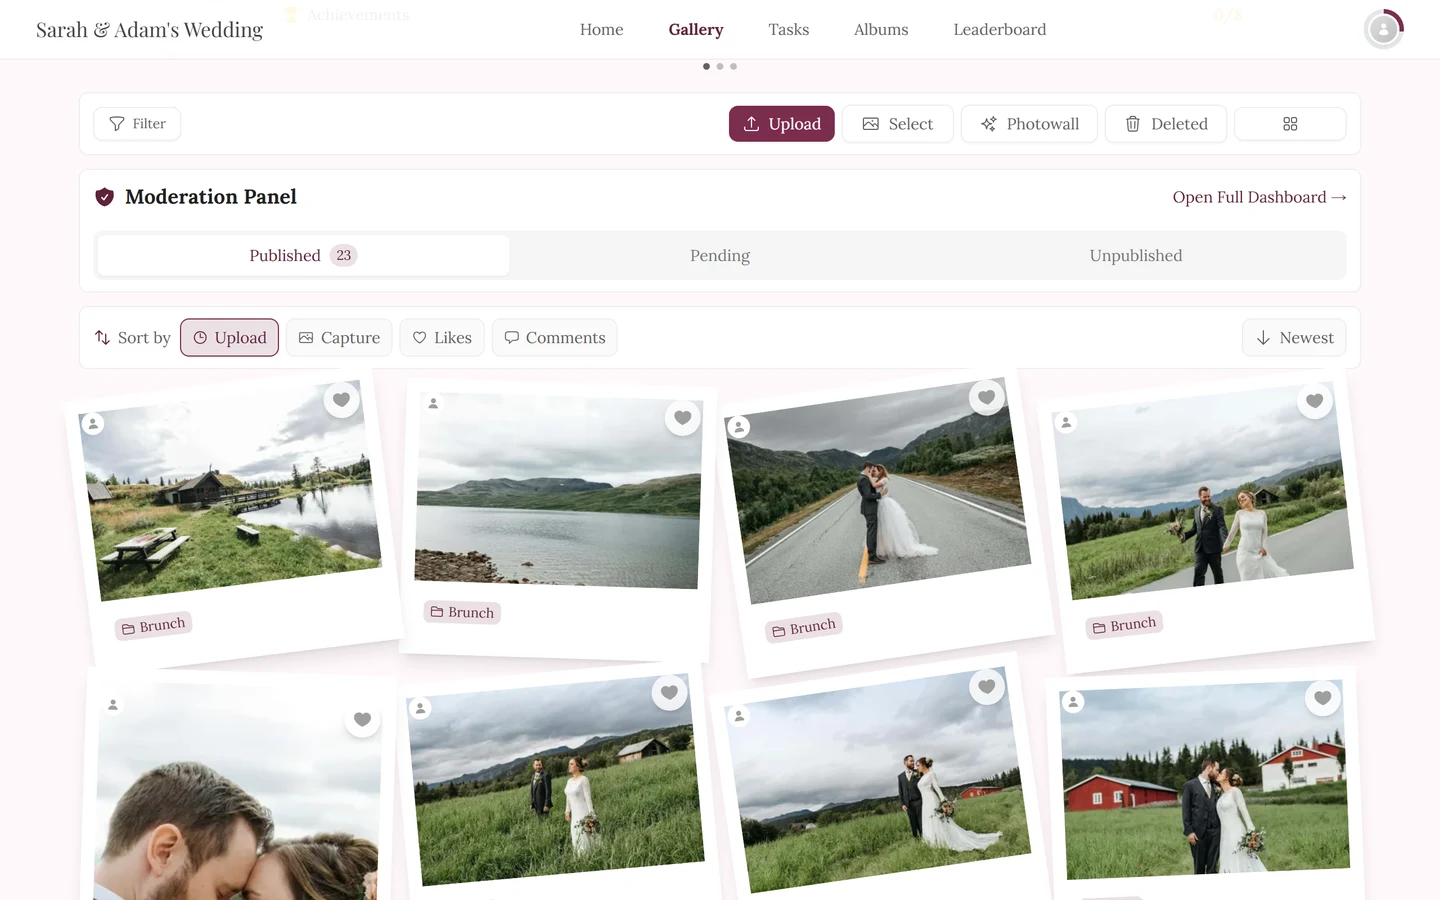
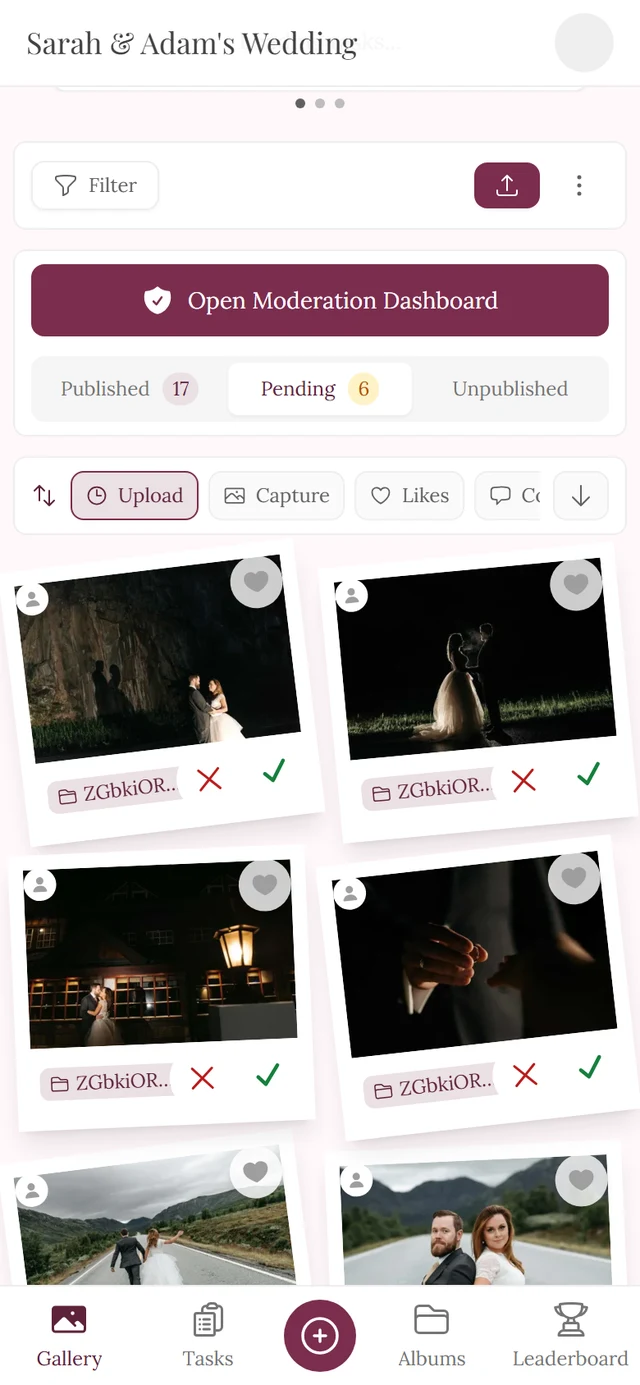
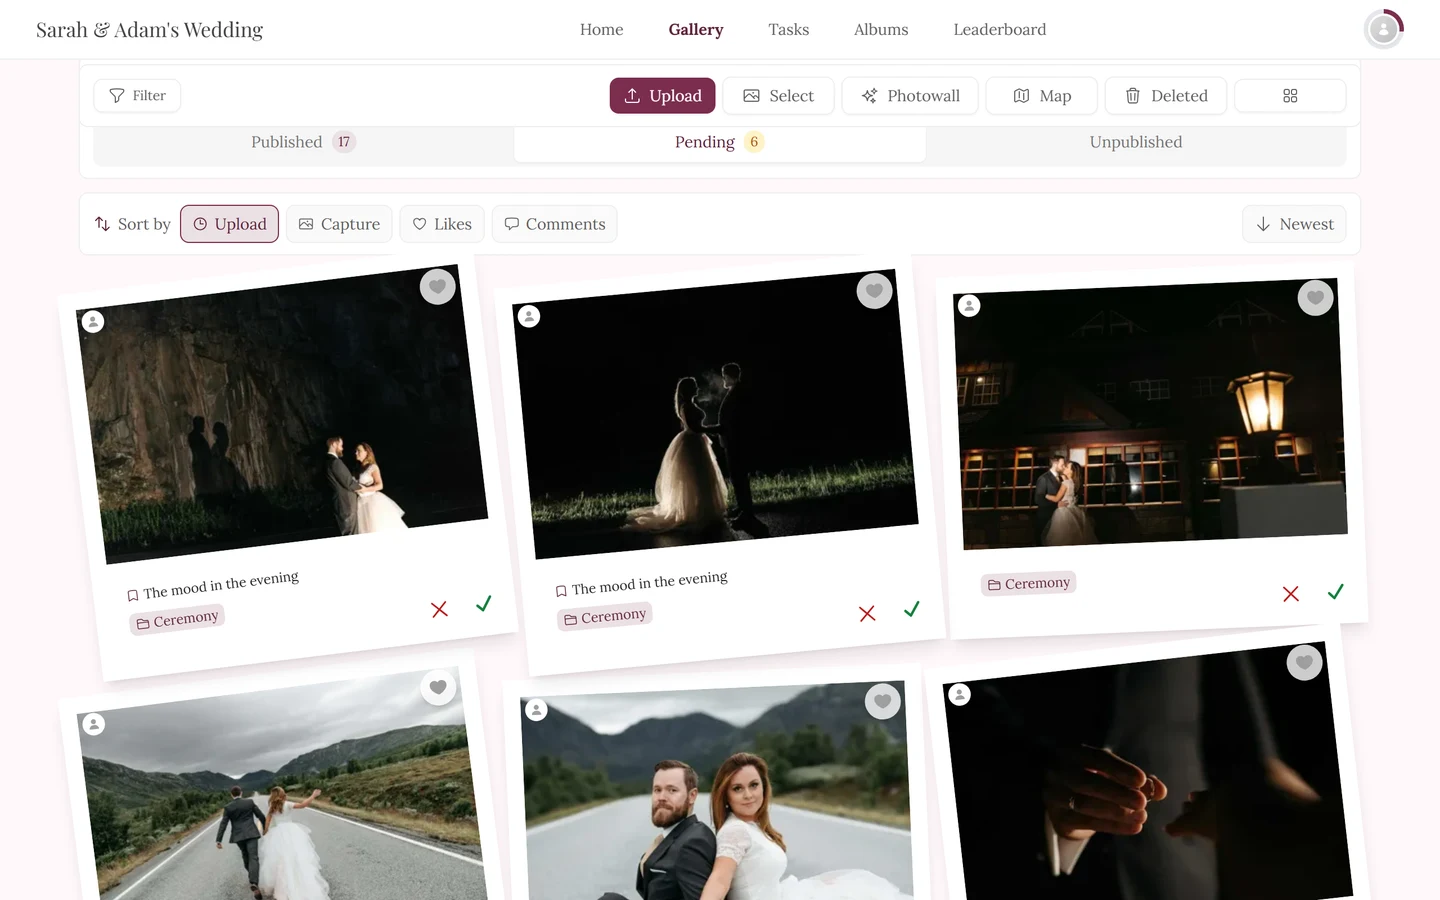
Section titled “The moderation panel in the gallery”The Moderation Panel is a card of its own that sits directly above the gallery grid for moderators. It is not an overlay on a photo but a switch bar for the whole gallery:
- On a computer the card carries the heading Moderation Panel (shield icon) and, on the right, the link Open Full Dashboard →.
- On a phone, a large Open Moderation Dashboard button sits above the panel instead of the heading and link.
- Below them are three status tabs with counters: Published, Pending and Unpublished. A click switches which photos the gallery grid below shows – so you work through pending uploads in the familiar gallery layout. The chosen tab lands in the address bar (
?filter=…).
The approval overlay on a tile
Section titled “The approval overlay on a tile”Something different from the panel: a photo that isn’t approved yet shows you – and only you as a moderator – two round buttons on the tile itself, to approve and to deny. Both ask first (“Do you really want to publish this image?” or “Do you really want to deny this image?”). At the same spot, guests only see a clock icon with the note “This image is waiting for approval”.
An already unpublished photo carries a button to publish it after all instead.
Moderating in fullscreen
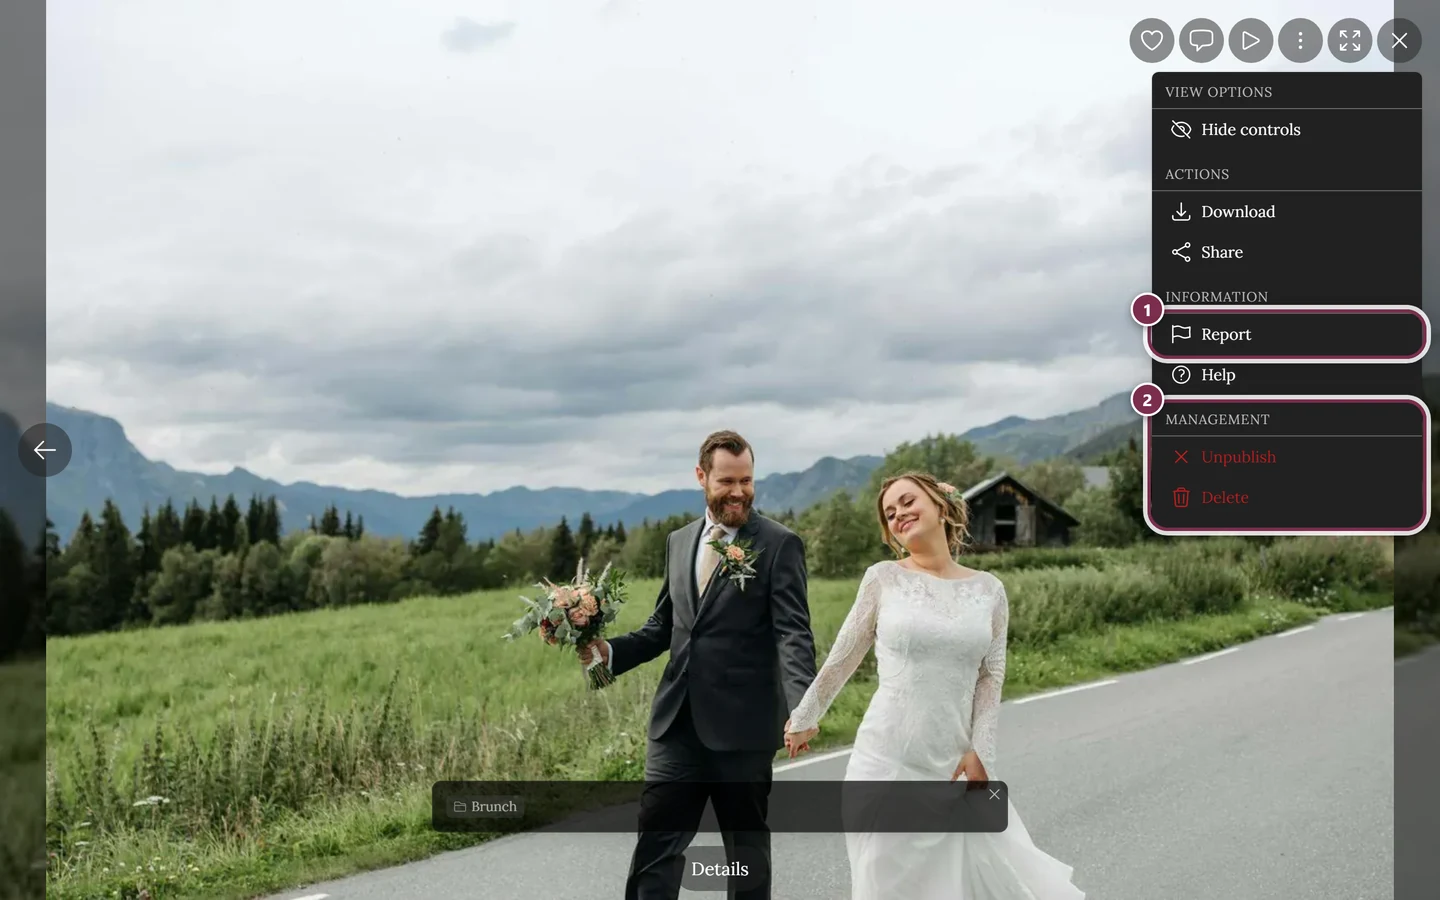
Section titled “Moderating in fullscreen”Open a photo large and the ⋮ menu of the fullscreen/slideshow view carries a Management section at the very bottom with Publish or Unpublish and Delete (recycle bin). Which entries you see depends on status and role: publish and unpublish need moderator rights, Delete is only there for hosts and admins – and there a prompt still asks before it acts.
Troubleshooting
Section titled “Troubleshooting”- No Media tab visible → approval is off and there is no orphaned content. That’s normal; the page then opens on Reports. To enable: Moderation & safety.
- I can’t find the old overview card with the three counters → it no longer exists. The numbers are badges on the status tabs.
- No Refresh button at the top → it sits in the toolbar of the section you are in, and in Reports only under Pending.
- No moderation panel in the gallery → the host has switched Show approval bar in the gallery off. You still reach moderation through the profile menu or the admin area.
- No approve buttons on the tile → the event uses the Timeline layout; there the actions sit in the card’s ⋮ menu.
- Unpublish button missing in Reports → only with content moderation active. Without it, Dismiss and Delete remain.
- Face Clusters tab missing → AI face processing not in the plan, or face recognition off for the event.
- Access Denied → your role is lower than moderator. The owner has to grant it.
- Purple Live badge on cards → the upload came from a photo booth/camera (live upload), not from an app guest.
- Decided cards don’t disappear → that’s by design. They stay as a receipt until you hit Clear decided in the bar at the bottom.
Related help
Section titled “Related help”- For moderators – the entry point to this section
- Ban & restrict users · Managing face clusters
- Reporting & moderating content – how guests report a photo
- Moderation & safety – required approval, the AI filter and the approval bar in the gallery
- Roles & permissions – who is allowed to moderate