Managing your device fleet
The Device Fleet area is for resellers who rent out photo booths or cameras themselves. The subtitle says what it is about: Photo booths and cameras upload straight into your clients’ events via FTP/WebDAV.
The core idea: configure once, rotate per gig
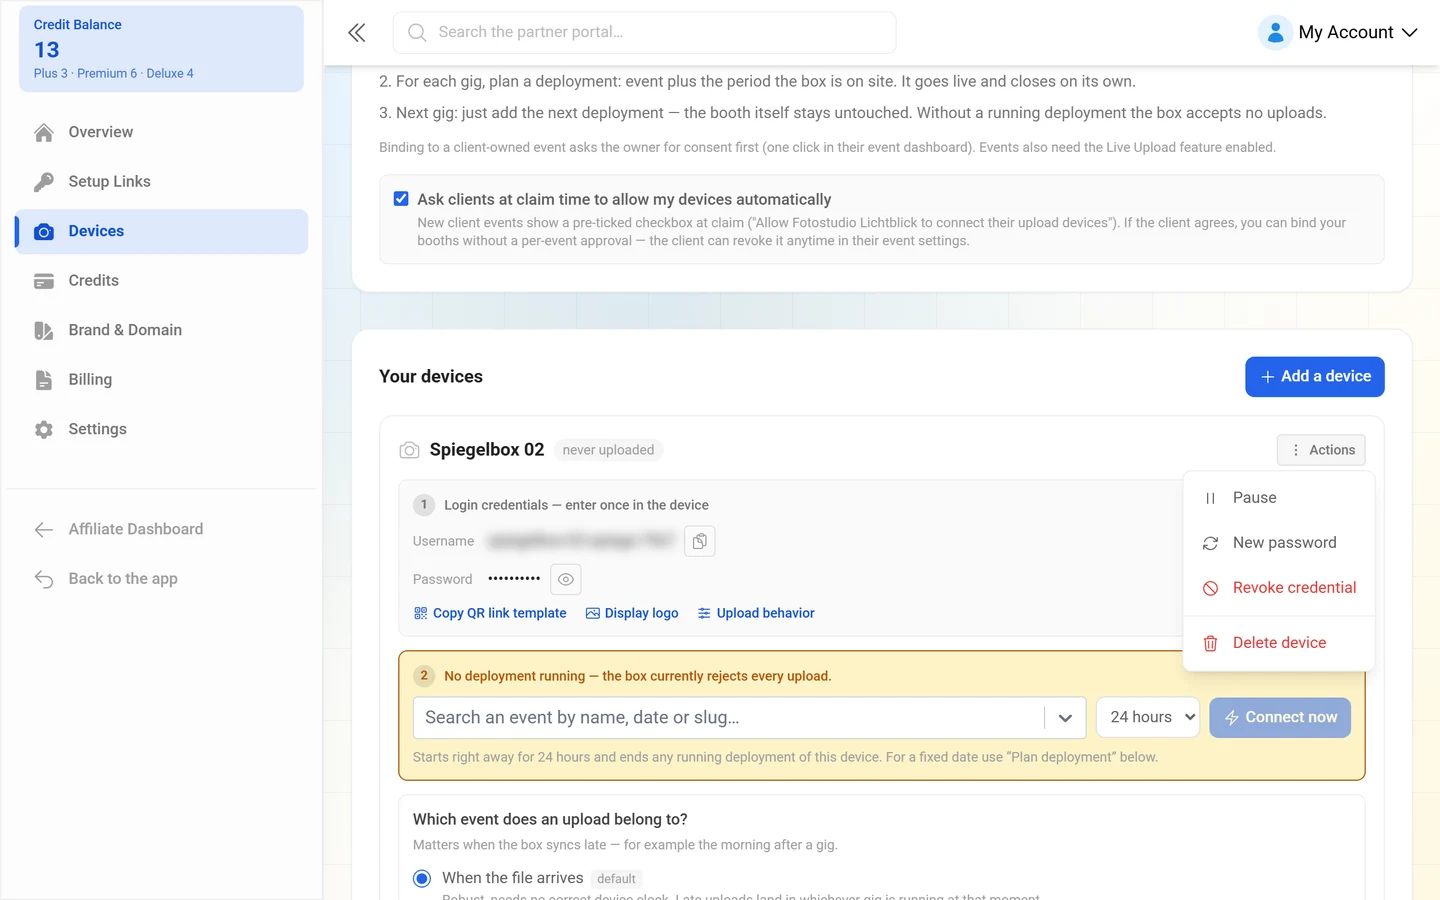
Section titled “The core idea: configure once, rotate per gig”That is exactly what the explainer box at the top of the page is called: Configure once, rotate per gig. The three steps:
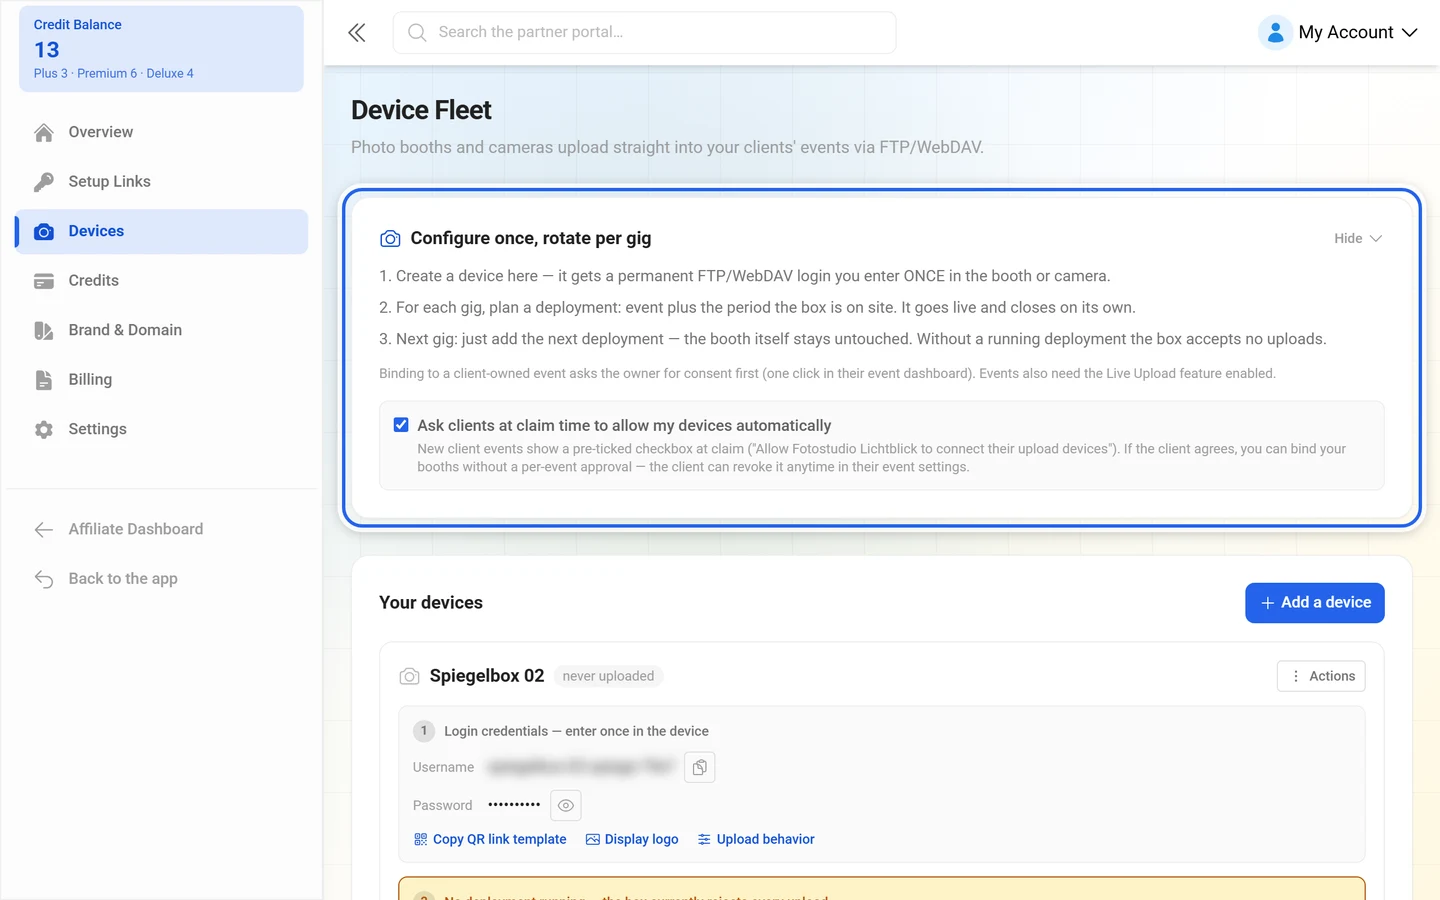
- Create a device here — it gets a permanent FTP/WebDAV login you enter ONCE in the booth or camera.
- For each gig, plan a deployment: event plus the period the box is on site. It goes live and closes on its own.
- Next gig: just add the next deployment — the booth itself stays untouched. Without a running deployment the box accepts no uploads.
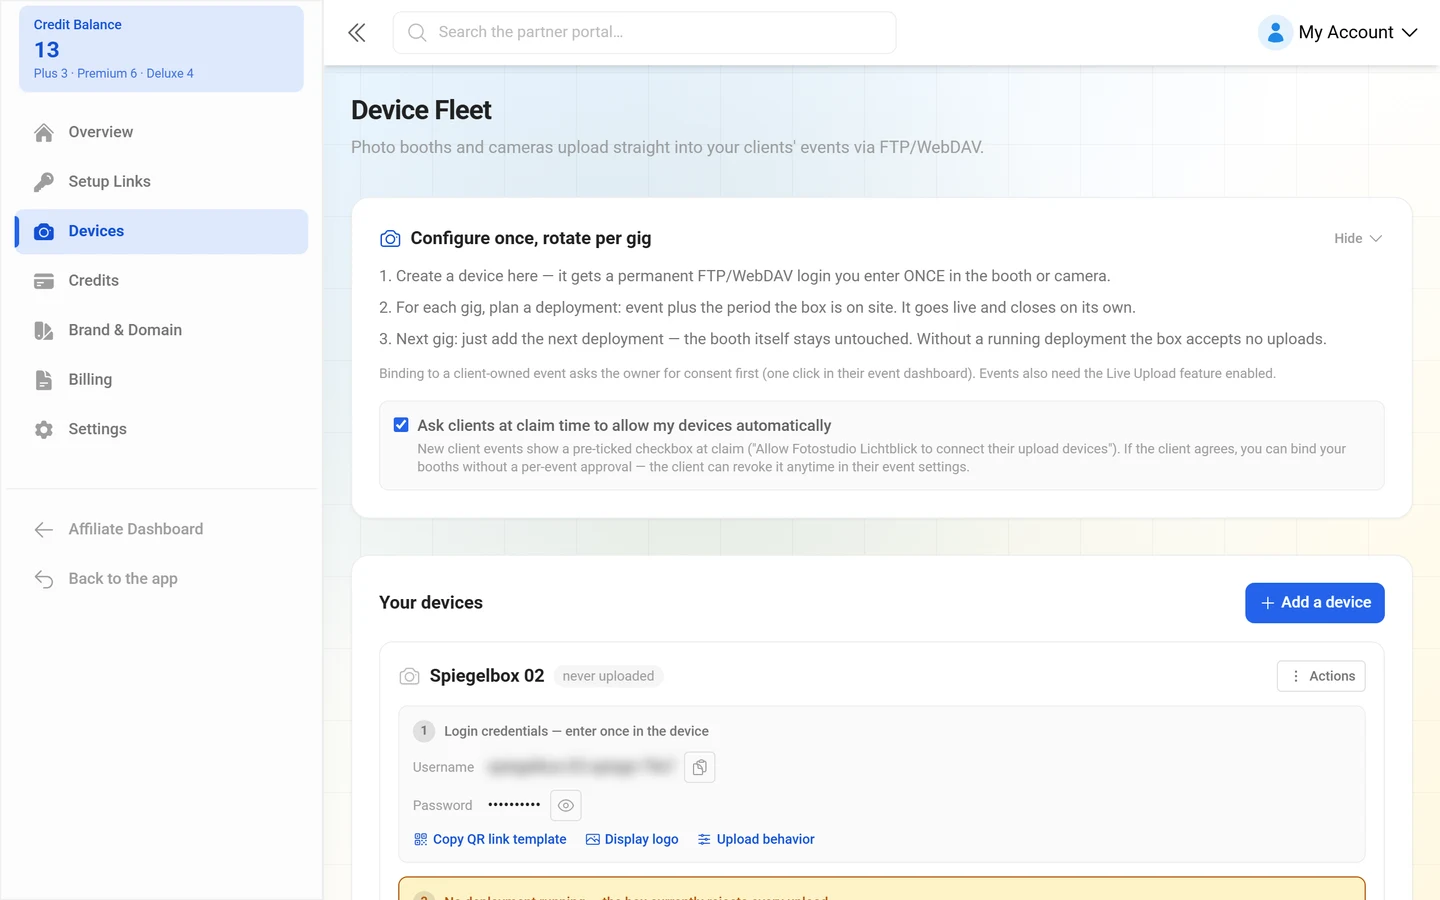
The key point: nothing ever changes inside the booth. You only plan the next deployment. That is why every device card is split into three numbered sections: 1 the credentials, 2 the deployment running right now, 3 the deployment schedule.
Hide collapses the explainer box, How it works brings it back.
Connection settings for your devices
Section titled “Connection settings for your devices”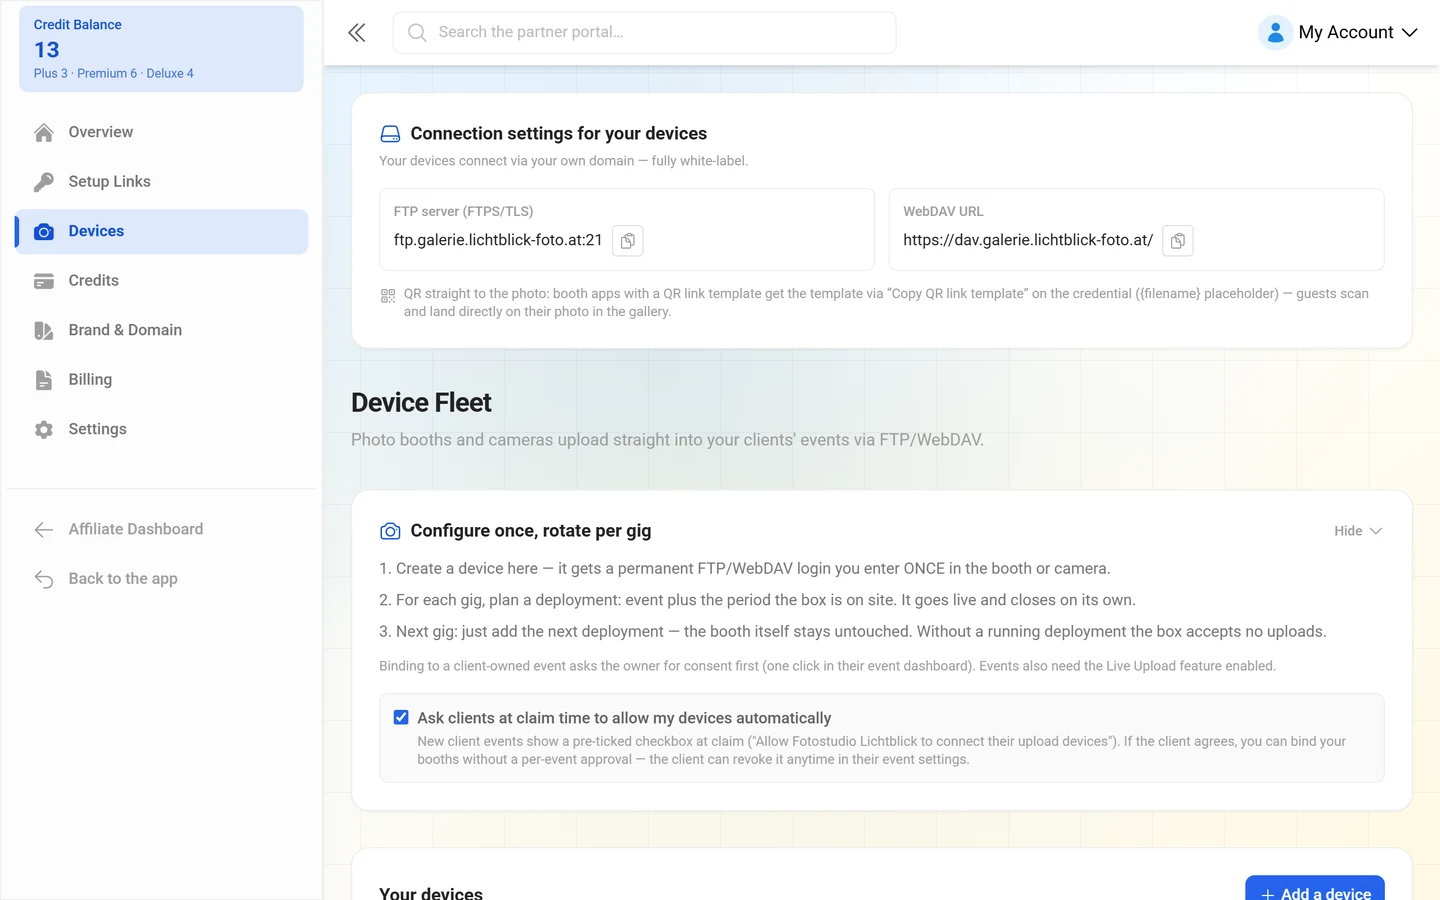
The card Connection settings for your devices shows the brand-wide endpoints you enter into each booth — each with Copy:
- FTP server (FTPS/TLS) — host and port.
- WebDAV URL — the address for the WebDAV route.
Which addresses these are depends on your brand:
- With a custom domain: Your devices connect via your own domain — fully white-label.
- Without one: Using the platform endpoints. Activate a custom domain under Brand & Domain to get branded endpoints (ftp.yourdomain.com).
Creating a device
Section titled “Creating a device”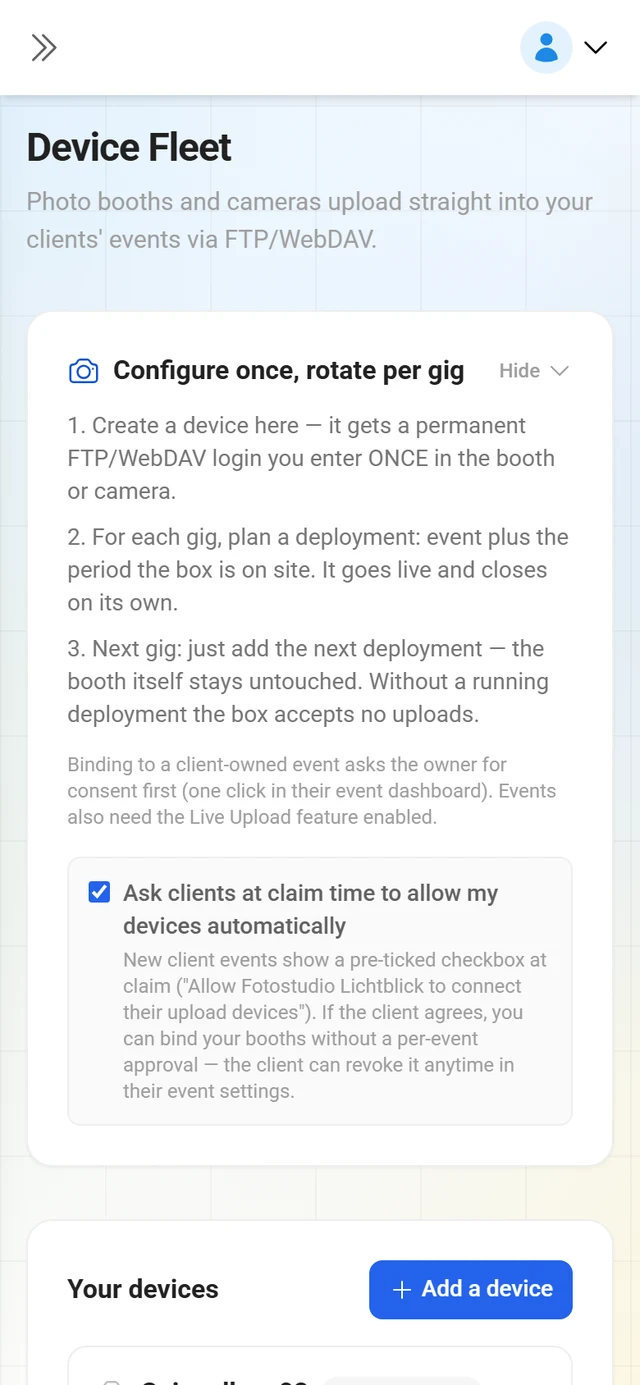
-
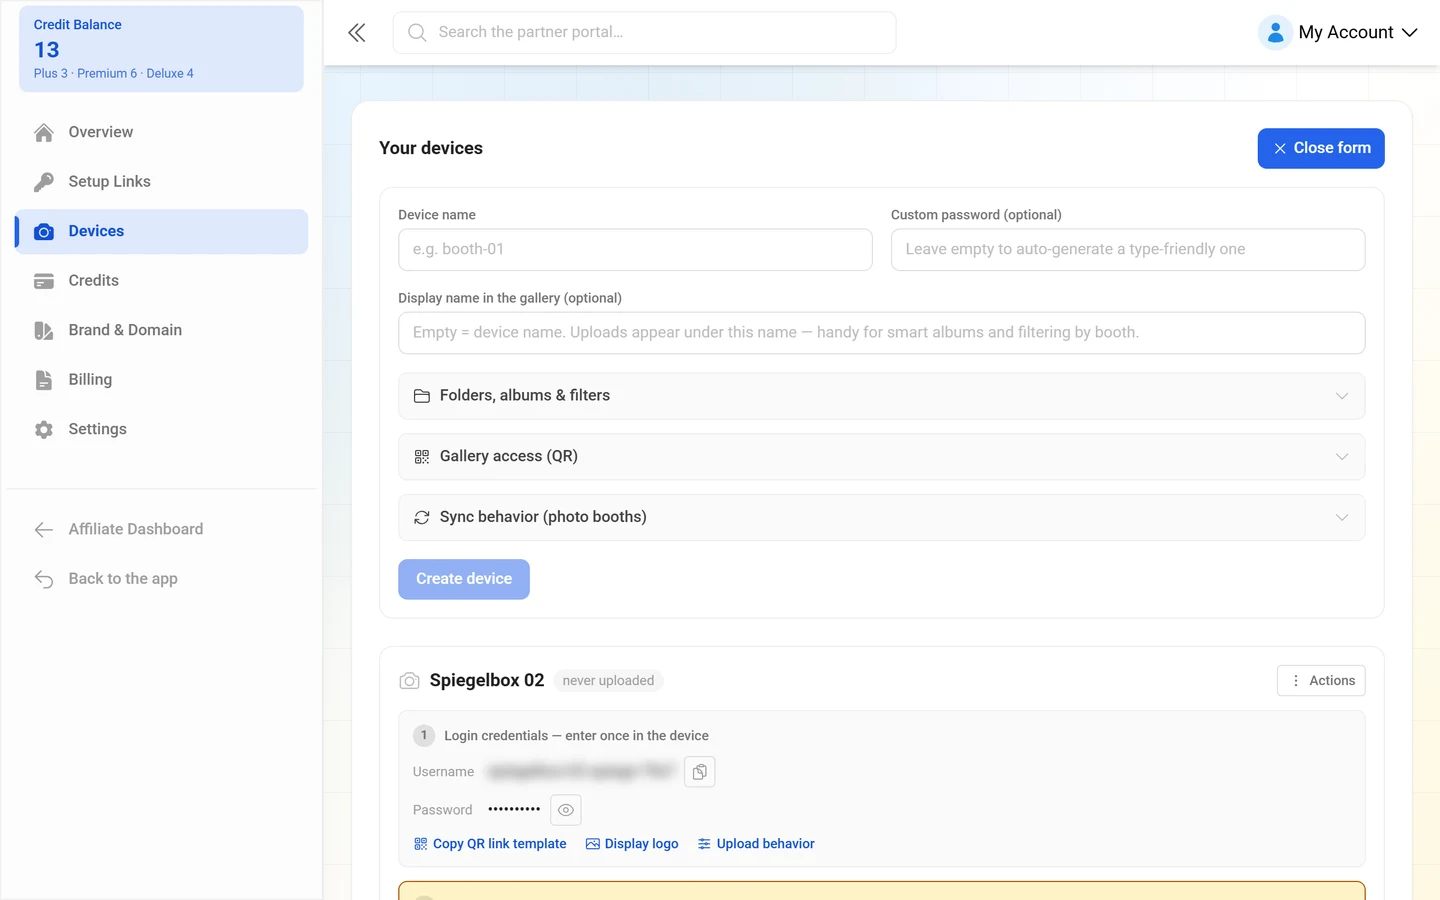
Open Device Fleet and click + Add a device on the right above the Your devices list. The form expands above the list; Close form hides it again.
-
Enter a Device name (e.g.
booth-01). Without a name the Create device button stays disabled. -
Optional: Custom password (optional). Leaving it empty auto-generates a type-friendly one. Your own has to be 10–64 characters, printable ASCII only (no spaces) and use at least 4 different characters — otherwise the field reports Too simple — use at least 4 different characters.
-
Optional: Display name in the gallery (optional). Empty means the device name is used. Uploads appear under this name — handy for smart albums and filtering by booth.
-
Optional: set the upload behavior right away (see below).
-
Click Create device.
Upload behavior
Section titled “Upload behavior”Three expandable groups — at creation time and later via Configure upload behavior:
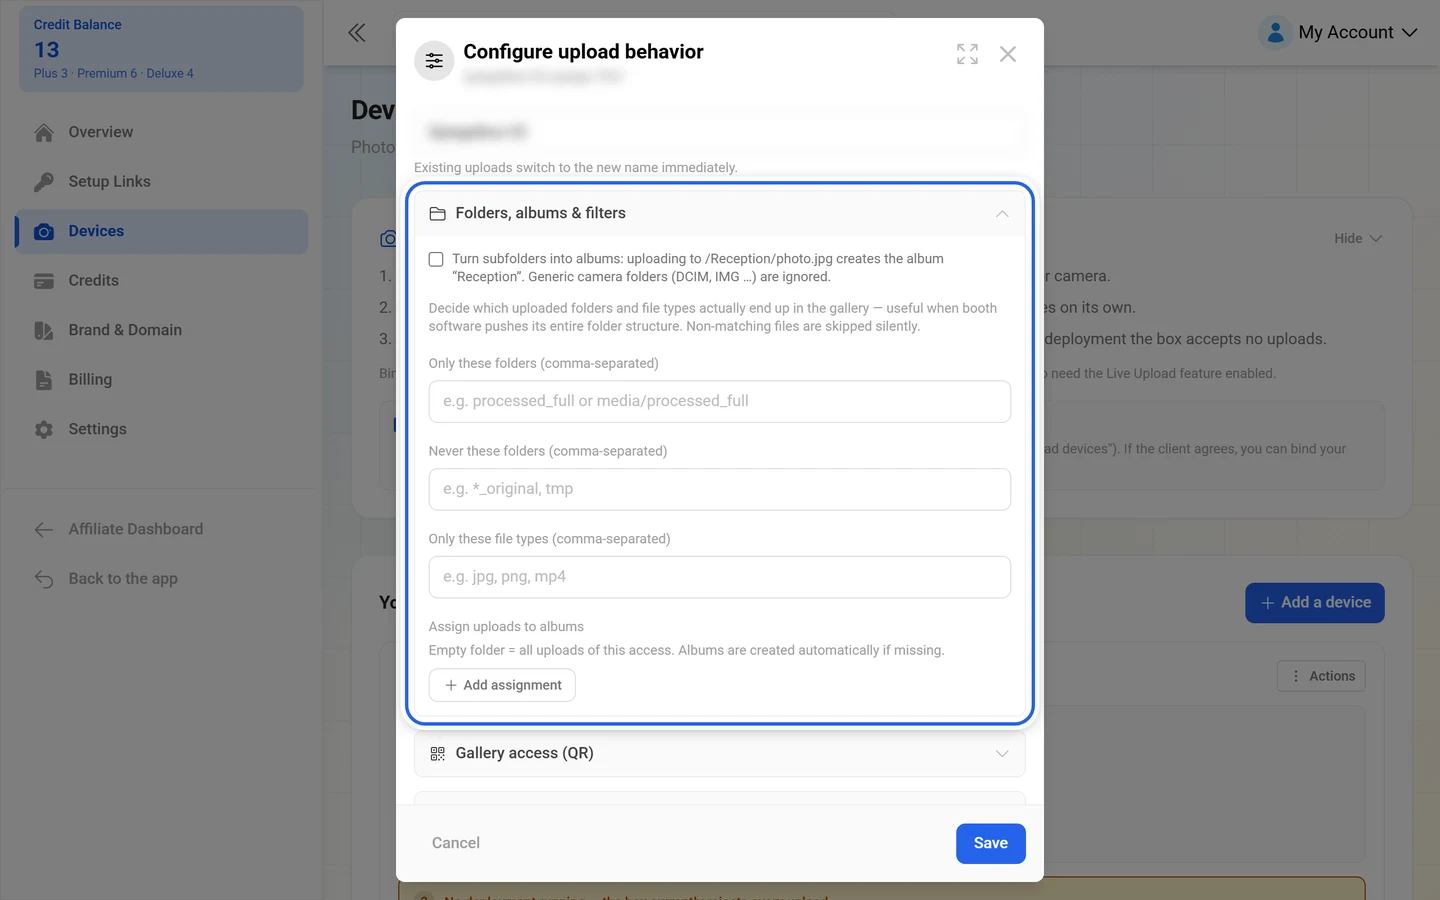
Folders, albums & filters
- Turn subfolders into albums — an upload to
/Reception/photo.jpgcreates the album “Reception”. Generic camera folders (DCIM, IMG …) are ignored. - Upload filters for folders and file types, plus fixed mappings from folders to albums.
Gallery access (QR)
- Include default password in the QR link — guests scanning the booth QR skip the password screen; the gallery code is filled in automatically. Only works when the event is password-protected and has a default code.
Sync behavior (photo booths)
- Re-uploading the same file name replaces the photo in place — edited booth versions update the gallery, likes and comments are kept. Images only.
- Don’t let the booth re-upload deleted photos — deleted photos still count as present in the sync listing (but can’t be downloaded), so the booth won’t re-send them on every sync. Turn it off for a pure download access.
The credentials
Section titled “The credentials”Right after creating a device, the green panel Login for “…” appears with Username and Password, each with a copy button. The note: Enter these once in the device. You can reveal the password again anytime via the eye icon. Done, hide this closes the panel.
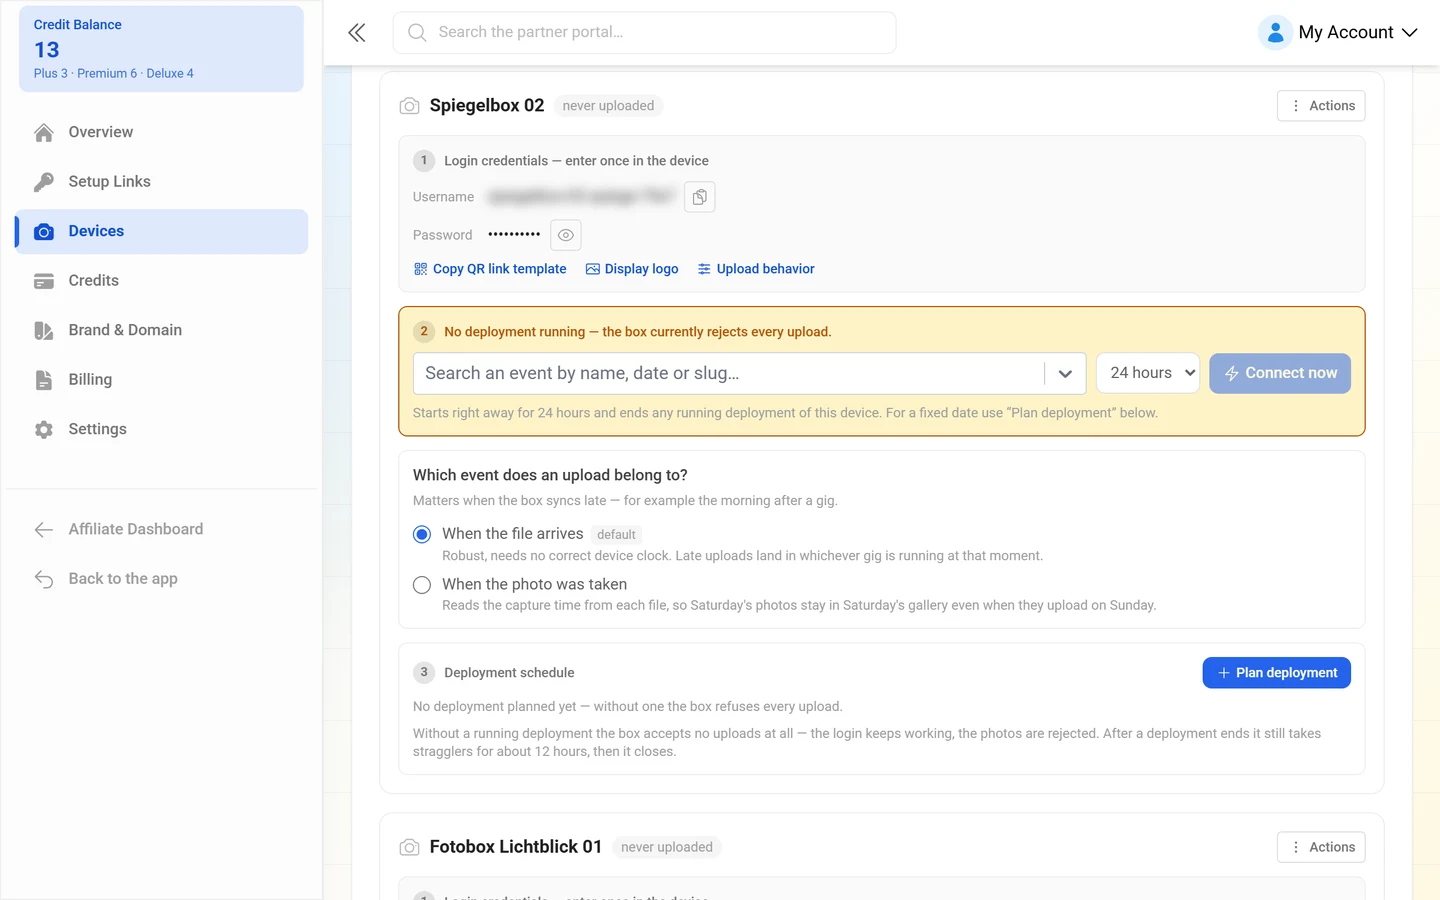
In the device list the section is called Login credentials — enter once in the device. There you can:
- Copy username and password.
- Use the eye icon to Show password or Hide password.
- Set a Display logo — it appears as the uploader avatar for every upload from that credential. A small cross removes it again.
- Change filter and album settings via Upload behavior.
If no credential is active, you see No active credential — issue a new one so the device can upload. with the button Issue new credential.
Deployments: connect now or plan ahead
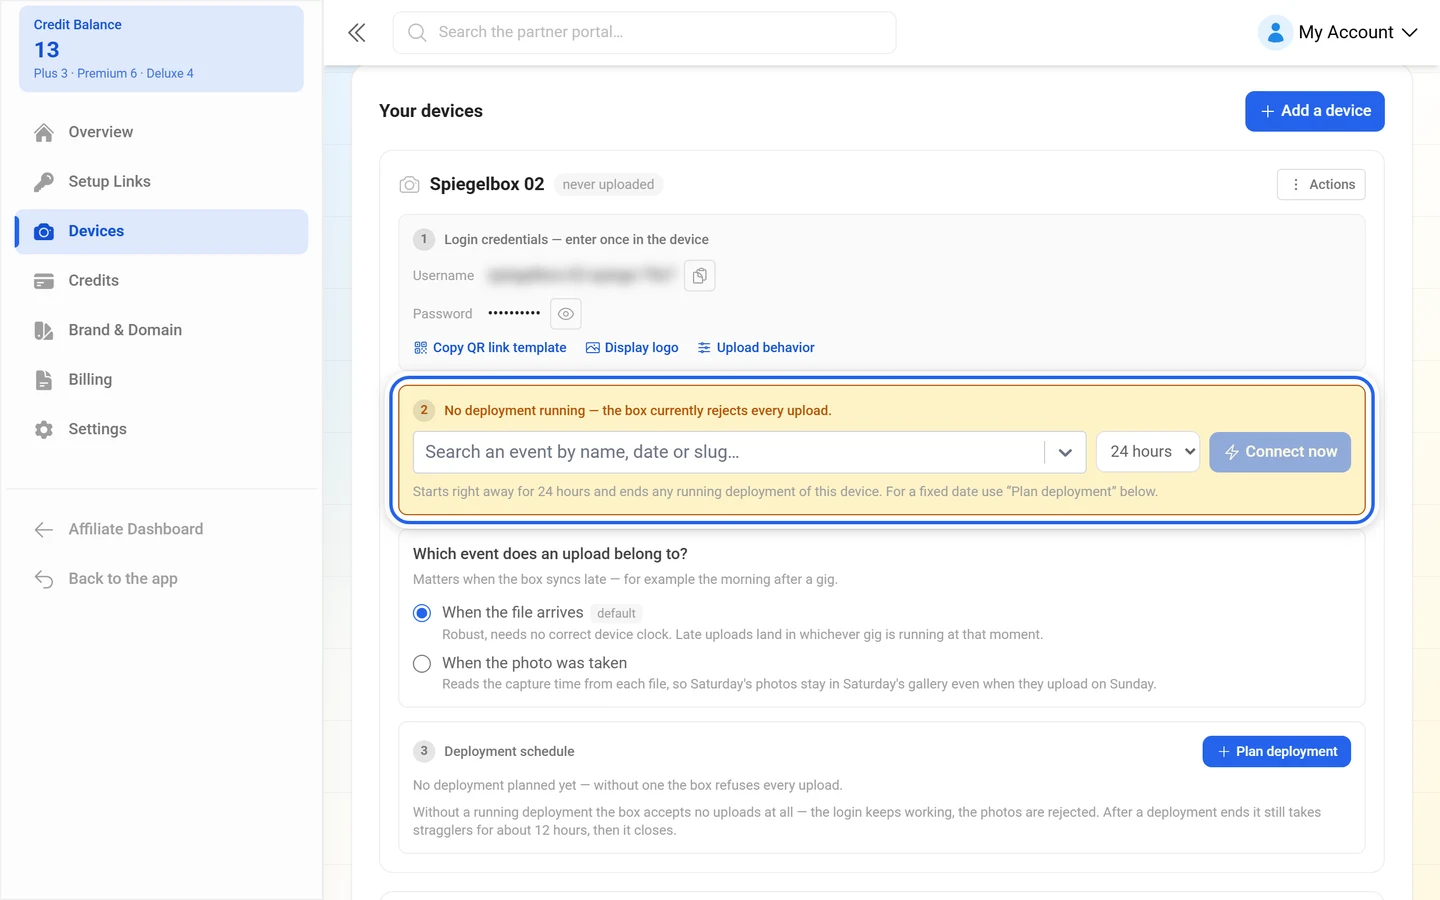
Section titled “Deployments: connect now or plan ahead”A device only uploads while a deployment is running. When none is running, section 2 of the device card shows the amber No deployment running — the box currently rejects every upload. While one runs it reads green Uploads go to: … — with a time window it adds period … – ….
Connect now
Section titled “Connect now”For the “the booth is already on site” case, the row in section 2 is enough:
-
Find the event in the Search an event by name, date or slug… field. The suggestions are grouped into Running now, Coming up, No date yet and Finished.
-
Pick the Deployment length next to it: 4, 8, 12 or 24 hours, or 2, 3 or 7 days. The default is 24 hours.
-
Click Connect now. The note below spells out what happens: Starts right away for 24 hours and ends any running deployment of this device. For a fixed date use “Plan deployment” below.
-
While a deployment runs, End deployment sits next to it and stops it early: Deployment ended — the device stops uploading.
Plan a deployment
Section titled “Plan a deployment”For a date in the future, use the + Plan deployment button in section 3 Deployment schedule.
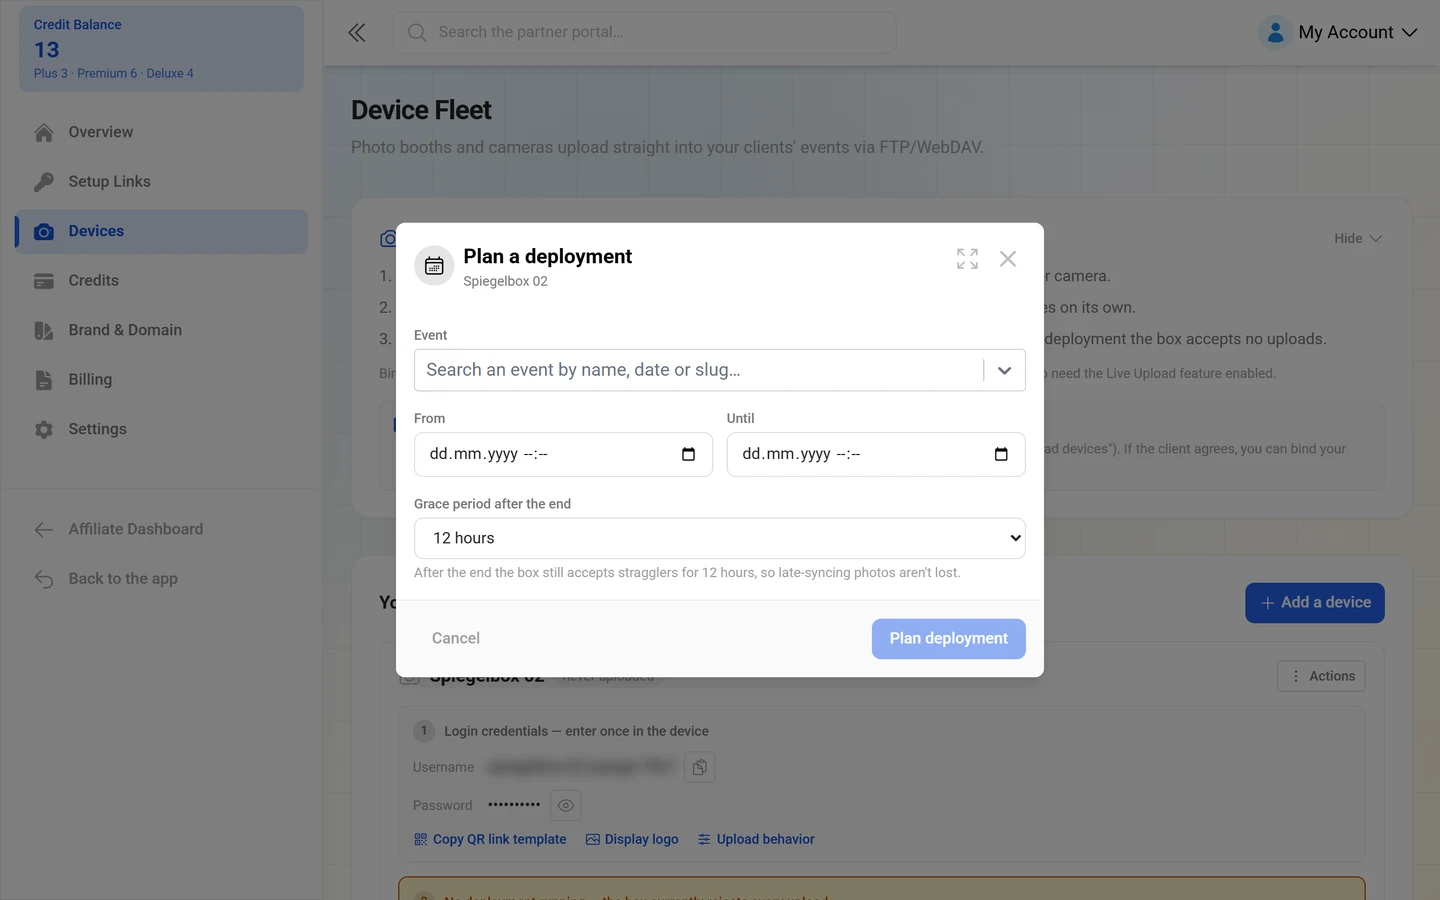
The Plan a deployment dialog has four fields:
- Event — the same search as above. In Edit deployment the field is locked: Only the times can be changed. For a different event, cancel this deployment and plan a new one.
- From and Until — date with time. If the event has a date, both are pre-filled: Suggested from the event date — adjust it to the actual booth hours.
- Grace period after the end — No grace period, 2, 6, 12 or 24 hours. With a grace period: After the end the box still accepts stragglers for 12 hours, so late-syncing photos aren’t lost. Without it: Uploads are rejected the second the deployment ends — late booth syncs are lost.
Two checks block saving: The deployment must end after it starts. and Overlaps with another deployment of this device. So one device can never serve two gigs at the same time.
The deployment schedule
Section titled “The deployment schedule”Every entry in section 3 Deployment schedule carries a status: running, grace period, planned, approval pending, canceled or finished. Next to it sit the number of uploads (… uploads) and, if the booth was too late, … late uploads rejected.
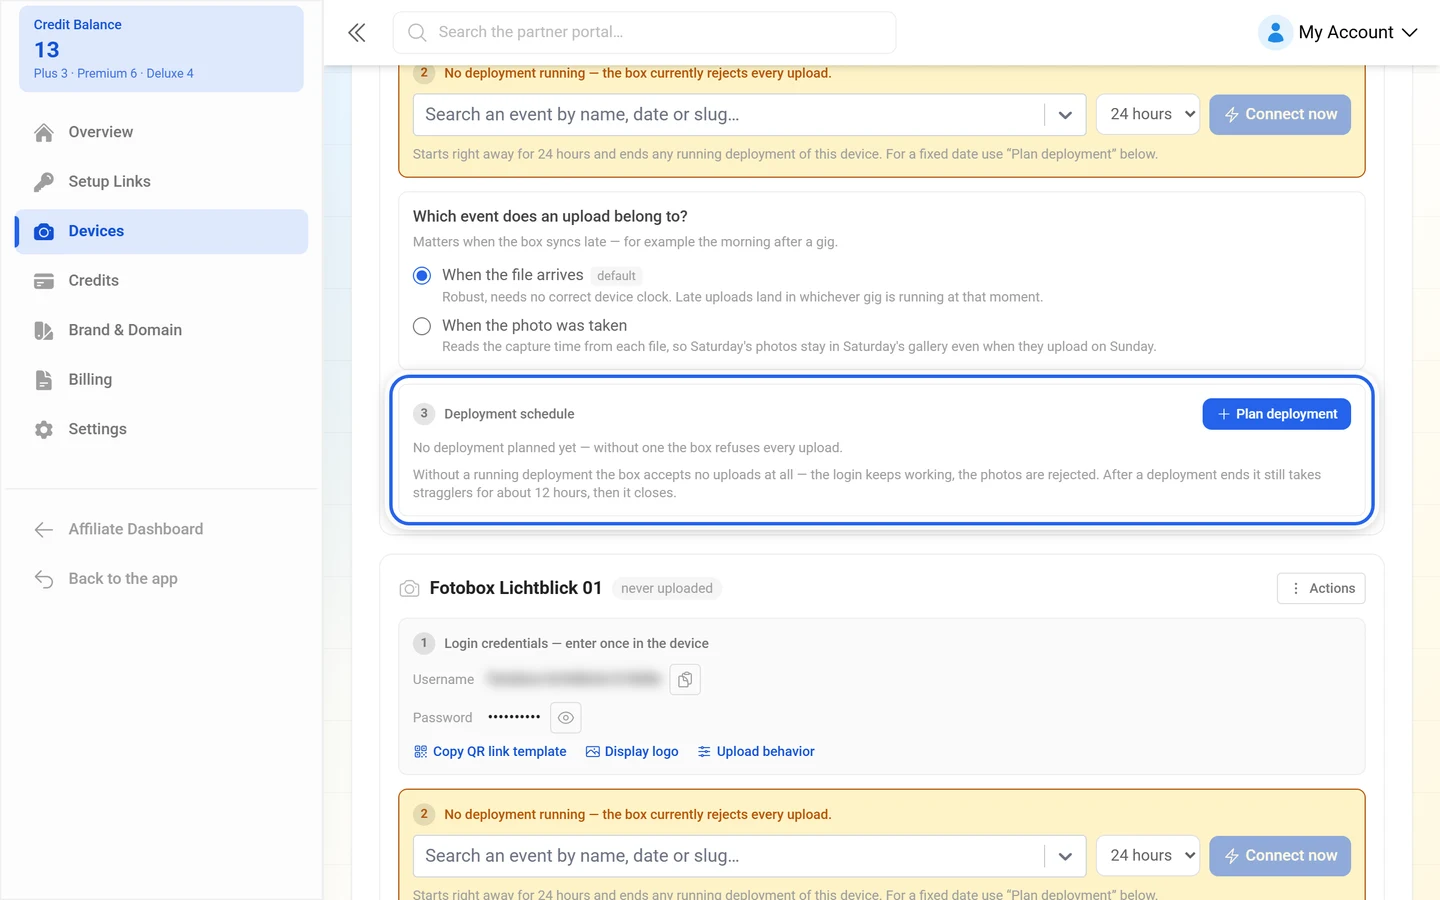
- Edit changes the times of a deployment.
- Cancel deployment dissolves it: The device stops uploading into “…” for this period. Photos already uploaded stay in the event.
- Show all deployments and Show only current deployments switch between the short and the full list.
- With nothing planned yet it reads No deployment planned yet — without one the box refuses every upload.
Below that, the gray system note sums up the behavior: Without a running deployment the box accepts no uploads at all — the login keeps working, the photos are rejected. After a deployment ends it still takes stragglers for about 12 hours, then it closes.
Which event does an upload belong to?
Section titled “Which event does an upload belong to?”Between the running deployment and the schedule sits the question Which event does an upload belong to? It matters when the box syncs late — for example the morning after a gig.
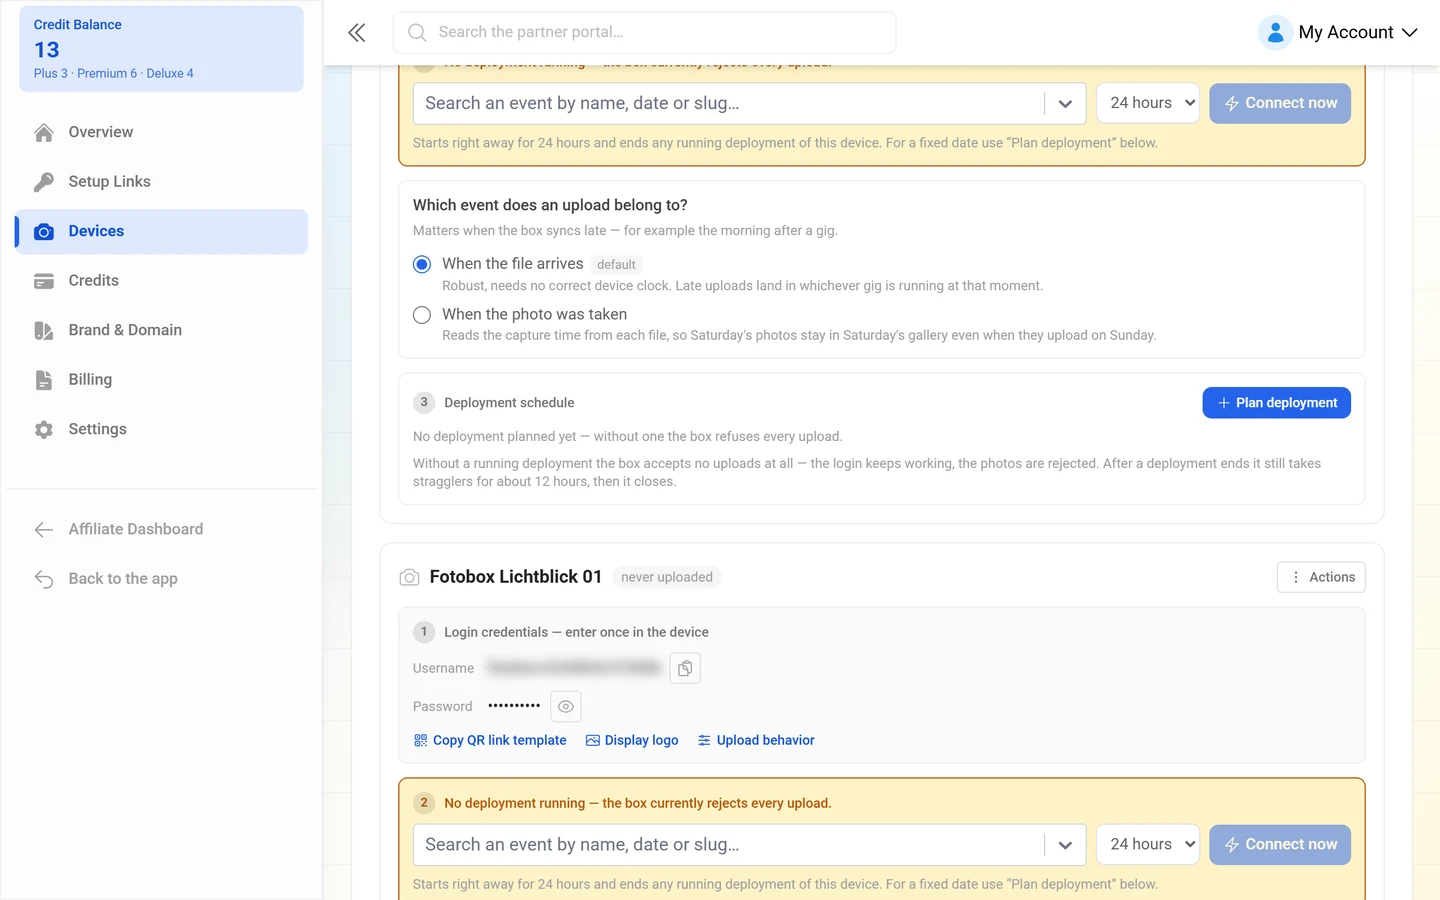
- When the file arrives (default) — Robust, needs no correct device clock. Late uploads land in whichever gig is running at that moment.
- When the photo was taken — Reads the capture time from each file, so Saturday’s photos stay in Saturday’s gallery even when they upload on Sunday.
Switching to the capture time triggers a warning: Check the clock on this device. Assignment now follows the time the device writes into each file — a camera set to the wrong date or time zone will file photos into the wrong gig, and photos taken outside any booked slot are rejected. The interface then also asks for the Time zone of the device clock (Please pick the time zone the device clock runs in.). Files that carry their own UTC offset ignore the setting — it only fills the gap for cameras that store local time without a zone.
Client consent
Section titled “Client consent”A device may not simply upload into somebody else’s event. The note in the explainer box: Binding to a client-owned event asks the owner for consent first (one click in their event dashboard). Events also need the Live Upload feature enabled.
In practice:
- Using Connect now without permission makes the app report The event owner has been asked for consent — binding works once they accept. Until then the device card carries the note Waiting for the owner of “…” to approve access. Try binding again once they accept. After the client accepts, click Connect now again.
- For a planned deployment you do not repeat anything. The dialog reports The deployment is saved — the client still has to allow your devices for “…”. and explains: They got the request in their event dashboard, one click. As soon as they accept, the deployment switches to “planned” on its own and starts at the time you set — you don’t have to do anything else here. Until then the schedule entry carries the approval pending status. Got it closes the note.
Collecting consent up front
Section titled “Collecting consent up front”Above the card sits a switch that saves you the individual requests: Ask clients at claim time to allow my devices automatically.
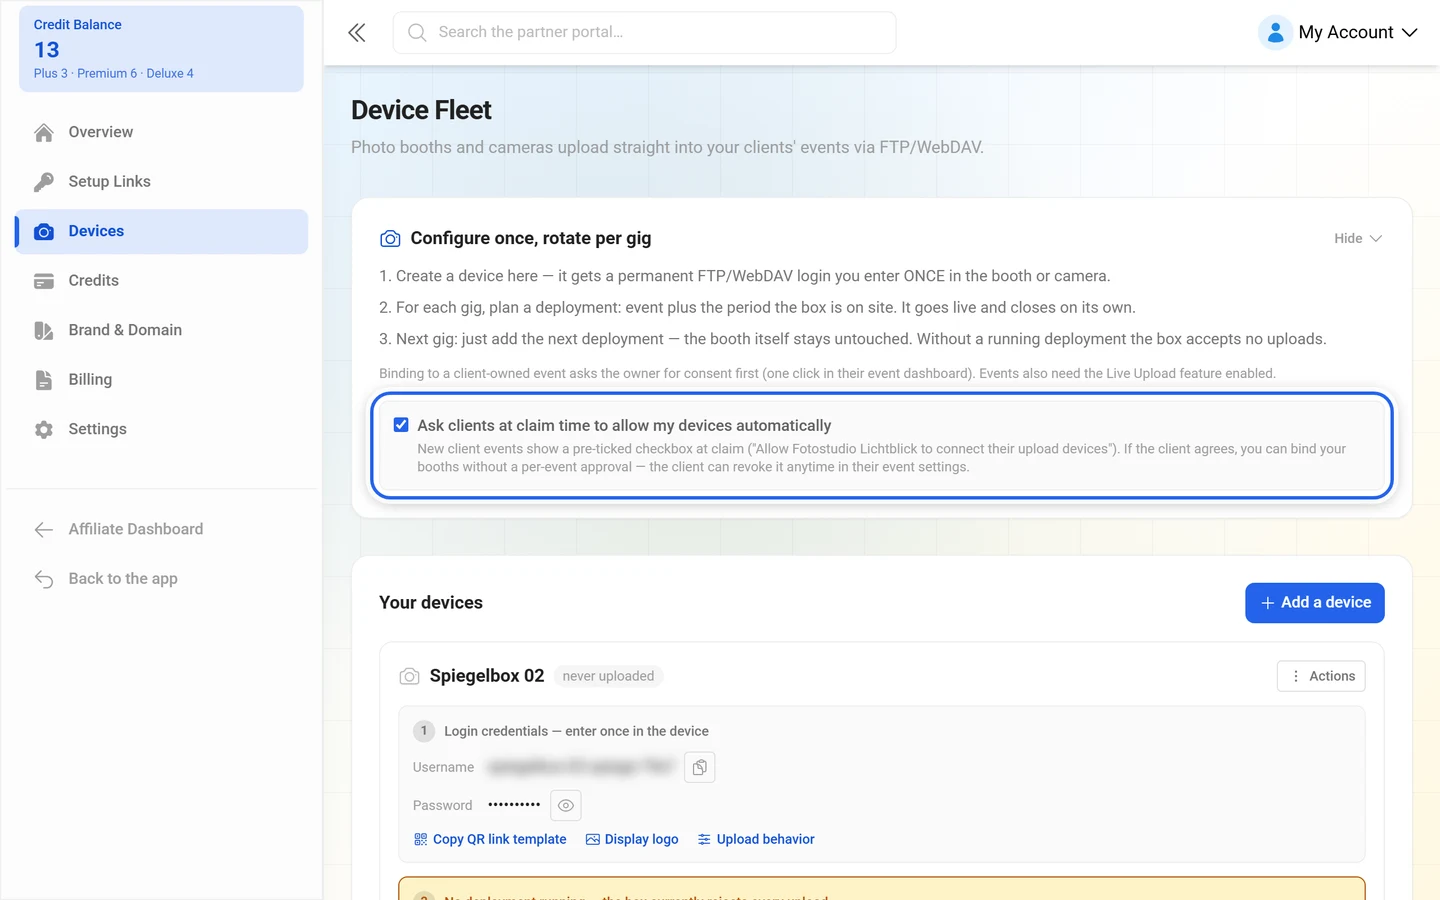
Its explanation: New client events show a pre-ticked checkbox at claim (“Allow … to connect their upload devices”). If the client agrees, you can bind your booths without a per-event approval — the client can revoke it anytime in their event settings.
Managing credentials
Section titled “Managing credentials”The Actions menu on each device card offers:
- Pause — confirmation Pause credential?, description: The device stops uploading with this login until you resume it. The header then shows the paused chip.
- Resume — reactivates a paused credential (Credential resumed.).
- New password — confirmation Set a new password? with the warning: The current password stops working immediately — you must update it on the device. Afterwards the app reports New password set — update it on the device.
- Revoke credential — final: The device can no longer upload with this login. This cannot be undone.
- Delete device — removes the device and its credentials: “…” and its logins will stop working immediately. This cannot be undone.
History and activity
Section titled “History and activity”Every device card shows at the top whether the device has done any work: last active … (green) or never uploaded (gray). The active credential lists the number of uploads and the time of the last activity.
Revoked and rotated credentials are not lost — they move into the collapsed history Previous credentials (…). Each entry lists the username, the revoked chip, the last activity (otherwise no uploads yet) and the upload count. That keeps it traceable which credential uploaded what and when.
QR links to the gallery
Section titled “QR links to the gallery”Every device gets a QR link. Guests scanning the booth QR land straight in the gallery of the event whose deployment is running right now — with the photo QR template even directly on their own photo.
- Next to the credential sits Copy QR link template. The template ends in a file-name placeholder that the booth software replaces.
- Under Configure upload behavior you also find the Static QR link (no placeholder, e.g. dslrBooth) — it simply opens the gallery.
- With Include default password in the QR link, guests skip the password screen entirely.
Troubleshooting
Section titled “Troubleshooting”- Uploads do not arrive. Check in order: is a deployment running (section 2 green rather than amber)? Is the credential active and not paused? Is live upload enabled on the event?
- Section 2 says “No deployment running”. That is the normal state between two gigs. The login keeps working, the photos are rejected — plan a deployment or click Connect now.
- The binding fails and seemingly nothing happens. A consent request was sent to the event owner. After they accept, click Connect now again; a planned deployment starts by itself once consent arrives.
- A planned deployment is stuck on “approval pending”. The client has not confirmed the request in their event dashboard yet. Without their consent the deployment does not start.
- The deployment will not save. Either it ends before it starts (The deployment must end after it starts.) or it clashes with another one (Overlaps with another deployment of this device.). One device can only serve one gig at a time.
- The event I want is not in the list. It does not belong to your brand, or live upload is not enabled there.
- The last photos of a gig are missing. The booth synced too late: the deployment then shows … late uploads rejected. Next time set a Grace period after the end.
- Photos land in the wrong deployment. With the assignment set to When the photo was taken, the camera clock decides. Check its date, time and the configured Time zone of the device clock — or switch back to When the file arrives.
- The password suddenly stopped working. After New password the old one is invalid immediately; enter the new one in the booth.
- Some photos are missing. Most likely the upload filters under Folders, albums & filters are kicking in.
- The client disconnected my devices. They can revoke the device permission in their event settings anytime; after that you need their consent again for every device.
- The endpoints do not carry my name. Your brand is still running on the platform endpoints — a custom domain unlocks branded addresses.
Related pages
Section titled “Related pages”- Connecting a photo booth live — the same devices from the host’s point of view
- Reseller basics — setup links, credits and portal structure
- Setting up brand & domain — branded FTP and WebDAV addresses
- Creating albums — albums created from folders and mappings
- Set up the photo wall — bringing live booth photos onto the wall