Guest menu
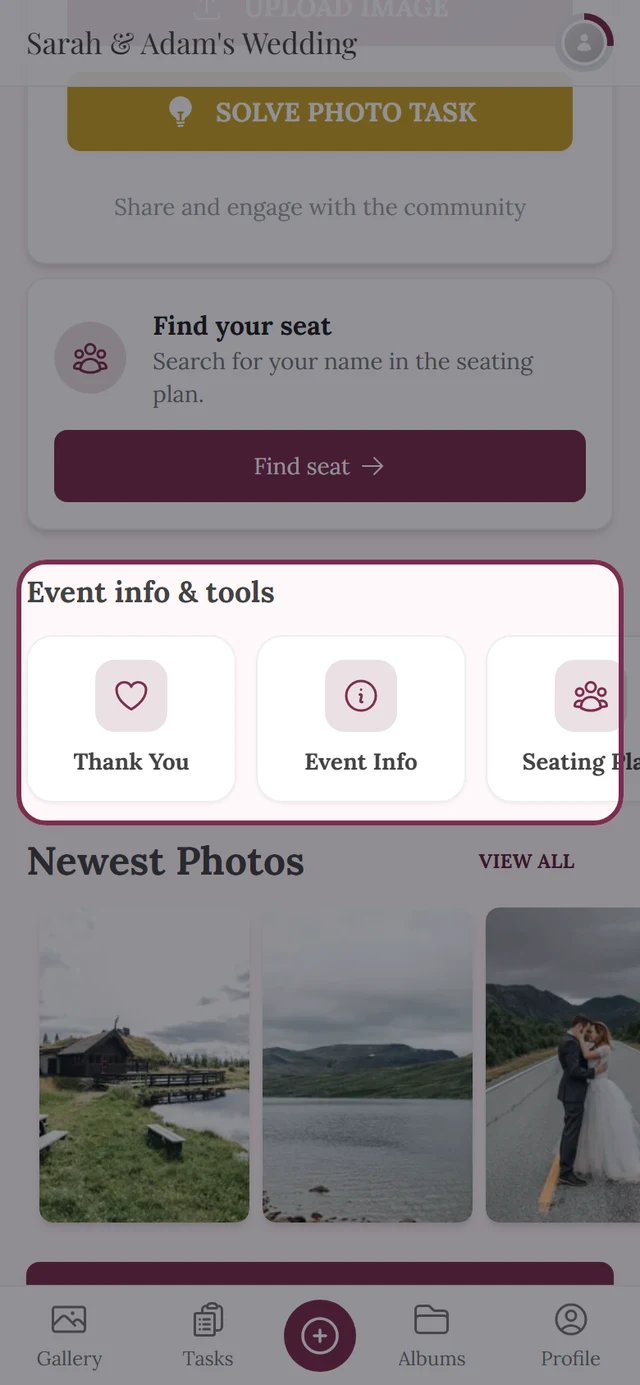
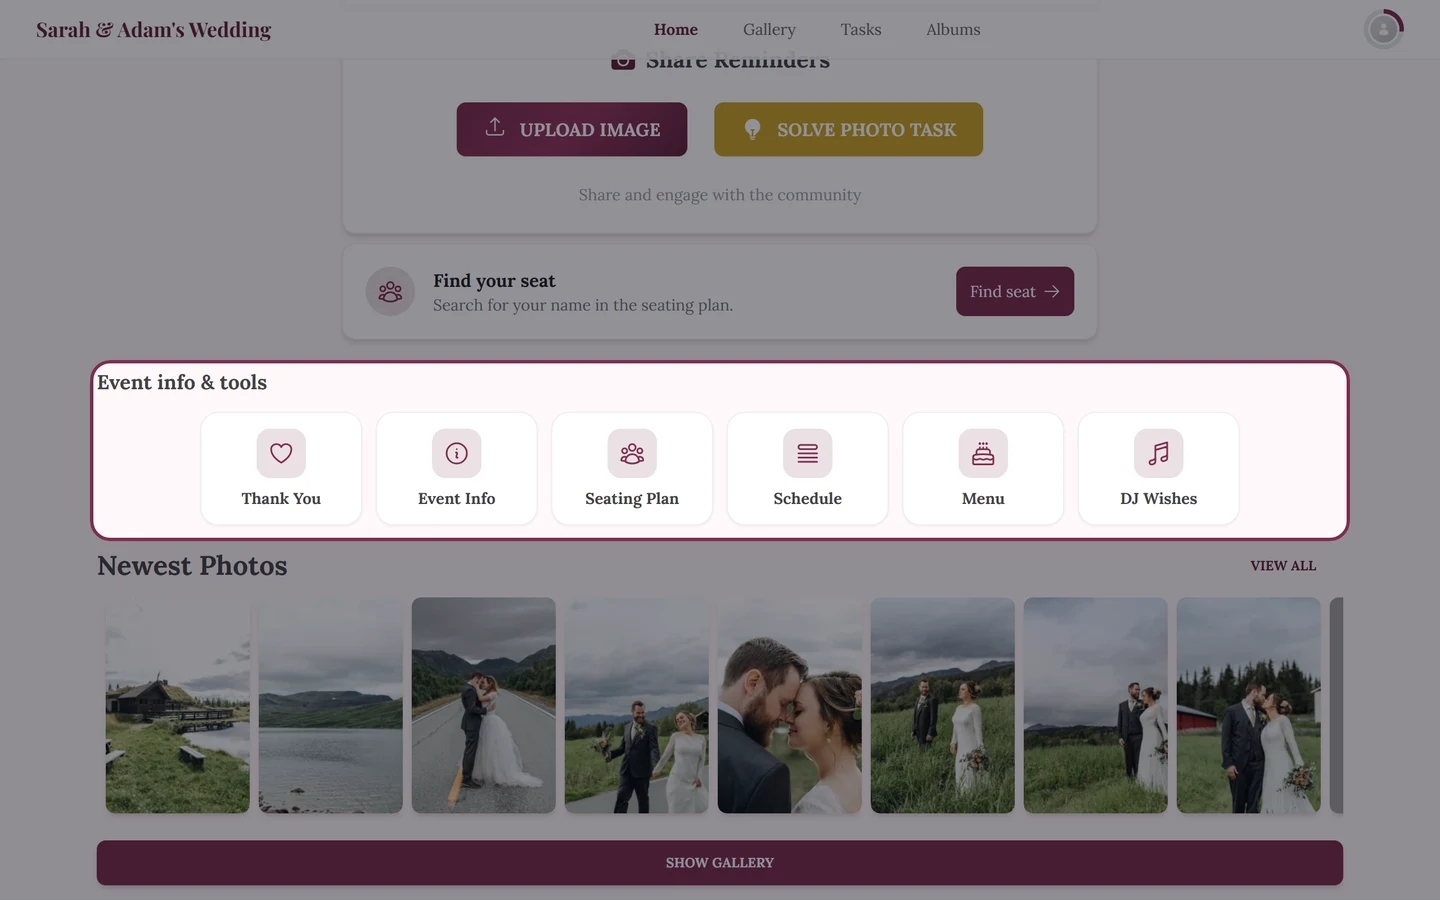
On the event home page, right below the cover image, sits the Event info & tools bar: small cards that take your guests to the thank-you page, the event info, the schedule, the menu or one of your own pages. The Guest menu is where you decide what appears there and in which order.
You find the page in the sidebar under Planning → Guest menu (route /admin/tools/guest-menu).
One row, left to right
Section titled “One row, left to right”Every entry is a row, and every row is built the same way.
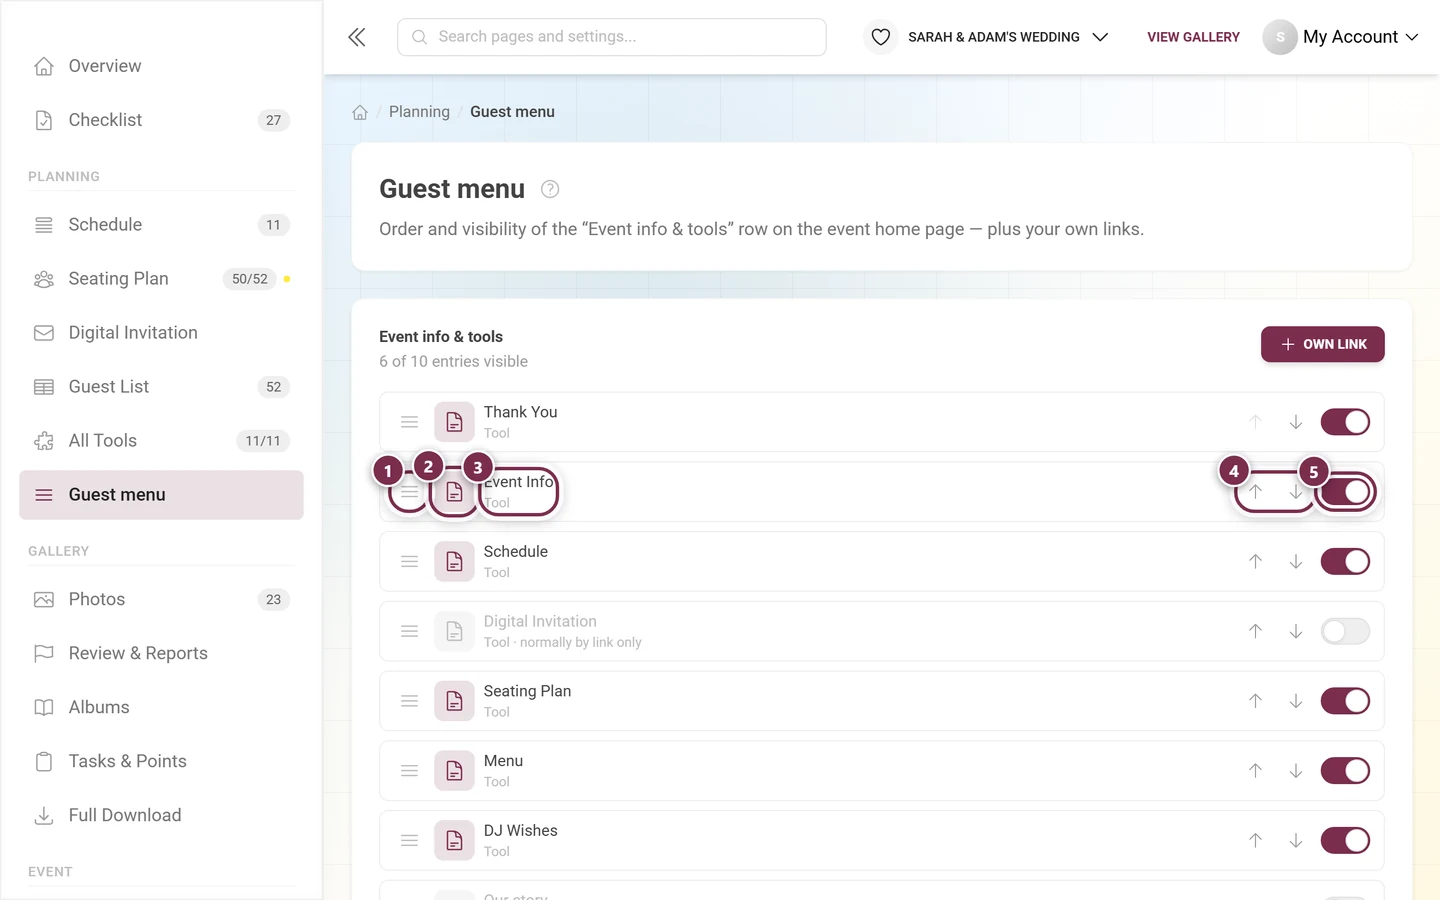
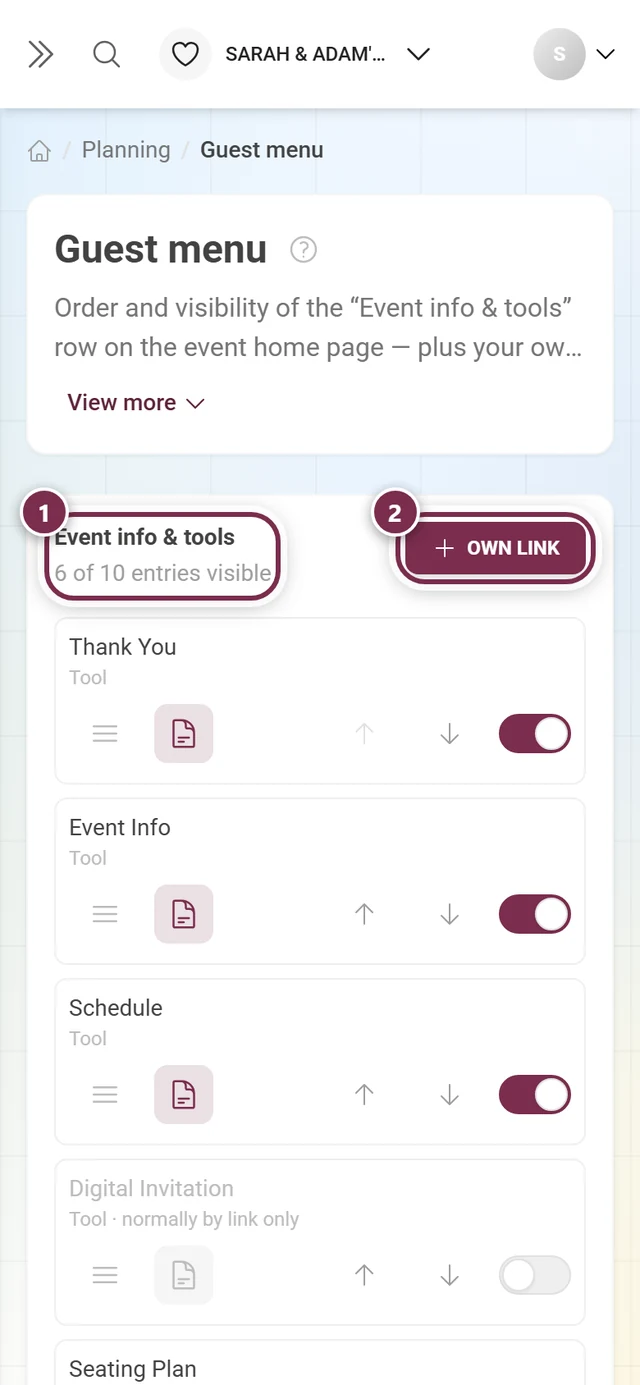
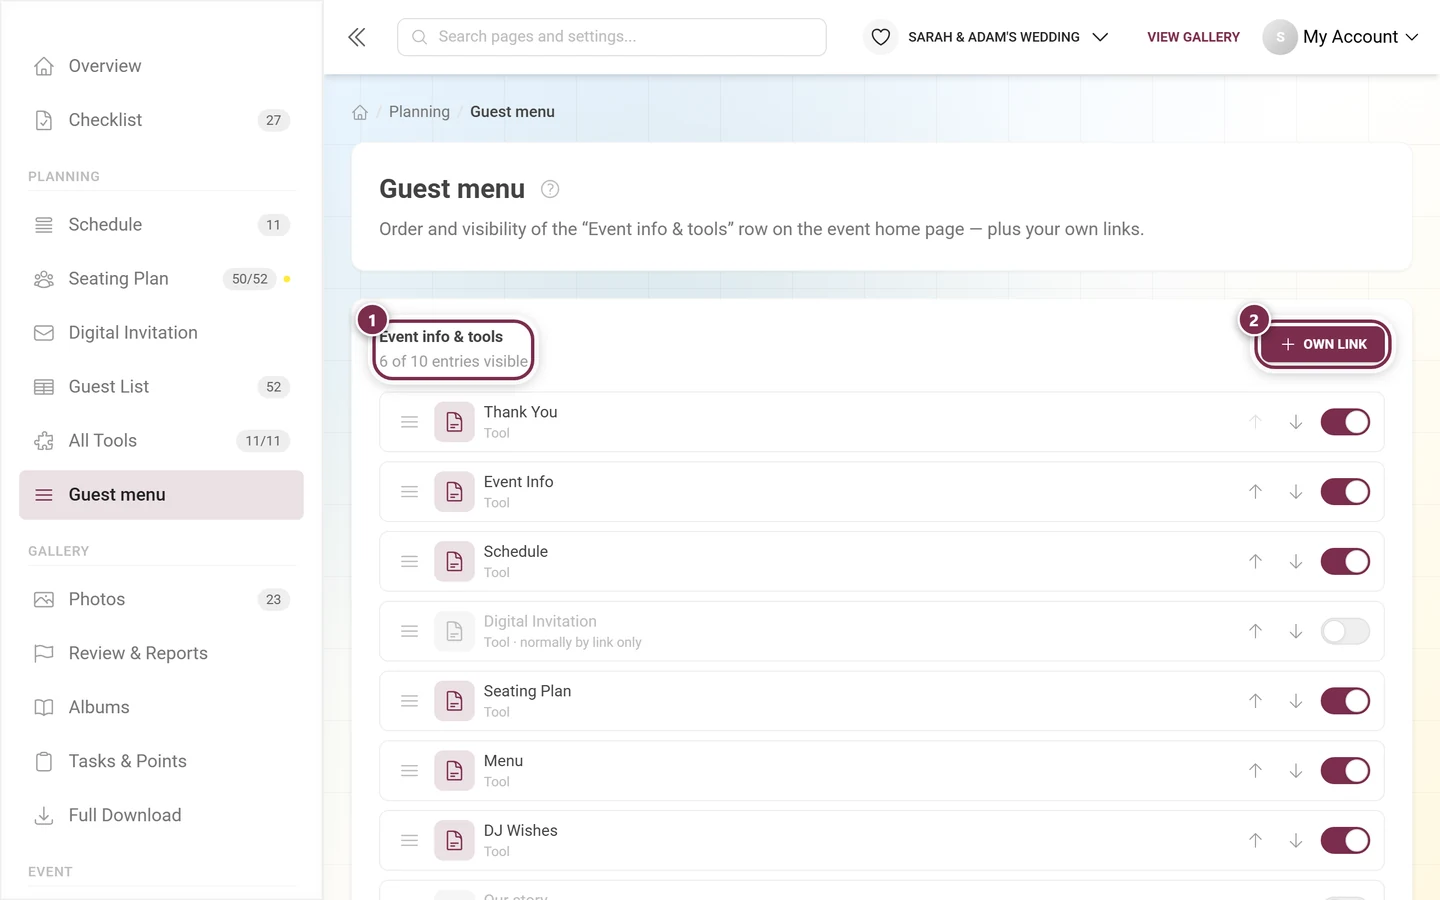
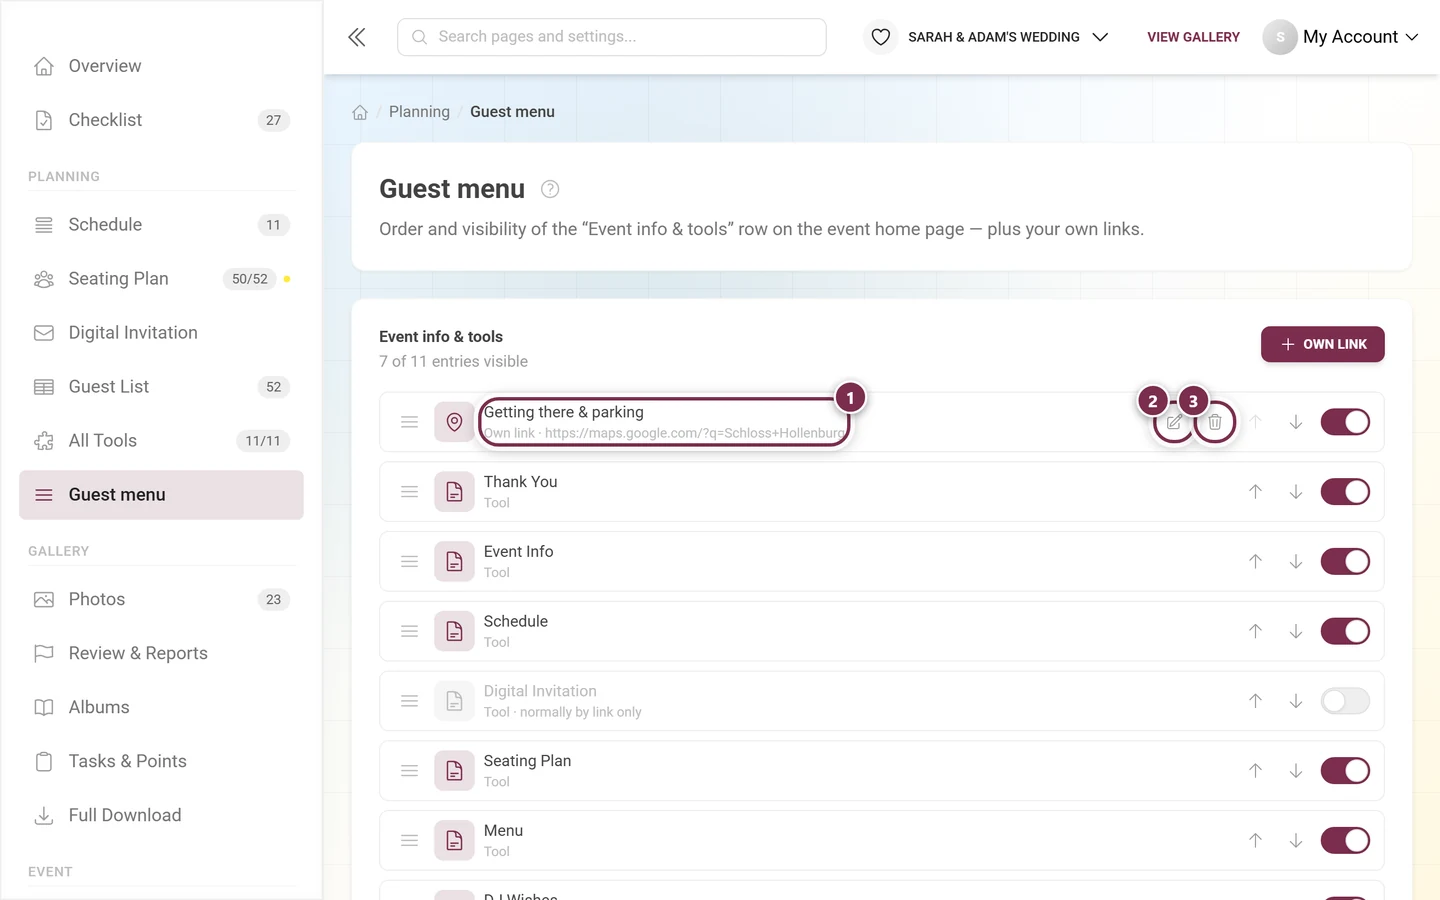
① Handle (three lines) – this is where you grab the row to move it. Only the handle drags; the rest of the row stays tappable.
② Symbol – the icon your guests see on the card. While the row is visible the tile carries your event color; switched off, it turns gray.
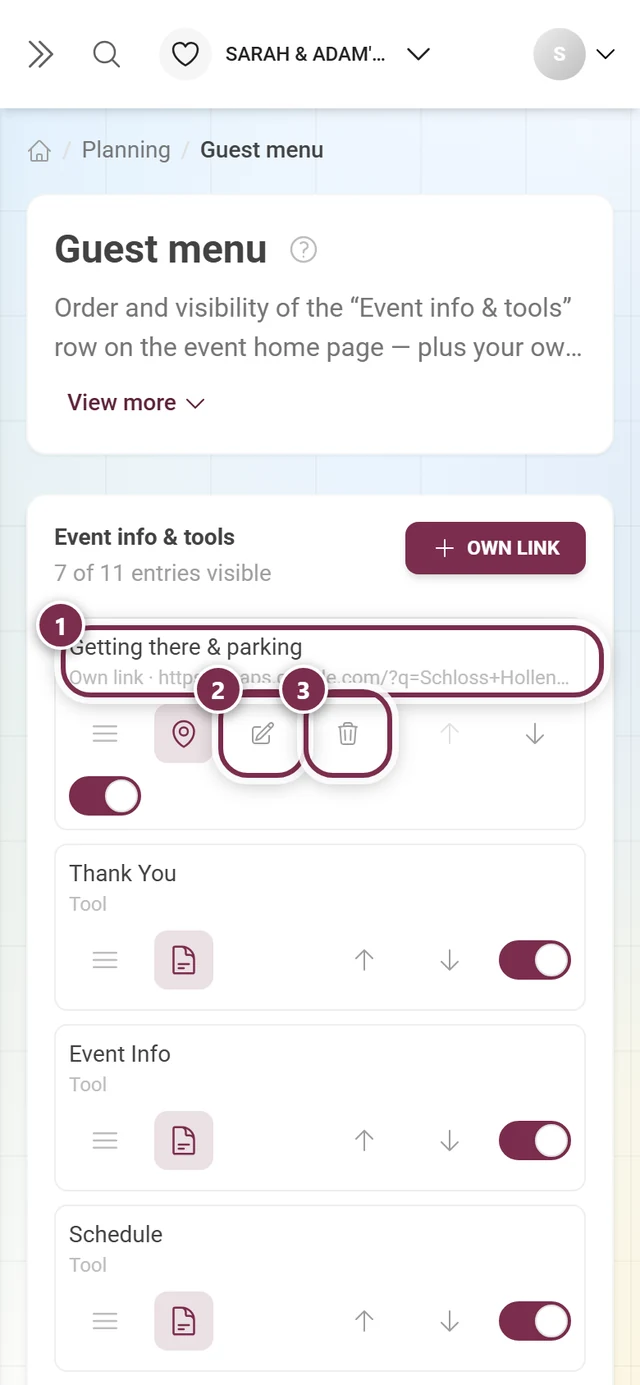
③ Label and kind – the name of the card, with its kind in small type below (Tool, Own page, Own link …). For an own link the destination address is shown there as well.
④ Arrows – one click moves the row one place. In the top row the up arrow is faded and does nothing, in the bottom row the down arrow – the buttons stay put rather than disappear, so the row never jumps under your cursor.
⑤ “Visible” switch – takes the card out of the bar or brings it back.
Own links carry two more buttons between ③ and ④: a pencil (edit) and a bin (remove). Tools and own pages have neither – they are managed on their own admin page.
What the list contains
Section titled “What the list contains”Above the list you see how many entries are currently visible – for example 6 of 10 entries visible. The number on the right is the length of the list, the one on the left counts the rows that are switched on.
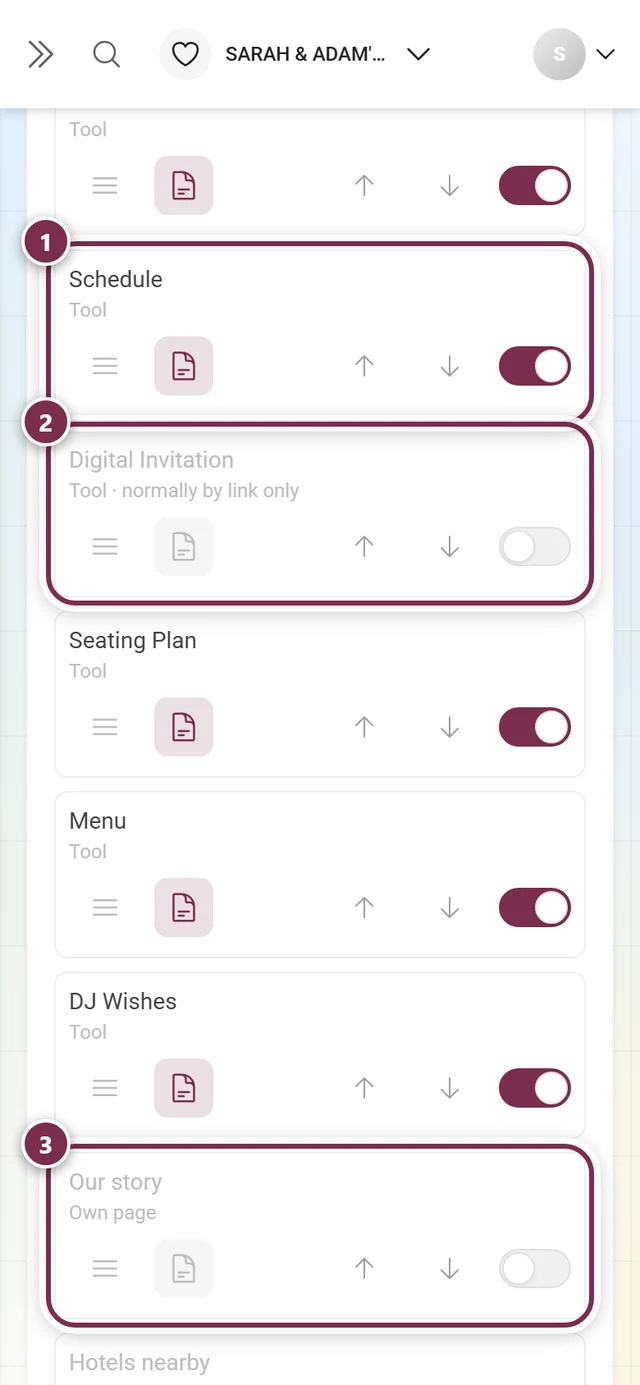
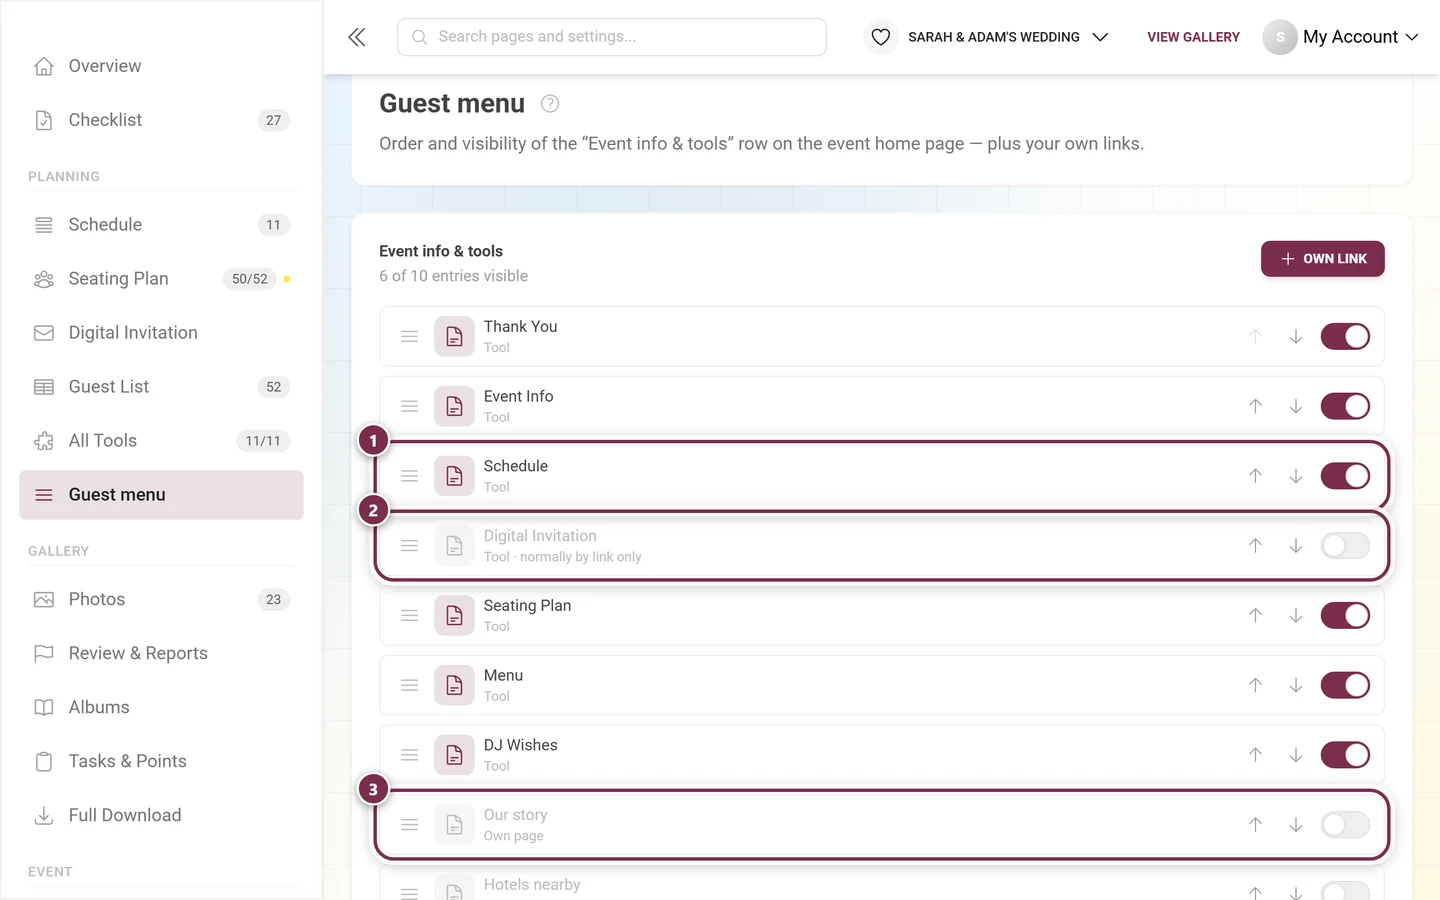
- Tool – an active tool that has a guest page (thank you, event info, schedule, menu, DJ requests, seating …).
- Tool · normally by link only – tools that stand on their own and only join the bar on request, first among them the digital invitation. It is off by default: an invitation usually goes out on purpose, not to everyone who is already in the gallery.
- Own page – a published custom page.
- Own link – a destination you enter yourself (see below).
Changing the order
Section titled “Changing the order”-
Drag a row by its handle (the three-line icon) to its new place – or use the Move up and Move down arrows.
-
Done. There is no save button: the order is stored automatically a moment after your last move.
Guests see the cards in exactly this order – rows that are switched off keep their place too and slide back into exactly that spot when you switch them on again. Whatever you put on top is what gets found fastest on the day.
Switching visibility
Section titled “Switching visibility”The Visible switch in each row takes an entry out of the bar or brings it back. The row turns pale – symbol and name go gray – but stays where it is. Three things worth knowing:
- The switch writes the same value as the Display tab of the tool itself. The two places cannot disagree – this is simply a second remote control for one switch.
- For an own page, the card depends on two conditions: the page itself, and the Custom pages tool being in the bar at all. If you switch a page on while the tool was out, the tool is pulled in with it – otherwise you would have flipped a switch no guest could ever notice.
- An entry set to invisible is not deleted: the page or tool stays reachable through its direct link and its QR code, only the card is gone.
Own link
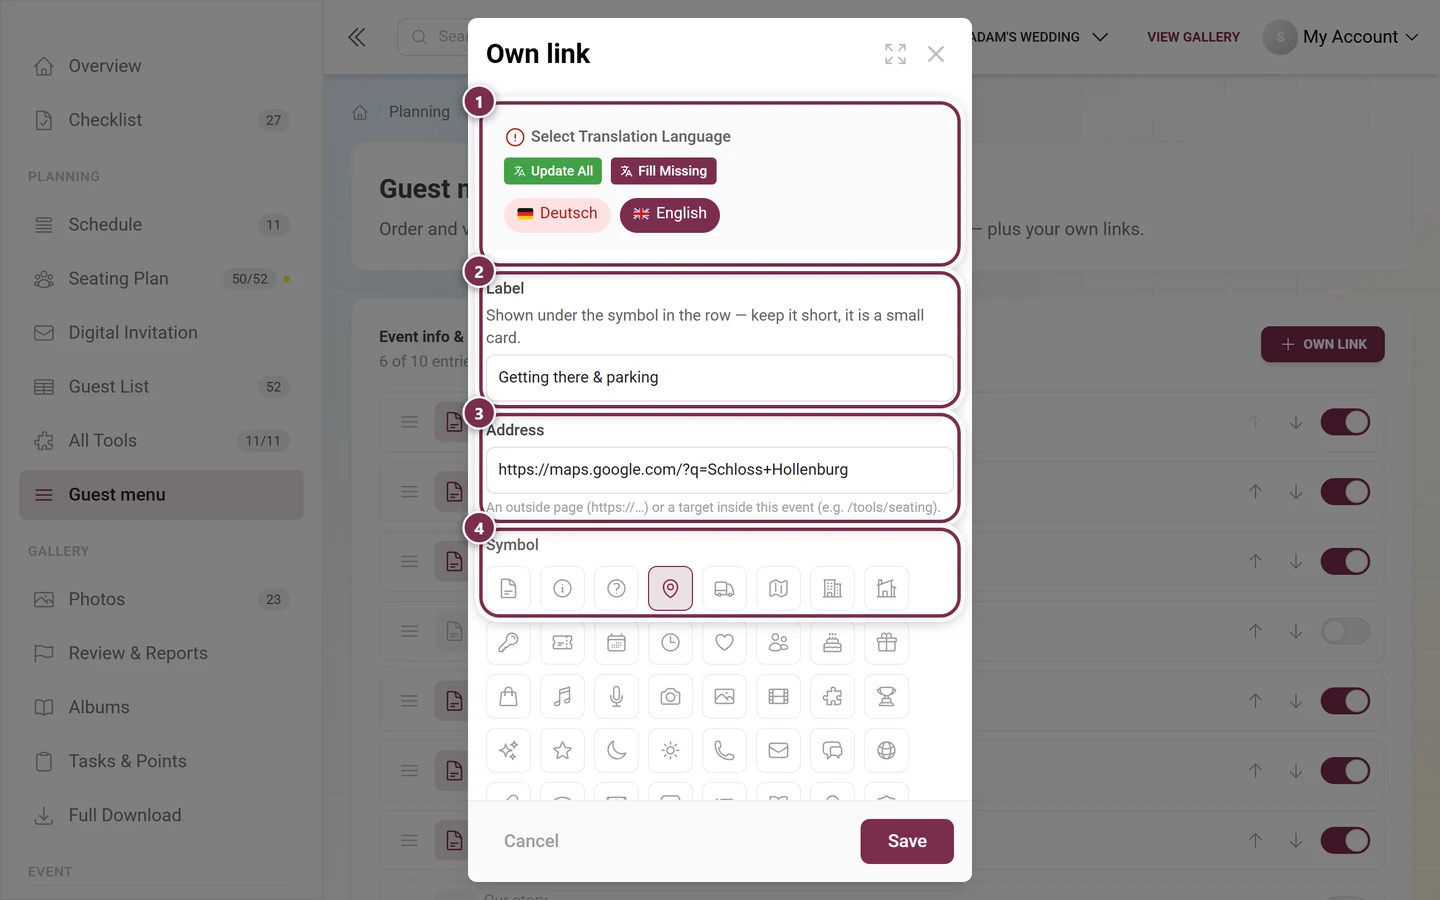
Section titled “Own link”Own link (the button at the top right) creates a card that points anywhere – to the map of the venue, to the hotel, to a shared playlist.
-
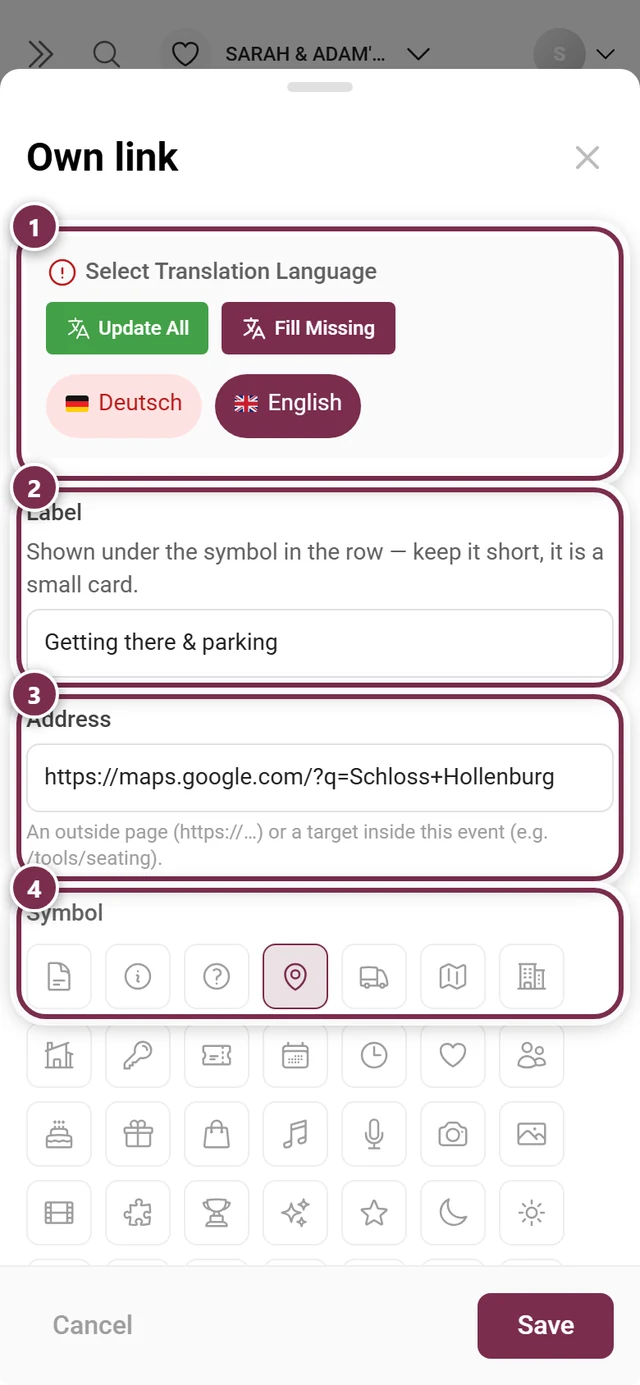
Enter a Label – what the card says, for example Getting there & parking. Keep it short, it is a small card; the field takes no more than 60 characters.
-
Enter an Address – either an external address starting with
https://or a destination inside your event starting with/(such as/tools/seating). Anything else is refused and the field turns red, because this text ends up as a link on a guest page. -
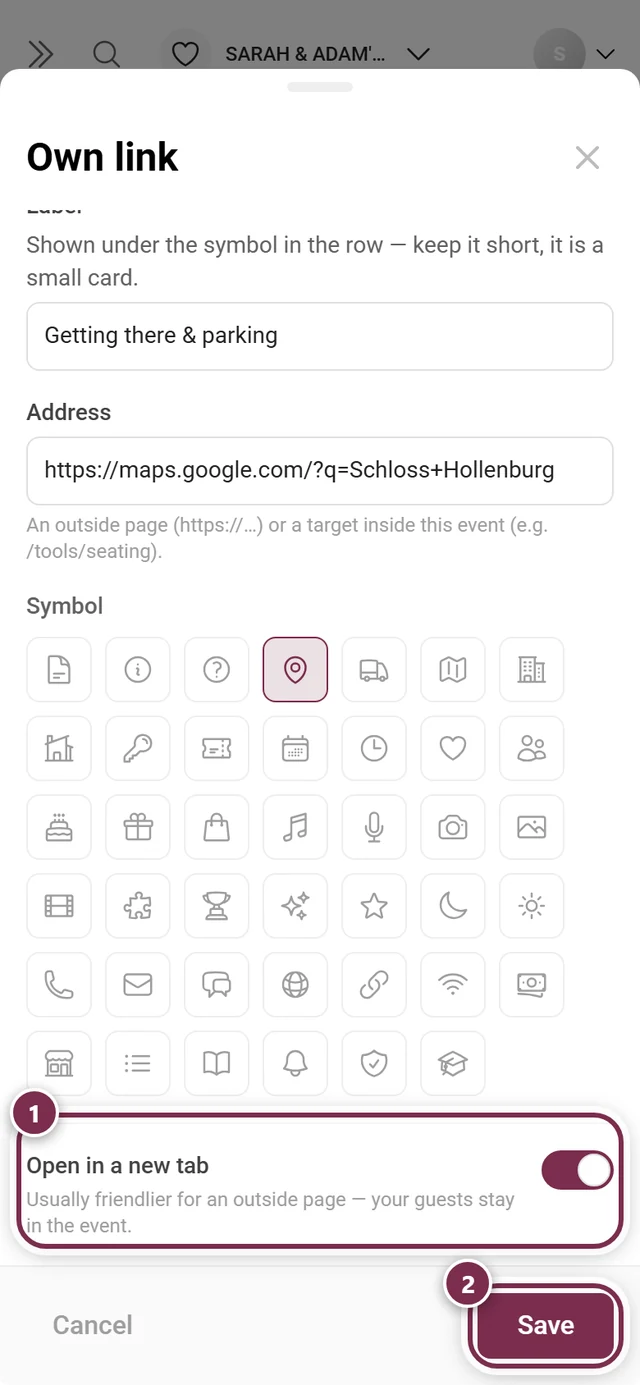
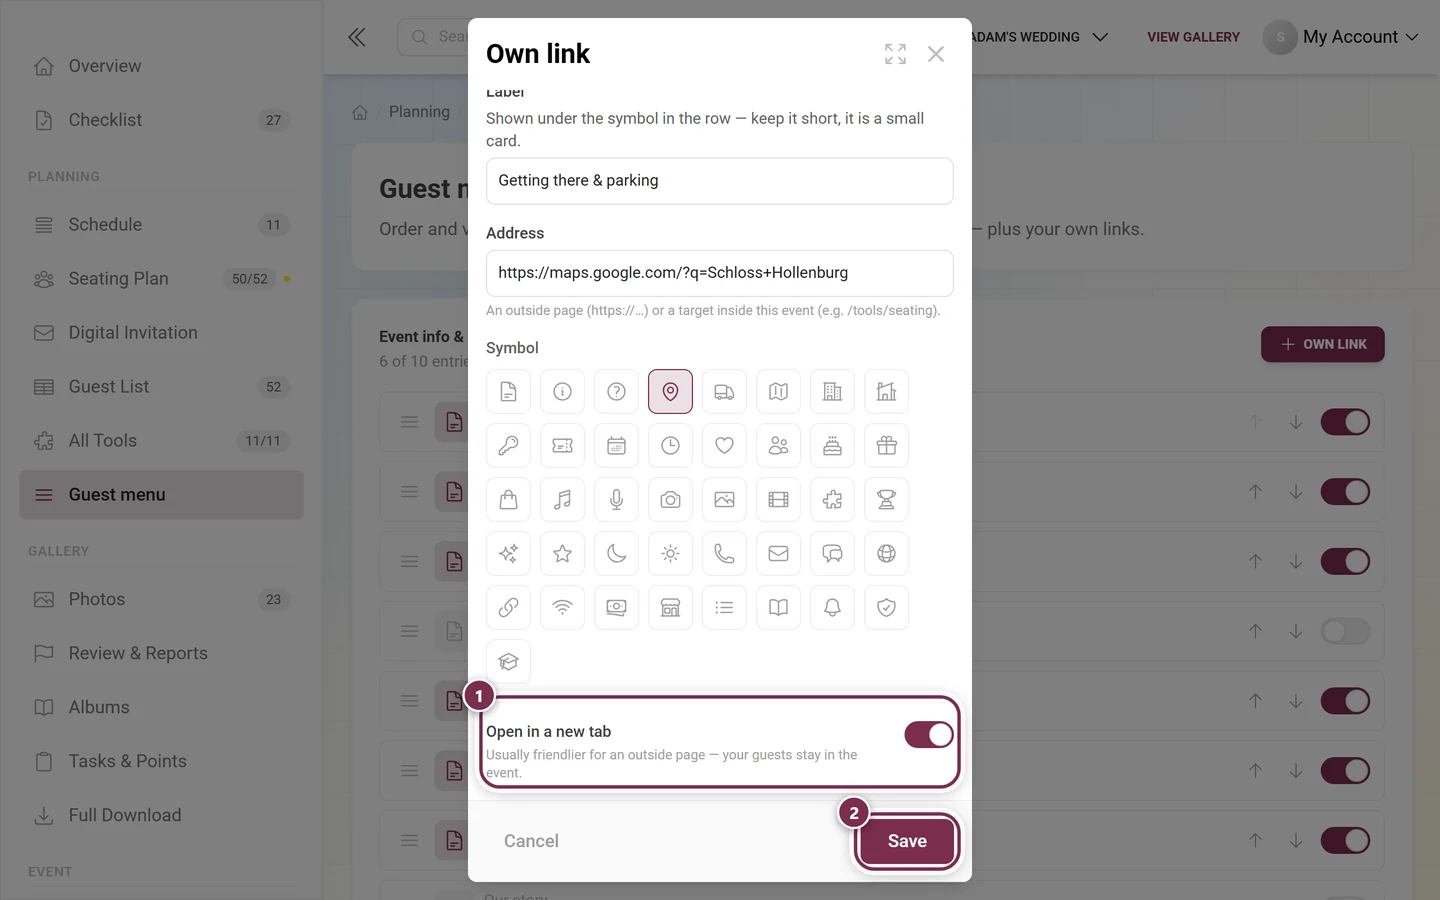
Pick a Symbol – 41 icons are on offer, the active one is outlined. Without a choice of your own the card gets the document symbol.
-
Save. As long as the label or the address is missing, the button stays faded and cannot be pressed.
A new link lands at the end of the bar; from there you move it into place.
What sits below the list
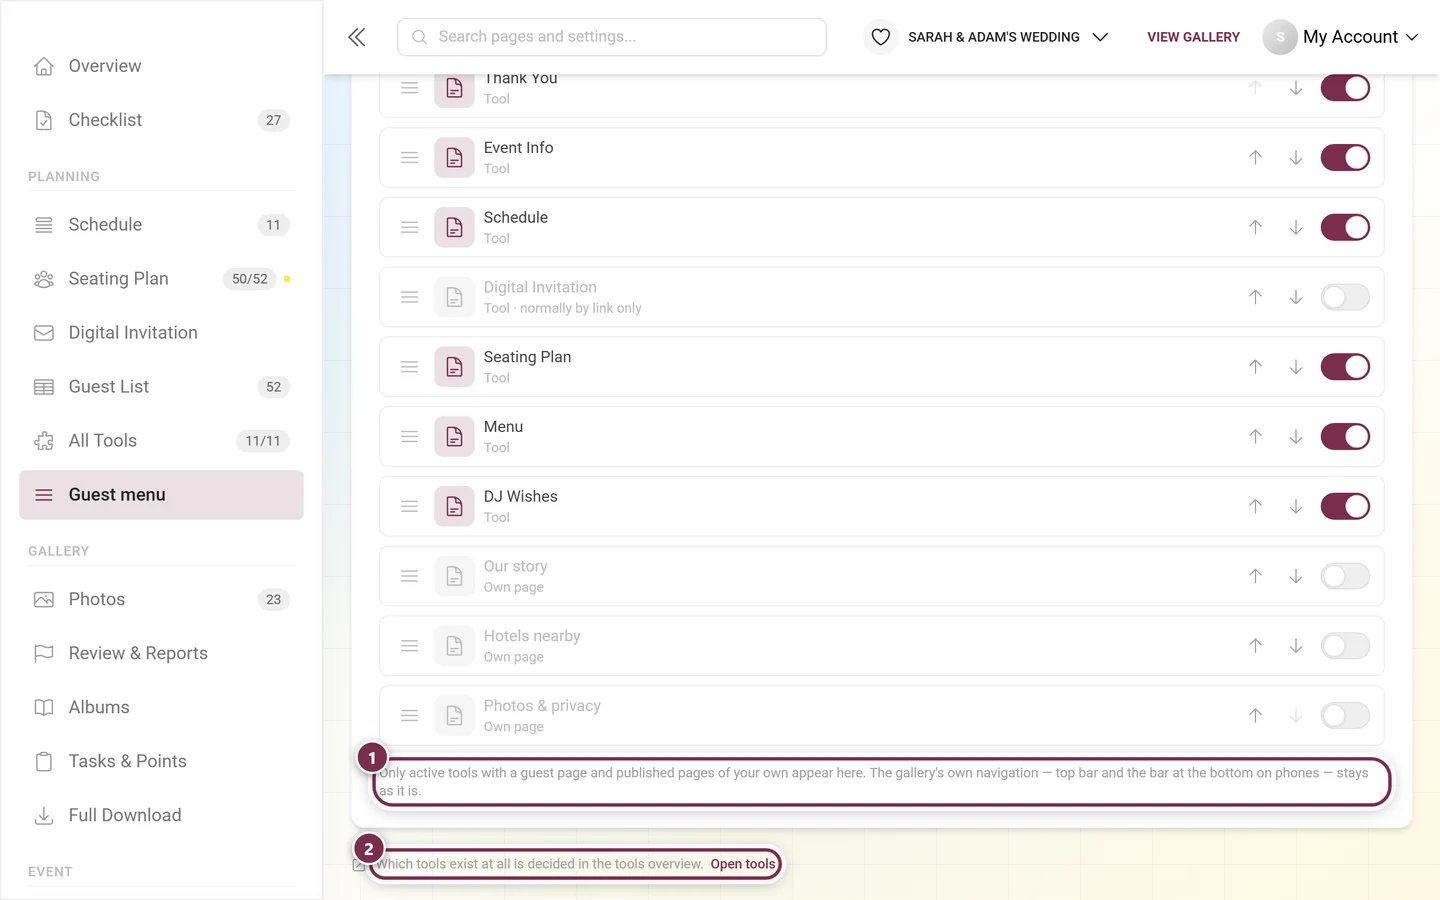
Section titled “What sits below the list”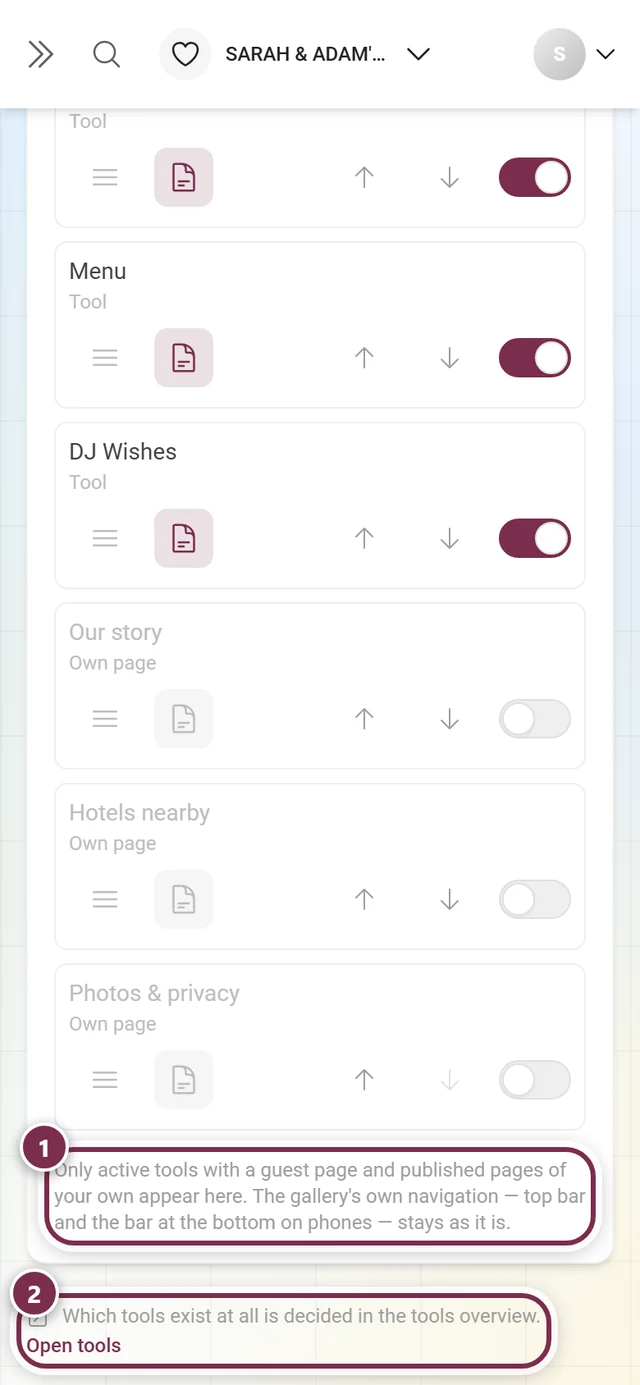
When the list is empty
Section titled “When the list is empty”If it says Nothing for the row yet, you have no active tool with a guest page and no published custom page. The Open tools button leads straight to the tooling overview. An own link can be added at any time regardless.
Related pages
Section titled “Related pages”- Tooling – Overview – which tools exist and how to switch them on
- Custom pages – the pages that show up here as cards
- Digital invitation – the “normally by link only” special case
- Event info & tools from the guest side – how the bar looks to your guests