Menu
The menu shows food and drinks at a glance – including dietary notes. Your guests see what’s coming, you save yourself the questions, and your caterer ends up with a clean order list.
Structure: courses and dishes
Section titled “Structure: courses and dishes”The menu has two levels: you create courses (starter, main course, dessert, drinks), and each course holds the individual dishes.
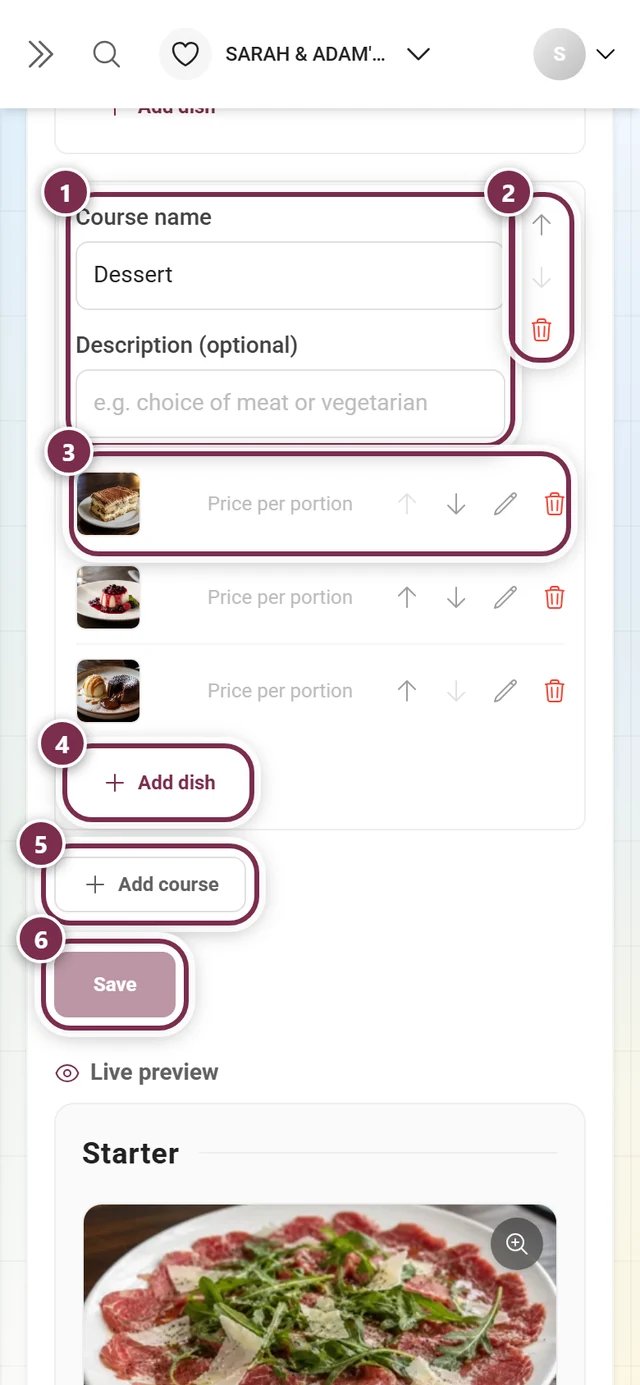
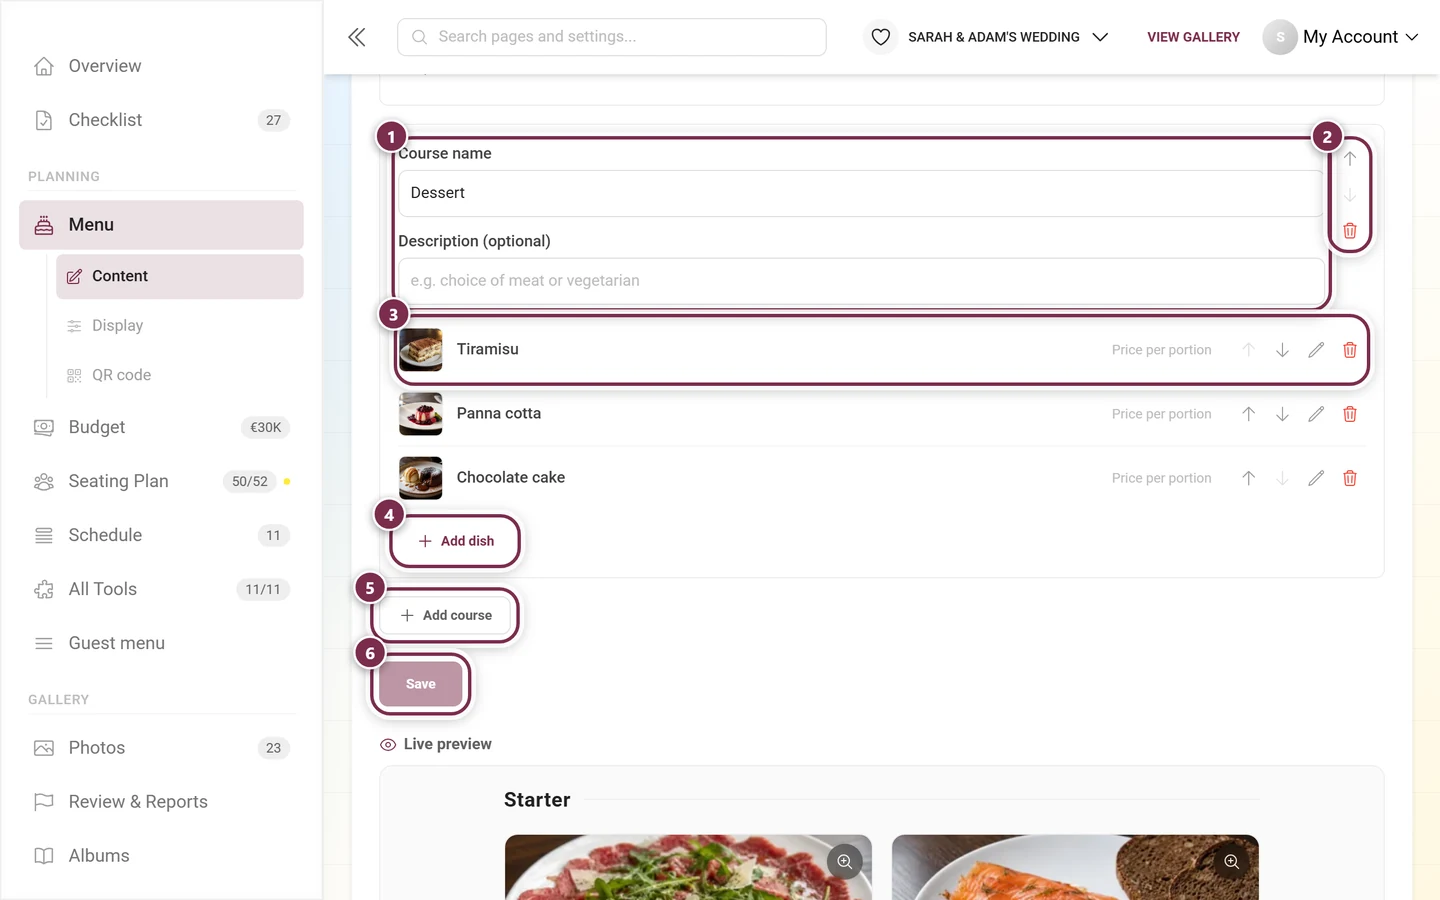
-
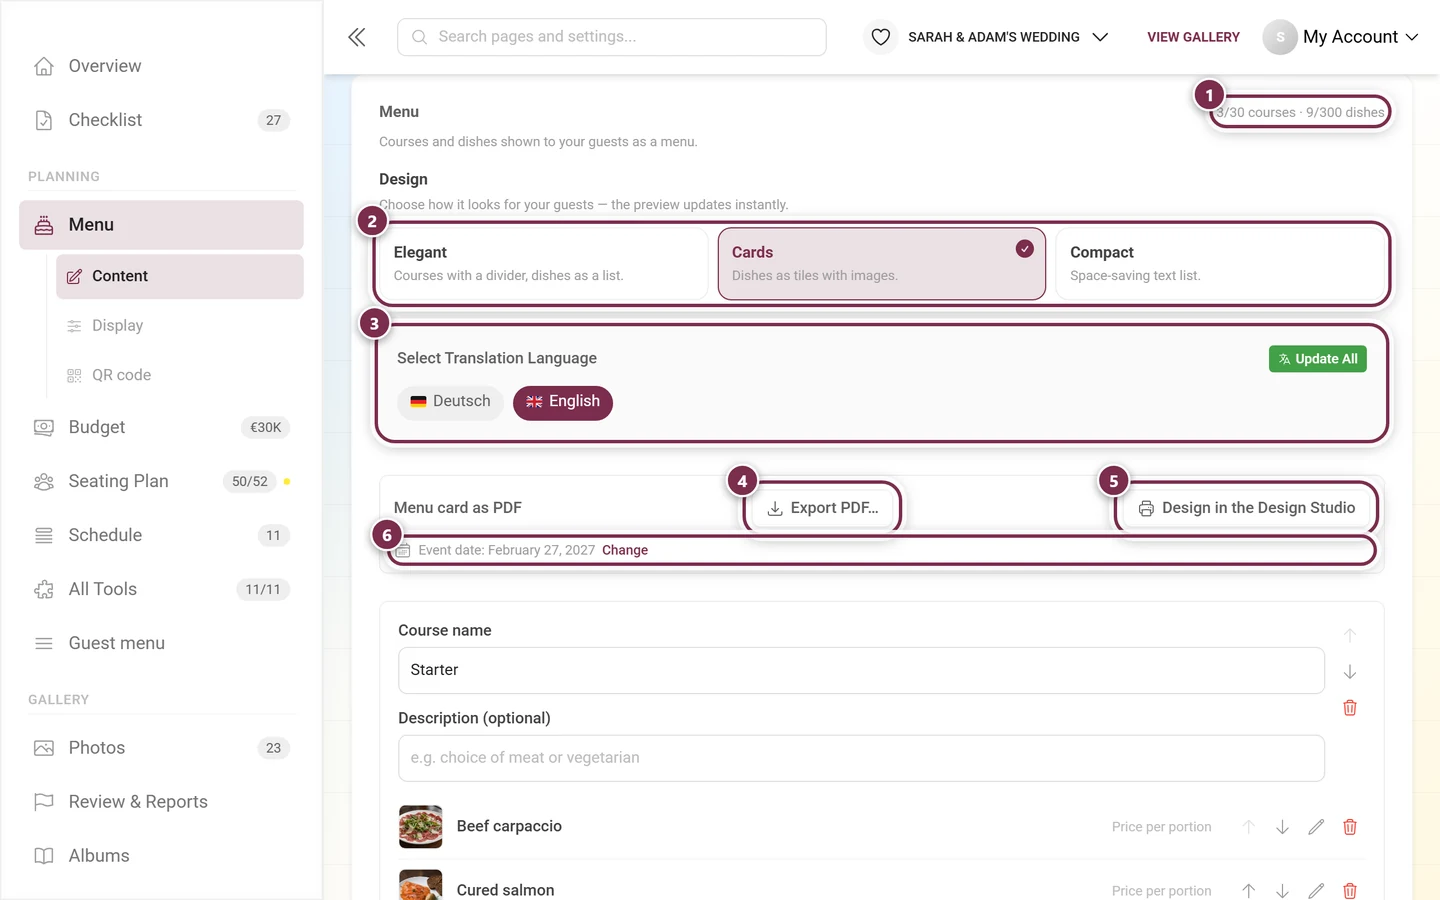
Add course creates a new section. It has a Course name and an optional Description (optional) – for example choice of meat or vegetarian.
-
Add dish opens the dish dialog inside that course (see below).
-
The arrows on the right move courses and dishes up and down individually. Your guests see exactly this order.
-
Price per portion on the right of each dish row is for you only – your guests never see a price. The value feeds the budget: positions with the per menu selection driver use the price of the dish a guest picked, and the course average for everyone who has not picked yet. Leave the field empty and the budget reports The menu is missing prices.
-
Save applies everything.
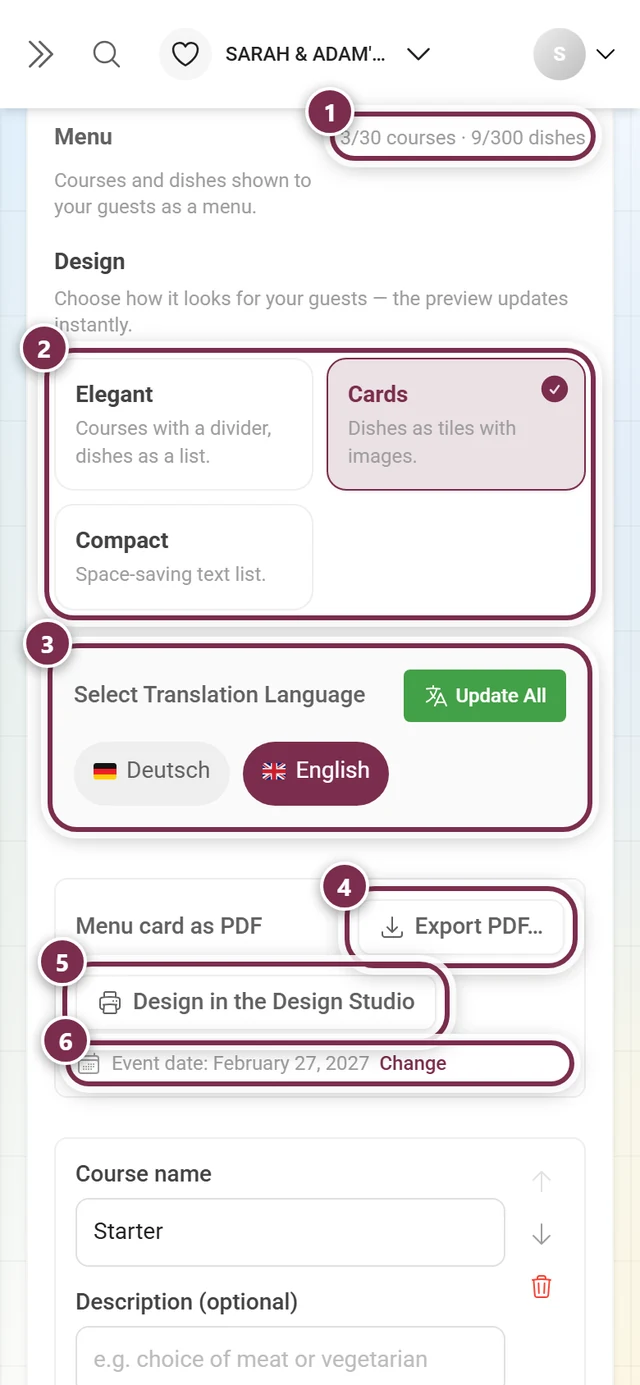
The Content tab keeps a running count in the top right – 3/30 courses · 9/300 dishes in the example on this page. The ceilings are 30 courses and 300 dishes; once they are reached, the add buttons stop responding.
Creating a dish
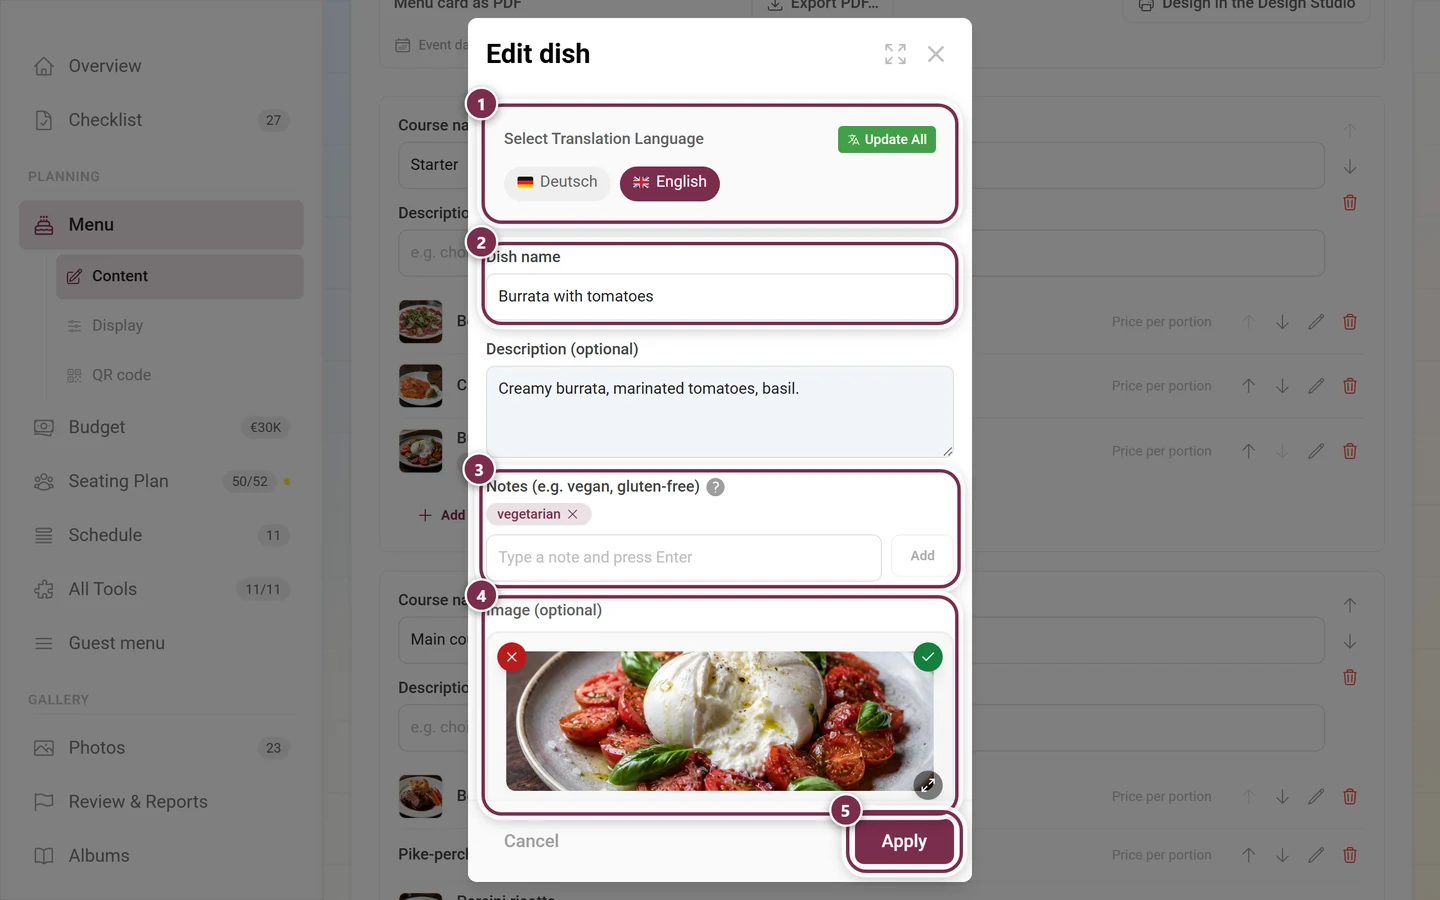
Section titled “Creating a dish”The Add dish dialog (or Edit dish for an existing one) has four fields:
- Dish name – the only required field, e.g. Beef fillet with rosemary potatoes.
- Description (optional) – a sentence or two about the dish.
- Notes (e.g. vegan, gluten-free) – short dietary and allergy notes as chips. Type the note and confirm it with Enter, a comma or the Add button. Typical chips are vegan, vegetarian, gluten-free, lactose-free or spicy. Up to 20 notes per dish; duplicates are not added twice.
- Image (optional) – a photo of the dish. Clicking the field opens the file picker; dragging a file onto it works too. Landscape and a well-lit, appetizing shot work best. Once an image sits there, the red ✕ in the top left removes it and the arrow in the bottom right shows it full size.
Apply puts the dish into the course. It is only stored once you press the editor’s Save button.
Design for your guests
Section titled “Design for your guests”In the Content tab, Design decides how the menu looks for your guests. The Live preview right under the editor shows the effect immediately – Desktop and Mobile switch between the computer and the phone view:
- Elegant – courses with a divider, dishes as a list. This is the default.
- Cards – dishes as tiles with images.
- Compact – a space-saving text list.
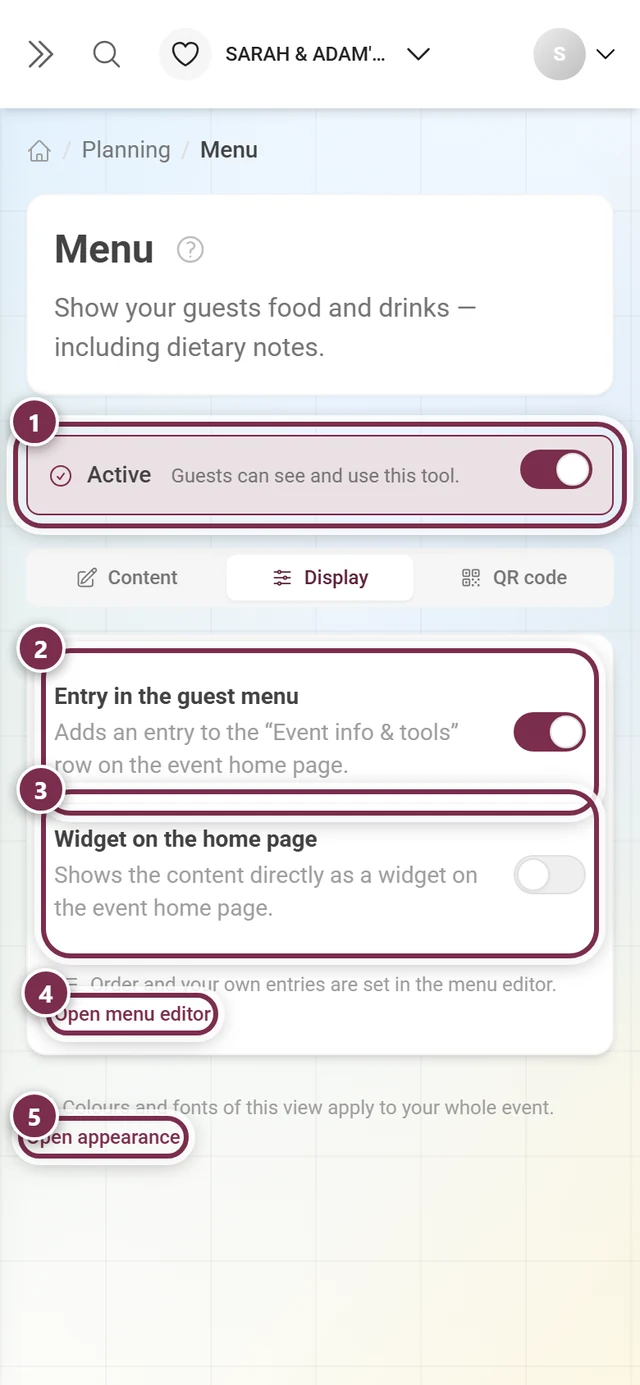
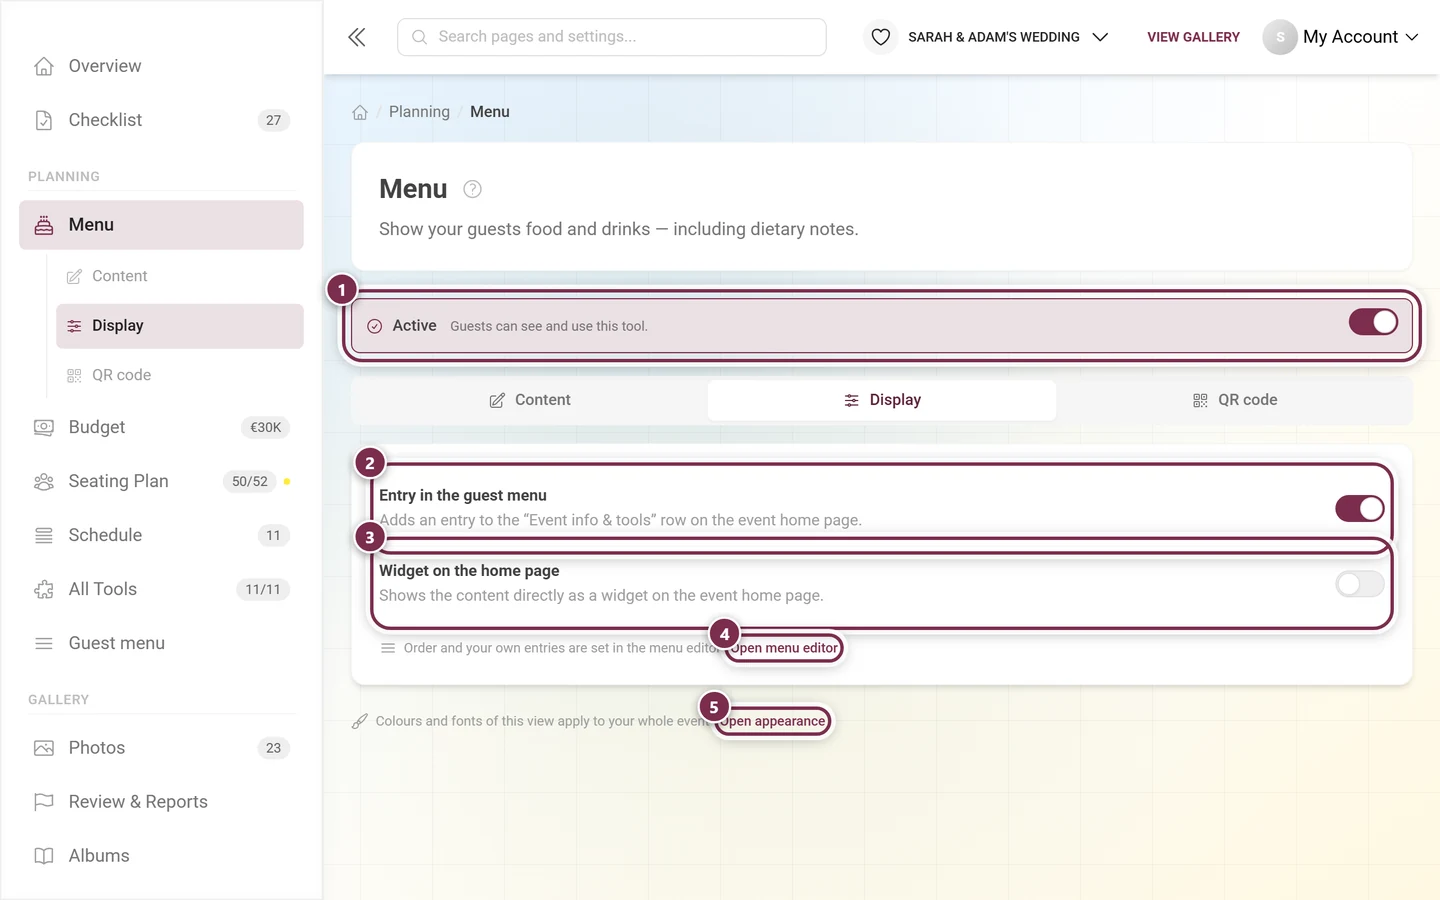
The Display tab decides where the menu shows up: Widget on the home page (the widget links to the full page via See the full menu) and Entry in the guest menu. Once Widget on the home page is on, the Widget style appears below it.
What your guests see
Section titled “What your guests see”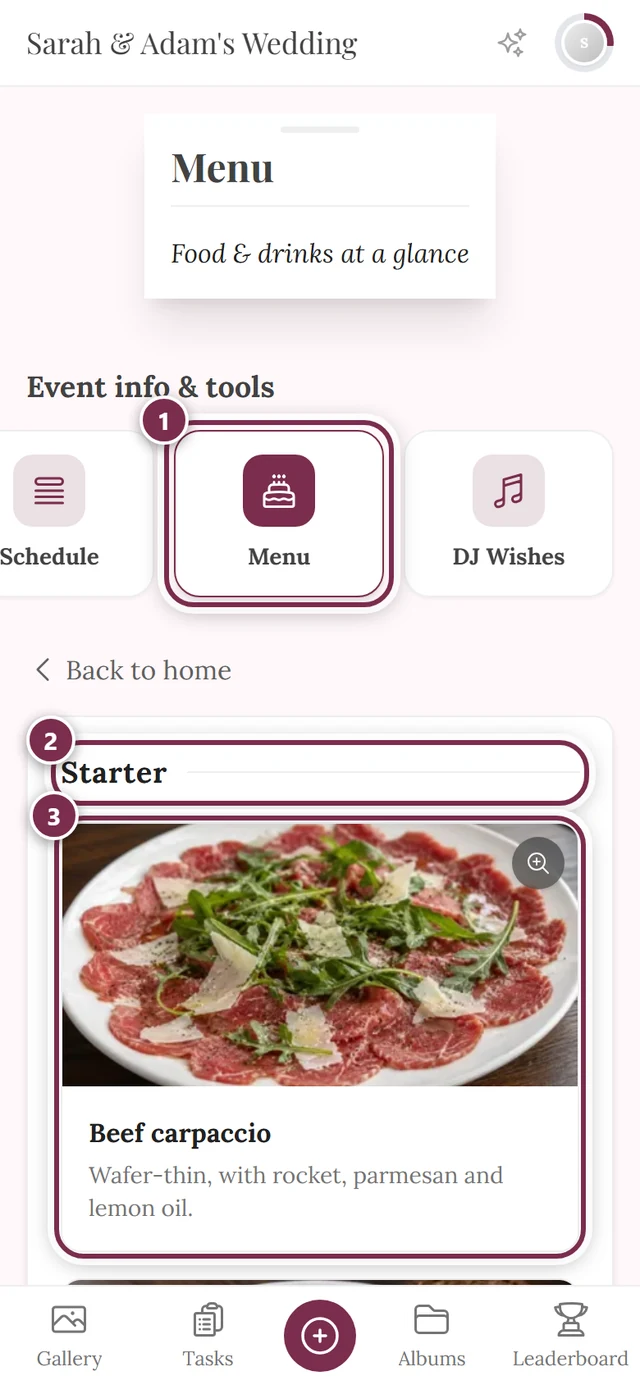
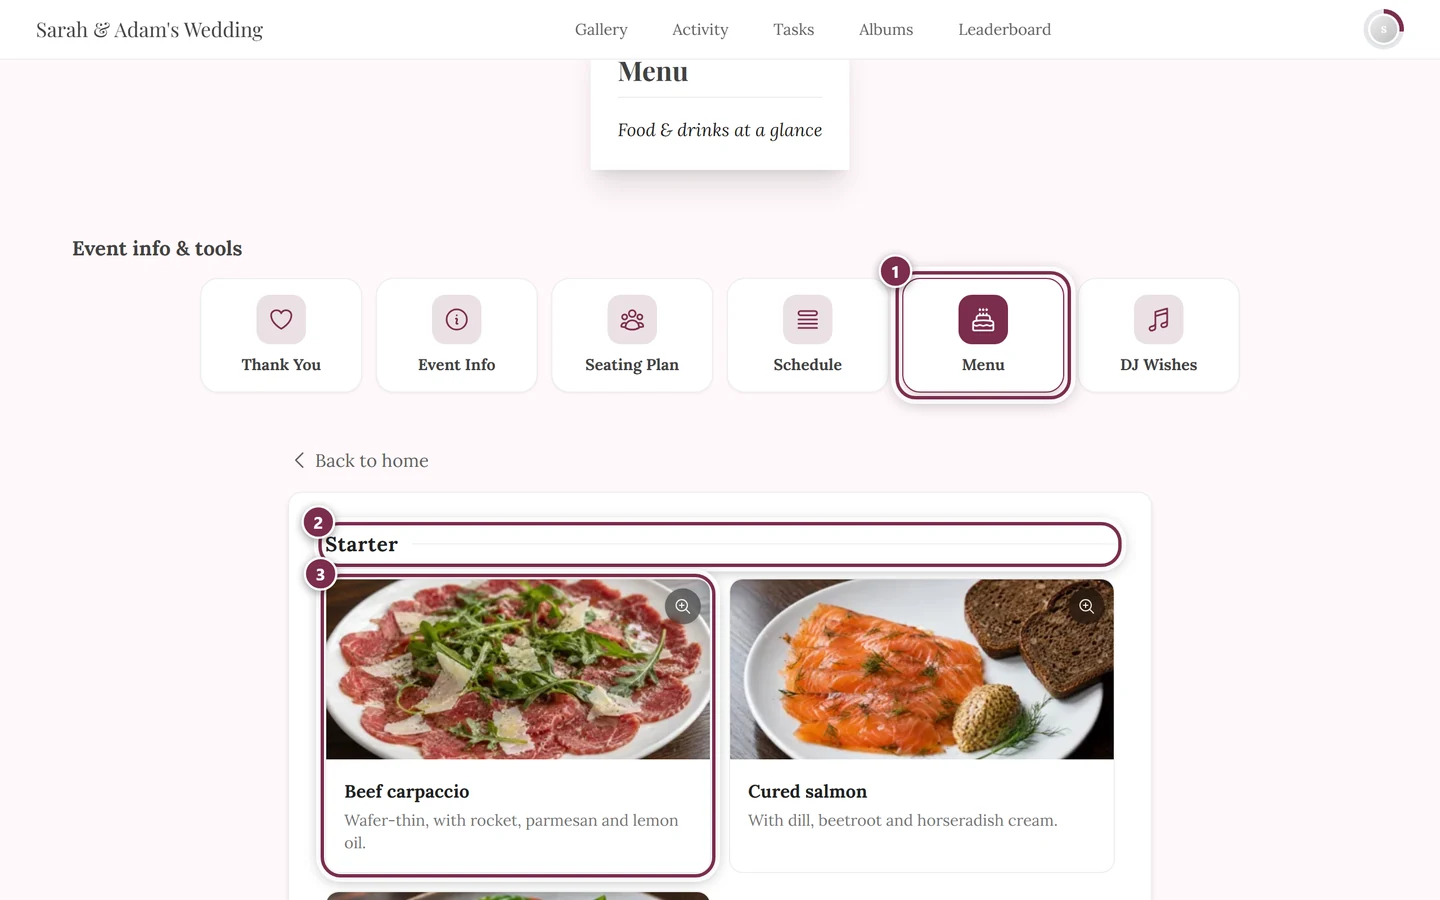
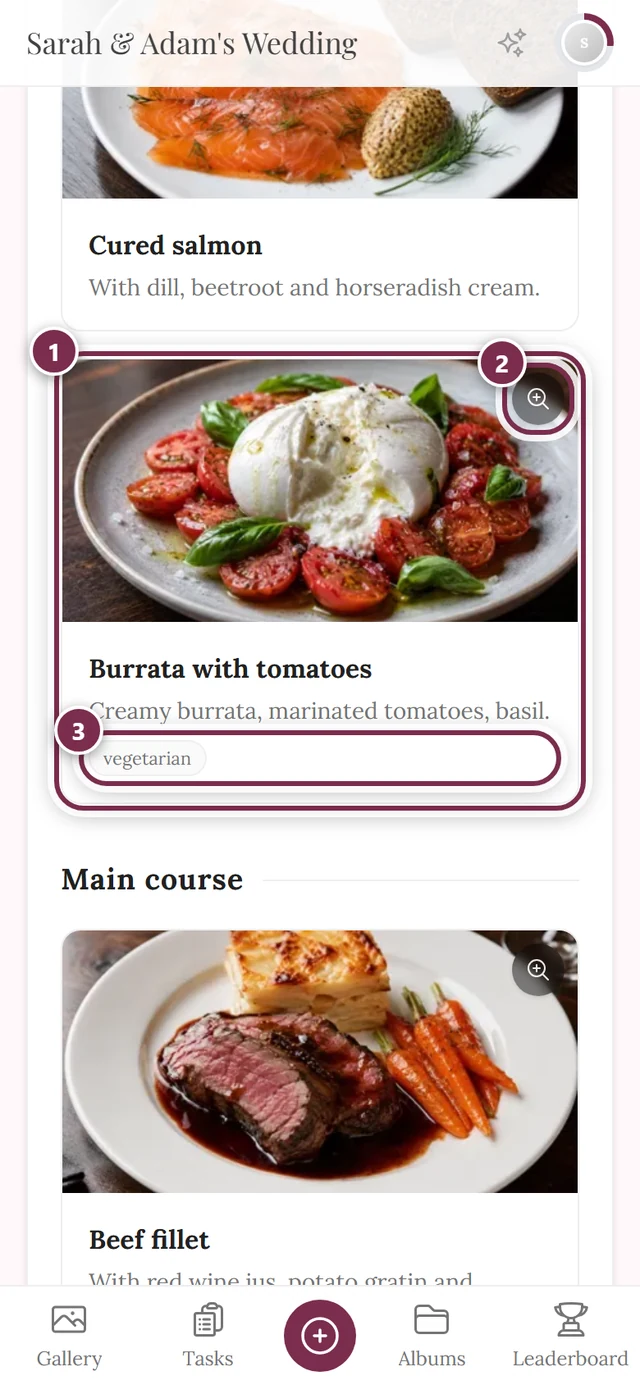
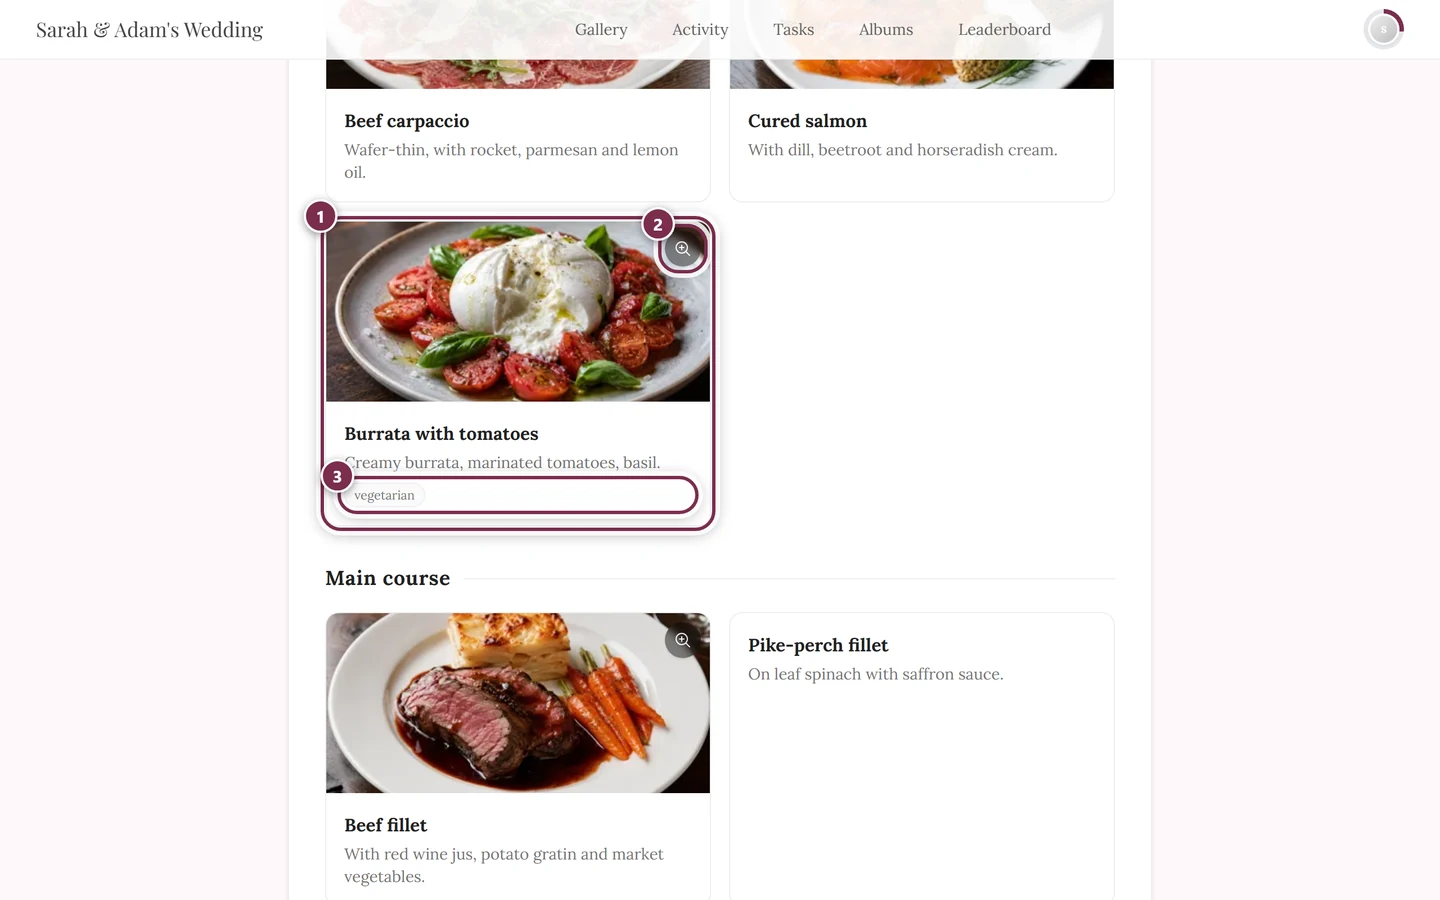
A QR code for the menu
Section titled “A QR code for the menu”The third tab, QR code, provides the direct link for guests: whoever scans the code lands on the menu page right away, without signing in – handy for a small stand on the table.
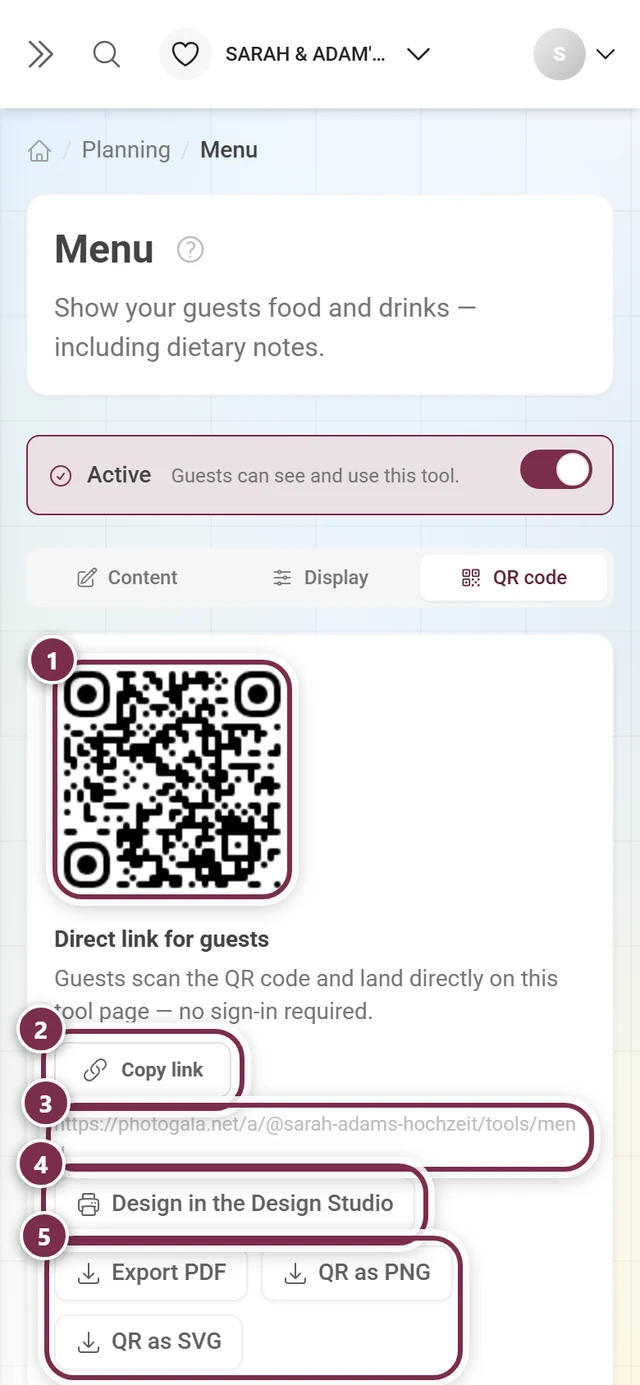
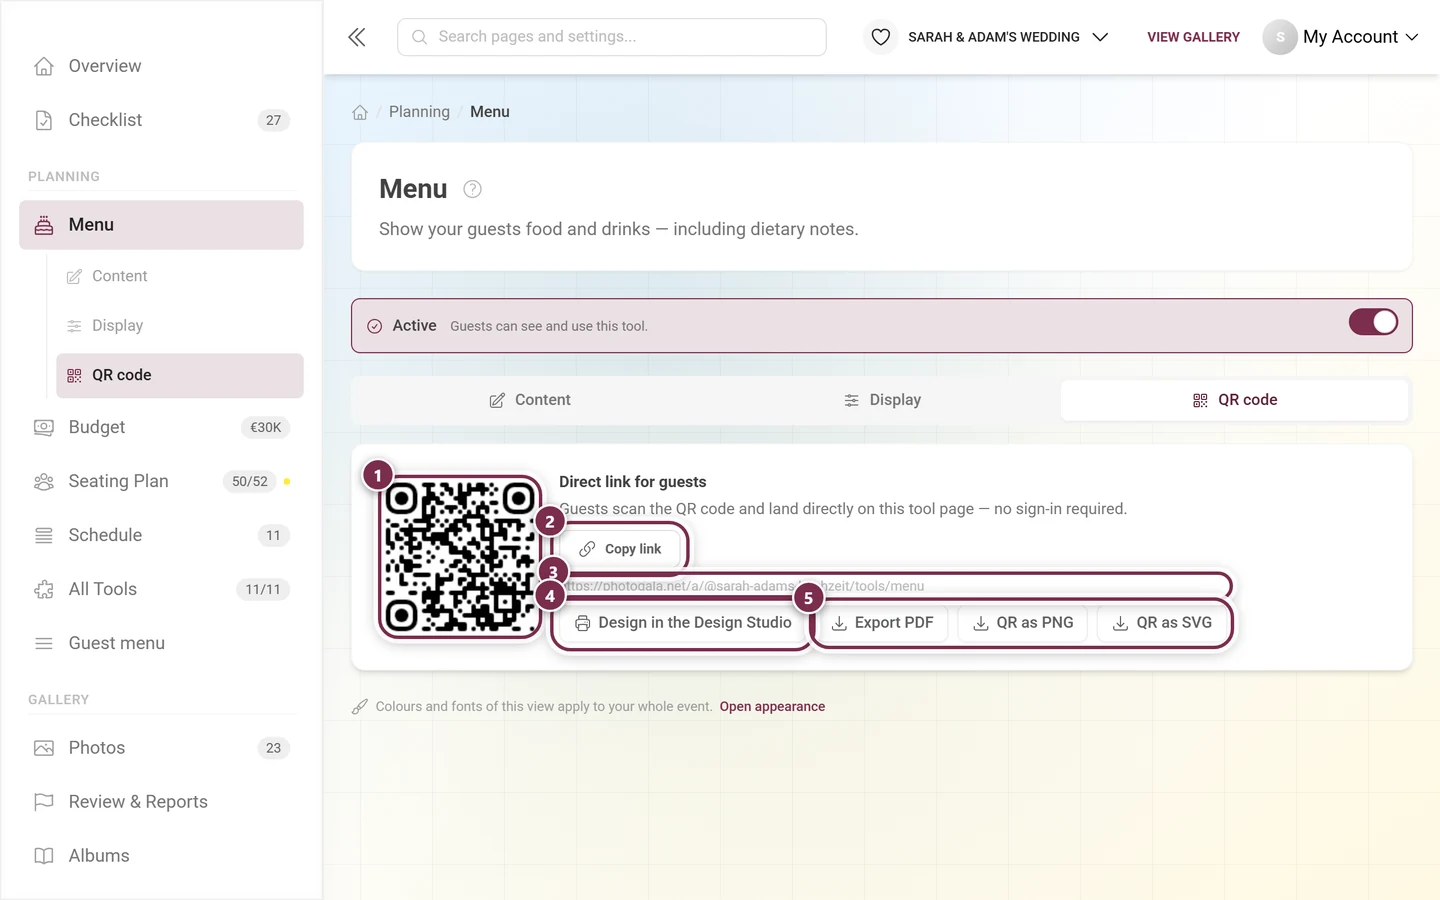
- Copy link puts the address on the clipboard.
- Design in the Design Studio opens a poster carrying the code as a freely editable template.
- Export PDF downloads a ready-made scan-me poster. Do not confuse it with the menu card as PDF in the next section – that one prints the dishes, this poster only the code.
- QR as PNG and QR as SVG save the code itself, for instance to place it in your own printed material.
Menu card as PDF
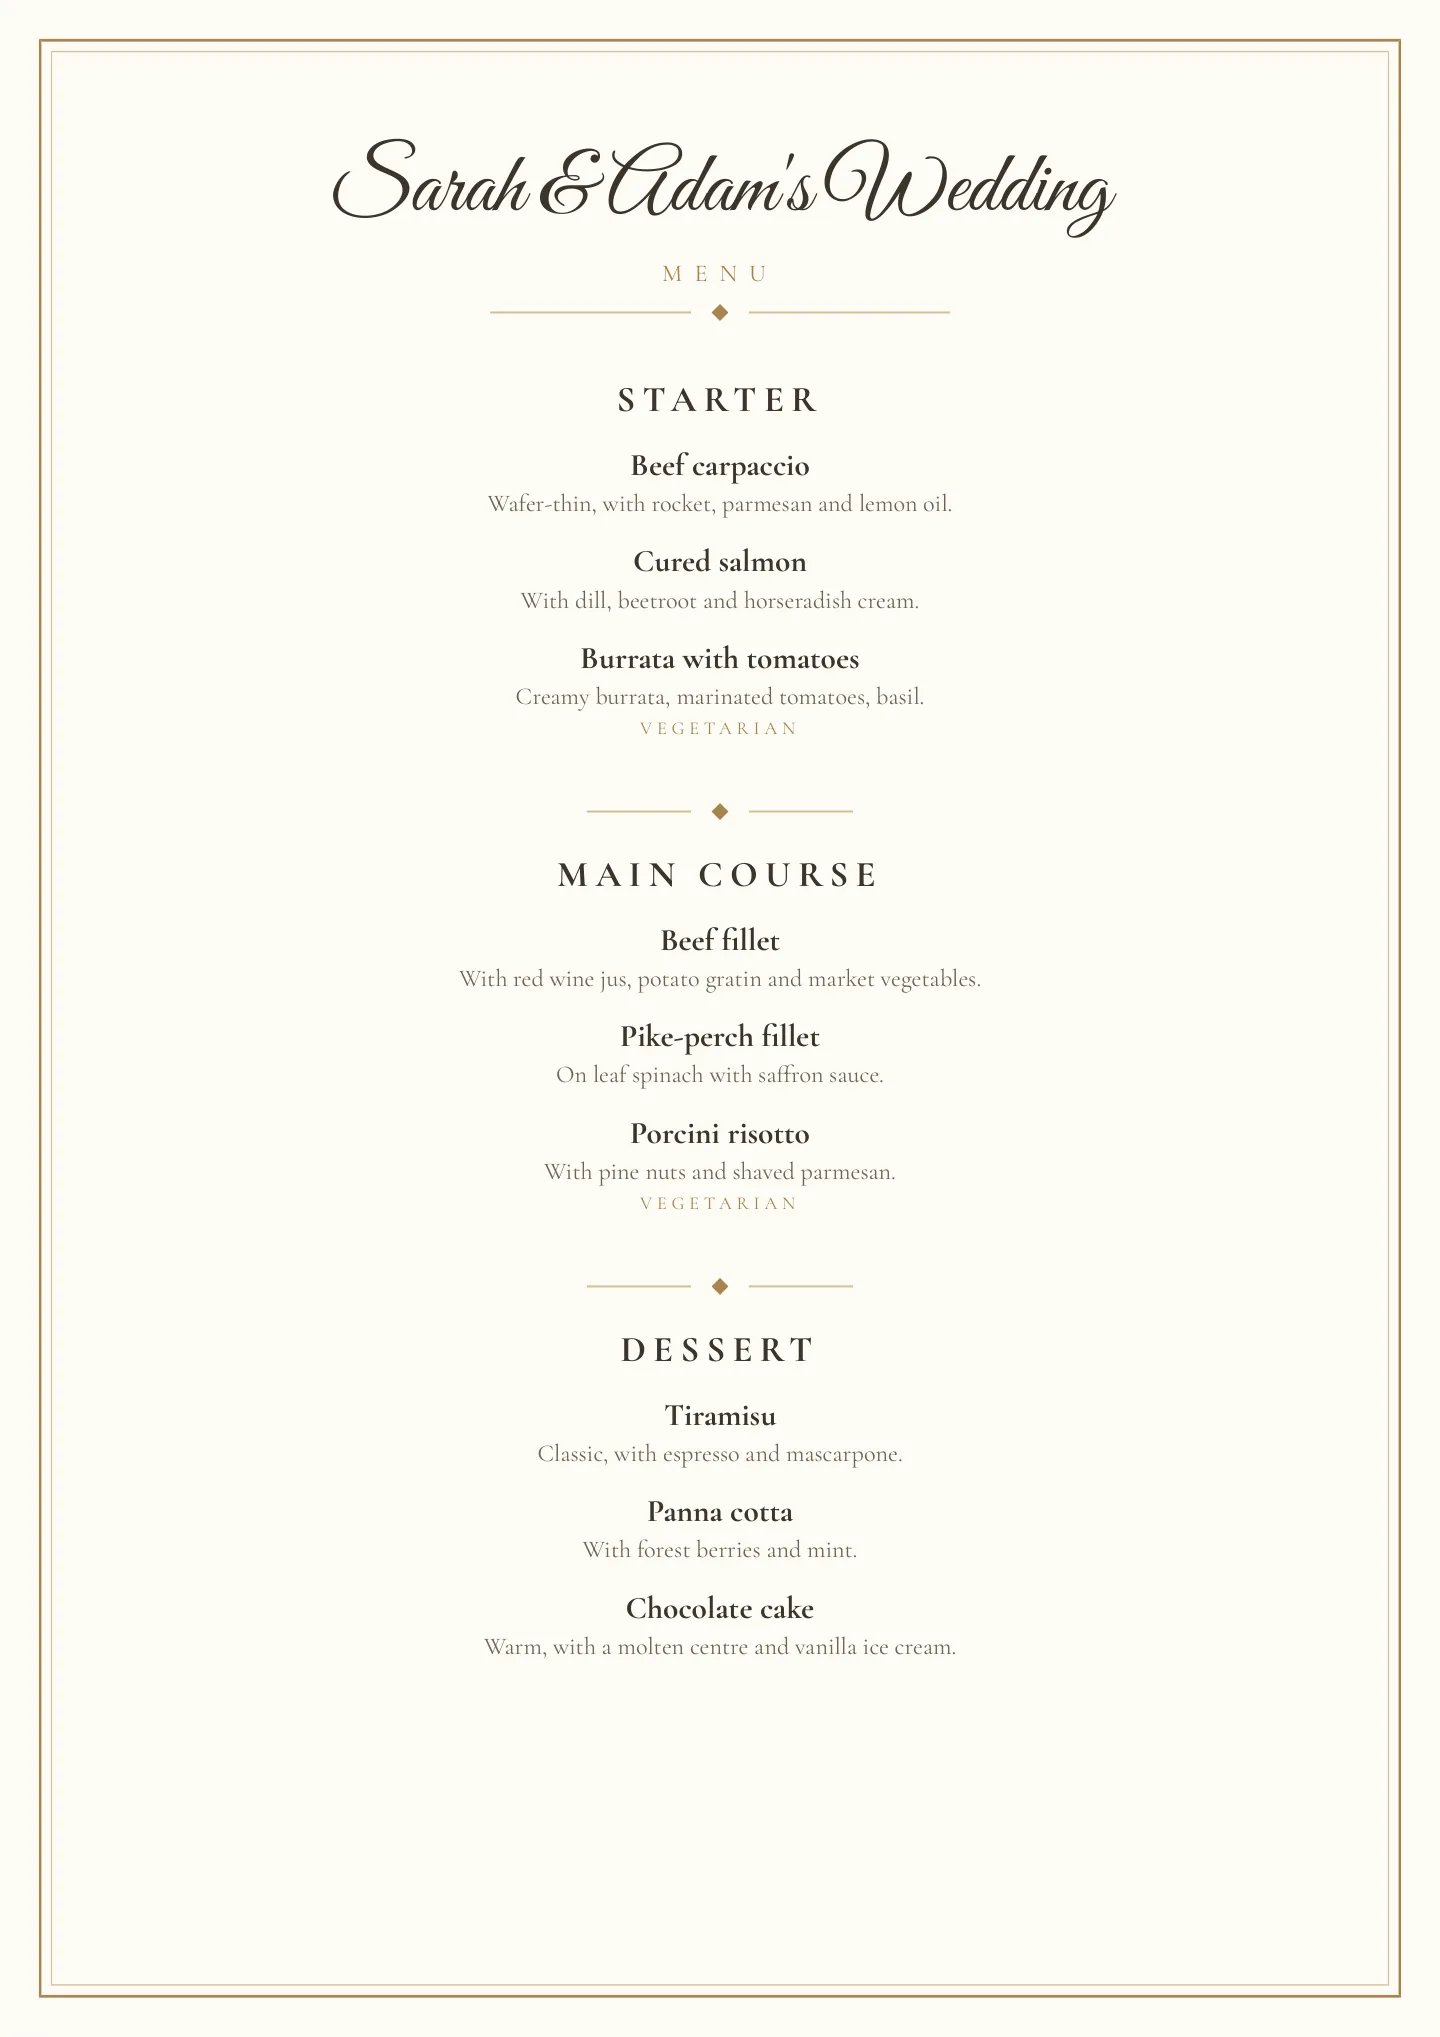
Section titled “Menu card as PDF”The menu isn’t only digital. In the Menu card as PDF section, Export PDF… opens the Export menu card as PDF dialog – with a live preview of the finished card next to the settings.
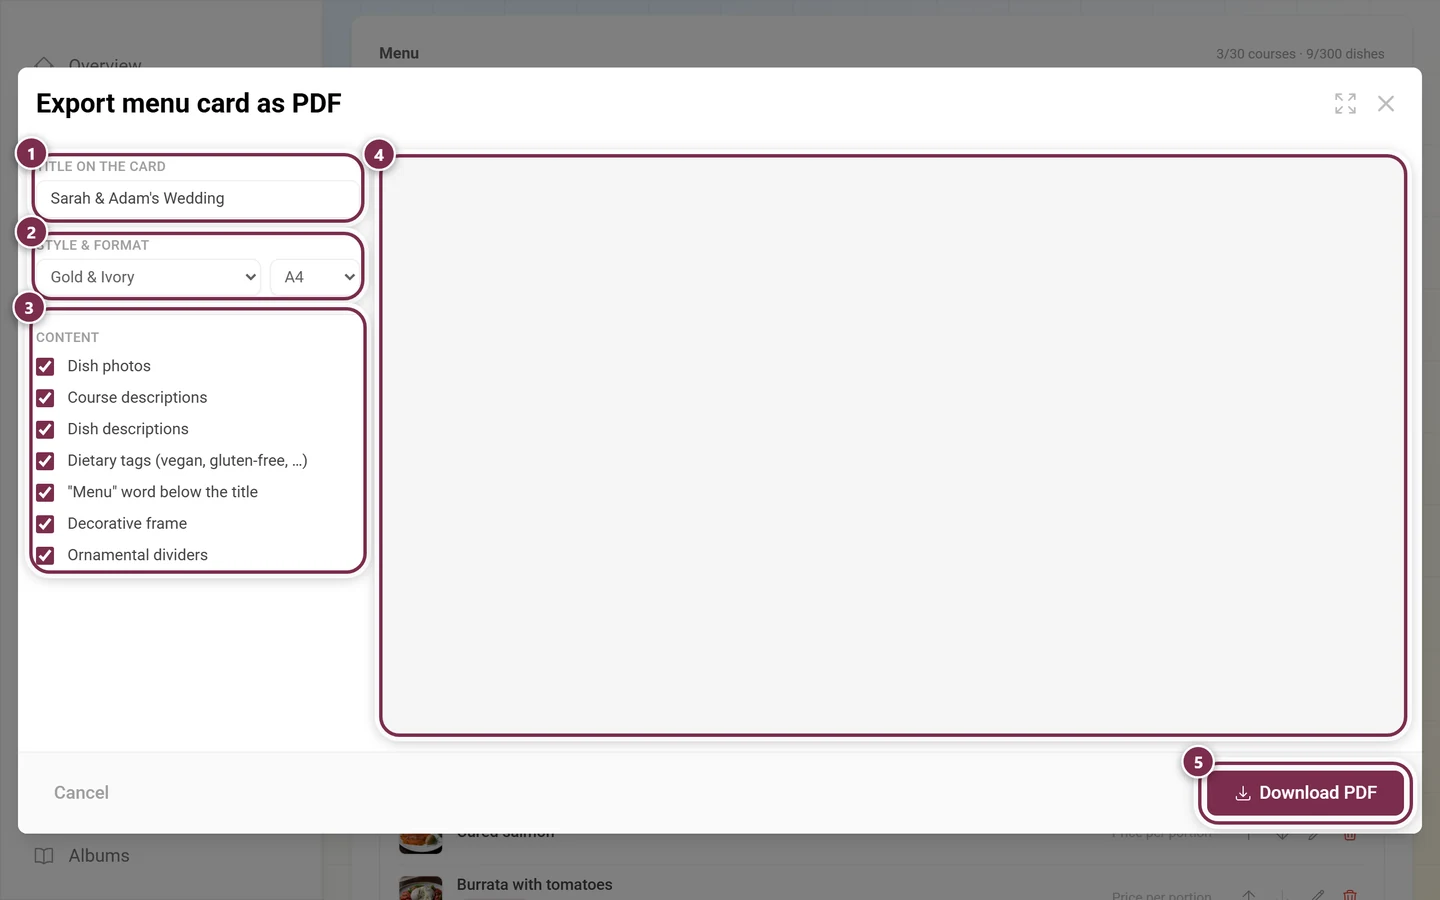
Title on the card is prefilled with the event name and can be overwritten freely.
Style & format offers four styles:
- Gold & Ivory – ivory paper with antique gold and a script title. The default.
- Classic Black & White – timeless, clean typography without color.
- Romantic Blush – soft blush with playful script course names.
- Midnight Blue – deep blue with gold ink, an evening gala look.
Next to it you pick the Paper size: A4 or A5.
Under Content you switch on individually what gets printed:
- Dish photos
- Course descriptions
- Dish descriptions
- Dietary tags (vegan, gluten-free, …)
- “Menu” word below the title
- Decorative frame
- Ornamental dividers
Download PDF saves the finished file.
Designing it in the Design Studio
Section titled “Designing it in the Design Studio”If the ready-made styles aren’t enough, Design in the Design Studio opens the menu card as a freely editable template – in A5 by default. There you set the background, fonts, images and QR codes yourself; everything else is on the Design Studio page.
The special part: your real menu can be inserted as a text block. In the panel for adding elements, Insert content offers three granularities:
- The whole menu – every course with its dishes in one block. If the text doesn’t fit on one page, it flows onto further pages automatically.
- Per course – one block per course, freely placeable.
- Per dish – one block per dish, for layouts where every dish gets its own spot.
If dishes carry photos, an insert for the dish images appears as well and places the existing photos as image blocks.
The menu card also prints the event date. If none is set yet, the editor says so right next to the export buttons and links into the event settings.
A personal menu for guests
Section titled “A personal menu for guests”If a guest’s session is linked to an entry in the guest list – via a personalized link or a scanned place card – and that guest has a menu selection on file, the menu page shows only their dishes.
- A banner says so: You are seeing your personal menu.
- Show all dishes takes the guest back to the full card at any time, Show only my menu switches back.
- Courses without a selection (a buffet course, say) stay complete.
More on this in Why do I only see my own menu?.
Working together with RSVP, guest list and seating
Section titled “Working together with RSVP, guest list and seating”The menu is the source for everything food-related:
- RSVP: switch on Ask for menu choices there and the reply form pulls the courses straight from this tool. Every companion picks their own dish.
- Guest list: the choice lands per guest in the Menu column and can be filled in by hand there too.
- Seating export: the Service plan (waiting staff) prints per table who ordered what, plus Kitchen totals (all guests).
Troubleshooting
Section titled “Troubleshooting”- There’s nothing to choose in RSVP. The menu tool has no course with dishes yet, or the menu wasn’t saved. Create courses and dishes, save, then check again.
- My changes are gone. The editor does not autosave. Unsaved work is flagged with Unsaved changes next to the Save button.
- Export PDF… can’t be clicked. No course has been created yet.
- The Dish photos switch is gray. Not a single dish has an image. Add at least one in the dish dialog.
- The Design Studio still shows the old menu text. Click Update all at the top; inserted blocks do not follow changes on their own.
- A guest only sees one dish per course. That’s the personal menu. Show all dishes brings back the full card.
- The menu doesn’t show up for guests. Check the Active switch at the very top and, in the Display tab, the Widget on the home page and Entry in the guest menu switches.
Related pages
Section titled “Related pages”- For guests: Tools at the event · Why do I only see my own menu?
- For hosts: RSVP · Guest List · Seating Export · Design Studio · Tooling – Overview