Schedule
The schedule shows how your event unfolds – reception, dinner, speeches, first dance. Your guests stop asking what happens when, and you have the whole day in one view.
How the page is laid out
Section titled “How the page is laid out”You find the schedule in the sidebar under Planning › Schedule. The page has three tabs – Content, Display and QR code – and inside Content the blocks always come in this order, top to bottom:
- Schedule tabs with + Add schedule and the language bar
- Start date
- Design with the three looks
- Plan the schedule – templates, start time, Shift all times, Add item, Print
- Warnings about overlaps and gaps
- The items themselves, closed off at the bottom by the Total duration
- Live preview – what your guests get to see
At the very bottom sits the note Colors and fonts of this view apply to your whole event. with the link Open appearance. Fonts and colors are therefore not set here but once for the entire event under Settings › Appearance.
Several schedules
Section titled “Several schedules”An event can hold several schedules – one for the ceremony, one for the party, one for day two. A row of tabs above the editor holds one entry per schedule.
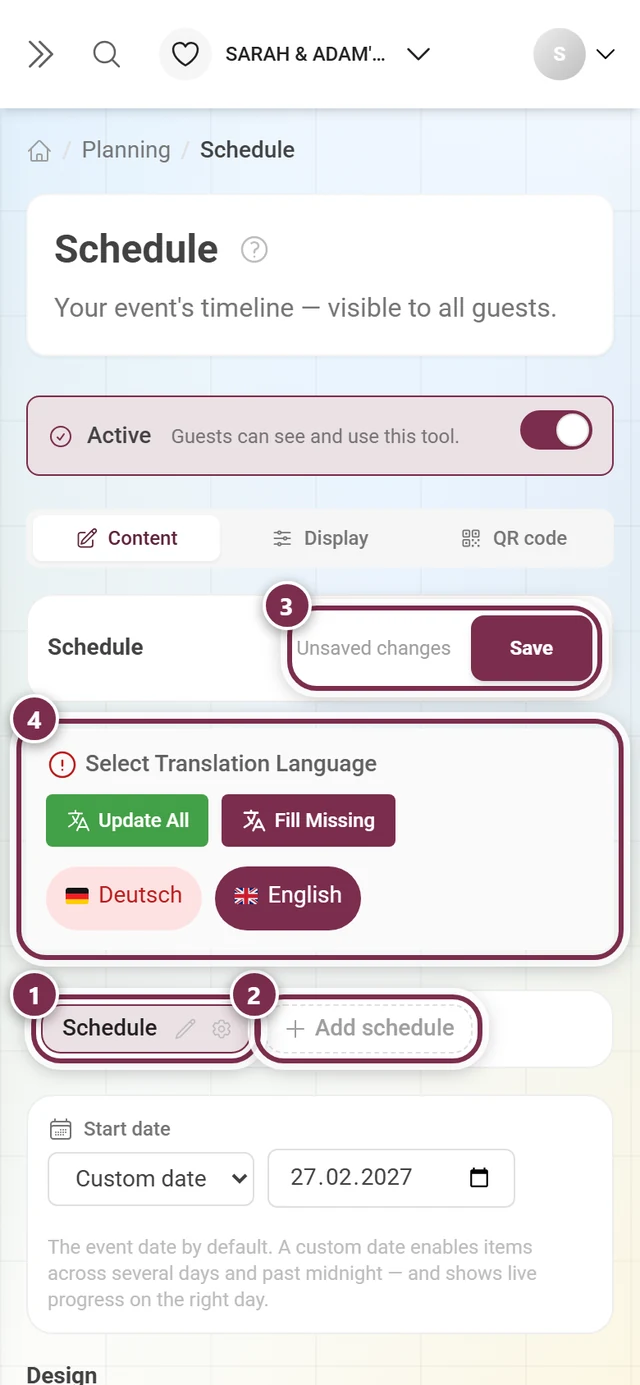
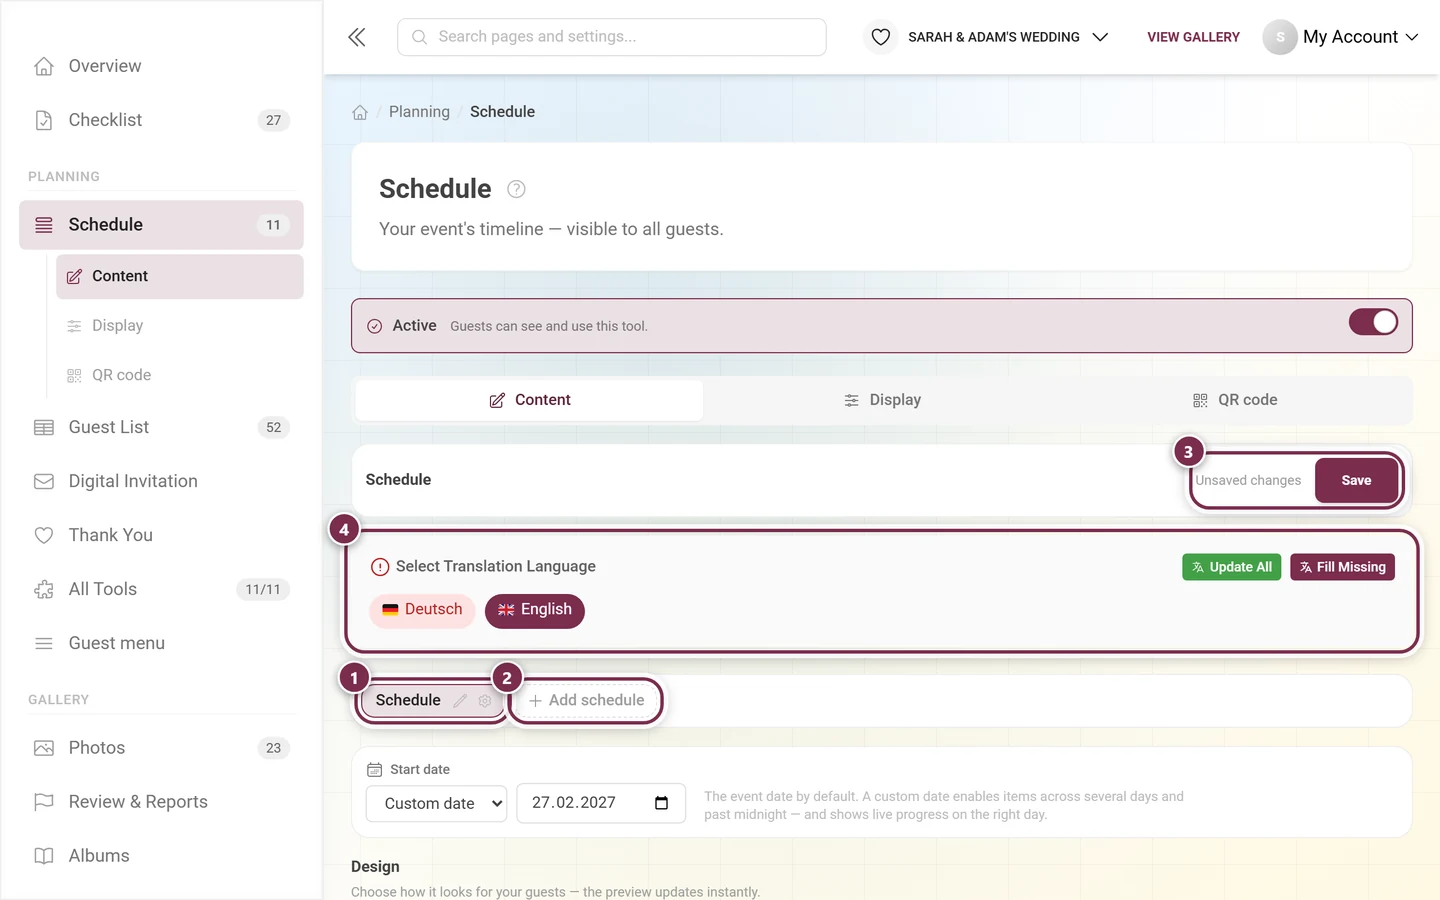
- Add schedule creates another one; the name can be typed in right away.
- The active tab gets a pencil to rename it (Rename schedule), a cog for the visibility settings and – as soon as there is more than one schedule – a bin for Delete schedule.
- Deleting asks first and states explicitly that all items of this schedule will be lost.
- More than 20 schedules are not possible; after that the button is gone.
Two small icons in a tab tell you the state of a schedule without opening it:
- a crossed-out eye when the schedule is hidden from guests – hovering it shows Hidden from guests
- a clock with a time when a time window is set – hovering it shows the full window, e.g. Time window 22:00–02:00
Visibility and time window
Section titled “Visibility and time window”The cog on the active tab opens a dialog named after the schedule – if the schedule is called Schedule, the heading reads Visibility: Schedule.
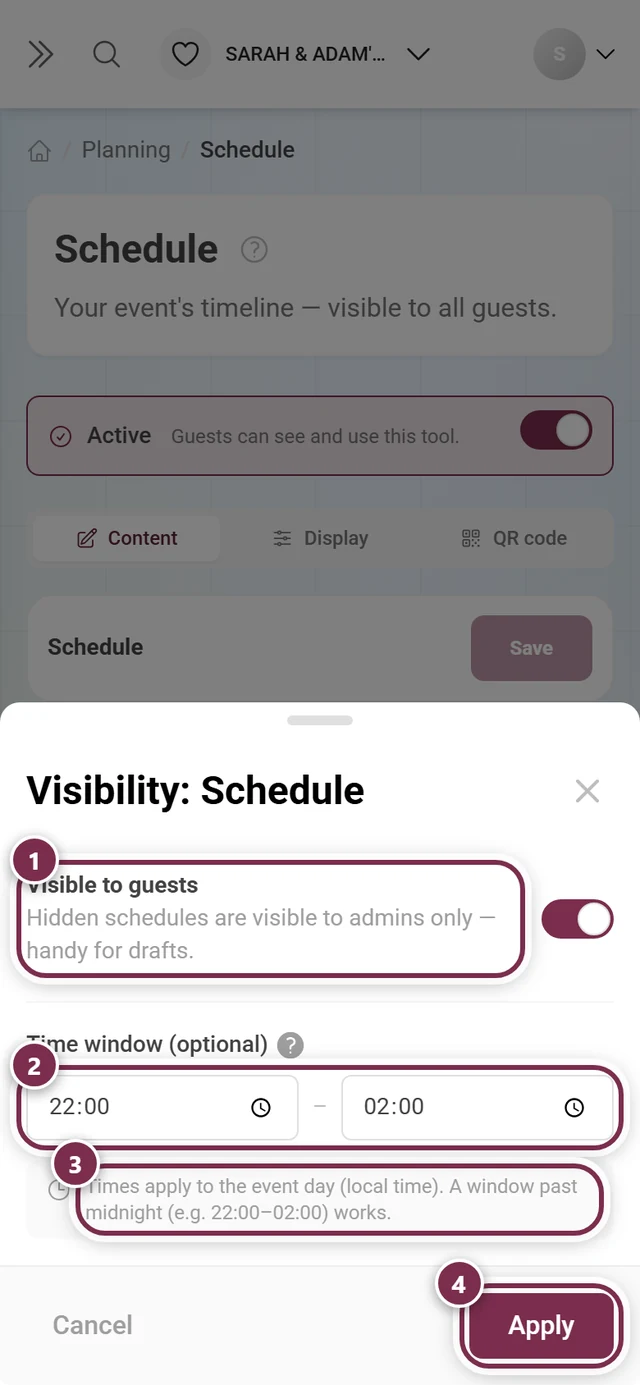
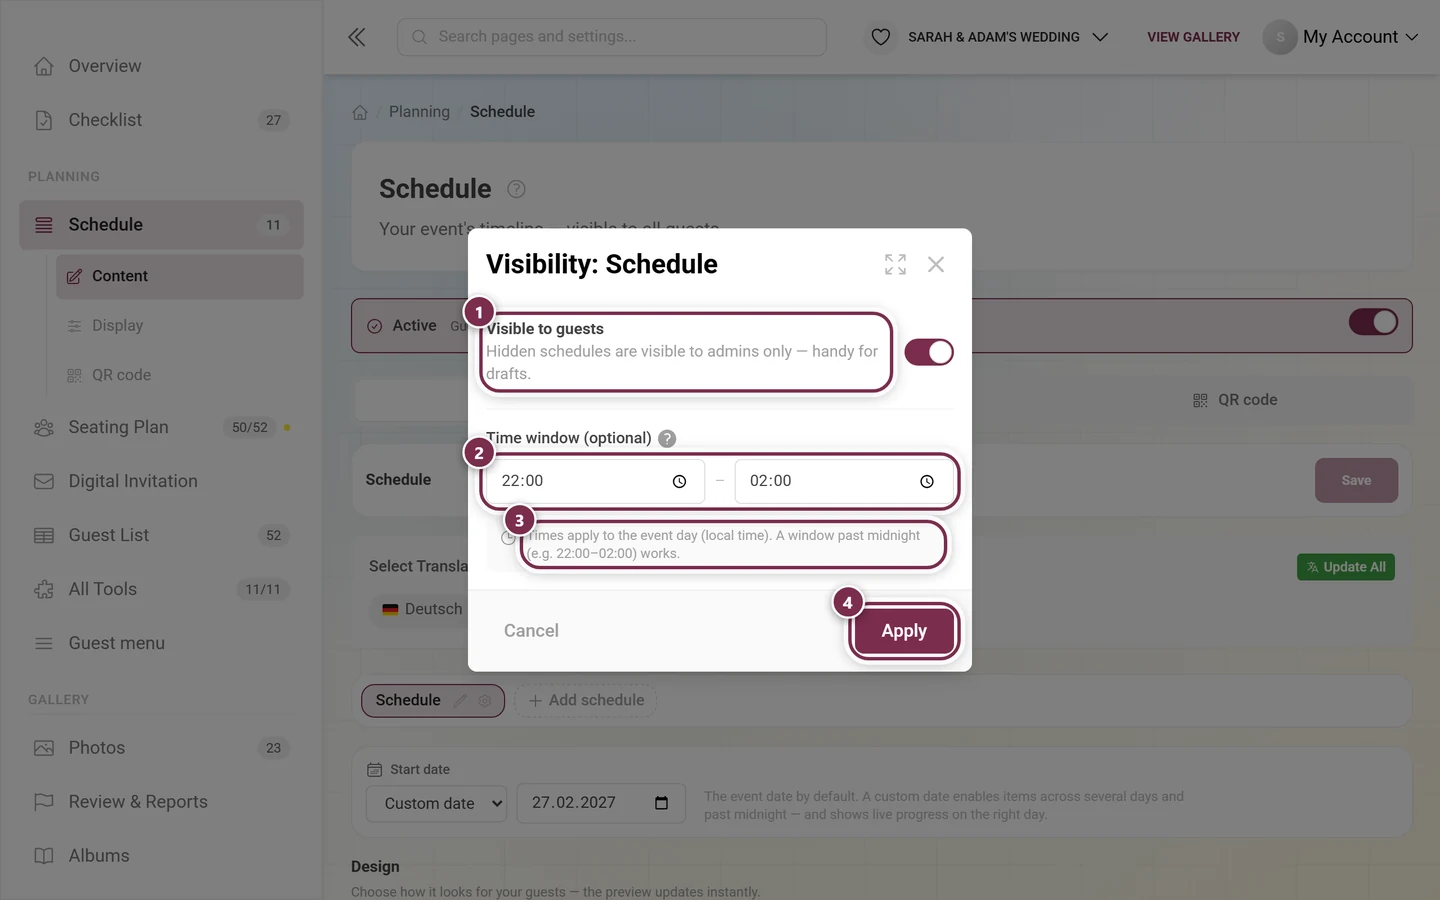
- Visible to guests – switched off, only admins see the schedule. Handy for drafts.
- Time window (optional) with From and Until – during that period your guests automatically see this schedule first. They can still switch at any time; the window never hides anything.
- Times apply to the event day in local time. A window past midnight – 22:00–02:00, say – works.
Apply puts the settings into the draft, Save in the top right writes them to the server.
Start date
Section titled “Start date”Every schedule has its own Start date.
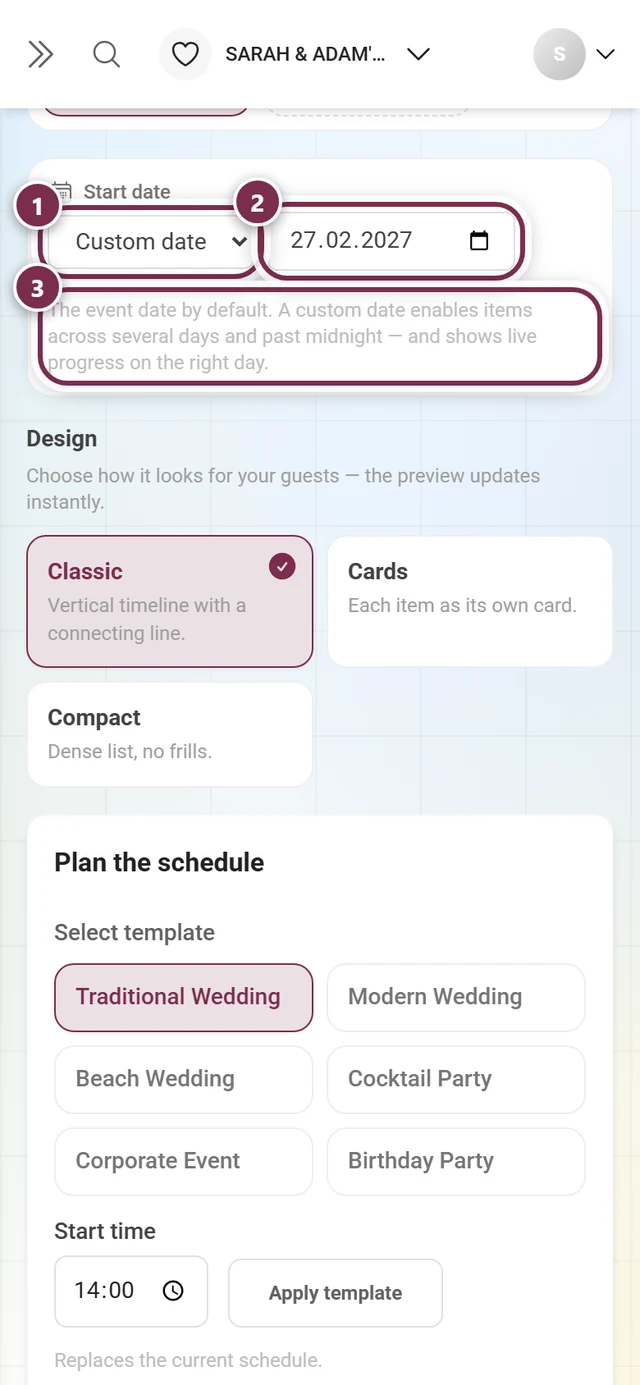
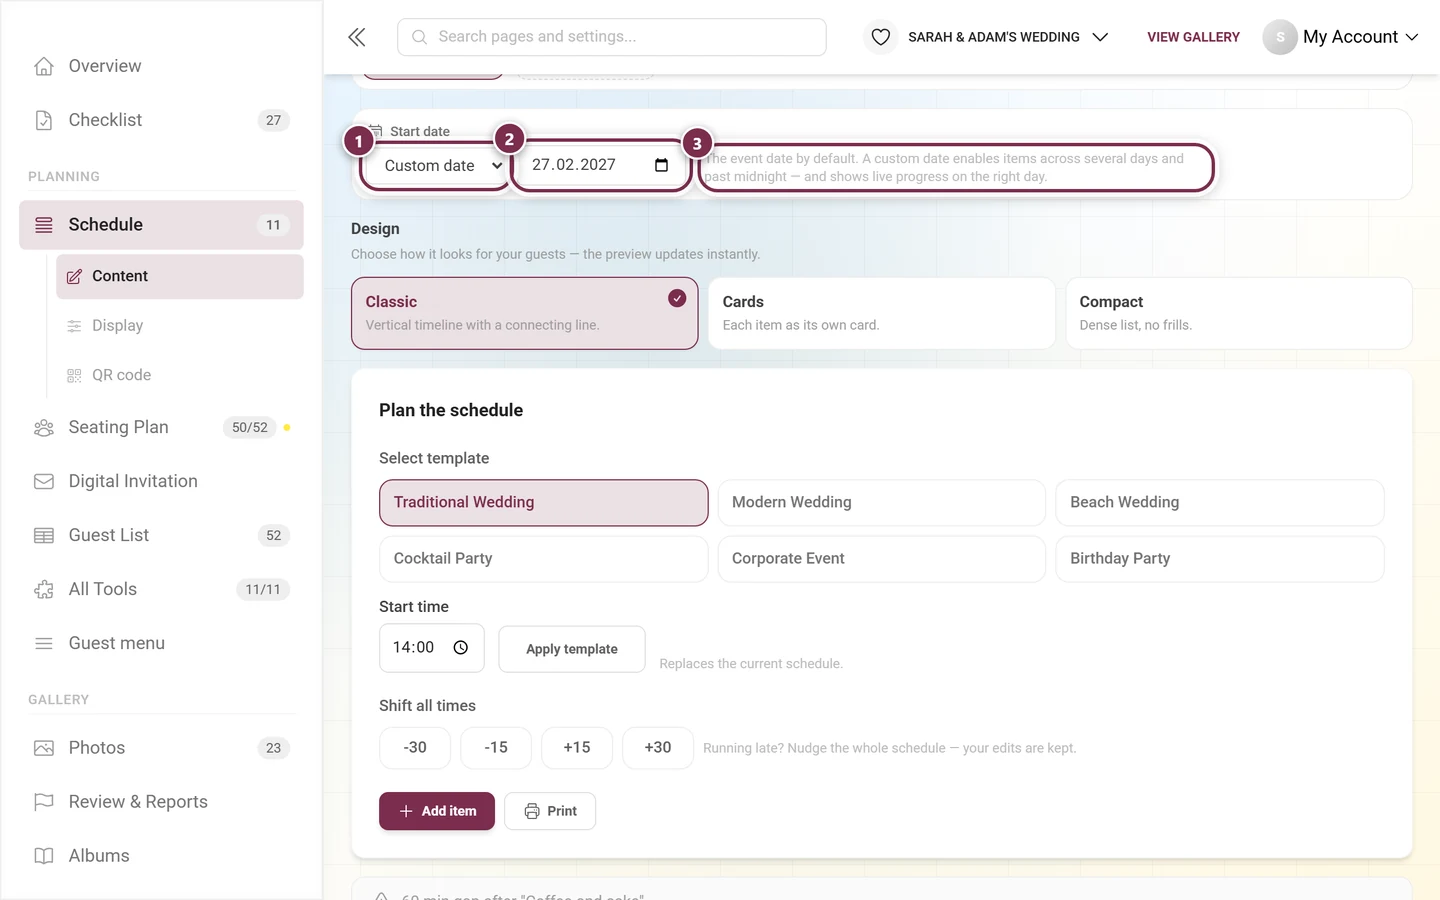
- Event date – the default. Below it you see which date that currently is, with a link into the event settings if none is set yet.
- Custom date – reveals a date field.
A custom date is the key to multi-day events and to items past midnight: only then does Photogala know which day an item belongs to, and shows the live progress on the right day.
Creating items
Section titled “Creating items”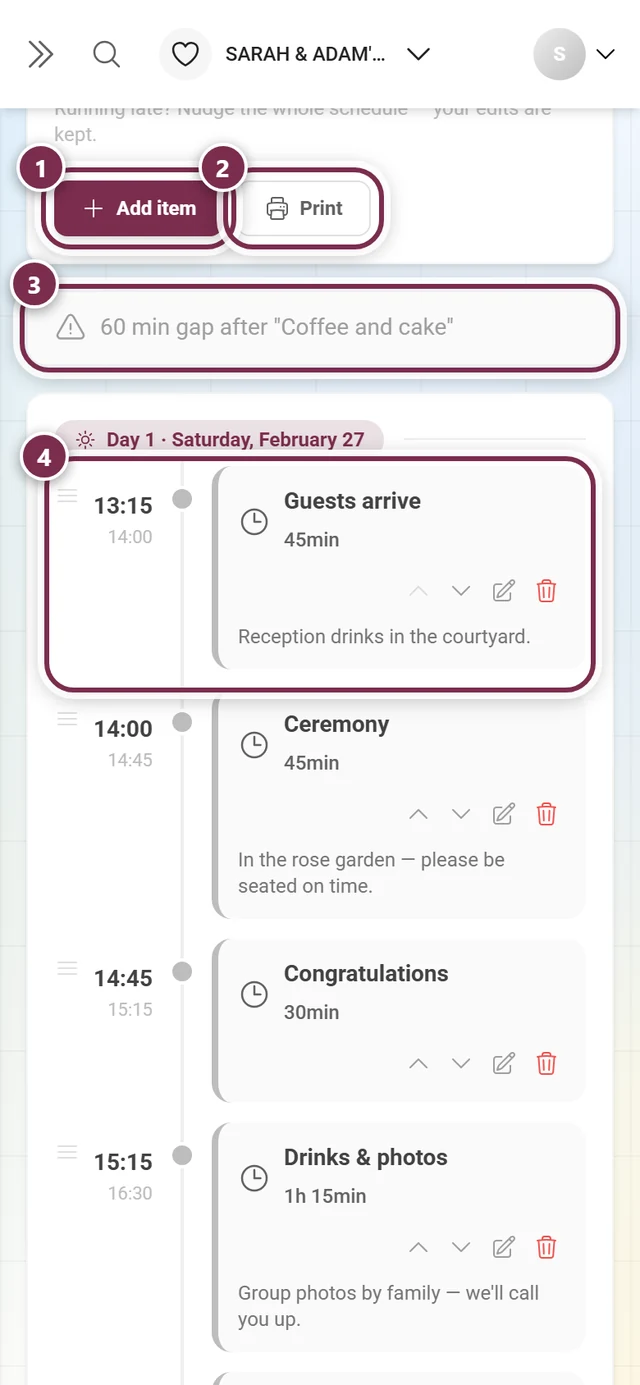
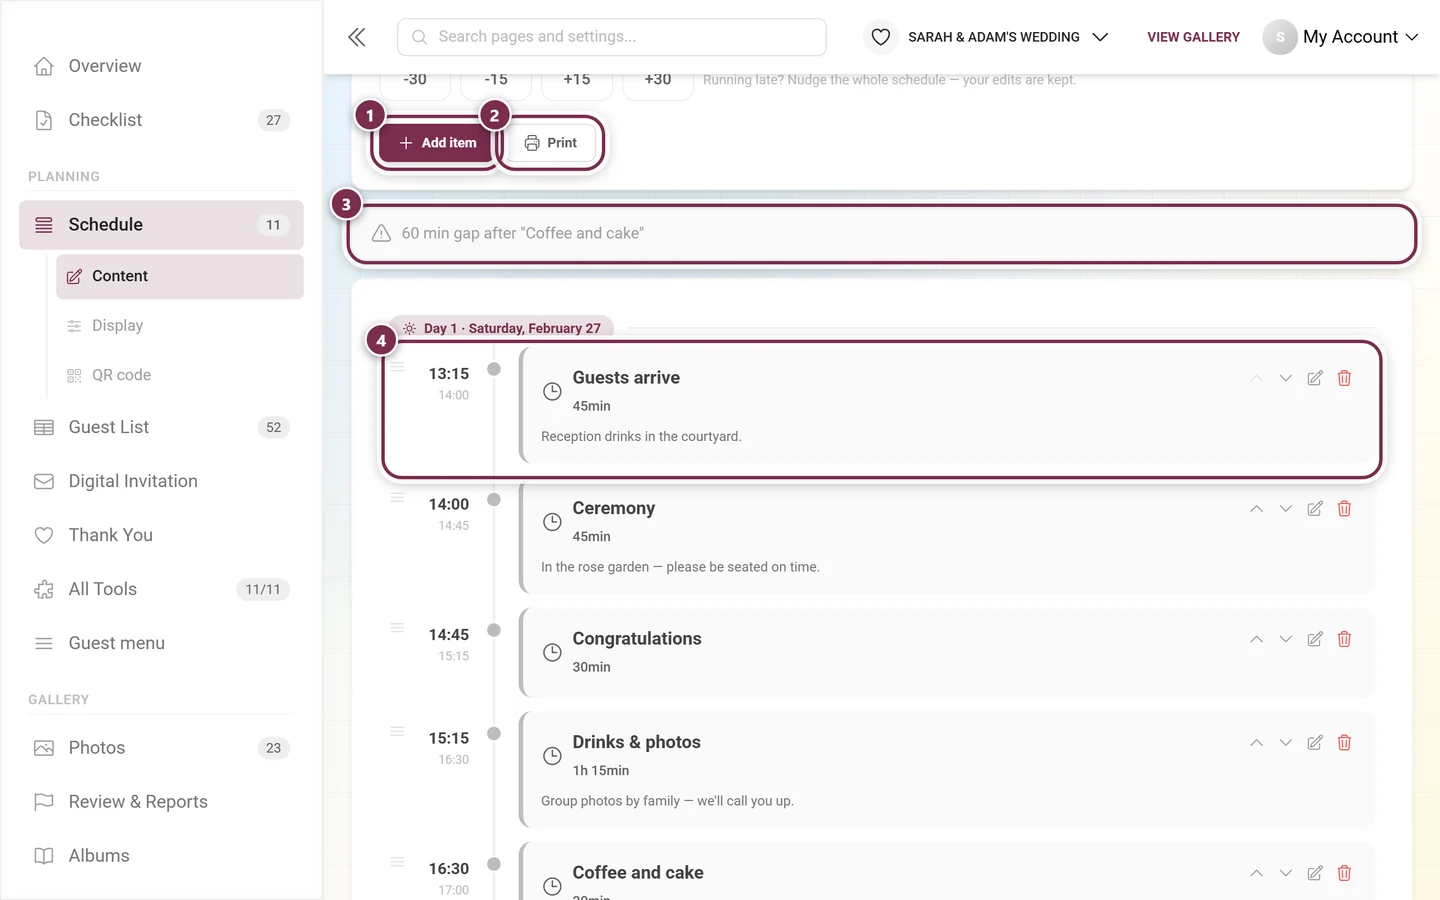
Add item creates a new entry and expands it right away. To open an existing item, use the pencil on the right of its row – it toggles the item open and closed.
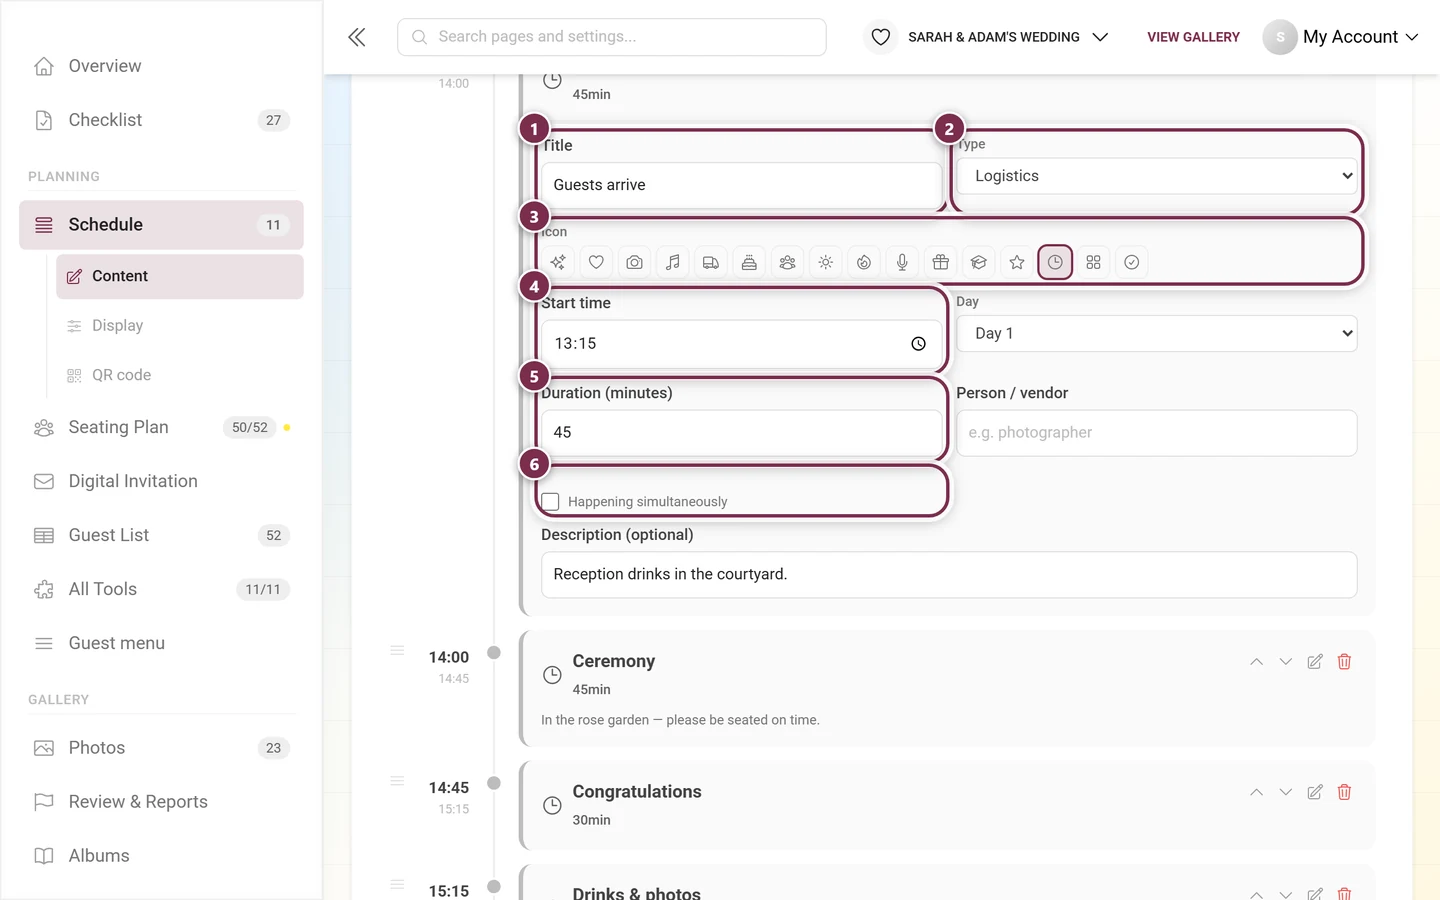
The fields one by one:
- Title – e.g. Champagne reception.
- Type – Preparation, Ceremony, Photo, Reception, Entertainment or Logistics.
- Icon – one from the row below.
- Start time – the time of day.
- Day – for multi-day schedules, the day the item falls on.
- Duration (minutes) – in five-minute steps, at least 5.
- Person / vendor – who is responsible, e.g. photographer.
- Happening simultaneously – for items running in parallel with another. They are skipped by the gap and overlap check and carry a small Parallel label next to the duration in the list.
- Description (optional) – details for your guests.
More than 200 items per schedule are not possible; the editor says so once the limit is reached.
Reorder, expand, delete
Section titled “Reorder, expand, delete”Every row has a drag handle on the left and four small buttons on the right.
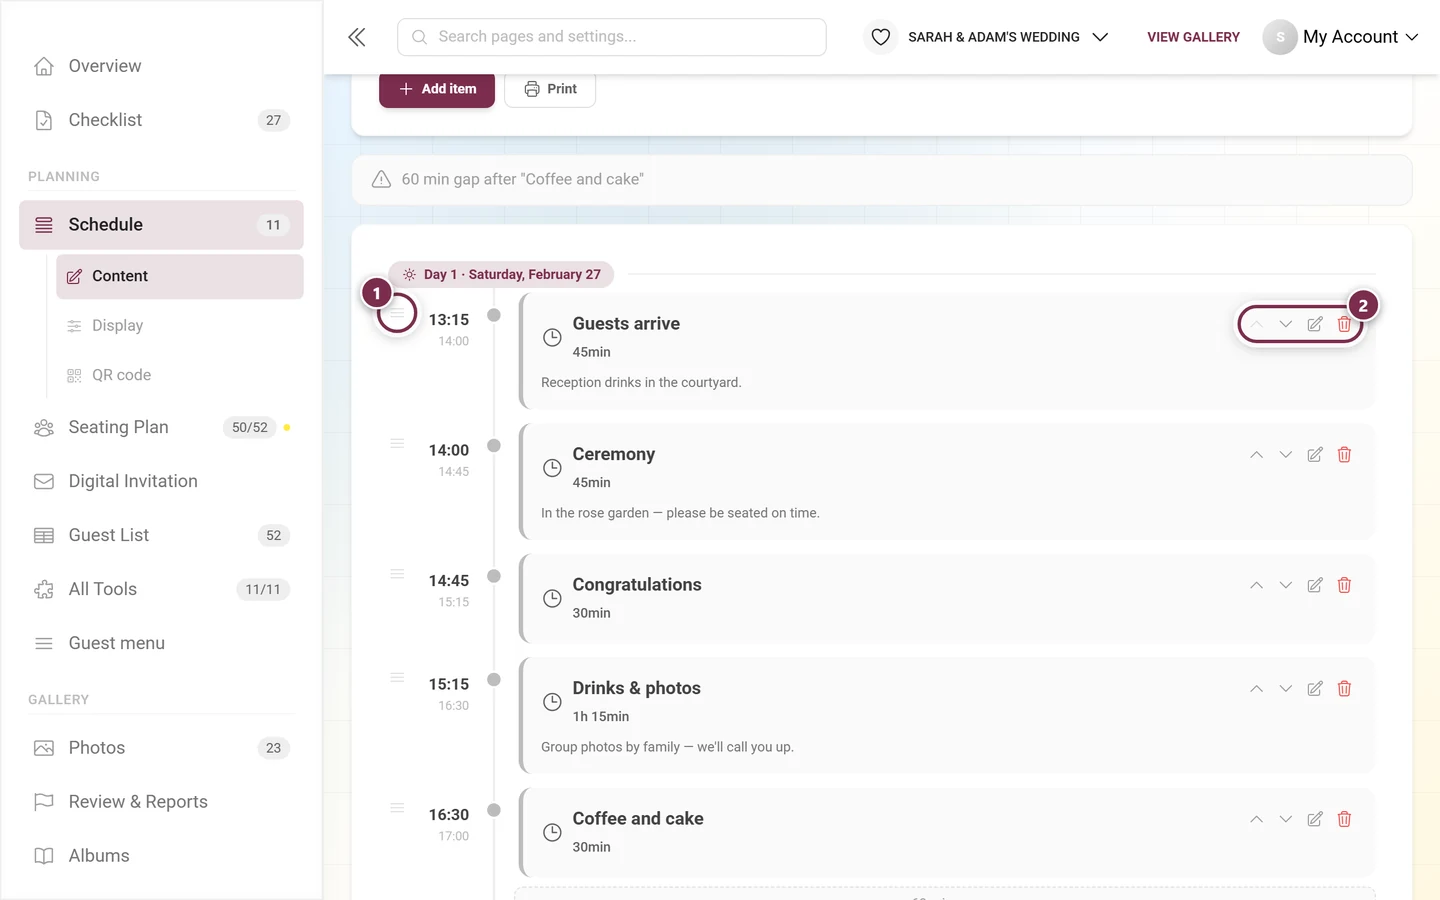
Templates
Section titled “Templates”Rather than starting from scratch, pick a ready-made schedule under Select template, set the Start time and click Apply template. Six templates are built in:
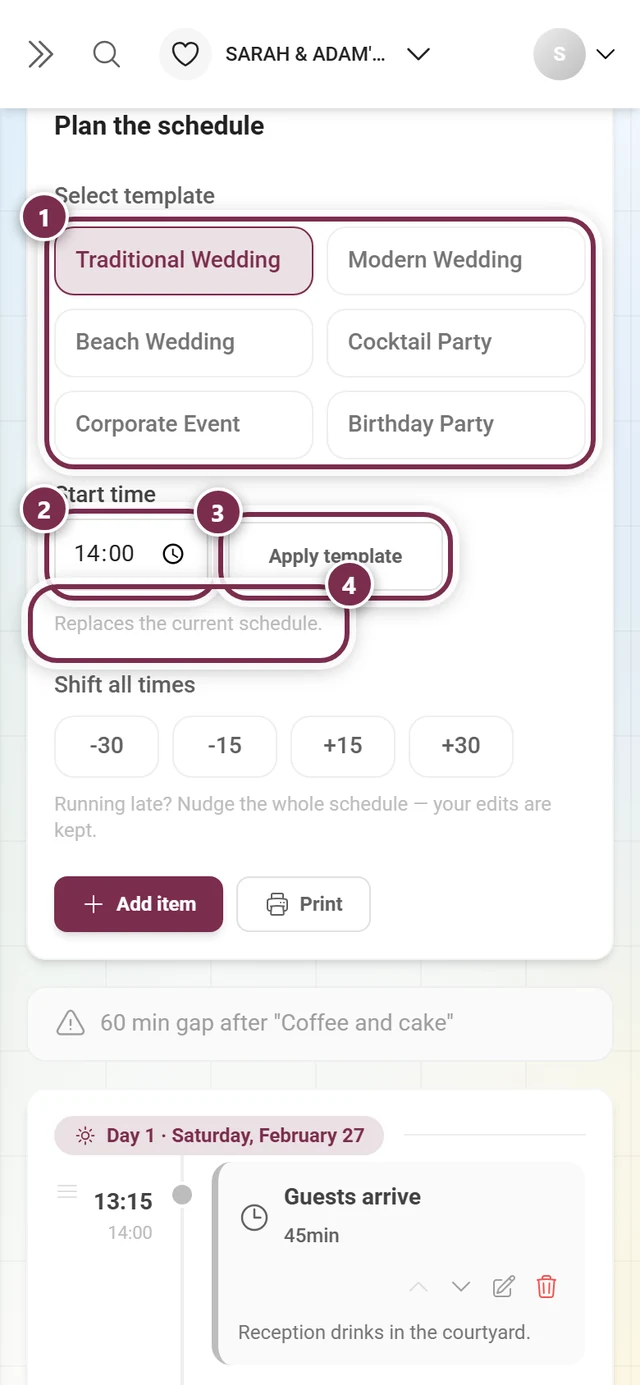
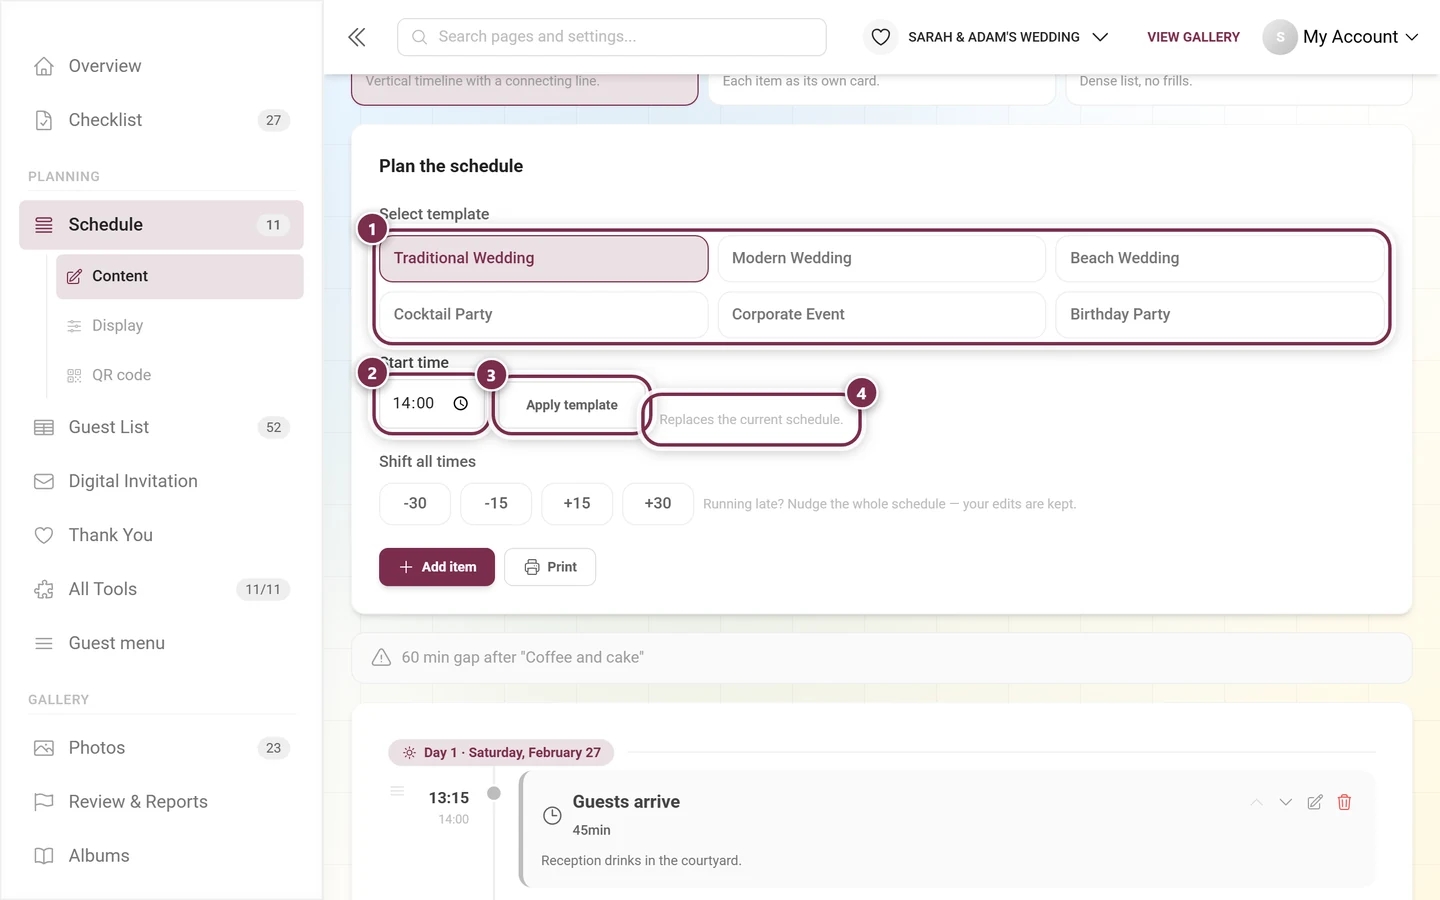
- Traditional Wedding
- Modern Wedding
- Beach Wedding
- Cocktail Party
- Corporate Event
- Birthday Party
Shift all times
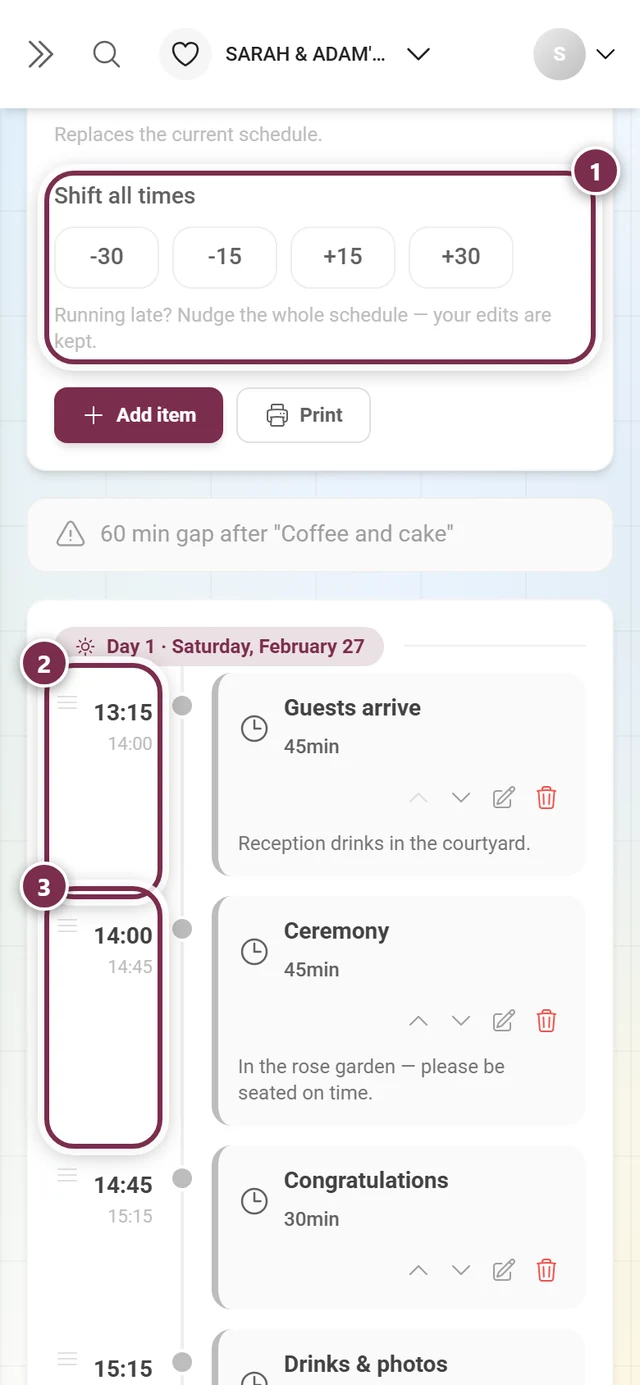
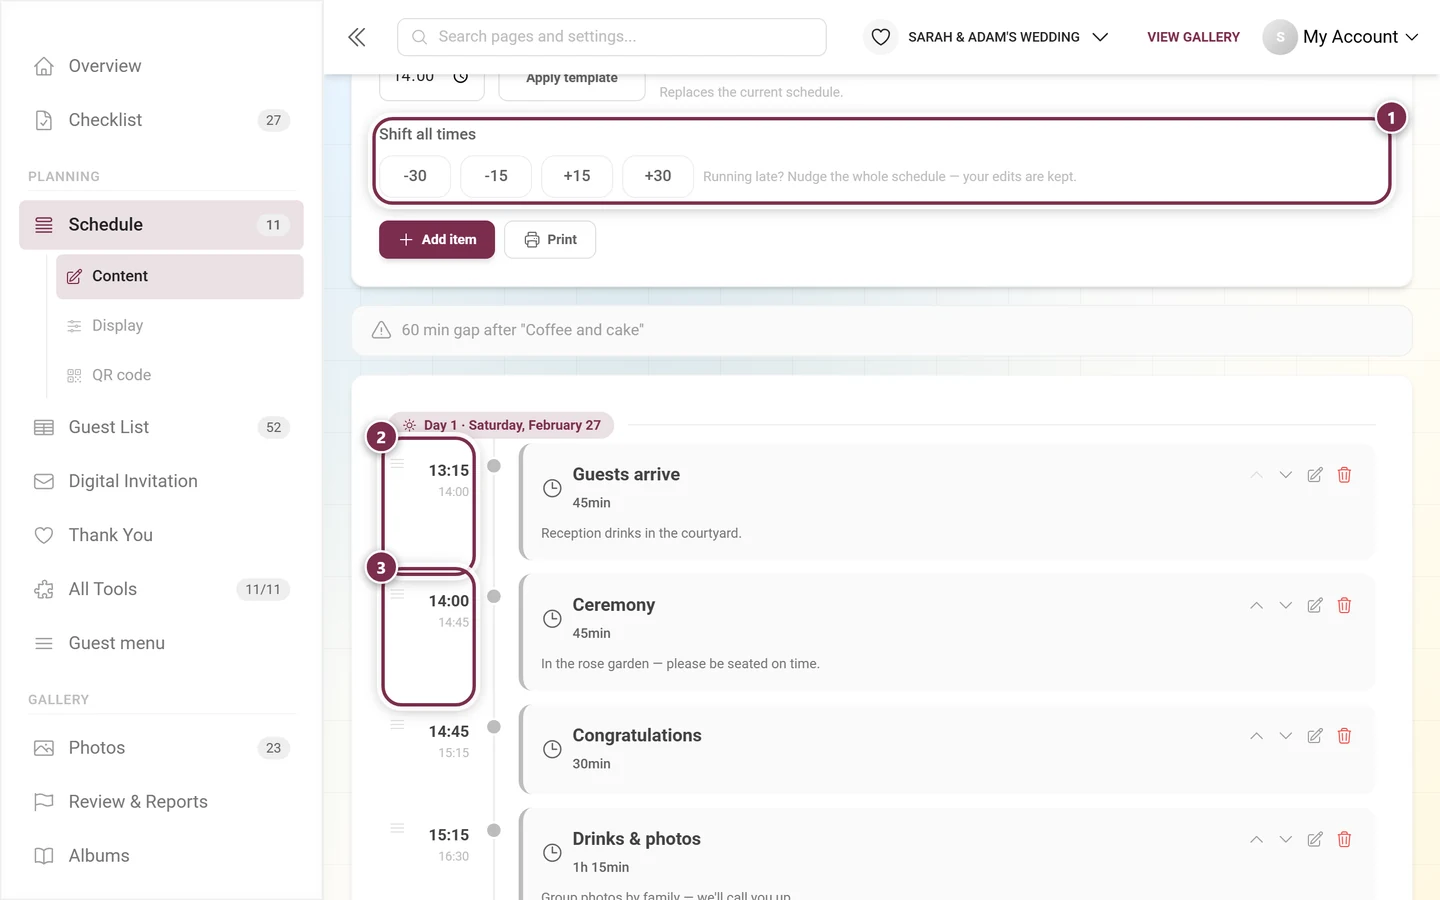
Section titled “Shift all times”When the day slips, Shift all times is the rescue. Four buttons move the entire schedule: -30, -15, +15 and +30 minutes. Your edits to individual items survive – the gaps between items stay exactly as they were.
Warnings and total duration
Section titled “Warnings and total duration”While you edit, Photogala checks the schedule. The warnings sit above the list of items, right below the Plan the schedule block:
- Overlaps first – in red, when one item is still running as the next one starts.
- Gaps below them – in gray, when more than 15 minutes stay empty between two items. Shorter pauses count as normal buffers and are not reported. The gap is also shown right at the item it follows.
Items marked Happening simultaneously are skipped by both checks – otherwise every parallel programme would read as an overlap.
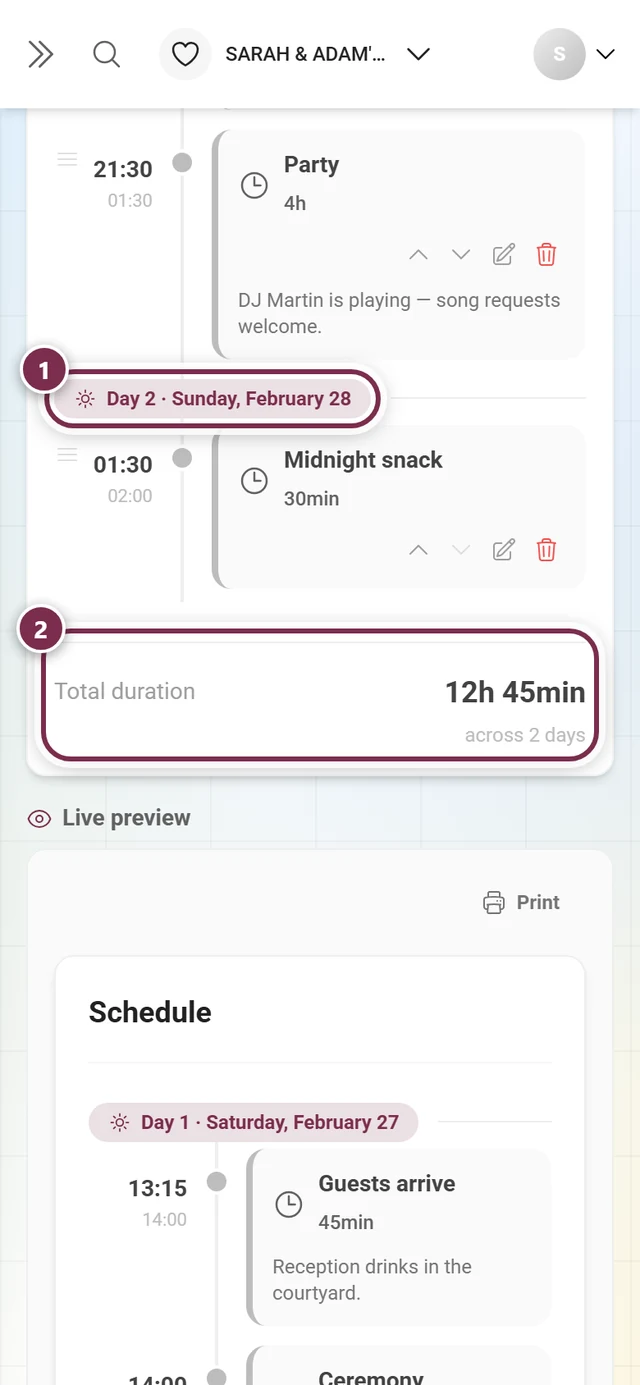
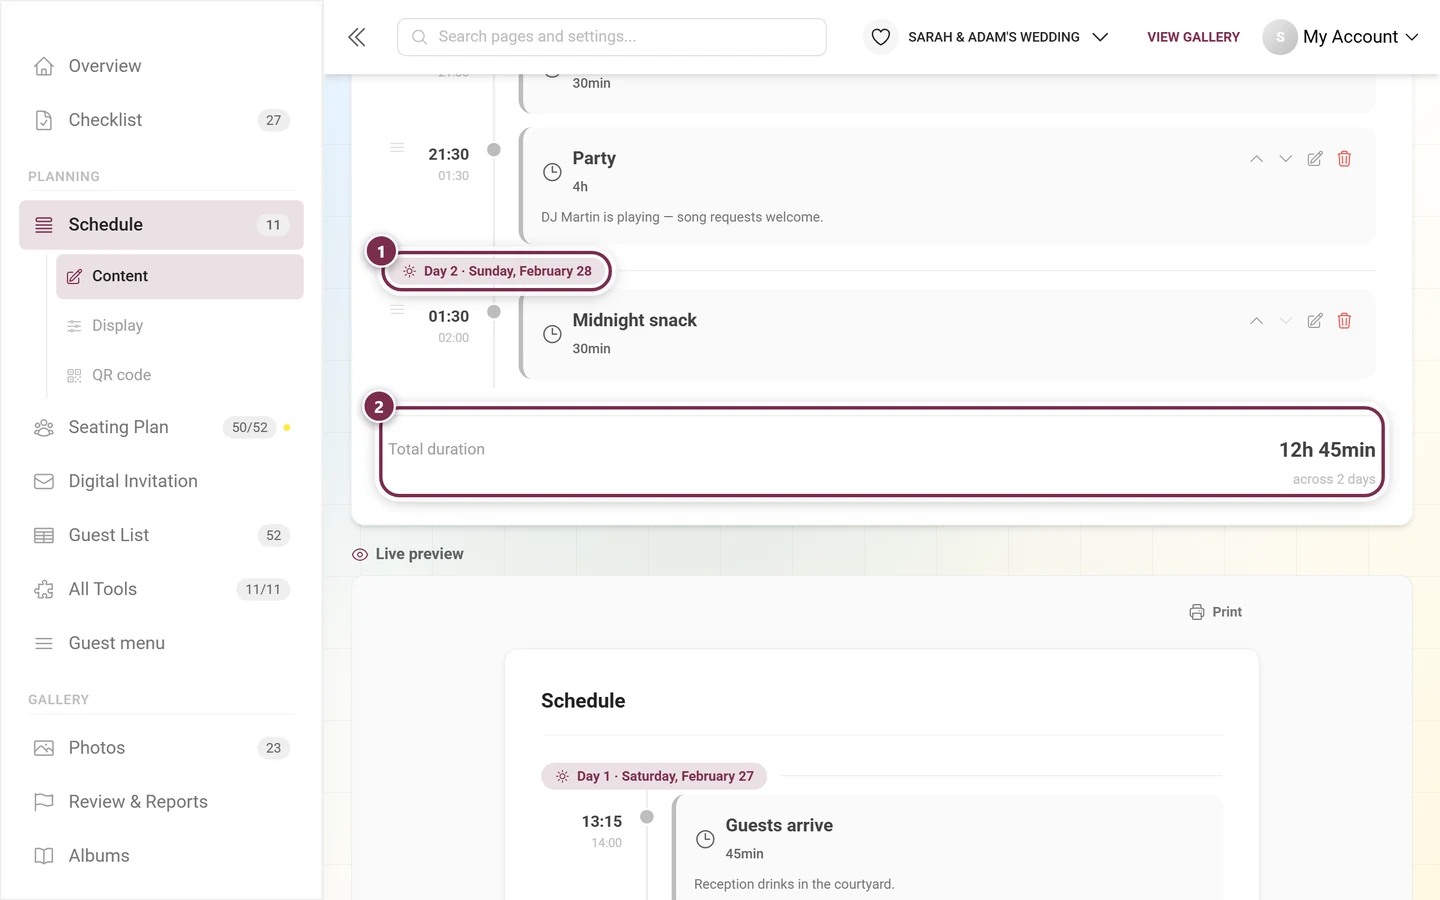
Below the list, behind a thin divider, sits the Total duration of the schedule – and in small type under it, the time span, or across N days for multi-day schedules.
Design for your guests
Section titled “Design for your guests”In the Content tab, Design sets the look; the Live preview at the bottom of the page shows it immediately.
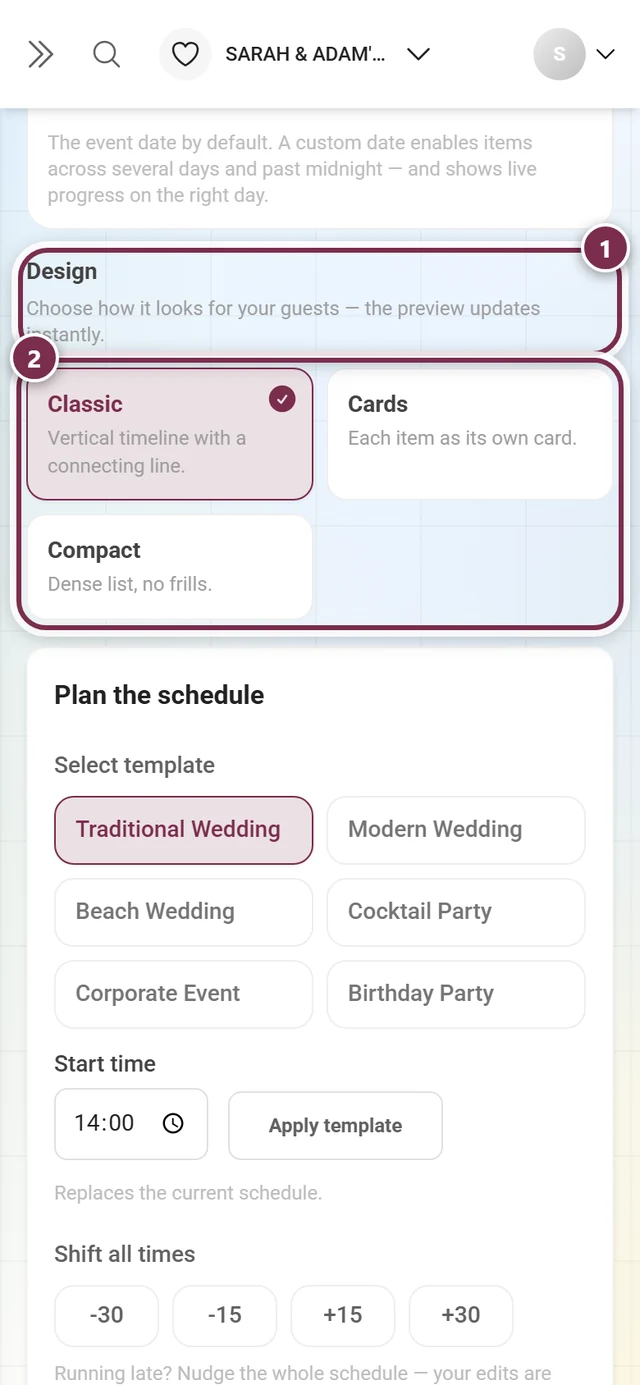
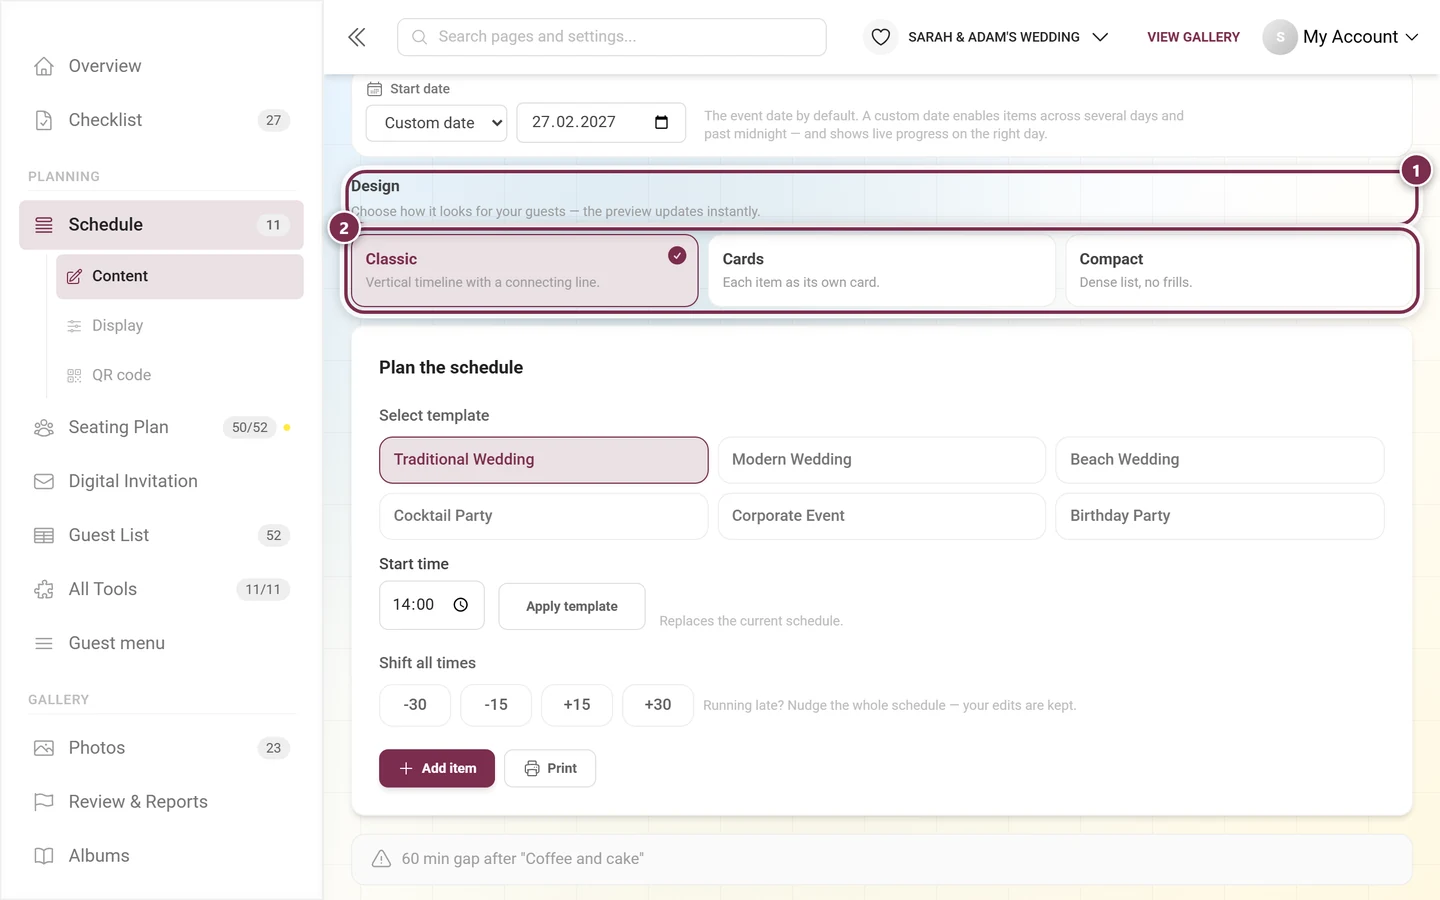
- Classic – a vertical timeline with a connecting line. The default.
- Cards – every item as its own card.
- Compact – a dense list, no frills.
The Display tab controls Widget on the home page and Entry in the guest menu. The Widget style only appears once the widget is switched on.
What your guests see
Section titled “What your guests see”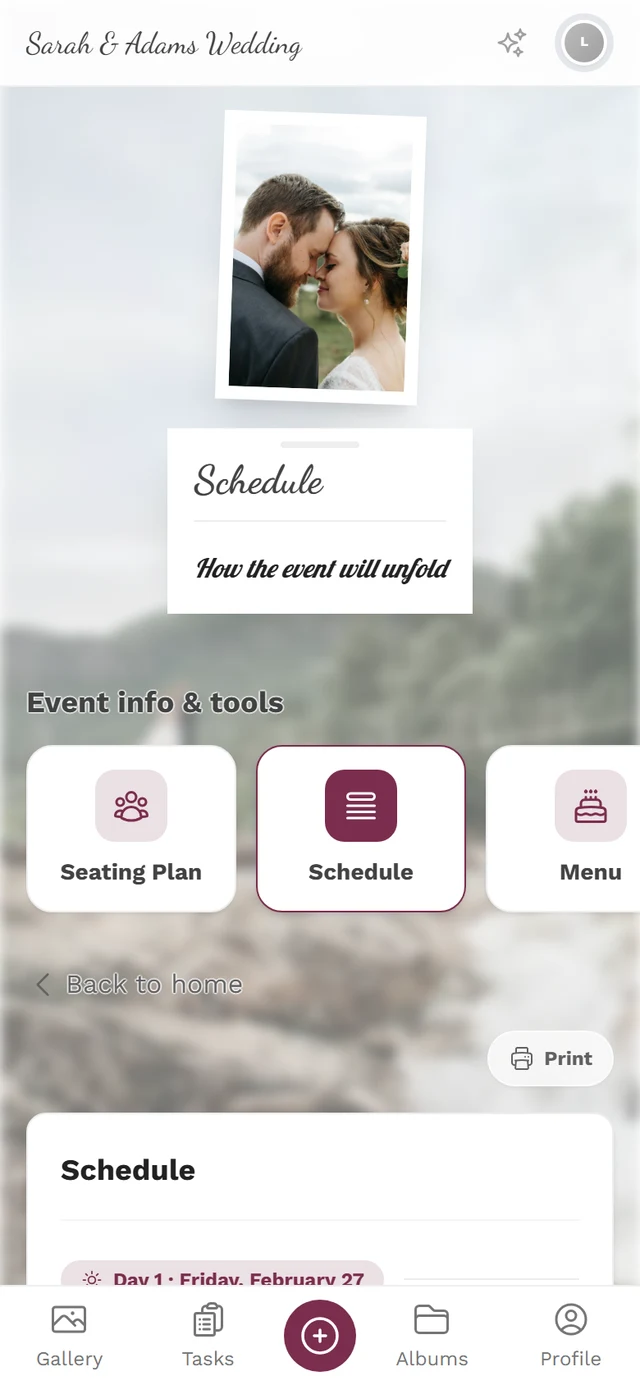
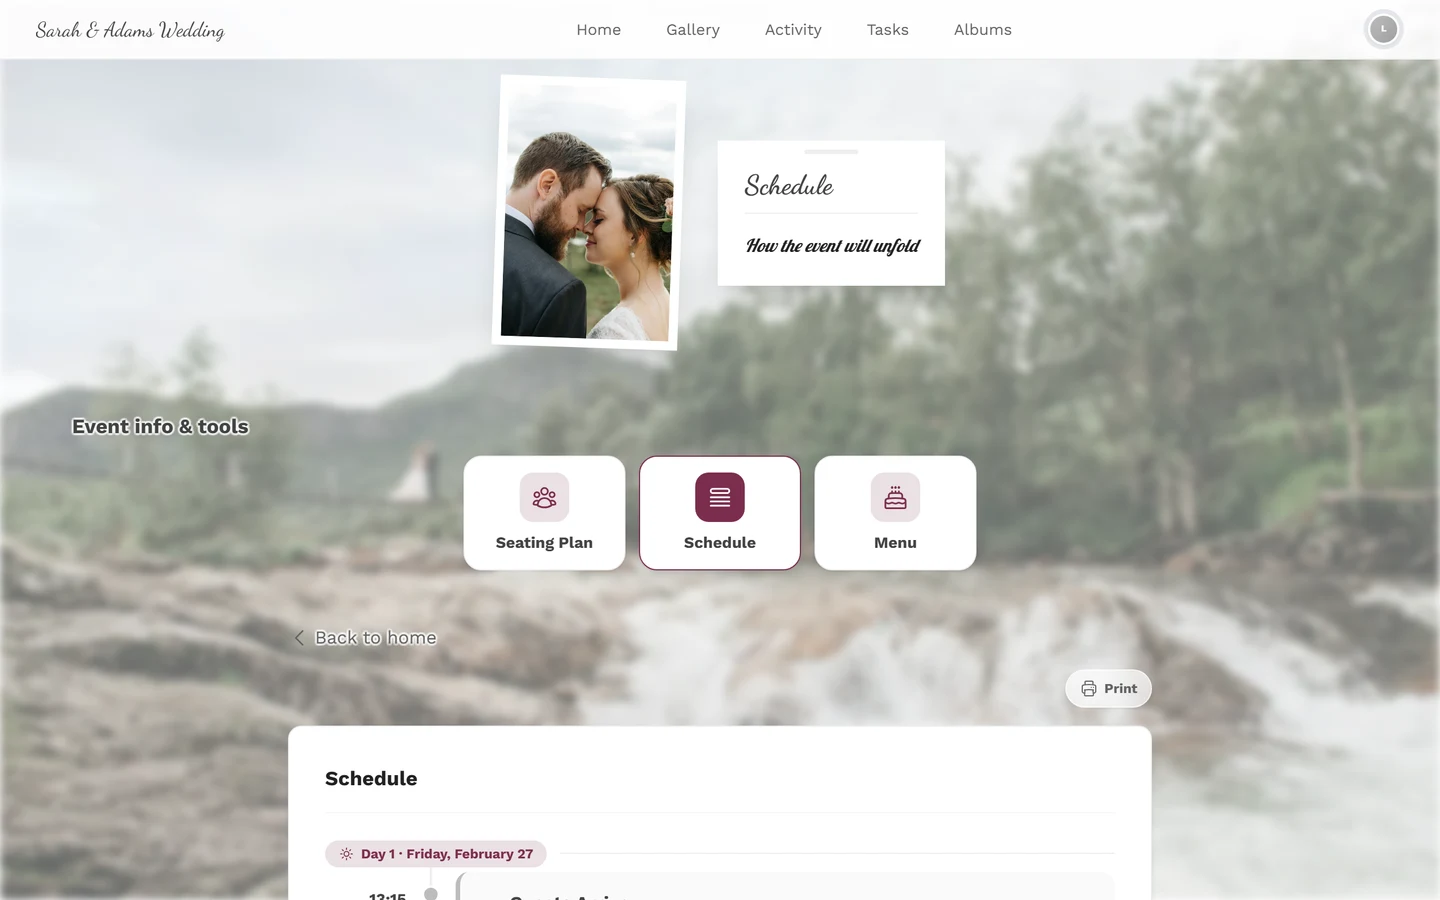
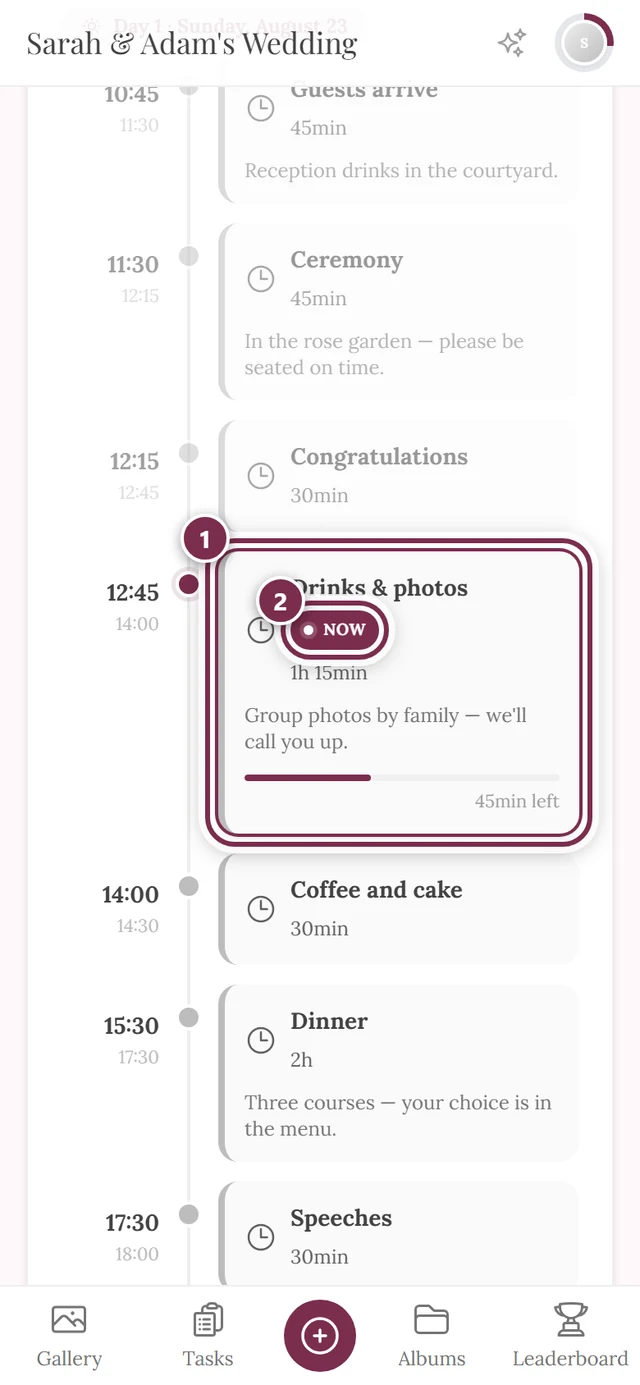
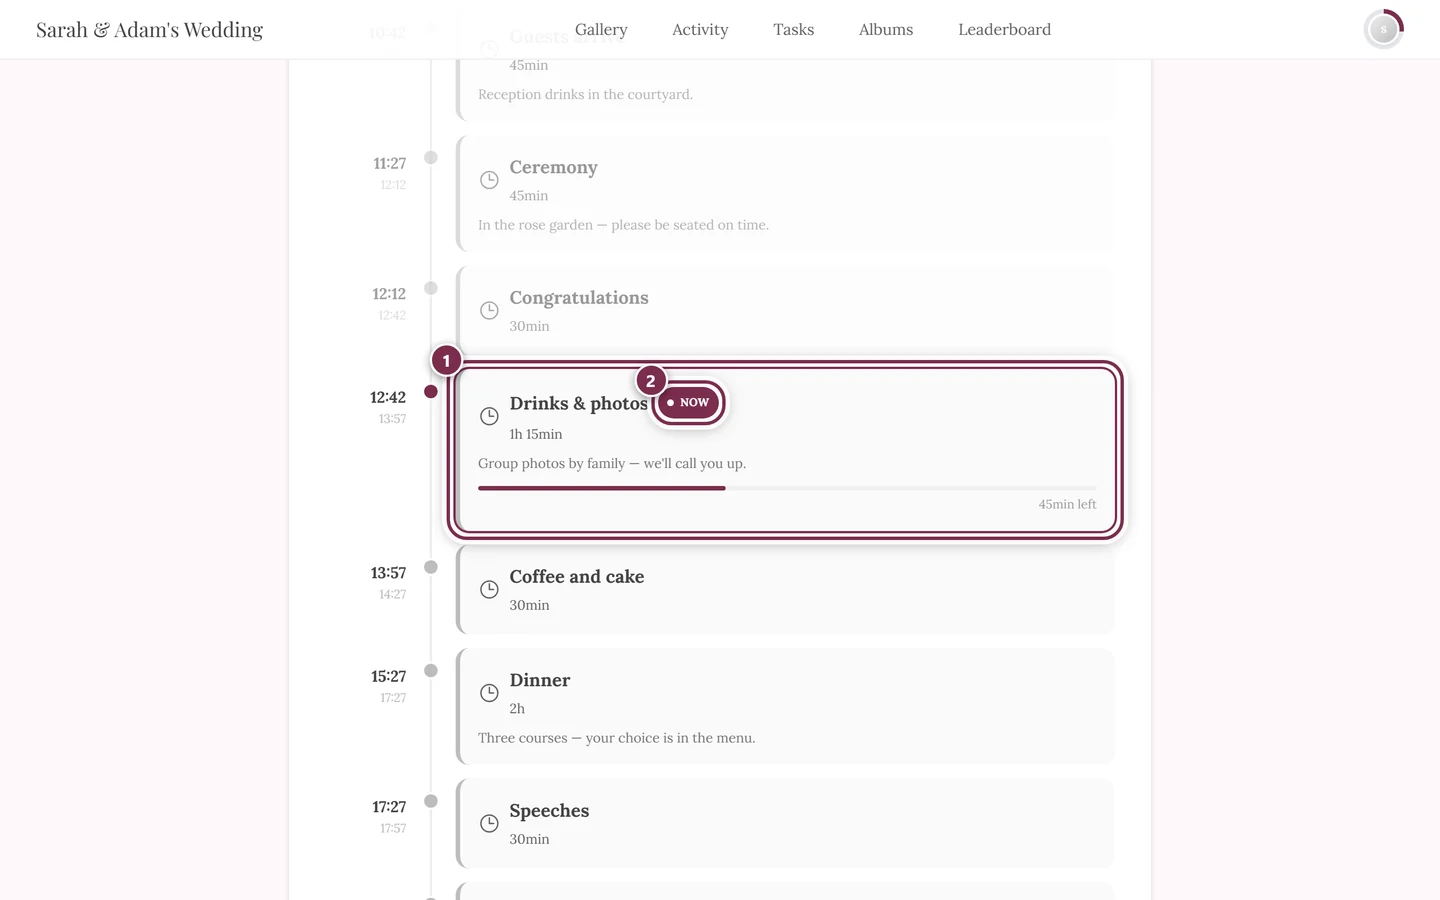
- Tabs, as soon as more than one schedule is visible to guests. The one whose time window matches right now is preselected.
- Live progress: the running item gets a Now marker, with a progress bar and the remaining time below it.
- Print – for the copy on the welcome table or for your vendors.
The widget on the home page does not show the whole schedule but, under Up next, specifically the next item with its time and title.
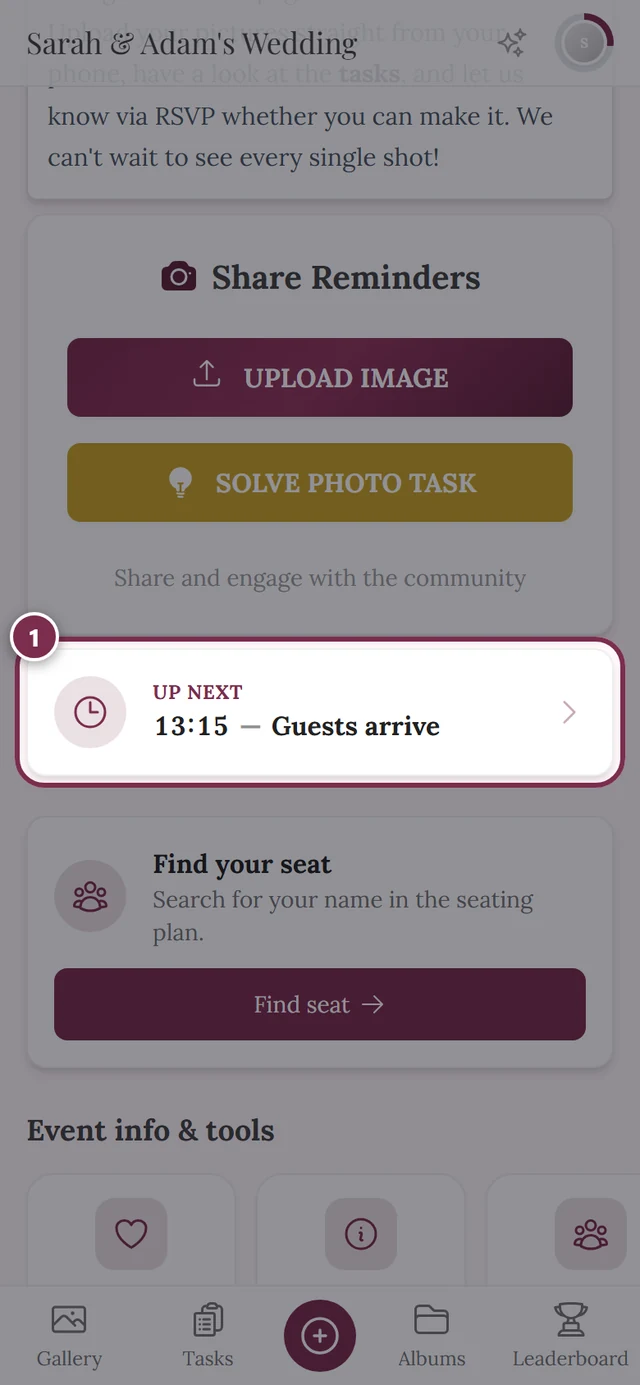
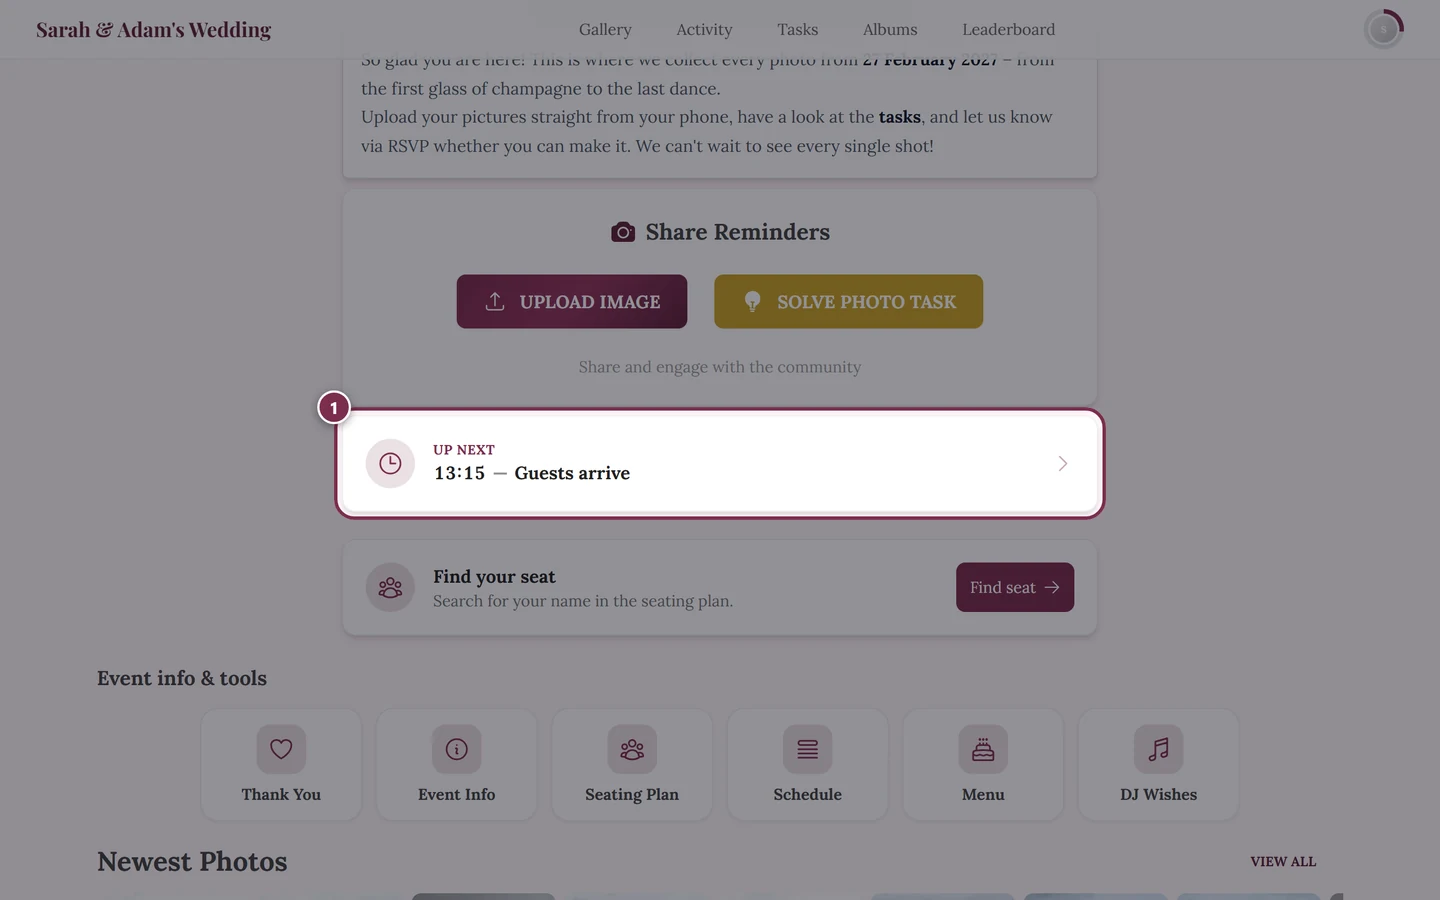
It refreshes every minute and disappears once every item is in the past – for guests that’s exactly the information that matters.
Working together with other tools
Section titled “Working together with other tools”- Seating plan: in a seating plan’s settings, Take from a schedule item copies the start and duration of an item as the plan’s time slot. That way the guest view switches from the reception plan to the dinner plan by itself. Editing the time by hand later detaches the link.
- Digital invitation: the Schedule switch shows the schedule as a section right inside the invitation. The content isn’t copied – the invitation always shows the current state from this tool.
Troubleshooting
Section titled “Troubleshooting”- A schedule doesn’t show up for guests. Visible to guests is off in the cog dialog. You can spot it in the tab by the crossed-out eye.
- An item sits on the wrong day. Set the schedule’s Start date to Custom date and pick the right Day on the item.
- An item after midnight jumps to the top. The item’s Day solves that too – 01:00 on day 2 rather than 01:00 on day 1.
- I deleted the wrong item. The bin doesn’t ask, but it only touches the draft. Reload the page without saving and the item is back.
- The gap warning is noisy. It only appears above 15 minutes of empty time. If the pause is intentional, create an item for it – or mark the parallel item as Happening simultaneously.
- The template overwrote my schedule. Apply template replaces the items of the active schedule. As long as you haven’t saved, the old state is still on the server – leave the page without saving and it stays.
- The widget is gone. It only shows the next item. Once every item is in the past, it hides itself. The full schedule stays reachable via the guest menu.
- The font in the schedule doesn’t match the rest. Fonts and colors come from the event settings, not from this tool. The Open appearance link at the bottom of the page takes you straight there.
- Saving reports someone else’s change. Someone else saved in the meantime. Your input is kept – review it and save again.
Related pages
Section titled “Related pages”- For guests: Tools at the event – how the schedule reaches your guests.
- For hosts: Seating plan · Digital invitation · Event Info · Tooling – Overview